


利用PHPMailer发送邮件和附件
要利用PHPmailer发送邮件, 首先先得去官网下载PHPmailer,该包至少需要
- PHPMailer.php
PHP文件。若找不到下载,可从这里拷贝。这里是我的整个项目地址(dev分支) (采用yaf框架)
代码
<?php
/**
 * 发送邮件
 */
class Mail_SendMail
{

    const DEFAULT_CHAR_SET = 'utf-8';

    /**
    *
    *
    * @param $to     邮件接收者
    * @param $from   邮件发送者
    * @param $fromdesc
    * @param $subject     主题
    * @param $plaintext   内容,向下兼容考虑
    * @param $content     内容
    */
    public static function sendmail($to, $from, $fromdesc, $subject, $plaintext, $content) {
        static $phpmailer = NULL;

        if ( $phpmailer == NULL ) {
            //这里采用了自动加载机制, 故没有引入
            $phpmailer = new Mail_PHPMailer();
        }

        //清除 发送地址
        $phpmailer->ClearAddresses();

        //支持批量发送, 但这里只是单线程,
        if ( !is_array($to) ) {
            $to = array($to);
        }
        try {
            //该处是取得配置文件邮件服务器信息,详情见下
            $emailConfig = Config::get('Email_setting');
            if ( empty( $emailConfig || !is_array($emailConfig))) {

                exit;

            } else {
                $CharSet = isset($emailConfig['CHAR_SET']) ? $emailConfig['CHAR_SET'] : self::DEFAULT_CHAR_SET;
                $phpmailer->CharSet = $CharSet;
                $phpmailer->Encoding = 'base64';
                $phpmailer->IsSMTP();
                // 启用 SMTP 验证功能
                $phpmailer->SMTPAuth   = $emailConfig['SMTPAuth'];
                // SMTP 安全协议
                $phpmailer->SMTPSecure = $emailConfig['SMTP'];
                // SMTP 服务器
                $phpmailer->Host       = $emailConfig['HOST'];
                // SMTP服务器的端口号
                $phpmailer->Port       = $emailConfig['PORT'];
                // SMTP服务器用户名
                $phpmailer->Username   = $emailConfig['USERNAME'];
                // SMTP服务器密码
                $phpmailer->Password   = $emailConfig['PASSWD'];

                // 设置发件人地址和名称, 名称采用64编码
                $phpmailer->SetFrom($from, "=?UTF-8?B?".base64_encode($fromdesc)."?=");
                //批量支持
                foreach ( $to as $dest ) {
                    $destname = @ explode('@', $dest);
                    $destname = $destname[0];
                    $phpmailer->AddAddress($dest, "=?UTF-8?B?".base64_encode($destname)."?=");
                }
                //收件人回复时回复给的地址和姓名
                $phpmailer->AddReplyTo('aa@aaa.com',"=?UTF-8?B?".base64_encode('请勿回复')."?=");
                //附件,
                $phpmailer->AddAttachment("F:/Zend/git/test/.gitignore", '.gitignore');

                //主题
                $phpmailer->Subject = "=?UTF-8?B?".base64_encode($subject)."?=";
                //向下兼容考虑, 设置AltBody
                $phpmailer->AltBody = $plaintext;
                //设置邮件内容
                $phpmailer->MsgHTML($content);
                $phpmailer->Send();
                return TRUE;
            }

        } catch (phpmailerException $e) {
            return FALSE;
        } catch (Exception $e) {
            return FALSE;
        }

        return TRUE;
    }
}
注:
$fromdesc参数是指

$phpmailer->AddAttachment("F:/Zend/git/test/.gitignore", '.gitignore'); 设置附件时, 第一个参数是附件地址, 第二个参数是附件发送后显示的名称,
//用户收到的附件则为   .gitignore
$phpmailer->AddAttachment("F:/Zend/git/test/.gitignore");

//用户收到的附件则为   aaaa.doc, 自动转换
$phpmailer->AddAttachment("F:/Zend/git/test/.gitignore", 'aaaa.doc');
邮件发送配置如下
//$emailConfig = Config::get('Email_setting');


'Email_setting' => array(
    'CHAR_SET'            => 'UTF-8',
    // 启用 SMTP 验证功能
    'SMTPAuth'            => true,
    // SMTP 安全协议,
    'SMTP'                => 'smtp',
    'HOST'                => 'smtp.163.com',
    'PASSWD'              => '',
    'USERNAME'            => 'godruoyi',
    'PORT'                => 25,
),
在上述配置中(这里采用163作为邮件服务器), 不同的服务器配置不同,由于这里是163, 故USERNAME 不能有后缀(godruoyi@163.com), 密码为客户端授权密码, 如果你有配置faxmail的经验, 如果不知道客服端授权密码
登录你的163 –> 设置 –> 邮箱安全设置 –> 客户端授权密码, 开启即可, 可能会验证手机验证码
测试代码
$email_contents = file_get_contents(ROOT . '/../resource/email/reg.html');
$email_contents = str_replace("{0}", '快来顶我吧', $email_contents);
$email_contents = str_replace("{1}", date('Y'), $email_contents);
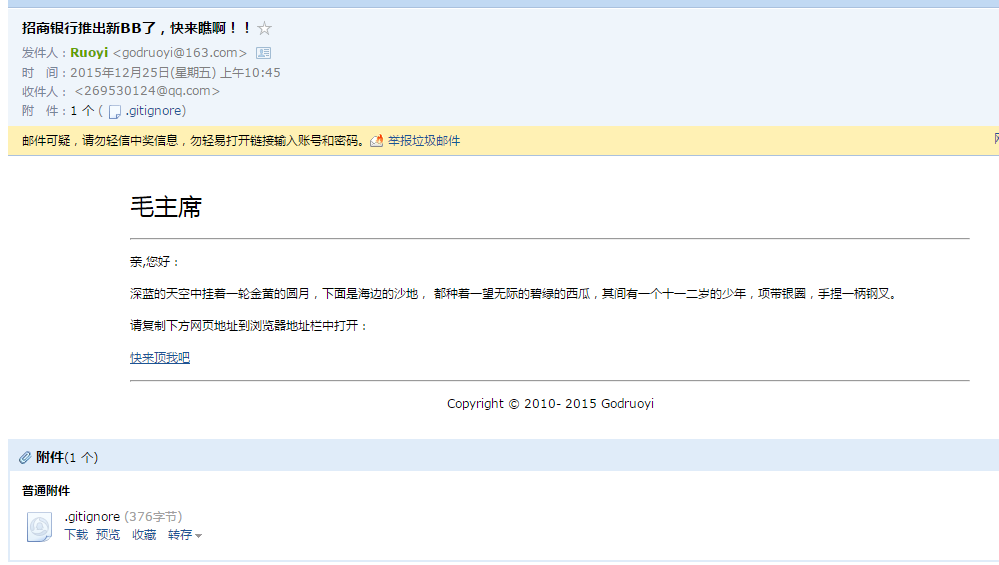
$res = Helper_Mail::SendSysMail('269530124@qq.com', gettext('招商银行推出新BB了,快来瞧啊!!'), $email_contents);
var_dump($res);reg.html文件为
<table align=center><tr><td width="840px">
<p>
<a href="#" style="text-decoration: none">
<font color="#000000" size="5">毛主席</font>
</a>
</p>
<hr>
<p>亲,您好:</p><p>深蓝的天空中挂着一轮金黄的圆月,下面是海边的沙地,
都种着一望无际的碧绿的西瓜,其间有一个十一二岁的少年,项带银圈,手捏一柄钢叉。</p><p>请复制下方网页地址到浏览器地址栏中打开:</p>
<p><a href= {0} > {0} </a></p>
<hr><p align=center>Copyright © 2010- {1} Godruoyi</p></td></tr>
</table>类Helper_Mail
//调用核心代码发送邮件, 可不用该类
class Helper_Mail
{
    //发送系统邮件,系统相关信息自动填充
    public static function SendSysMail($addresses, $title, $content)
    {
        //调用核心代码发送邮件, 可直接跳过这步直接使用Mail_SendMail类发送
        $res = Mail_SendMail::sendmail($addresses, 'godruoyi@163.com', '招商银行信用卡中心', $title, $content, $content);
        return $res;
    }
}


 2054
2054

 被折叠的 条评论
为什么被折叠?
被折叠的 条评论
为什么被折叠?
 到【灌水乐园】发言


