一、下载与安装:
    [下载地址:https://windows.github.com/](https://windows.github.com/)
    安装就不多说了,跟着提示一路next就可以了。
二、登录github账户 :
   如果没有github账户,去官网注册一下即可。
   登录步骤也很简单,跟着界面提示一步步填写即可。
三、使用github for windows工作【重点部分】:
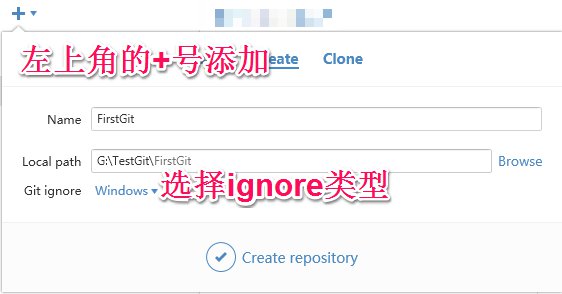
3.1、创建本地库:

这里好像有个问题,我直接在G:盘根目录下面创建本地库,总是不成功 ,只有有了一个二级目录,他就可以了,这个原因目前我也不清楚。
3.2、创建成功之后的页面:

3.3、提交更改:

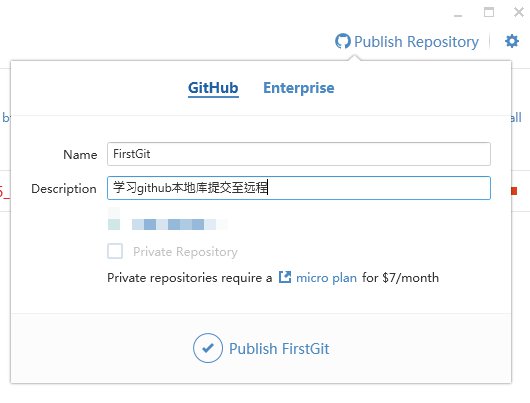
3.4、将本地库提交至远程库:

提交成功之后,之前的publish按钮将变为sync,表示同步功能的意思
以后这就是一个远程库连接了,里面的增删改操作提交都会提交到远程库中。

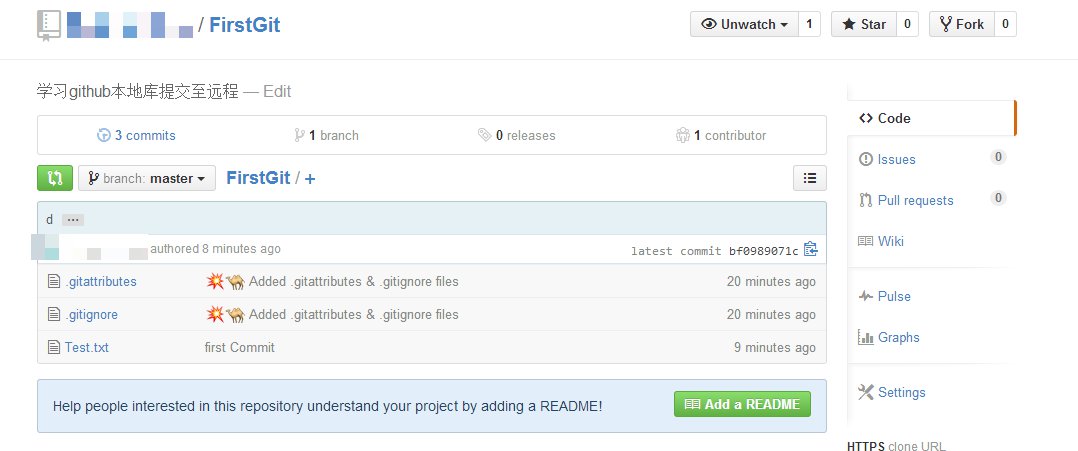
此时可以到自己的github网站中看到刚才新建的库:

3.5、创建分支:

当一个项目有很多个模块,那么我们可以根据模块打出分支,然后让每个开发在对应的模块的分支上面进行开发。最后再由一个人进行分支合并即可。
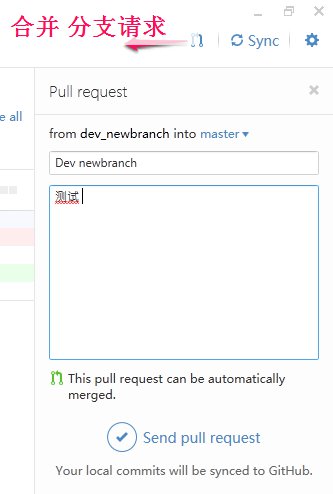
3.6、将一个分支合并到另一个分支:

成功发送一个合并请求之后,图标会发生改变:

之后点击会跳转至网页确定真正合并:

当我们执行了删除掉已经不用的分支之后,远程库上将不再有这个分支,此时在客户端此分支上执行sync操作之后,会发现sync按钮又变回了publish按钮。此时这个分支是一个本地库分支;
3.7、删除一个本地库分支:

四、一些publish和commit操作是报错修改:
github:Failed to publish this branch:
把默认git的默认连接方式由https改为ssh,只需在shell执行以下命令即可:
<code class="hljs avrasm has-numbering" style="display: block; padding: 0px; color: inherit; box-sizing: border-box; font-family: 'Source Code Pro', monospace;font-size:undefined; white-space: pre; border-radius: 0px; word-wrap: normal; background: transparent;">git config --global url<span class="hljs-preprocessor" style="color: rgb(68, 68, 68); box-sizing: border-box;">.ssh</span>://git@github<span class="hljs-preprocessor" style="color: rgb(68, 68, 68); box-sizing: border-box;">.com</span>/<span class="hljs-preprocessor" style="color: rgb(68, 68, 68); box-sizing: border-box;">.insteadOf</span> https://github<span class="hljs-preprocessor" style="color: rgb(68, 68, 68); box-sizing: border-box;">.com</span>/</code><ul class="pre-numbering" style="box-sizing: border-box; position: absolute; width: 50px; top: 0px; left: 0px; margin: 0px; padding: 6px 0px 40px; border-right-width: 1px; border-right-style: solid; border-right-color: rgb(221, 221, 221); list-style: none; text-align: right; background-color: rgb(238, 238, 238);"><li style="box-sizing: border-box; padding: 0px 5px;">1</li></ul>
五、常见的一些命令操作:
见我以前的一篇博文:http://blog.csdn.net/u011771755/article/details/43824547


 3589
3589

 被折叠的 条评论
为什么被折叠?


