


概述
Android底部导航栏实现方式真的是太多了~在这里仅介绍几种实现方式~建议使用TabLayout +ViewPager ,TabLayout是Android Material Design中的控件,布局文件简单。
LinearLayout + TextView方式
效果图
分析
- 根据效果图,我们可以看出在选中的时候,文字 图片 和背景都会发生改变,我们可以通过是否selected来判断。
- 首先来说下图片:
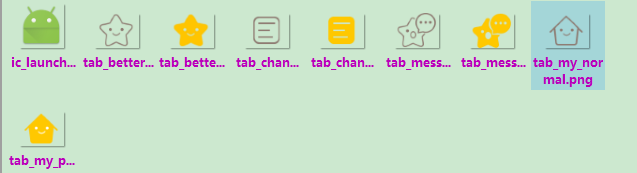
我们准备了如下的图片
分别是选中和未选中两种状态的图片。
要处理这些不同状态下展示什么的问题,就要用selector来实现了。
selector标签,可以添加一个或多个item子标签,而相应的状态是在item标签中定义的。定义的xml文件可以作为两种资源使用:drawable和color。 更多详细的细节 请参考Android样式的开发:selector篇
android:state_selected: 设置是否选中状态,true表示已选中,false表示未选中。
我们在这里使用的是图片,选中时为黄色的图标,未选中时为灰色的图标,如下所示。
<?xml version="1.0" encoding="utf-8"?>
<selector xmlns:android="http://schemas.android.com/apk/res/android">

    <item android:drawable="@drawable/tab_better_pressed" android:state_selected="true"/>
    <item android:drawable="@drawable/tab_better_normal"/>
</selector>
因为我们的思路是 图片在文字的上方
所以在TextView的xml属性中设置
android:drawableTop="@drawable/tab_menu_channel"即可。
其余的几个同上,在这里就不一一列举了。
- 接着说下文字的处理:
选中的时候为黄色,未选中 灰色
<?xml version="1.0" encoding="utf-8"?>
<selector xmlns:android="http://schemas.android.com/apk/res/android">

    <item android:color="@color/text_yellow" android:state_selected="true"/>
    <item android:color="@color/text_gray"/>

</selector>
然后在TextView的xml属性中设置
android:textColor="@drawable/tab_menu_text"- 最后说下背景的处理:
<?xml version="1.0" encoding="utf-8"?>
<selector xmlns:android="http://schemas.android.com/apk/res/android">

    <item android:state_selected="true">
        <!--形状定义工具-->
        <shape>
            <!--设置形状填充的颜色,只有android:color一个属性-->
            <solid android:color="#FFC4C4C4" />
        </shape>
    </item>


    <item>
        <shape>
            <solid android:color="@color/transparent" />
        </shape>
    </item>

</selector>
然后在TextView的xml属性中设置
android:background="@drawable/tab_menu_bg"综上所述,布局文件中TextView的属性如下:
        <TextView
            android:id="@+id/txt_channel"
            android:layout_width="0dp"
            android:layout_height="wrap_content"
            android:layout_weight="1"
            android:background="@drawable/tab_menu_bg"
            android:drawablePadding="3dp"
            android:drawableTop="@drawable/tab_menu_channel"
            android:gravity="center"
            android:padding="5dp"
            android:text="@string/tab_menu_alert"
            android:textColor="@drawable/tab_menu_text"
            android:textSize="16sp" />
也可以将公共的属性,提取到style中,然后设置给TextView。
- 主Activity中要思考的问题:
1)Fragment什么时候初始化和add到容器中?
2)Fragment什么时候hide和show?
3)如何让TextView被选中?选中一个TextView后,要做一些什么操作?
4)刚进入MainActivity怎么样让一个TextView处于Selected的状态?
1)+2)我们选中TextView后对对应的Fragment进行判空,如果为空,初始化,并添加到容器中; 而hide的话,我们定义一个方法hide所有的Fragment,每次触发点击事件就先调用这个hideAll方法, 讲所有Fragment隐藏起来,然后如果TextView对应的Fragment不为空,我们就将这个Fragment显示出来;
3)这个我们通过点击事件来实现,点击TextView后先重置所有TextView的选中状态为false,然后设置点击的 TextView的选中状态为true;
4)我们是通过点击事件来设置选中的,那么在onCreate()方法里加个触发点击事件的方法模拟点击就可以了~ txt_channel.performClick();
Code
BottomNvgWithTextView.java
package com.turing.base.activity.fragment.fragmentPractice1;

import android.os.Bundle;
import android.support.v4.app.FragmentManager;
import android.support.v4.app.FragmentTransaction;
import android.support.v7.app.AppCompatActivity;
import android.view.View;
import android.widget.FrameLayout;
import android.widget.TextView;

import com.turing.base.R;

public class BottomNvgWithTextView extends AppCompatActivity implements View.OnClickListener {


    //UI Object
    private TextView txt_topbar;
    private TextView txt_channel;
    private TextView txt_message;
    private TextView txt_better;
    private TextView txt_setting;
    private FrameLayout ly_content;

    //Fragment Object
    private Fragment_btm_nvg_tv_context fg1, fg2, fg3, fg4;

    private FragmentManager fManager;

    @Override
    protected void onCreate(Bundle savedInstanceState) {
        super.onCreate(savedInstanceState);
        setContentView(R.layout.activity_fragment__bottom_nvg_with_text_view);

        fManager = getSupportFragmentManager();
        bindViews();
        //模拟一次点击,既进去后选择第一项
        txt_channel.performClick();
    }


    /**
     * UI组件初始化与事件绑定
     */

    private void bindViews() {
        txt_topbar = (TextView) findViewById(R.id.txt_topbar);
        txt_channel = (TextView) findViewById(R.id.txt_channel);
        txt_message = (TextView) findViewById(R.id.txt_message);
        txt_better = (TextView) findViewById(R.id.txt_better);
        txt_setting = (TextView) findViewById(R.id.txt_setting);
        ly_content = (FrameLayout) findViewById(R.id.ly_content);

        txt_channel.setOnClickListener(this);
        txt_message.setOnClickListener(this);
        txt_better.setOnClickListener(this);
        txt_setting.setOnClickListener(this);
    }

    /**
     * 重置所有文本的选中状态
     */

    private void setSelected() {
        txt_channel.setSelected(false);
        txt_message.setSelected(false);
        txt_better.setSelected(false);
        txt_setting.setSelected(false);
    }

    /**
     * 隐藏所有Fragment
     */

    private void hideAllFragment(FragmentTransaction fragmentTransaction) {
        if (fg1 != null) fragmentTransaction.hide(fg1);
        if (fg2 != null) fragmentTransaction.hide(fg2);
        if (fg3 != null) fragmentTransaction.hide(fg3);
        if (fg4 != null) fragmentTransaction.hide(fg4);
    }

    @Override
    public void onClick(View v) {
        FragmentTransaction fTransaction = fManager.beginTransaction();
        hideAllFragment(fTransaction);
        switch (v.getId()) {
            case R.id.txt_channel:
                setSelected();
                txt_channel.setSelected(true);
                if (fg1 == null) {
                    fg1 = new Fragment_btm_nvg_tv_context("第一个Fragment");
                    fTransaction.add(R.id.ly_content, fg1);
                } else {
                    fTransaction.show(fg1);
                }
                break;
            case R.id.txt_message:
                setSelected();
                txt_message.setSelected(true);
                if (fg2 == null) {
                    fg2 = new Fragment_btm_nvg_tv_context("第二个Fragment");
                    fTransaction.add(R.id.ly_content, fg2);
                } else {
                    fTransaction.show(fg2);
                }
                break;
            case R.id.txt_better:
                setSelected();
                txt_better.setSelected(true);
                if (fg3 == null) {
                    fg3 = new Fragment_btm_nvg_tv_context("第三个Fragment");
                    fTransaction.add(R.id.ly_content, fg3);
                } else {
                    fTransaction.show(fg3);
                }
                break;
            case R.id.txt_setting:
                setSelected();
                txt_setting.setSelected(true);
                if (fg4 == null) {
                    fg4 = new Fragment_btm_nvg_tv_context("第四个Fragment");
                    fTransaction.add(R.id.ly_content, fg4);
                } else {
                    fTransaction.show(fg4);
                }
                break;
        }
        fTransaction.commit();
    }
}
activity_fragment__bottom_nvg_with_text_view.xml
<RelativeLayout xmlns:android="http://schemas.android.com/apk/res/android"
    android:layout_width="match_parent"
    android:layout_height="match_parent">

    <RelativeLayout
        android:id="@+id/ly_top_bar"
        android:layout_width="match_parent"
        android:layout_height="48dp"
        android:background="@color/bg_topbar">

        <TextView
            android:id="@+id/txt_topbar"
            android:layout_width="match_parent"
            android:layout_height="match_parent"
            android:layout_centerInParent="true"
            android:gravity="center"
            android:text="Fragment练习+TextView制作底部导航"
            android:textColor="@color/text_topbar"
            android:textSize="18sp" />


        <View
            android:layout_width="match_parent"
            android:layout_height="2px"
            android:layout_alignParentBottom="true"
            android:background="@color/div_white" />

    </RelativeLayout>


    <LinearLayout
        android:id="@+id/ly_tab_bar"
        android:layout_width="match_parent"
        android:layout_height="80dp"
        android:layout_alignParentBottom="true"
        android:background="@color/bg_white"
        android:orientation="horizontal">

        <TextView
            android:id="@+id/txt_channel"
            android:layout_width="0dp"
            android:layout_height="wrap_content"
            android:layout_weight="1"
            android:background="@drawable/tab_menu_bg"
            android:drawablePadding="3dp"
            android:drawableTop="@drawable/tab_menu_channel"
            android:gravity="center"
            android:padding="5dp"
            android:text="@string/tab_menu_alert"
            android:textColor="@drawable/tab_menu_text"
            android:textSize="16sp" />

        <TextView
            android:id="@+id/txt_message"
            android:layout_width="0dp"
            android:layout_height="wrap_content"
            android:layout_weight="1"
            android:background="@drawable/tab_menu_bg"
            android:drawablePadding="3dp"
            android:drawableTop="@drawable/tab_menu_message"
            android:gravity="center"
            android:padding="5dp"
            android:text="@string/tab_menu_profile"
            android:textColor="@drawable/tab_menu_text"
            android:textSize="16sp" />

        <TextView
            android:id="@+id/txt_better"
            android:layout_width="0dp"
            android:layout_height="wrap_content"
            android:layout_weight="1"
            android:background="@drawable/tab_menu_bg"
            android:drawablePadding="3dp"
            android:drawableTop="@drawable/tab_menu_my"
            android:gravity="center"
            android:padding="5dp"
            android:text="@string/tab_menu_pay"
            android:textColor="@drawable/tab_menu_text"
            android:textSize="16sp" />

        <TextView
            android:id="@+id/txt_setting"
            android:layout_width="0dp"
            android:layout_height="wrap_content"
            android:layout_weight="1"
            android:background="@drawable/tab_menu_bg"
            android:drawablePadding="3dp"
            android:drawableTop="@drawable/tab_menu_better"
            android:gravity="center"
            android:padding="5dp"
            android:text="@string/tab_menu_setting"
            android:textColor="@drawable/tab_menu_text"
            android:textSize="16sp" />

    </LinearLayout>

    <View
        android:id="@+id/div_tab_bar"
        android:layout_width="match_parent"
        android:layout_height="2px"
        android:layout_above="@id/ly_tab_bar"
        android:background="@color/div_white" />


    <FrameLayout
        android:id="@+id/ly_content"
        android:layout_width="match_parent"
        android:layout_height="match_parent"
        android:layout_above="@id/div_tab_bar"
        android:layout_below="@id/ly_top_bar">

    </FrameLayout>

</RelativeLayout>
首先定义顶部标题栏的样式,48dp的LinearLayout中间加上一个TextView作为标题!
接着定义一个大小为80dp的LinerLayout对其底部,在这个里面加入四个TextView,比例1:1:1:1, 并且设置相关属性,接着在这个LinearLayout上加一条线段!
最后以标题栏和底部导航栏为边界,写一个FrameLayout,宽高match_parent,用做Fragment的容器!
PS:这里四个TextView属性是重复的,你也可以自行抽取出来,编写一个style,设置下~
隐藏顶部导航栏
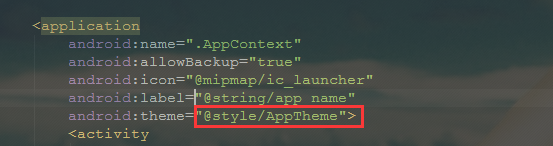
如果继承的是AppCompatActivity,以前在Activity中调用requestWindowFeature(Window.FEATURE_NO_TITLE);可以隐藏手机 自带顶部导航栏,,即使这句话写在了setContentView()之前,也会报错的,我们可以在AndroidManifest.xml设置下theme属性: NoActionBar

Fragment_btm_nvg_tv_context.java
package com.turing.base.activity.fragment.fragmentPractice1;


import android.os.Bundle;
import android.support.v4.app.Fragment;
import android.view.LayoutInflater;
import android.view.View;
import android.view.ViewGroup;
import android.widget.TextView;

import com.turing.base.R;

/**
 * A simple {@link Fragment} subclass.
 */
public class Fragment_btm_nvg_tv_context extends Fragment {

    private String content;

    /**
     * 无参构造函数
     */
    public Fragment_btm_nvg_tv_context() {

    }

    /**
     * 带有参数的构造函数
     *
     * @param content
     */
    public Fragment_btm_nvg_tv_context(String content) {
        this.content = content;
    }


    @Override
    public View onCreateView(LayoutInflater inflater, ViewGroup container,
                             Bundle savedInstanceState) {
        // Inflate the layout for this fragment
        View view = inflater.inflate(R.layout.fragment_btm_nvg_tv_context, container, false);

        TextView txt_content = (TextView) view.findViewById(R.id.txt_content);
        txt_content.setText(content);

        return view;
    }

}
重写了一个onCreateView()方法,其他方法可以按需重写!
fragment_btm_nvg_tv_context.xml
<FrameLayout xmlns:android="http://schemas.android.com/apk/res/android"
    xmlns:tools="http://schemas.android.com/tools"
    android:layout_width="match_parent"
    android:layout_height="match_parent"
    tools:context=".activity.fragment.fragmentPractice1.Fragment_btm_nvg_tv_context">

    <TextView
        android:id="@+id/txt_content"
        android:layout_width="match_parent"
        android:layout_height="match_parent"
        android:gravity="center"
        android:text="@string/hello_blank_fragment" />

</FrameLayout>
RadioGroup + RadioButton
上个方法使用LinearLayout + TextView实现了底部导航栏的效果,每次点击我们都要重置 所有TextView的状态,然后选中点击的TextView,有点麻烦是吧,接下来我们用另一种方法: RadioGroup + RadioButton实现相同的效果
效果图
分析
简单来说 ,一个RadioGroup包着四个RadioButton,和前面的一样用比例来划分:1:1:1:1;
另外我们只需重写RadioGroup的onCheckedChange,判断checkid即可知道点击的是哪个RadioButton。
drawable类的资源都是将selected 状态修改成checked
Code
Step 1:编写底部选项的一些资源文件
图片:tab_menu_channel_radiobutton.xml
android:state_checked=”true”
<?xml version="1.0" encoding="utf-8"?>
<selector xmlns:android="http://schemas.android.com/apk/res/android">

    <item android:drawable="@drawable/tab_channel_pressed" android:state_checked="true"/>
    <item android:drawable="@drawable/tab_channel_normal"/>
</selector>
其他三个同上,只需替换对应的图片资源即可。
文字:tab_menu_text_radiobutton.xml
android:state_checked=”true”
<?xml version="1.0" encoding="utf-8"?>
<selector xmlns:android="http://schemas.android.com/apk/res/android">

    <item android:color="@color/text_yellow" android:state_checked="true"/>
    <item android:color="@color/text_gray"/>

</selector>
背景资源:tab_menu_bg_radiobutton.xml
同TextView的
<?xml version="1.0" encoding="utf-8"?>
<selector xmlns:android="http://schemas.android.com/apk/res/android">

    <item android:state_checked="true">
        <!--形状定义工具-->
        <shape>
            <!--设置形状填充的颜色,只有android:color一个属性-->
            <solid android:color="#FFC4C4C4" />
        </shape>
    </item>


    <item>
        <shape>
            <solid android:color="@color/transparent" />
        </shape>
    </item>

</selector>
Step 2:主Activity布局
在前面用TextView实现底部导航栏我们就发现了一个问题,每个TextView的属性都几乎是差不多 的,而在建议那里我们也说让大家把相同的属性抽取出来写到Style中
首先我们取出其中一个RadioGroup的标签:
<RadioButton
            android:id="@+id/rb_channel"
            android:layout_width="0dp"
            android:layout_height="match_parent"
            android:layout_weight="1"
            android:background="@drawable/tab_menu_bg"
            android:button="@null"
            android:drawableTop="@drawable/tab_menu_channel"
            android:gravity="center"
            android:paddingTop="3dp"
            android:text="@string/tab_menu_alert"
            android:textColor="@drawable/tab_menu_text"
            android:textSize="18sp" />
我们可以把每个RadioButton都相同的属性抽取出来,写到style.xml文件中:
<style name="tab_menu_item">
    <item name="android:layout_width">0dp</item>
    <item name="android:layout_weight">1</item>
    <item name="android:layout_height">match_parent</item>
    <item name="android:background">@drawable/tab_menu_bg</item>
    <item name="android:button">@null</item>
    <item name="android:gravity">center</item>
    <item name="android:paddingTop">3dp</item>
    <item name="android:textColor">@drawable/tab_menu_text</item>
    <item name="android:textSize">18sp</item>
</style>
然后我们的主布局文件中的RadioButton就用不着每个都编写相同的代码了, 只需让RadioButton的style=”@style/tab_menu_item”就可以了!
activity_bottom_nvg_with_radio_button.xml
<RelativeLayout xmlns:android="http://schemas.android.com/apk/res/android"
    android:layout_width="match_parent"
    android:layout_height="match_parent"
    android:background="@color/bg_gray">


    <RelativeLayout
        android:id="@+id/ly_top_bar"
        android:layout_width="match_parent"
        android:layout_height="48dp"
        android:background="@color/bg_topbar">

        <TextView
            android:id="@+id/txt_topbar"
            android:layout_width="match_parent"
            android:layout_height="match_parent"
            android:layout_centerInParent="true"
            android:gravity="center"
            android:text="信息"
            android:textColor="@color/text_topbar"
            android:textSize="18sp" />

        <View
            android:layout_width="match_parent"
            android:layout_height="2px"
            android:layout_alignParentBottom="true"
            android:background="@color/div_white" />

    </RelativeLayout>

    <RadioGroup
        android:id="@+id/rg_tab_bar"
        android:layout_width="match_parent"
        android:layout_height="80dp"
        android:layout_alignParentBottom="true"
        android:background="@color/bg_white"
        android:orientation="horizontal">

        <RadioButton
            android:id="@+id/rb_channel"
            style="@style/tab_menu_item"
            android:drawableTop="@drawable/tab_menu_channel_radiobutton"
            android:text="@string/tab_menu_alert" />

        <RadioButton
            android:id="@+id/rb_message"
            style="@style/tab_menu_item"
            android:drawableTop="@drawable/tab_menu_message_radiobutton"
            android:text="@string/tab_menu_profile" />

        <RadioButton
            android:id="@+id/rb_better"
            style="@style/tab_menu_item"
            android:drawableTop="@drawable/tab_menu_better_radiobutton"
            android:text="@string/tab_menu_pay" />

        <RadioButton
            android:id="@+id/rb_setting"
            style="@style/tab_menu_item"
            android:drawableTop="@drawable/tab_menu_my_radiobutton"
            android:text="@string/tab_menu_setting"/>

    </RadioGroup>

    <View
        android:id="@+id/div_tab_bar"
        android:layout_width="match_parent"
        android:layout_height="2px"
        android:layout_above="@id/rg_tab_bar"
        android:background="@color/div_white" />

    <FrameLayout
        android:id="@+id/ly_content"
        android:layout_width="match_parent"
        android:layout_height="match_parent"
        android:layout_above="@id/div_tab_bar"
        android:layout_below="@id/ly_top_bar"></FrameLayout>

</RelativeLayout>
Step 3:隐藏顶部导航栏 同TextView的方式
Step 4:创建一个Fragment的简单布局与类 ,直接使用TextView中的~
Step 5: 主布局Activity的编写
package com.turing.base.activity.fragment.fragmentPractice2;

import android.os.Bundle;
import android.support.v4.app.FragmentManager;
import android.support.v4.app.FragmentTransaction;
import android.support.v7.app.AppCompatActivity;
import android.widget.RadioButton;
import android.widget.RadioGroup;

import com.turing.base.R;

/**
 * 我们使用LinearLayout + TextView实现了底部导航栏的效果,每次点击我们都要重置 所有TextView的状态,
 * 然后选中点击的TextView,有点麻烦是吧,
 * 接下来我们用另一种方法: RadioGroup + RadioButton来实现同样的效果
 */
public class BottomNvgWithRadioButton extends AppCompatActivity implements RadioGroup.OnCheckedChangeListener{


    private RadioGroup rg_tab_bar;
    private RadioButton rb_channel;

    //Fragment Object
    private Fragment_btm_nvg_rb_context fg1,fg2,fg3,fg4;
    private FragmentManager fManager;

    @Override
    protected void onCreate(Bundle savedInstanceState) {
        super.onCreate(savedInstanceState);
        setContentView(R.layout.activity_bottom_nvg_with_radio_button);

        fManager = getSupportFragmentManager();
        rg_tab_bar = (RadioGroup) findViewById(R.id.rg_tab_bar);
        rg_tab_bar.setOnCheckedChangeListener(this);
        //获取第一个单选按钮,并设置其为选中状态
        rb_channel = (RadioButton) findViewById(R.id.rb_channel);
        rb_channel.setChecked(true);
    }

    @Override
    public void onCheckedChanged(RadioGroup group, int checkedId) {

        // FragmentTransaction只能使用一次,
        // 每次使用都要调用FragmentManager 的beginTransaction()方法获得FragmentTransaction事务对象
        FragmentTransaction fTransaction = fManager.beginTransaction();
        hideAllFragment(fTransaction);
        switch (checkedId){
            case R.id.rb_channel:
                if(fg1 == null){
                    fg1 = new Fragment_btm_nvg_rb_context("第一个Fragment");
                    fTransaction.add(R.id.ly_content,fg1);
                }else{
                    fTransaction.show(fg1);
                }
                break;
            case R.id.rb_message:
                if(fg2 == null){
                    fg2 = new Fragment_btm_nvg_rb_context("第二个Fragment");
                    fTransaction.add(R.id.ly_content,fg2);
                }else{
                    fTransaction.show(fg2);
                }
                break;
            case R.id.rb_better:
                if(fg3 == null){
                    fg3 = new Fragment_btm_nvg_rb_context("第三个Fragment");
                    fTransaction.add(R.id.ly_content,fg3);
                }else{
                    fTransaction.show(fg3);
                }
                break;
            case R.id.rb_setting:
                if(fg4 == null){
                    fg4 = new Fragment_btm_nvg_rb_context("第四个Fragment");
                    fTransaction.add(R.id.ly_content,fg4);
                }else{
                    fTransaction.show(fg4);
                }
                break;
        }
        fTransaction.commit();
    }


    //隐藏所有Fragment
    private void hideAllFragment(FragmentTransaction fragmentTransaction){
        if(fg1 != null)fragmentTransaction.hide(fg1);
        if(fg2 != null)fragmentTransaction.hide(fg2);
        if(fg3 != null)fragmentTransaction.hide(fg3);
        if(fg4 != null)fragmentTransaction.hide(fg4);
    }
}
RadioGroup + RadioButton +ViewPager
效果图
分析
我们在第二个实例的基础上(RadioButton方式) 加上ViewPager来实现滑动切换页面的效果。
ViewPager概念
一个页面切换的组件,我们可以往里面填充多个View,然后我们可以通过触摸屏幕左右滑动 切换不同的View,和前面学习的ListView一样,我们需要一个Adapter(适配器),将要显示的View和 我们的ViewPager进行绑定,而ViewPager有他自己特定的Adapter——PagerAdapter!另外,Google 官方是建议我们使用Fragment来填充ViewPager的,这样可以更加方便的生成每个Page以及管理 每个Page的生命周期!当然它给我们提供了两个不同的Adapter,他们分别是: FragmentPageAdapter和FragmentStatePagerAdapter! 而我们本节用到的则是前者:FragmentPageAdapter! 另外要说一点的是ViewPager的缓存机制: ViewPager会缓存当前页,前一页,以及后一页,比如有1,2,3,4这四个页面:
——>当我们处于第一页:缓存1,2
——> 处于第二页:缓存 1,2,3
——> 处于第三页:缓存2,3,4 ——> 处于第四页缓存3,4这样!
使用PagerAdapter要重写相关方法
- getCount( ):获得viewpager中有多少个view
- destroyItem( ):移除一个给定位置的页面。适配器有责任从容器中删除这个视图。这是为了确保 在finishUpdate(viewGroup)返回时视图能够被移除。
- instantiateItem( ):①将给定位置的view添加到ViewGroup(容器)中,创建并显示出来 ②返回一个代表新增页面的Object(key),通常都是直接返回view本身就可以了, 当然你也可以自定义自己的key,但是key和每个view要一一对应的关系
- isViewFromObject( ):判断instantiateItem(ViewGroup, int)函数所返回来的Key与一个页面视图是否是 代表的同一个视图(即它俩是否是对应的,对应的表示同一个View),通常我们直接写 return view == object;就可以了,至于为什么要这样讲起来比较复杂,后面有机会进行了解吧 貌似是ViewPager中有个存储view状态信息的ArrayList,根据View取出对应信息的吧!
PS:不一定要重写所有方法~
Code
Step 1:相关资源文件的准备:
同方法2
Step 2:编写主Activity的布局文件:
只是把前面的FrameLayout替换成了:android.support.v4.view.ViewPager而已:
.....

 <android.support.v4.view.ViewPager
        android:id="@+id/vpager"
        android:layout_width="match_parent"
        android:layout_height="match_parent"
        android:layout_above="@id/div_tab_bar"
        android:layout_below="@id/ly_top_bar"></android.support.v4.view.ViewPager>
Step 3:编写Fragment的布局以及代码:
Fragment1.java
package com.turing.base.activity.fragment.fragmentPractice4;


import android.os.Bundle;
import android.support.v4.app.Fragment;
import android.view.LayoutInflater;
import android.view.View;
import android.view.ViewGroup;
import android.widget.TextView;

import com.apkfuns.logutils.LogUtils;
import com.turing.base.R;

/**
 * 为了顺便演示ViewPager的机制,
 * 特意写成了四个Fragment!在onCreateView中打印创建Log!
 */
public class Fragment1 extends Fragment {


    public Fragment1() {
        // Required empty public constructor
    }


    @Override
    public View onCreateView(LayoutInflater inflater, ViewGroup container,
                             Bundle savedInstanceState) {
        // Inflate the layout for this fragment
        View view = inflater.inflate(R.layout.fragment_fragment1, container, false);
        TextView txt_content = (TextView) view.findViewById(R.id.txt_content);
        txt_content.setText("第一个Fragment");
        LogUtils.e("Fragment1 onCreateView");
        return view;
    }

}
布局文件
<?xml version="1.0" encoding="utf-8"?>
<LinearLayout xmlns:android="http://schemas.android.com/apk/res/android"
    android:layout_width="match_parent"
    android:layout_height="match_parent"
    android:background="@color/bg_white"
    android:orientation="vertical">

    <TextView
        android:id="@+id/txt_content"
        android:layout_width="match_parent"
        android:layout_height="match_parent"
        android:gravity="center"
        android:text="XXX"
        android:textColor="@color/text_yellow"
        android:textSize="20sp" />

</LinearLayout>
Step 4:自定义FragmentPagerAdapter类:
MyFragmentPagerAdapter.java
package com.turing.base.activity.fragment.fragmentPractice4;

import android.support.v4.app.Fragment;
import android.support.v4.app.FragmentManager;
import android.support.v4.app.FragmentPagerAdapter;

/**
 * MyApp
 *
 * @author Mr.Yang on 2016-03-16  22:50.
 * @version 1.0
 * @desc
 */
public class MyFragmentPagerAdapter extends FragmentPagerAdapter {


    private final int PAGER_COUNT = 4;

    private Fragment1 myFragment1 = null;
    private Fragment2 myFragment2 = null;
    private Fragment3 myFragment3 = null;
    private Fragment4 myFragment4 = null;


    public MyFragmentPagerAdapter(FragmentManager fm) {
        super(fm);
        myFragment1 = new Fragment1();
        myFragment2 = new Fragment2();
        myFragment3 = new Fragment3();
        myFragment4 = new Fragment4();
    }

    @Override
    public Fragment getItem(int position) {
        Fragment fragment = null;
        switch (position) {
            case BottomNvgViewPageAct.PAGE_ONE:
                fragment = myFragment1;
                break;
            case BottomNvgViewPageAct.PAGE_TWO:
                fragment = myFragment2;
                break;
            case BottomNvgViewPageAct.PAGE_THREE:
                fragment = myFragment3;
                break;
            case BottomNvgViewPageAct.PAGE_FOUR:
                fragment = myFragment4;
                break;
        }
        return fragment;
    }

    @Override
    public int getCount() {
        return PAGER_COUNT;
    }
}
Step 5:BottomNvgViewPageAct的编写:
package com.turing.base.activity.fragment.fragmentPractice4;

import android.os.Bundle;
import android.support.v4.view.ViewPager;
import android.support.v7.app.AppCompatActivity;
import android.widget.RadioButton;
import android.widget.RadioGroup;
import android.widget.TextView;

import com.turing.base.R;

public class BottomNvgViewPageAct extends AppCompatActivity implements RadioGroup.OnCheckedChangeListener,
        ViewPager.OnPageChangeListener {


    //UI Objects
    private TextView txt_topbar;
    private RadioGroup rg_tab_bar;
    private RadioButton rb_channel;
    private RadioButton rb_message;
    private RadioButton rb_better;
    private RadioButton rb_setting;
    private ViewPager vpager;

    private MyFragmentPagerAdapter mAdapter;


    //几个代表页面的常量
    public static final int PAGE_ONE = 0;
    public static final int PAGE_TWO = 1;
    public static final int PAGE_THREE = 2;
    public static final int PAGE_FOUR = 3;


    @Override
    protected void onCreate(Bundle savedInstanceState) {
        super.onCreate(savedInstanceState);
        setContentView(R.layout.activity_bottom_nvg_view_page);

        mAdapter = new MyFragmentPagerAdapter(getSupportFragmentManager());
        bindViews();
        rb_channel.setChecked(true);
    }


 private void bindViews() {
    txt_topbar = (TextView) findViewById(R.id.txt_topbar);
    rg_tab_bar = (RadioGroup) findViewById(R.id.rg_tab_bar);
    rb_channel = (RadioButton) findViewById(R.id.rb_channel);
    rb_message = (RadioButton) findViewById(R.id.rb_message);
    rb_better = (RadioButton) findViewById(R.id.rb_better);
    rb_setting = (RadioButton) findViewById(R.id.rb_setting);
    rg_tab_bar.setOnCheckedChangeListener(this);

     vpager = (ViewPager) findViewById(R.id.vpager);
     vpager.setAdapter(mAdapter);
     vpager.setCurrentItem(0);
     vpager.addOnPageChangeListener(this);
    }


    @Override
    public void onCheckedChanged(RadioGroup group, int checkedId) {

        switch (checkedId) {
            case R.id.rb_channel:
                vpager.setCurrentItem(PAGE_ONE);
                break;
            case R.id.rb_message:
                vpager.setCurrentItem(PAGE_TWO);
                break;
            case R.id.rb_better:
                vpager.setCurrentItem(PAGE_THREE);
                break;
            case R.id.rb_setting:
                vpager.setCurrentItem(PAGE_FOUR);
                break;
        }

    }

    //重写ViewPager页面切换的处理方法
    @Override
    public void onPageScrolled(int position, float positionOffset, int positionOffsetPixels) {

    }

    @Override
    public void onPageSelected(int position) {

    }

    @Override
    public void onPageScrollStateChanged(int state) {
        //state的状态有三个,0表示什么都没做,1正在滑动,2滑动完毕

        if (state == 2) {
            switch (vpager.getCurrentItem()) {
                case PAGE_ONE:
                    rb_channel.setChecked(true);
                    break;
                case PAGE_TWO:
                    rb_message.setChecked(true);
                    break;
                case PAGE_THREE:
                    rb_better.setChecked(true);
                    break;
                case PAGE_FOUR:
                    rb_setting.setChecked(true);
                    break;
            }
        }
    }
}
TabLayout +ViewPager
关于TabLayout的使用,请查看本人博客TabLayout-Android M新控件
效果图
分析
- 导航栏显示的图片 和 导航TAB下的横线颜色 ,可以在自定义的style中设置
tabIndicatorColor来决定,如果要显示TAB,textAllCaps需要设置为false。如下所示
  <!--修改默认的TabLayout取的  tab indicator color chosen is the accent color defined for your Material Design theme-->
    <style name="MyCustomTabLayout" parent="Widget.Design.TabLayout">
        <item name="tabIndicatorColor">#0000FF</item>
        <!--必须设置textAllCaps为false,否则图片不显示-->
        <item name="tabTextAppearance">@style/MyCustomTextAppearance</item>
    </style>

    <!--By default, the tab created by TabLayout sets the textAllCaps property to be true, which prevents ImageSpans from being rendered.
    You can override this behavior by changing the tabTextAppearance property.-->
    <style name="MyCustomTextAppearance" parent="TextAppearance.Design.Tab">
        <item name="textAllCaps">false</item>
    </style>
如果要将TAB放在底部,只需要在主布局文件LinearLayout中将TabLayout放在下面即可
ViewPager 我们引用的是V4包下的,以实现更好地兼容,这样的话 就需要使用getSupportFragmentManager来获取FragmentManager
TabLayout设置TabMode为TabLayout.MODE_FIXED,防止TAB挤在一起
FragmentPageAdapter子类中,我们的标题是带有图片的,因此可以重写getPageTitle方法,通过SpannableString+ImageSpan来设置
Code
TabLayoutAct.java
package demo.turing.com.materialdesignwidget.tabLayout;

import android.os.Bundle;
import android.support.design.widget.TabLayout;
import android.support.v4.view.ViewPager;
import android.support.v7.app.AppCompatActivity;

import demo.turing.com.materialdesignwidget.R;

public class TabLayoutAct extends AppCompatActivity {

    @Override
    protected void onCreate(Bundle savedInstanceState) {
        super.onCreate(savedInstanceState);
        setContentView(R.layout.activity_tab_layout);


        // Get the ViewPager and set it's PagerAdapter so that it can display items
        ViewPager viewPager = (ViewPager) findViewById(R.id.viewpager);
        viewPager.setAdapter(new SimpleFragmentPagerAdapter(getSupportFragmentManager(), TabLayoutAct.this));


        // Give the TabLayout the ViewPager
        TabLayout tabLayout = (TabLayout) findViewById(R.id.sliding_tabs);
        tabLayout.setupWithViewPager(viewPager);
        // 设置MODE_FIXED避免TabLayout挤到一块去
        tabLayout.setTabMode(TabLayout.MODE_FIXED);
    }
}
activity_tab_layout.xml
style见分析中的第一条
<?xml version="1.0" encoding="utf-8"?>
<LinearLayout xmlns:android="http://schemas.android.com/apk/res/android"
    android:layout_width="match_parent"
    android:layout_height="match_parent"
    android:orientation="vertical">


    <android.support.design.widget.TabLayout
        android:id="@+id/sliding_tabs"
        android:layout_width="match_parent"
        android:layout_height="wrap_content"
        style="@style/MyCustomTabLayout"/>


    <android.support.v4.view.ViewPager
        android:id="@+id/viewpager"
        android:layout_width="match_parent"
        android:layout_height="0px"
        android:layout_weight="1"
        android:background="@android:color/white" />


</LinearLayout>
SimpleFragmentPagerAdapter.java
package demo.turing.com.materialdesignwidget.tabLayout;

import android.content.Context;
import android.graphics.drawable.Drawable;
import android.support.v4.app.Fragment;
import android.support.v4.app.FragmentManager;
import android.support.v4.app.FragmentPagerAdapter;
import android.text.Spannable;
import android.text.SpannableString;
import android.text.style.ImageSpan;
import android.util.Log;
import android.view.LayoutInflater;
import android.view.View;

import demo.turing.com.materialdesignwidget.R;

/**
 * MyApp
 *
 * @author Mr.Yang on 2016-03-08  09:58.
 * @version 1.0
 * @desc
 */
public class SimpleFragmentPagerAdapter extends FragmentPagerAdapter {

    /**
     * Add Icons to TabLayout ,在getPageTitle获取
     */
    private int[] imageResId = {
            R.drawable.tag_blue,
            R.drawable.flag_mark_violet,
            R.drawable.flag_mark_yellow
    };


    final int PAGE_COUNT = 3;
    private String tabTitles[] = new String[]{"TAB_1", "TAB_2", "TAB_3"};

    private Context context;

    /**
     * 构造函数
     *
     * @param fm
     * @param context
     */
    public SimpleFragmentPagerAdapter(FragmentManager fm, Context context) {
        super(fm);

        this.context = context;
    }

    @Override
    public Fragment getItem(int position) {
        return PageFragment.newInstance(position + 1);
    }

    @Override
    public int getCount() {
        return PAGE_COUNT;
    }


    @Override
    public CharSequence getPageTitle(int position) {
        // Generate title based on item position 设置文字
        // return tabTitles[position];

        // 设置图片
//        Drawable image = ContextCompat.getDrawable(context, imageResId[position]);
//        image.setBounds(0, 0, image.getIntrinsicWidth(), image.getIntrinsicHeight());
//        SpannableString sb = new SpannableString(" ");
//        ImageSpan imageSpan = new ImageSpan(image, ImageSpan.ALIGN_BOTTOM);
//        sb.setSpan(imageSpan, 0, 1, Spannable.SPAN_EXCLUSIVE_EXCLUSIVE);
//        return sb;

        // 设置文字和图片

        // Generate title based on item position
        Drawable image = context.getResources().getDrawable(imageResId[position]);
        image.setBounds(0, 0, image.getIntrinsicWidth(), image.getIntrinsicHeight());
        // Replace blank spaces with image icon
        SpannableString sb = new SpannableString("   " + tabTitles[position]);
        ImageSpan imageSpan = new ImageSpan(image, ImageSpan.ALIGN_BOTTOM);
        sb.setSpan(imageSpan, 0, 1, Spannable.SPAN_EXCLUSIVE_EXCLUSIVE);
        return sb;
    }

    /**
     * 自定义tab
     * 如果需要每个TAB都需要指定成单独的布局,switch即可,如果是相同的,写一个即可
     * 这里自定义的不是Fragment的布局,不要搞混了,仅仅是TAB的样式
     * @param
     * @return
     */
    public View getTabView(int position) {
        View view  = null;
        Log.d("getTabView", String.valueOf(position));
        switch (position) {
            case 0:
                // Given you have a custom layout in `res/layout/custom_tab.xml` with a TextView and ImageView
                view = LayoutInflater.from(context).inflate(R.layout.custom_tab, null);
//                TextView tv = (TextView) view.findViewById(R.id.textView);
//                tv.setText(tabTitles[position]);
//                ImageView img = (ImageView) view.findViewById(R.id.imageView);
//                img.setImageResource(imageResId[position]);
                break;
            case 1:
                // Given you have a custom layout in `res/layout/custom_tab1.xml` with a TextView and ImageView
                view = LayoutInflater.from(context).inflate(R.layout.custom_tab1, null);
//                TextView tv2 = (TextView) view.findViewById(R.id.textView);
//                tv2.setText(tabTitles[position]);
//                ImageView img2 = (ImageView) view.findViewById(R.id.imageView);
//                img2.setImageResource(imageResId[position]);
                break;
            case 2:
                // Given you have a custom layout in `res/layout/custom_tab2.xml` with a TextView and ImageView
                view = LayoutInflater.from(context).inflate(R.layout.custom_tab2, null);
//                TextView tv3 = (TextView) view.findViewById(R.id.textView);
//                tv3.setText(tabTitles[position]);
//                ImageView img3 = (ImageView) view.findViewById(R.id.imageView);
//                img3.setImageResource(imageResId[position]);
                break;
            default:
                break;
        }


        return view;
    }
}
PageFragment.java
package demo.turing.com.materialdesignwidget.tabLayout;


import android.os.Bundle;
import android.support.annotation.Nullable;
import android.support.v4.app.Fragment;
import android.view.LayoutInflater;
import android.view.View;
import android.view.ViewGroup;
import android.widget.TextView;

import demo.turing.com.materialdesignwidget.R;

/**
 * MyApp
 *
 * @author Mr.Yang on 2016-03-08  09:43.
 * @version 1.0
 * @desc
 */
public class PageFragment extends Fragment {

    public static final String ARG_PAGE = "ARG_PAGE";

    private int mPage;

    public static PageFragment newInstance(int page) {
        Bundle args = new Bundle();
        args.putInt(ARG_PAGE, page);

        PageFragment fragment = new PageFragment();
        // 传递参数
        fragment.setArguments(args);

        return fragment;

    }


    @Override
    public void onCreate(Bundle savedInstanceState) {
        super.onCreate(savedInstanceState);
        // 获取参数
        mPage = getArguments().getInt(ARG_PAGE);
    }


    @Nullable
    @Override
    public View onCreateView(LayoutInflater inflater, ViewGroup container, Bundle savedInstanceState) {

        View view = inflater.inflate(R.layout.fragment_page, container, false);
        TextView textView = (TextView) view;
        textView.setText("Fragment~" + mPage);

        return view;
    }
}
fragment_page.xml
仅作为演示,fragment的布局文件只有一个TextView~
<?xml version="1.0" encoding="utf-8"?>
<TextView xmlns:android="http://schemas.android.com/apk/res/android"
    android:layout_width="match_parent"
    android:layout_height="match_parent"
    android:gravity="center"
    android:text="fragment~"/>


 207
207


 被折叠的 条评论
为什么被折叠?
被折叠的 条评论
为什么被折叠?
 到【灌水乐园】发言


