


   小记:
   在这里笔者将之前写的Ldap接口操作类与Range接口操作类通过Spring boot整合,并对外以http方式提供访问接口。
   这么做的好处是,别人访问我的接口只需要我提供一个url便可以了。
   以后无论我对程序进行任何改动,只要url与返回值不变,
   调用该接口的人都不用做什么变动。
   这里采用Spring boot的原因主要是因为其部署与开发实在是太简便了。
- 1
- 2
- 3
- 4
- 5
- 6
- 7
特别提醒:
     整个项目的部署,只需要用maven将项目打包,上传至linux服务器,运行java -jar xx.jar 则可。
     无需任何配置,像修改端口可直接通过如下代码便可修改;
     如需要用log4j打印日志,需将log4j放到src/main/resource目录(不能是src/main/java),
     并将spring boot 中自带的默认日志组件去掉(这一点通过maven实现很方便)。
- 1
- 2
- 3
- 4
- 5
// 修改访问的默认端口
    public void customize(ConfigurableEmbeddedServletContainer configurableEmbeddedServletContainer) {
        configurableEmbeddedServletContainer.setPort(Integer.parseInt(PropertyUtil.getProperty("projectPort")));
}- 1
- 2
- 3
- 4
Ldap接口可见如下链接:
http://blog.csdn.net/u013850277/article/details/76651167
Range接口见如下链接:
http://blog.csdn.net/u013850277/article/details/76651242
下面步入正题:
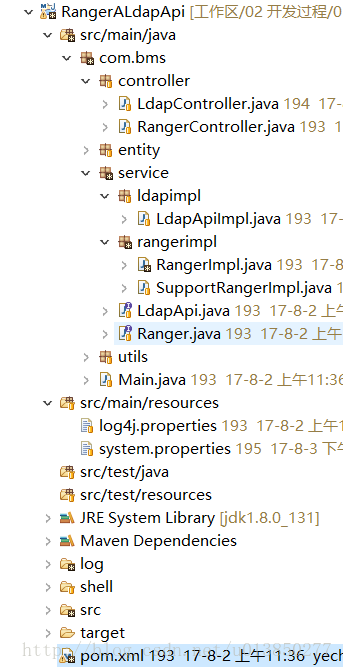
Eclipse 中的项目结构如下图所示:
pom.xml 内容
<project xmlns="http://maven.apache.org/POM/4.0.0" xmlns:xsi="http://www.w3.org/2001/XMLSchema-instance"
    xsi:schemaLocation="http://maven.apache.org/POM/4.0.0 http://maven.apache.org/xsd/maven-4.0.0.xsd">
    <modelVersion>4.0.0</modelVersion>
    <groupId>RangerALdapApi</groupId>
    <artifactId>RangerALdapApi</artifactId>
    <version>0.0.1-SNAPSHOT</version>

    <parent>
        <groupId>org.springframework.boot</groupId>
        <artifactId>spring-boot-starter-parent</artifactId>
        <version>1.5.4.RELEASE</version>
    </parent>

    <dependencies>
        <dependency>
            <groupId>org.springframework.boot</groupId>
            <artifactId>spring-boot-starter-web</artifactId>

            <exclusions>
                <exclusion>
                    <groupId>org.springframework.boot</groupId>
                    <artifactId>spring-boot-starter-logging</artifactId>
                </exclusion>
            </exclusions>

        </dependency>

        <!-- https://mvnrepository.com/artifact/org.springframework.boot/spring-boot-starter-log4j -->
        <dependency>
            <groupId>org.springframework.boot</groupId>
            <artifactId>spring-boot-starter-log4j</artifactId>
            <version>1.3.0.RELEASE</version>
        </dependency>

        <!-- https://mvnrepository.com/artifact/com.unboundid/unboundid-ldapsdk -->
        <dependency>
            <groupId>com.unboundid</groupId>
            <artifactId>unboundid-ldapsdk</artifactId>
        </dependency>

        <dependency>
            <groupId>org.apache.ranger</groupId>
            <artifactId>ranger-plugins-common</artifactId>
            <version>0.6.0</version>
        </dependency>

        <dependency>
            <groupId>com.google.code.gson</groupId>
            <artifactId>gson</artifactId>
        </dependency>

        <dependency>
            <groupId>jdk.tools</groupId>
            <artifactId>jdk.tools</artifactId>
            <version>1.8</version>
            <scope>system</scope>
            <systemPath>${JAVA_HOME}/lib/tools.jar</systemPath>
        </dependency>
    </dependencies>

    <build>
        <plugins>
            <plugin>
                <groupId>org.springframework.boot</groupId>
                <artifactId>spring-boot-maven-plugin</artifactId>
                <configuration>
                    <fork>true</fork>
                    <mainClass>${start-class}</mainClass>
                </configuration>
                  <executions>
                    <execution>
                      <goals>
                        <goal>repackage</goal>
                      </goals>
                    </execution>
                </executions>
            </plugin>
            <plugin>
              <artifactId>maven-assembly-plugin</artifactId>
              <version>2.2-beta-5</version>
              <configuration>
                <archive>
                  <manifest>
                    <addClasspath>true</addClasspath>
                    <mainClass>com.bms.Main.Main</mainClass>
                  </manifest>
                </archive>
                <descriptorRefs>
                  <descriptorRef>jar-with-dependencies</descriptorRef>
                </descriptorRefs>
              </configuration>
              <executions>
                <execution>
                  <id>assemble-all</id>
                  <phase>package</phase>
                  <goals>
                    <goal>single</goal>
                  </goals>
                </execution>
              </executions>
            </plugin>
        </plugins>
    </build>

</project>- 1
- 2
- 3
- 4
- 5
- 6
- 7
- 8
- 9
- 10
- 11
- 12
- 13
- 14
- 15
- 16
- 17
- 18
- 19
- 20
- 21
- 22
- 23
- 24
- 25
- 26
- 27
- 28
- 29
- 30
- 31
- 32
- 33
- 34
- 35
- 36
- 37
- 38
- 39
- 40
- 41
- 42
- 43
- 44
- 45
- 46
- 47
- 48
- 49
- 50
- 51
- 52
- 53
- 54
- 55
- 56
- 57
- 58
- 59
- 60
- 61
- 62
- 63
- 64
- 65
- 66
- 67
- 68
- 69
- 70
- 71
- 72
- 73
- 74
- 75
- 76
- 77
- 78
- 79
- 80
- 81
- 82
- 83
- 84
- 85
- 86
- 87
- 88
- 89
- 90
- 91
- 92
- 93
- 94
- 95
- 96
- 97
- 98
- 99
- 100
- 101
- 102
- 103
- 104
- 105
Main.java
package com.bms;

import org.springframework.boot.SpringApplication;
import org.springframework.boot.autoconfigure.SpringBootApplication;
import org.springframework.boot.context.embedded.ConfigurableEmbeddedServletContainer;
import org.springframework.boot.context.embedded.EmbeddedServletContainerCustomizer;
import org.springframework.web.bind.annotation.RequestMapping;
import org.springframework.web.bind.annotation.RestController;

import com.bms.utils.PropertyUtil;

/**
 * @author YeChunBo
 * @time 2017年8月2日
 *
 *       类说明 :项目启动类,启动该项目只需求启动该类便可
 */

@SpringBootApplication
@RestController
public class Main implements EmbeddedServletContainerCustomizer{

    @RequestMapping("/")
    public String getHello() {
        return "Hello Spring Boot .....";
    }

    // 修改访问的默认端口
    public void customize(ConfigurableEmbeddedServletContainer configurableEmbeddedServletContainer) {
        configurableEmbeddedServletContainer.setPort(Integer.parseInt(PropertyUtil.getProperty("projectPort")));
    }

    public static void main(String[] args) {
        SpringApplication.run(Main.class, args);
    }
}
- 1
- 2
- 3
- 4
- 5
- 6
- 7
- 8
- 9
- 10
- 11
- 12
- 13
- 14
- 15
- 16
- 17
- 18
- 19
- 20
- 21
- 22
- 23
- 24
- 25
- 26
- 27
- 28
- 29
- 30
- 31
- 32
- 33
- 34
- 35
- 36
- 37
LdapController
package com.bms.controller;

import java.util.List;

import org.jboss.logging.Logger;
import org.springframework.boot.autoconfigure.SpringBootApplication;
import org.springframework.web.bind.annotation.RequestMapping;
import org.springframework.web.bind.annotation.RequestParam;
import org.springframework.web.bind.annotation.ResponseBody;
import org.springframework.web.bind.annotation.RestController;

import com.bms.service.ldapimpl.LdapApiImpl;

/**
 * @author YeChunBo
 * @time 2017年8月2日
 *
 *       类说明 Ldap api接口控制类
 */

@SpringBootApplication
@RestController
public class LdapController {

    private static Logger log = Logger.getLogger(LdapController.class);
    public static final String DEFAULT_LDAP_PWD = "ddd_aaa"; // ldap user 默认的用户密码

    LdapApiImpl ldapApiImpl = new LdapApiImpl();

    /**创建ldap 用户
     * 请求样例:http://localhost:8567/create_ldap_user?uid=bms_test5&pwd=123
     * @param basedN:非必需,默认为:ou=people,dc=apache,dc=org
     * @param uid:必需
     * @param pwd:非必需,默认为:ddd_aaa
     * @return
     */
    @RequestMapping("/create_ldap_user")
    @ResponseBody
    Integer createLdapUser(
            @RequestParam(value = "basedN", required = false, defaultValue = "ou=people,dc=hadoop,dc=apache,dc=org") String basedN,
            @RequestParam(value = "uid", required = true) String uid,
            @RequestParam(value = "pwd", required = false, defaultValue = DEFAULT_LDAP_PWD) String pwd) {

        log.info("LdapController createEntry the base DN is: " + basedN + " ,and the uid is: " + uid + " ,and the usePwd is: " + pwd);

        return ldapApiImpl.createEntry(basedN, uid, pwd);
    }


    /**
     * 查询所有Ldap用户
     * @param searchDN:非必需参数
     * @param filter:非必需参数
     * @return
     */
    @RequestMapping("/query_ldap_user")
    @ResponseBody
    List<String> queryLdapUser(
            @RequestParam(value = "searchDN", required = false, defaultValue = "ou=people,dc=hadoop,dc=apache,dc=org") String searchDN,
            @RequestParam(value = "filter", required = false, defaultValue = "objectClass=person") String filter) {

        log.info("LdapController of searchDN: " + searchDN + ", filter :" + filter);

        return ldapApiImpl.queryLdap(searchDN, filter);
    }


    /**
     * 删除Ldap用户
     * @param uid:用户名。eg:hive
     * @return
     */
    @RequestMapping("/delete_ldap_user")
    @ResponseBody
    Integer deleteLdapUser(@RequestParam(value = "uid", required = true) String uid) {

        log.info("LdapController of deleteLdapUser: " + uid);
        uid = "uid=" + uid + ",ou=people,dc=hadoop,dc=apache,dc=org";

        return ldapApiImpl.deleteEntry(uid);
    }

}
- 1
- 2
- 3
- 4
- 5
- 6
- 7
- 8
- 9
- 10
- 11
- 12
- 13
- 14
- 15
- 16
- 17
- 18
- 19
- 20
- 21
- 22
- 23
- 24
- 25
- 26
- 27
- 28
- 29
- 30
- 31
- 32
- 33
- 34
- 35
- 36
- 37
- 38
- 39
- 40
- 41
- 42
- 43
- 44
- 45
- 46
- 47
- 48
- 49
- 50
- 51
- 52
- 53
- 54
- 55
- 56
- 57
- 58
- 59
- 60
- 61
- 62
- 63
- 64
- 65
- 66
- 67
- 68
- 69
- 70
- 71
- 72
- 73
- 74
- 75
- 76
- 77
- 78
- 79
- 80
- 81
- 82
- 83
- 84
- 85
- 86
- 87
打包项目
- 然后通过maven 打包(eclipse :Run as –> maven install ),将生成的jar( RangerALdapApi-0.0.1-SNAPSHOT.jar)包,上传到服务器,运行(java -jar RangerALdapApi-0.0.1-SNAPSHOT.jar >> catalina.out 2>&1 &)便可看到其自动创建log目录,并生成对应的日志文件。通过 浏览器同样可以访问
四、下面是比较正规的部署方式,添加了启停脚本
整体步骤如下
1、 在服务器上创建项目目录
mkdir -p project/RangerALdapApi
2、 上传RangerALdapApi-0.0.1-SNAPSHOT.jar 包到服务器
这个jar 包是通过 maven 打包的。
3、编写启停脚本
start.sh
\#!/bin/bash
PROJECTNAME=RangerALdapApi
pid=`ps -ef |grep $PROJECTNAME |grep -v "grep" |awk '{print $2}'`
if [ $pid ]; then
echo "$PROJECTNAME is running and pid=$pid"
else
echo "Start success to start $PROJECTNAME ...."
nohup java -jar RangerALdapApi-0.0.1-SNAPSHOT.jar >> catalina.out 2>&1 &
fi- 1
- 2
- 3
- 4
- 5
- 6
- 7
- 8
- 9
- 10
- 11
- 12
- 13
- 14
- 15
- 16
- 17
stop.sh
\#!/bin/bash
PROJECTNAME=RangerALdapApi
pid=`ps -ef |grep $PROJECTNAME |grep -v "grep" |awk '{print $2}' `
if [ $pid ]; then
echo "$PROJECTNAME is running and pid=$pid"
kill -9 $pid
if [[ $? -eq 0 ]];then
echo "sucess to stop $PROJECTNAME "
else
echo "fail to stop $PROJECTNAME "
fi
fi- 1
- 2
- 3
- 4
- 5
- 6
- 7
- 8
- 9
- 10
- 11
- 12
- 13
- 14
- 15
- 16
- 17
- 18
- 19
- 20
- 21
- 22
- 23
4、测试
测试启停脚本
测试项目运行情况(由于端口没有对外开放,因而采用curl 这种方式测试)
[root@hdc10 RangerALdapApi]# curl http://localhost:8567/query_ldap_user

["uid=admin,ou=people,dc=hadoop,dc=apache,dc=org","uid=tom,ou=people,dc=hadoop,dc=apache,dc=org","uid=sam,ou=people,dc=hadoop,dc=apache,dc=org","uid=guest,ou=people,dc=hadoop,dc=apache,dc=org","uid=zhineng_user,ou=people,dc=hadoop,dc=apache,dc=org","uid=keyun_user,ou=people,dc=hadoop,dc=apache,dc=org","uid=bms_test5,ou=people,dc=hadoop,dc=apache,dc=org","uid=yingling_user,ou=people,dc=hadoop,dc=apache,dc=org","uid=yunhong_user,ou=people,dc=hadoop,dc=apache,dc=org","uid=bmsoft1,ou=people,dc=hadoop,dc=apache,dc=org","uid=bmsoft_test,ou=people,dc=hadoop,dc=apache,dc=org"]
[root@hdc10 RangerALdapApi]#- 1
- 2
- 3
- 4
在部署过程遇到过的坑
1、日志没有正常输出
- 将log4j.properties 文件放到src/main/java 目录下时,在window中的Eclipse运行一切正常,日志也可以正常输出到log目录中。但是当把包放到Linux后,程序正常运行,日志不能正常输出。
- 解决的方法:将log4j.properties 文件放到src/main/resource 目录下便可。具体原因有等深究。。。
2、直接导入可运行的 jar包(Runable JAR file),通过 java -jar xx.jar包运行时,出现如下错误:
[main] ERROR org.springframework.boot.SpringApplication - Application startup failed
org.springframework.beans.factory.BeanDefinitionStoreException: Failed to process import candidates for configuration class [pl.mypackage.Main]; nested exception is java.lang.IllegalArgumentException: No auto configuration classes found in META-INF/spring.factories. If you are using a custom packaging, make sure that file is correct.
        at org.springframework.context.annotation.ConfigurationClassParser.processDeferredImportSelectors(ConfigurationClassParser.java:489)
        at org.springframework.context.annotation.ConfigurationClassParser.parse(ConfigurationClassParser.java:191)
        at org.springframework.context.annotation.ConfigurationClassPostProcessor.processConfigBeanDefinitions(ConfigurationClassPostProcessor.java:321)
        at org.springframework.context.annotation.ConfigurationClassPostProcessor.postProcessBeanDefinitionRegistry(ConfigurationClassPostProcessor.java:243)
        at org.springframework.context.support.PostProcessorRegistrationDelegate.invokeBeanDefinitionRegistryPostProcessors(PostProcessorRegistrationDelegate.java:273)
        at org.springframework.context.support.PostProcessorRegistrationDelegate.invokeBeanFactoryPostProcessors(PostProcessorRegistrationDelegate.java:98)
        at org.springframework.context.support.AbstractApplicationContext.invokeBeanFactoryPostProcessors(AbstractApplicationContext.java:681)
        at org.springframework.context.support.AbstractApplicationContext.refresh(AbstractApplicationContext.java:523)
        at org.springframework.boot.context.embedded.EmbeddedWebApplicationContext.refresh(EmbeddedWebApplicationContext.java:122)
        at org.springframework.boot.SpringApplication.refresh(SpringApplication.java:759)
        at org.springframework.boot.SpringApplication.refreshContext(SpringApplication.java:369)
        at org.springframework.boot.SpringApplication.run(SpringApplication.java:313)
        at org.springframework.boot.SpringApplication.run(SpringApplication.java:1185)
        at org.springframework.boot.SpringApplication.run(SpringApplication.java:1174)
        at pl.mypackage.Main.main(Main.java:39)
Caused by: java.lang.IllegalArgumentException: No auto configuration classes found in META-INF/spring.factories. If you are using a custom packaging, make sure that file is correct.
        at org.springframework.util.Assert.notEmpty(Assert.java:276)
        at org.springframework.boot.autoconfigure.EnableAutoConfigurationImportSelector.getCandidateConfigurations(EnableAutoConfigurationImportSelector.java:145)
        at org.springframework.boot.autoconfigure.EnableAutoConfigurationImportSelector.selectImports(EnableAutoConfigurationImportSelector.java:84)
        at org.springframework.context.annotation.ConfigurationClassParser.processDeferredImportSelectors(ConfigurationClassParser.java:481)
        ... 14 common frames omitted
org.springframework.beans.factory.BeanDefinitionStoreException: Failed to process import candidates for configuration class [pl.mypackage.Main]; nested exception is java.lang.IllegalArgumentException: No auto configuration classes found in META-INF/spring.factories. If you are using a custom packaging, make sure that file is correct.
        at org.springframework.context.annotation.ConfigurationClassParser.processDeferredImportSelectors(ConfigurationClassParser.java:489)
        at org.springframework.context.annotation.ConfigurationClassParser.parse(ConfigurationClassParser.java:191)
        at org.springframework.context.annotation.ConfigurationClassPostProcessor.processConfigBeanDefinitions(ConfigurationClassPostProcessor.java:321)
        at org.springframework.context.annotation.ConfigurationClassPostProcessor.postProcessBeanDefinitionRegistry(ConfigurationClassPostProcessor.java:243)
        at org.springframework.context.support.PostProcessorRegistrationDelegate.invokeBeanDefinitionRegistryPostProcessors(PostProcessorRegistrationDelegate.java:273)
        at org.springframework.context.support.PostProcessorRegistrationDelegate.invokeBeanFactoryPostProcessors(PostProcessorRegistrationDelegate.java:98)
        at org.springframework.context.support.AbstractApplicationContext.invokeBeanFactoryPostProcessors(AbstractApplicationContext.java:681)
        at org.springframework.context.support.AbstractApplicationContext.refresh(AbstractApplicationContext.java:523)
        at org.springframework.boot.context.embedded.EmbeddedWebApplicationContext.refresh(EmbeddedWebApplicationContext.java:122)
        at org.springframework.boot.SpringApplication.refresh(SpringApplication.java:759)
        at org.springframework.boot.SpringApplication.refreshContext(SpringApplication.java:369)
        at org.springframework.boot.SpringApplication.run(SpringApplication.java:313)
        at org.springframework.boot.SpringApplication.run(SpringApplication.java:1185)
        at org.springframework.boot.SpringApplication.run(SpringApplication.java:1174)
        at pl.mypackage.Main.main(Main.java:39)
Caused by: java.lang.IllegalArgumentException: No auto configuration classes found in META-INF/spring.factories. If you are using a custom packaging, make sure that file is correct.
        at org.springframework.util.Assert.notEmpty(Assert.java:276)
        at org.springframework.boot.autoconfigure.EnableAutoConfigurationImportSelector.getCandidateConfigurations(EnableAutoConfigurationImportSelector.java:145)
        at org.springframework.boot.autoconfigure.EnableAutoConfigurationImportSelector.selectImports(EnableAutoConfigurationImportSelector.java:84)
        at org.springframework.context.annotation.ConfigurationClassParser.processDeferredImportSelectors(ConfigurationClassParser.java:481)
... 14 more- 1
- 2
- 3
- 4
- 5
- 6
- 7
- 8
- 9
- 10
- 11
- 12
- 13
- 14
- 15
- 16
- 17
- 18
- 19
- 20
- 21
- 22
- 23
- 24
- 25
- 26
- 27
- 28
- 29
- 30
- 31
- 32
- 33
- 34
- 35
- 36
- 37
- 38
- 39
- 40
- 41
- 42
- 43
- 44
- 45
解决方式:通过修改pom.xml文件,改用maven 打包,问题解决
添加上如下代码:
<build>
        <plugins>
            <plugin>
                <groupId>org.springframework.boot</groupId>
                <artifactId>spring-boot-maven-plugin</artifactId>
                <configuration>
                    <fork>true</fork>
                    <mainClass>${start-class}</mainClass>
                </configuration>
                  <executions>
                    <execution>
                      <goals>
                        <goal>repackage</goal>
                      </goals>
                    </execution>
                </executions>
            </plugin>
            <plugin>
              <artifactId>maven-assembly-plugin</artifactId>
              <version>2.2-beta-5</version>
              <configuration>
                <archive>
                  <manifest>
                    <addClasspath>true</addClasspath>
                    <mainClass>com.bms.Main.Main</mainClass>
                  </manifest>
                </archive>
                <descriptorRefs>
                  <descriptorRef>jar-with-dependencies</descriptorRef>
                </descriptorRefs>
              </configuration>
              <executions>
                <execution>
                  <id>assemble-all</id>
                  <phase>package</phase>
                  <goals>
                    <goal>single</goal>
                  </goals>
                </execution>
              </executions>
            </plugin>
        </plugins>
</build>- 1
- 2
- 3
- 4
- 5
- 6
- 7
- 8
- 9
- 10
- 11
- 12
- 13
- 14
- 15
- 16
- 17
- 18
- 19
- 20
- 21
- 22
- 23
- 24
- 25
- 26
- 27
- 28
- 29
- 30
- 31
- 32
- 33
- 34
- 35
- 36
- 37
- 38
- 39
- 40
- 41
- 42
- 43
- 44
如上部署成功之后,可通过相关的Url 访问Ldap与Ranger的接口。
注:用maven 打包时运用 java -jar xxx.jar包运行时,需要在pom.xml指定启动的Main class
版权声明:本文大部分为博主原创,转载请注明出处。 //blog.csdn.net/u013850277/article/details/76651581


 3803
3803


 被折叠的 条评论
为什么被折叠?
被折叠的 条评论
为什么被折叠?
 到【灌水乐园】发言


