


死亡的日子终究会到来,在那一天到来之前,别忘记,来我坟前再看一眼
上一章简单介绍了SpringBoot自定义日志Starter(二十五),如果没有看过,请观看上一章
关于这一章节的内容,参考了 大神江南一点雨的文章:
Spring Boot2 系列教程(八)Spring Boot 中配置 Https
参考了文章: SpringBoot系列——启用https
https 协议:
超文本传输安全协议(HyperText Transfer Protocol Secure),缩写:HTTPS;
常称为 HTTP over TLS、HTTP over SSL 或 HTTP Secure)
是一种通过计算机网络进行安全通信的传输协议。HTTPS 经由 HTTP 进行通信,但利用 SSL/TLS 来加密数据包。
HTTPS 开发的主要目的,是提供对网站服务器的身份认证,保护交换数据的隐私与完整性。
这个协议由网景公司(Netscape)在 1994 年首次提出,随后扩展到互联网上。
HTTPS 连接经常用于网络上的交易支付和企业信息系统中敏感信息的传输。
在 2000 年代末至 2010 年代初,HTTPS 开始广泛使用,以确保各类型的网页真实,
保护账户和保持用户通信,身份和网络浏览的私密性。
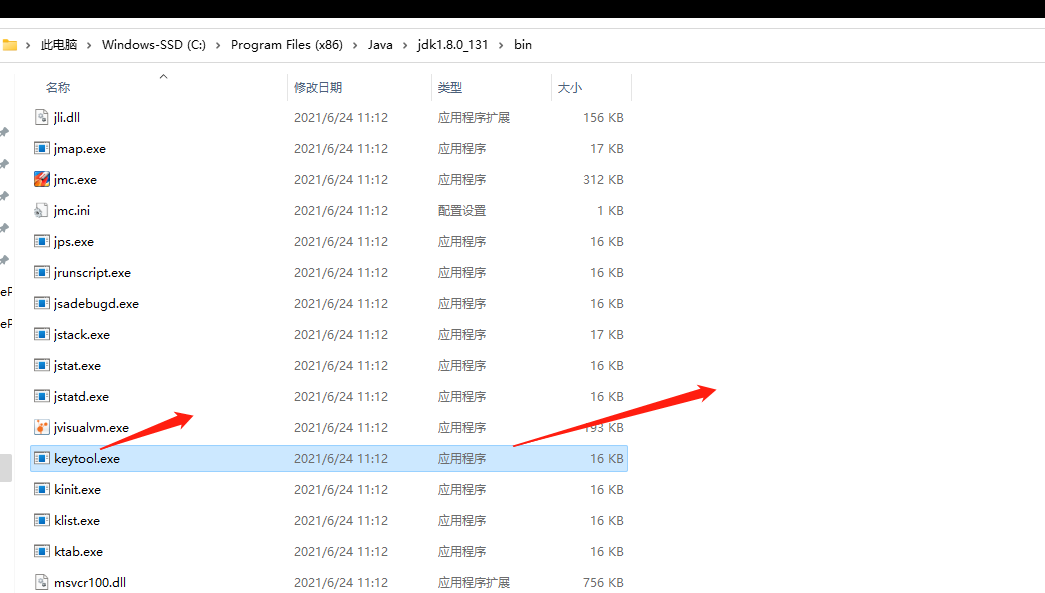
一. 通过 JDK自带的工具生成 https 证书
进入到 %JAVA_HOME%\bin 目录下, 使用 keytool.exe 命令
生成证书
在这个 bin 目录,打开 cmd 窗口
keytool -genkey -alias myhttps -keyalg RSA -keysize 1024 -keystore D:\yjl.p12 -validity 365
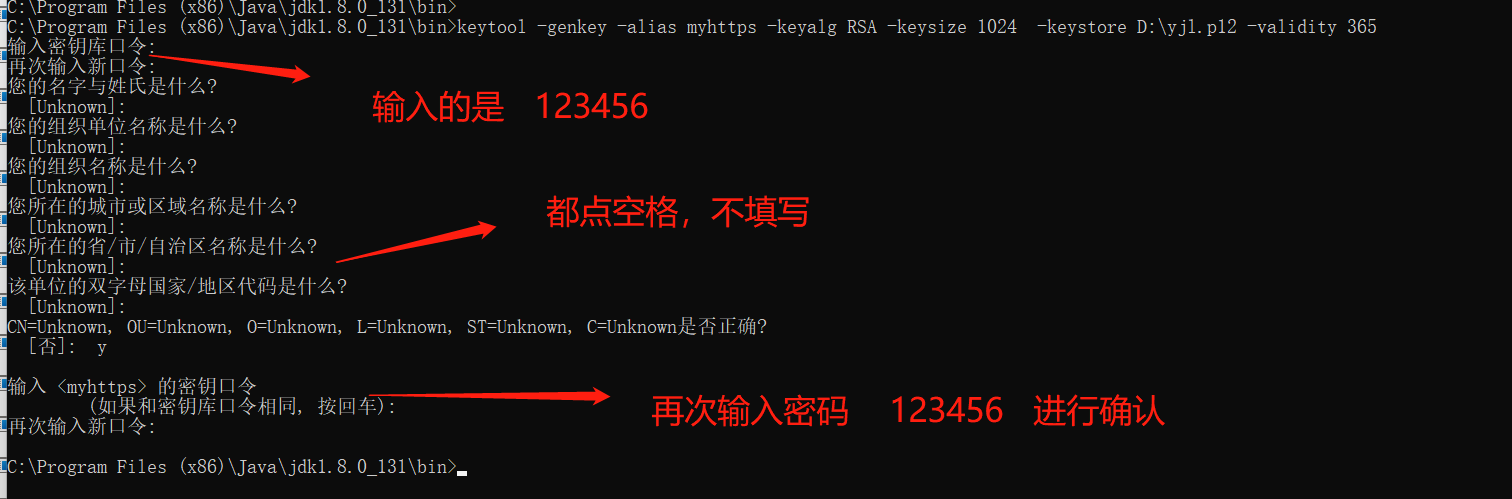
命令含义:
genkey 表示要创建一个新的密钥。
alias 表示 keystore 的别名。
keyalg 表示使用的加密算法是 RSA ,一种非对称加密算法。
keysize 表示密钥的长度。
keystore 表示生成的密钥存放位置。
validity 表示密钥的有效时间,单位为天。
注意,我们使用的密码是 123456, 在 D 盘下生成了 yjl.p12 文件.

二. 构建 SpringBoot 的 Thymeleaf 项目环境
创建 Maven 项目,构建 Thymeleaf 环境
可以参考老蝴蝶以前写的系列文章: SpringBoot整合Thymeleaf(十三)
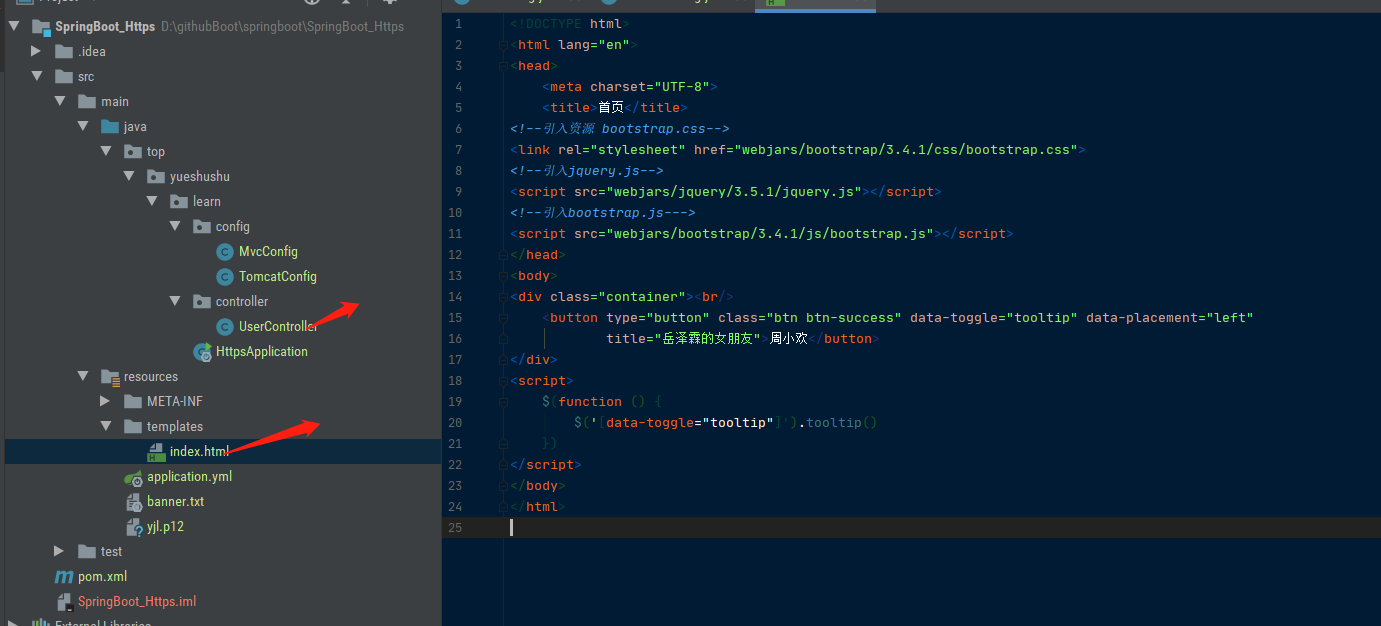
实现一个 index.html 页面 和对应的接口实现
UserController
@Controller
public class UserController {
    //跳转到页面
    @RequestMapping("/")
    public String index(){
        return "index";
    }
    @RequestMapping("/hello")
    @ResponseBody
    //实现接口
    public String hello(){
        return "你好啊,我是岳泽霖";
    }
}
启动项目,页面可以正常的跳转,接口可以正常的访问.
三. SpringBoot 启用 https
三.一 放置文件
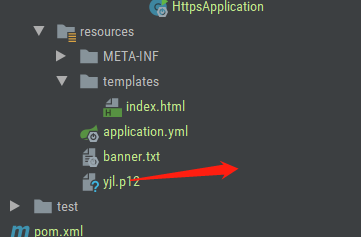
将keytools 生成的秘钥文件 放置在 resources 目录下
三.二 application.yml 配置 https
server:
  port: 8043
  servlet:
    context-path: /Https
  # 配置https
  ssl:
    key-store: classpath:yjl.p12   #路径
    key-alias: myhttps # 别名,与创建时一致
    key-store-password: 123456  # 密码,与创建时一致
spring:
  # 配置thymeleaf的相关信息
  thymeleaf:
    # 开启视图解析
    enabled: true
    #编码格式
    encoding: UTF-8
    #前缀配置
    prefix: classpath:/templates/
    # 后缀配置
    suffix: .html
    #是否使用缓存 开发环境时不设置缓存
    cache: false
    # 格式为 HTML 格式
    mode: HTML5
    # 配置类型
    servlet:
      content-type: text/html
三.三 启动连接
启动项目, 注意观察控制台
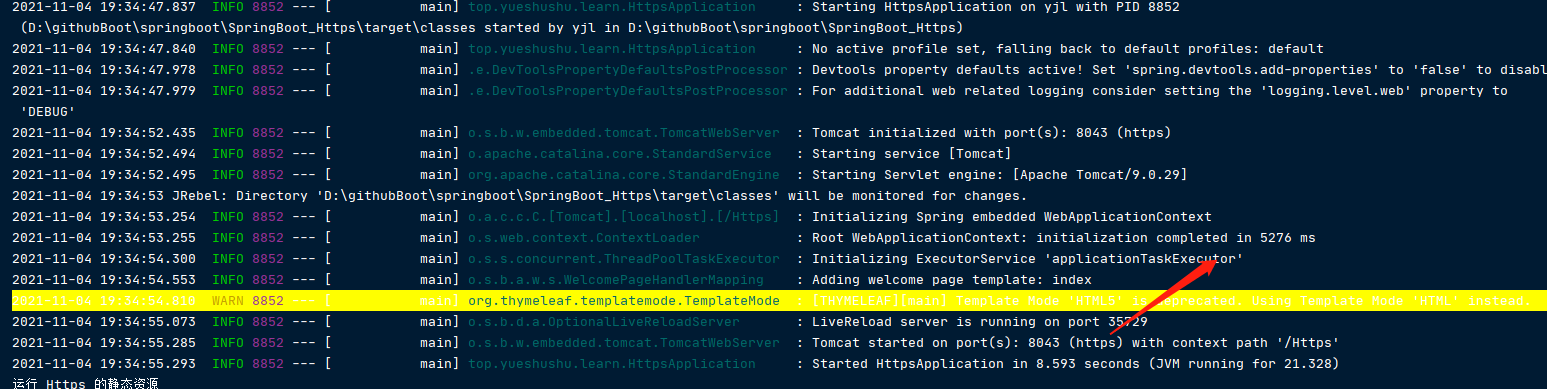
使用的是 8043(https) 以前是 8043(http)
访问页面跳转
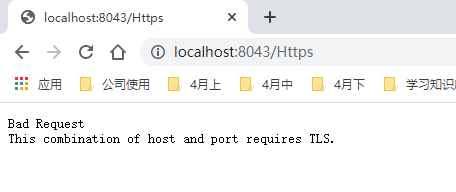
输入网址: http://localhost:8043/Https
输入接口: http://localhost:8043/Https/hello
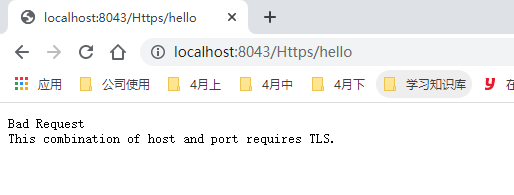
这个时候,传统的 http 协议就无法访问了, 只能使用 https 协议
https://localhost:8043/Https/
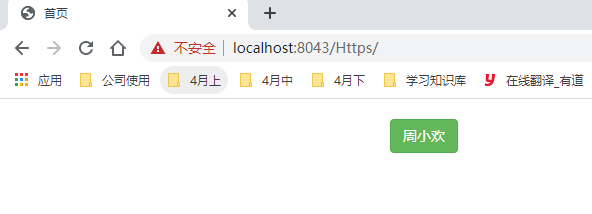
仔细看:
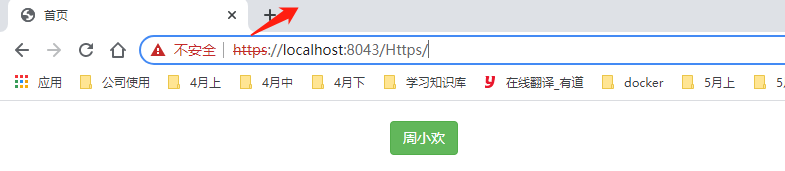
写着不安全.
https://localhost:8043/Https/hello

https 是生效的.
三.四 https 配置时配置信息错误
application.yml
  ssl:
    key-store: classpath:yjl.p12
    key-alias: myhttps
    key-store-password: 123456
配置时,
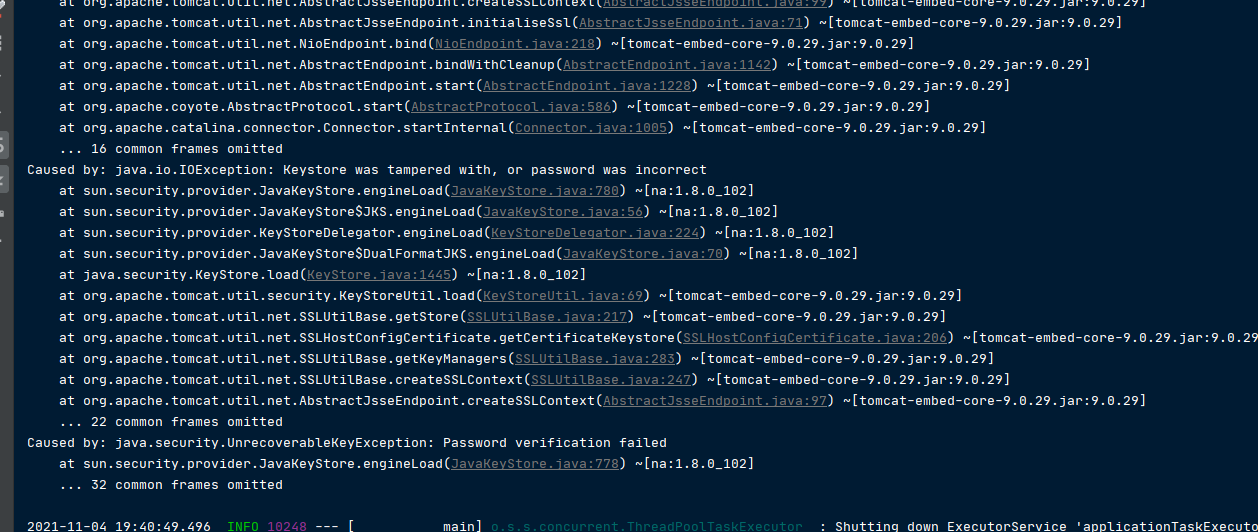
如果配置密码写错误时, 如 key-store-password 配置成 abc123
Caused by: java.security.UnrecoverableKeyException: Password verification failed
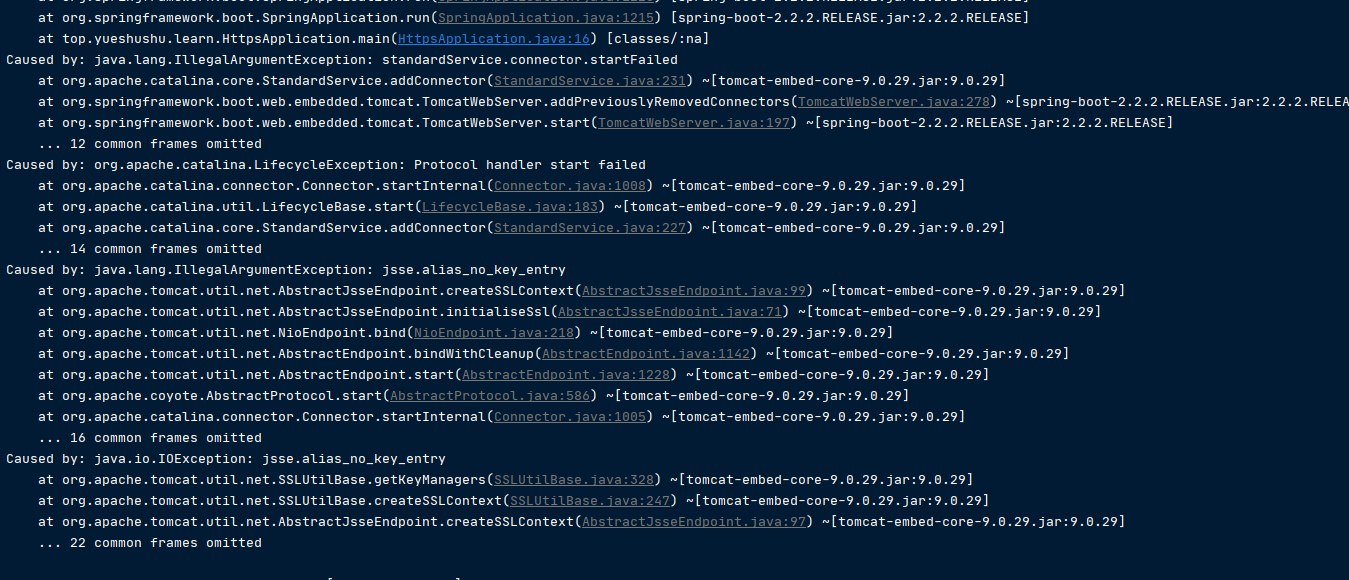
如果密码写对,但是 别名 key-alias 配置错了,如写成 hhhhttps
Caused by: java.io.IOException: jsse.alias_no_key_entry
配置的https 文件的别名和密码不能写错.
三.五 启动 http 配置
考虑到 Spring Boot 不支持同时启动 HTTP 和 HTTPS ,为了解决这个问题,我们这里可以配置一个请求转发,当用户发起 HTTP 调用时,自动转发到 HTTPS 上。
在 config 包下 创建 TomcatConfig 配置
package top.yueshushu.learn.config;

import org.apache.catalina.Context;
import org.apache.catalina.connector.Connector;
import org.apache.tomcat.util.descriptor.web.SecurityCollection;
import org.apache.tomcat.util.descriptor.web.SecurityConstraint;
import org.springframework.boot.web.embedded.tomcat.TomcatServletWebServerFactory;
import org.springframework.context.annotation.Bean;
import org.springframework.context.annotation.Configuration;

/**
 * @ClassName:TomcatConfig
 * @Description 配置Tomcat,同时支持 https 和http
 * @Author zk_yjl
 * @Date 2021/11/1 18:42
 * @Version 1.0
 * @Since 1.0
 **/
@Configuration
public class TomcatConfig {
    @Bean
    TomcatServletWebServerFactory tomcatServletWebServerFactory() {
        TomcatServletWebServerFactory factory = new TomcatServletWebServerFactory(){
            @Override
            protected void postProcessContext(Context context) {
                SecurityConstraint constraint = new SecurityConstraint();
                constraint.setUserConstraint("CONFIDENTIAL");
                SecurityCollection collection = new SecurityCollection();
                collection.addPattern("/*");
                constraint.addCollection(collection);
                context.addConstraint(constraint);
            }
        };
        factory.addAdditionalTomcatConnectors(createTomcatConnector());
        return factory;
    }
    private Connector createTomcatConnector() {
        Connector connector = new
                Connector("org.apache.coyote.http11.Http11NioProtocol");
        connector.setScheme("http");
        connector.setPort(8081);  //接口跳转  访问用的是  http: 80
        connector.setSecure(false);
        connector.setRedirectPort(8043);  //会跳转到  https: 8043
        return connector;
    }
}
启动,查看控制台信息
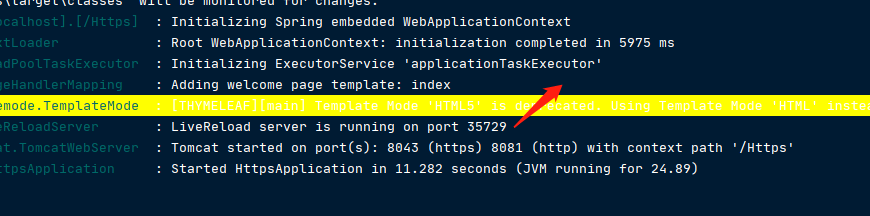
8081(http) 8043(https) 都是可以访问的.
当我们输入网址: http://localhost:8081/Https/ 访问 http 请求时
会自动跳转到: https://localhost:8043/Https/
配置生效
本章节的代码放置在 github 上:
https://github.com/yuejianli/springboot/tree/develop/SpringBoot_Https
谢谢您的观看,如果喜欢,请关注我,再次感谢 !!!


 481
481


 被折叠的 条评论
为什么被折叠?
被折叠的 条评论
为什么被折叠?
 到【灌水乐园】发言


