


使用该开源项目的之前,先给该开源项目在Github上的地址吧。
开始的时候,自己看得也是很头痛,因为许多自己不要的东西上面配置的也多,下面简单给有需要的童鞋介绍下使用吧,暂不涉及太多的东西。
我们看看项目的结构:
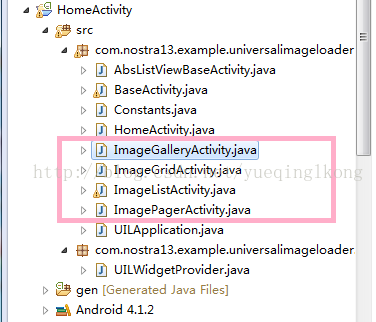
这里有四个例子,针对ListView ,Gallery ,GridView和Viewpager大量使用图片,做了简单的使用示例。
里面写的很复杂,入门的话,也许要看许久,现在省略理论的那些东西,说下直接点的。
下面是一般的使用步骤:
1.重写application,并初始化配置,在这有缓存图片和不缓存图片两种设置:
在这之前,你需要倒入demo中的jar包,这个没啥说的。
在oncreate()中添加:
1.未缓存图片:
ImageLoaderConfiguration config = new ImageLoaderConfiguration.Builder(getApplicationContext())
                .threadPriority(Thread.NORM_PRIORITY - 2)
                .denyCacheImageMultipleSizesInMemory()
                .discCacheFileNameGenerator(new Md5FileNameGenerator())
                .tasksProcessingOrder(QueueProcessingType.LIFO)
                .enableLogging() // Not necessary in common
                .build();
ImageLoader.getInstance().init(config);DisplayImageOptions defaultOptions = new DisplayImageOptions.Builder()
.cacheInMemory().cacheOnDisc().build();
ImageLoaderConfiguration config = new ImageLoaderConfiguration.Builder(
context).defaultDisplayImageOptions(defaultOptions)
.threadPriority(Thread.NORM_PRIORITY - 2)
.denyCacheImageMultipleSizesInMemory()
.discCacheFileNameGenerator(new Md5FileNameGenerator())
.tasksProcessingOrder(QueueProcessingType.LIFO).build();
ImageLoader.getInstance().init(config);在使用ImageLoader的实例之前,你需要初始化该配置,否则会报初始化错误。一般我们直接写在application中初始化。
在初始化配置完成后,在清单中写入你自定义的application,并写入访问权限。
 <uses-permission android:name="android.permission.INTERNET" />
    <uses-permission android:name="android.permission.WRITE_EXTERNAL_STORAGE" />

    <application
        android:name="com.demo.DemoApp"
2.在activity中加载图片,这里针对不同的参数,可能使用的方法和配置也不咋相同:
其实对于图片的加载主要有三种方法:
1.displayImages及其重载,在Imageview组件中直接加载图片。
public void displayImage(String uri, ImageAware imageAware, DisplayImageOptions options,
			ImageLoadingListener listener, ImageLoadingProgressListener progressListener)
其同名的重载方法,使用的多的是下面几个:
直接加载:
public void displayImage(String uri, ImageAware imageAware) {
		displayImage(uri, imageAware, null, null, null);
}public void displayImage(String uri, ImageAware imageAware, DisplayImageOptions options) {
displayImage(uri, imageAware, options, null, null);
}
带监听加载:
public void displayImage(String uri, ImageAware imageAware, ImageLoadingListener listener) {
		displayImage(uri, imageAware, null, listener, null);
	}
选项+监听加载:
public void displayImage(String uri, ImageAware imageAware, DisplayImageOptions options,
			ImageLoadingListener listener) {
		displayImage(uri, imageAware, options, listener, null);
	}
2.loadImages及其重载,它的内部其实也会调用displayImages方法:
public void loadImage(String uri, ImageSize targetImageSize, DisplayImageOptions options,
			ImageLoadingListener listener, ImageLoadingProgressListener progressListener)
主要的是那个监听的方法ImageLoadListener,会监听开始,失败,完成和取消的状态。在完成后,会返回bitmap对象。
void onLoadingComplete(String imageUri, View view, Bitmap loadedImage);3.loadImageSync及其重载,它会返回一个Bitmap对象,自定义View的时候,需要bitmap来绘制图形,就可以使用该方法了。
public Bitmap loadImageSync(String uri, ImageSize targetImageSize, DisplayImageOptions options)加载的方法说完了,下面来谈谈选项:
public final class DisplayImageOptions {

	private final int imageResOnLoading;
	private final int imageResForEmptyUri;
	private final int imageResOnFail;
	private final Drawable imageOnLoading;
	private final Drawable imageForEmptyUri;
	private final Drawable imageOnFail;
	private final boolean resetViewBeforeLoading;
	private final boolean cacheInMemory;
	private final boolean cacheOnDisk;
	private final ImageScaleType imageScaleType;
	private final Options decodingOptions;
	private final int delayBeforeLoading;
	private final boolean considerExifParams;
	private final Object extraForDownloader;
	private final BitmapProcessor preProcessor;
	private final BitmapProcessor postProcessor;
	private final BitmapDisplayer displayer;
	private final Handler handler;
	private final boolean isSyncLoading;

	private DisplayImageOptions(Builder builder) {
		imageResOnLoading = builder.imageResOnLoading;
		imageResForEmptyUri = builder.imageResForEmptyUri;
		imageResOnFail = builder.imageResOnFail;
		imageOnLoading = builder.imageOnLoading;
		imageForEmptyUri = builder.imageForEmptyUri;
		imageOnFail = builder.imageOnFail;
		resetViewBeforeLoading = builder.resetViewBeforeLoading;
		cacheInMemory = builder.cacheInMemory;
		cacheOnDisk = builder.cacheOnDisk;
		imageScaleType = builder.imageScaleType;
		decodingOptions = builder.decodingOptions;
		delayBeforeLoading = builder.delayBeforeLoading;
		considerExifParams = builder.considerExifParams;
		extraForDownloader = builder.extraForDownloader;
		preProcessor = builder.preProcessor;
		postProcessor = builder.postProcessor;
		displayer = builder.displayer;
		handler = builder.handler;
		isSyncLoading = builder.isSyncLoading;
	}
这个看自己的需要配置,各个参数的作用跟它的英文意思一样,认真看下大概就明白了,没必要所有的都去配置,下面是一般使用的选项参数:
缓存图片:
DisplayImageOptions   options = new DisplayImageOptions.Builder()
            .showStubImage(R.drawable.ic_stub)          // 设置图片下载期间显示的图片
            .showImageForEmptyUri(R.drawable.ic_empty)  // 设置图片Uri为空或是错误的时候显示的图片
            .showImageOnFail(R.drawable.ic_error)       // 设置图片加载或解码过程中发生错误显示的图片
            .cacheInMemory(true)                        // 设置下载的图片是否缓存在内存中
            .cacheOnDisc(true)                          // 设置下载的图片是否缓存在SD卡中
            .displayer(new RoundedBitmapDisplayer(20))  // 设置成圆角图片
            .build();                                   // 创建配置过得DisplayImageOption对象

    ImageLoader.getInstance().displayImage(url, imageView, options);
好了,基本的步骤就差不多了。
效果(图片来自百度图库):

注意:
1.但是要注意传入的URI ,要分网络地址和本地地址,我这传入的是本地图片地址。
对该方法的说明:
/**
	 * Adds display image task to execution pool. Image will be set to ImageView when it's turn.<br />
	 * <b>NOTE:</b> {@link #init(ImageLoaderConfiguration)} method must be called before this method call
	 *
	 * @param uri       Image URI (i.e. "http://site.com/image.png", "file:///mnt/sdcard/image.png")
	 * @param imageView {@link ImageView} which should display image
	 * @param options   {@linkplain com.nostra13.universalimageloader.core.DisplayImageOptions Options} for image
	 *                  decoding and displaying. If <b>null</b> - default display image options
	 *                  {@linkplain ImageLoaderConfiguration.Builder#defaultDisplayImageOptions(DisplayImageOptions)
	 *                  from configuration} will be used.
	 * @throws IllegalStateException    if {@link #init(ImageLoaderConfiguration)} method wasn't called before
	 * @throws IllegalArgumentException if passed <b>imageView</b> is null
	 */
	public void displayImage(String uri, ImageView imageView, DisplayImageOptions options) {
		displayImage(uri, new ImageViewAware(imageView), options, null, null);
	}
对于本地的图片 ,在其绝对地址前面要加入"file://"。网络图片就直接写路径了。
由于我的这个是最新的包,可能跟以前老的版本不同,看到有些网友说的是:
String imageUri = "http://site.com/image.png"; // 网络图片
String imageUri = "file:///mnt/sdcard/image.png"; //SD卡图片
String imageUri = "content://media/external/audio/albumart/13"; // 媒体文件夹
String imageUri = "assets://image.png"; // assets
String imageUri = "drawable://" + R.drawable.image; //  drawable文件
2.:Unable to resolve target 'android-19' 错误:
修改编译的版本为你现在有的版本,或者升级你的版本到19.然后在project.properties中修改你的版本号跟编译的版本号相同。


 646
646


 被折叠的 条评论
为什么被折叠?
被折叠的 条评论
为什么被折叠?
 到【灌水乐园】发言


