


 本文记录了在Ubuntu 18.04上手动部署JupyterHub的详细步骤,包括使用Nginx作为反向代理,配置LocalAuthenticator以实现已登录用户的自动授权,以及针对界面风格的定制。在部署过程中遇到了登陆验证、模块未找到、连接错误等问题,并给出了解决方案。此外,文章还提及了JupyterHub的Docker和Kubernetes部署选项。
主要记录过程,方便自己以后查看
JupterHub提供两个发行版本部署到云端:
1. Zero to JupyterHub for Kubernetes
2. The Littlest JupterHub
我的环境:Ubuntu18.04、Python3.6.9 、nodejs v2.18.3
<<<首先是原始部署Jupyterhub,不使用发行版本>>>
我的部署场景是首先有一个自己的应用主页,在主页完成登陆(自己有一套登陆系统),主页中有一个jupyterhub的入口(或按钮),点击按钮进入jupyterhb,使用在主页登陆的用户登陆jupyterhub,jupyterhub使用nginx反向代理
1、安装和配置nginx
下载nginx并安装https://nginx.org/en/linux_packages.html#Ubuntu
我下载安装的nginx版本是1.18.0
-
nginx配置
配置文件:/etc/nginx/conf.d/default.conf,配置如下,路径/python/是任意取的
server {
    listen       80;
    server_name  localhost;

    #charset koi8-r;
    #access_log  /var/log/nginx/host.access.log  main;

    location / {
        root   /usr/share/nginx/html;
        index  index.html index.htm;
    }

    #error_page  404              /404.html;

    # redirect server error pages to the static page /50x.html
    #
    error_page   500 502 503 504  /50x.html;
    location = /50x.html {
        root   /usr/share/nginx/html;
    }

    location /python/ {
        proxy_pass http://localhost:8000;
        proxy_set_header X-Forwarded-For $proxy_add_x_forwarded_for;
        proxy_set_header X-Real-IP $remote_addr;
        proxy_set_header Host $http_host;
        proxy_http_version 1.1;
        proxy_redirect off;
        proxy_buffering off;
        proxy_set_header Upgrade $http_upgrade;
        proxy_set_header Connection "upgrade";
        proxy_read_timeout 86400;
    }
}
为什么??????
我的主页位置:/usr/share/nginx/html/index.html,在我的应用主页中完成登陆后将登陆信息保存在cookie中,jupyterhub会验证cookie,其中进入jupyterhub的代码是:
function handleClick() {
    window.open("/python/");
}
2、安装JupyterHub及必要软件包
因为支持多用户,所有操作使用sudo权限,由于电脑以前使用过普通用户权限安装过一些包,导致部署过程中许多包找不到,重新使用sudo安装
sudo python3 -m pip install jupyterhub
sudo npm install -g configurable-http-proxy
sudo python3 -m pip install notebook
目前时间点自动安装的版本是jupyter notebook 6.1.3,jupyterhub 1.1.0
-
配置jupyterhub
创建JupyterHub配置目录
sudo mkdir /etc/jupyterhub
cd /etc/jupyterhub
sudo jupyterhub --generate-config // 生成jupyterhub配置文件jupyterhub_config.py
启动:sudo jupyterhub // 默认地址是http://localhost:8000
#  Currently installed:
#    - default: jupyterhub.auth.PAMAuthenticator
#    - dummy: jupyterhub.auth.DummyAuthenticator
#    - pam: jupyterhub.auth.PAMAuthenticator
# c.JupyterHub.authenticator_class = 'jupyterhub.auth.PAMAuthenticator'
# c.JupyterHub.authenticator_class = 'jupyterhub.auth.DummyAuthenticator'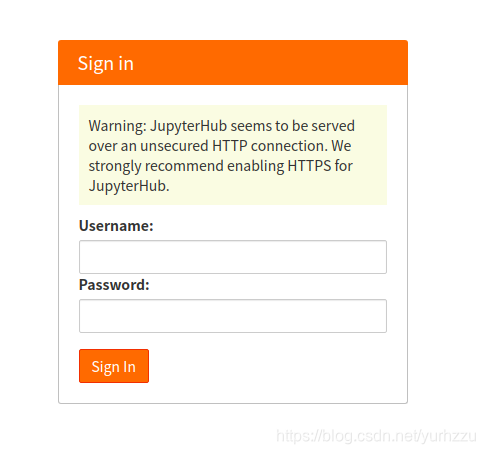
进入jupyterhub需要登陆,默认认证使用PAMAuthenticator,登陆用户名和秘密是Linux账户,DummyAuthenticatior适合测试环境,支持任意用户名和秘密,jupyterhub会自动创建Linux账户,因为在我的主页已经登陆验证过,需要跳过jupyterhub的登陆页并自动登陆,并使用主页的用户名登陆,选择jupyterhub提供LocalAuthenticatior,jupyterhub_config.py主要配置如下:
from tornado import gen
from jupyterhub.auth import LocalAuthenticator

class MyAuthenticator(LocalAuthenticator):
  @gen.coroutine
  def authenticate(self, handler, data):
    username = handler.get_cookie('username')
    if username is not None:
      return username

#   def get_handlers(self, app):
#     return [('/other', MyHandler)]
#
#   def login_url(self, base_url):
#     return url_path_join(base_url, 'other')

c.JupyterHub.authenticator_class = MyAuthenticator
# c.Authenticator.add_user_cmd = []
c.LocalAuthenticator.create_system_users = True
c.LocalAuthenticator.auto_login = True

c.JupyterHub.bind_url = 'http://:8000/python'在函数authenticate中可以完成认证,如果cookie中保存了用户名,表示以及在主页登陆过,身份验证通过,参数handler是LoginHandler对象,想了解handler和authenticator可以参考jupyterhub源码,auto_login表示自动登陆,create_system_users表示用户不存在是自动创建用户
3、修改JupyterHub和notebook用户界面
当将JupyterHub部署到云端时界面风格需要与自己的应用主题一致
-
notebook
主要修改:
/usr/local/lib/python3.6/dist-packages/notebook/static/custom.css
/usr/local/lib/python3.6/dist-packages/notebook/static/custom.js
如:custom.css
#header {
    background-color: #5a4398 !important;
}

#login_widget {
    display: none !important;
}

a[href="/python/hub/home"] {
    display: none !important;
}
另外可以了解下jupyter-theme主题设置
-
jupyterhub
目前看到资源目录是/usr/local/share/jupyterhub/static/,还不太确定是否修改这里,继续了解
4、遇到的问题
- 问题1:跳过登陆页和身份验证,参考jupyerhub配置
- 问题2:各种MoudleNotFound,曾经安装的包位于普通用户,重新安装
- 问题3:A connection to the notebook server could not be established. The notebook will continue trying to reconnect. Check your network connection or notebook server configuration. 属于Nginx配置问题,参考nginx配置
- 问题4:每次登陆一个用户,jupyerhub使用adduser创建了一个Linux用户,当用户数量很大时,可以参考JupyterHub for Kubernetes
<<<JupyterHub with Docker>>>
单主机 https://blog.csdn.net/yurhzzu/article/details/108826759
<<<JupyterHub for Kubernetes>>>


 被折叠的 条评论
为什么被折叠?
被折叠的 条评论
为什么被折叠?
 到【灌水乐园】发言


