


最近看了下ruby on rails,试着把Dynamic Web TWAIN集成到ruby on rails中。这里分享下如何在rails中用几行代码搞定文件上传。
参考原文:How to Load, Scan and Upload Files with Ruby on Rails
作者:Desmond Shaw
翻译:yushulx
软件安装
在Windows上不要选择Ruby 2.2,不然在运行rails server的时候会报错:

nokogiri不支持,详情可以阅读https://github.com/sparklemotion/nokogiri/issues/1256。
Rails创建工程的基本步骤
-
安装rails:
1gem install rails -
创建应用:
1railsnewdwt -
cd到dwt
-
启动服务
1rails server -
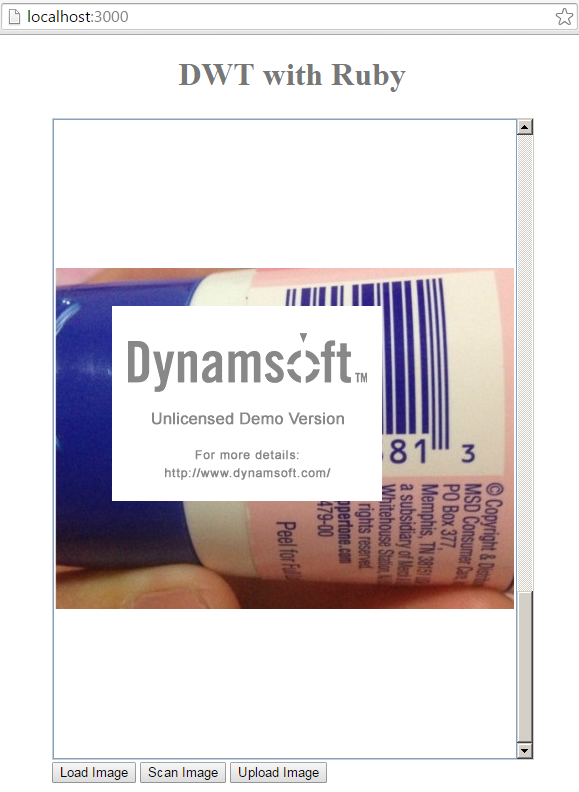
访问http://localhost:3000
Rails集成Dynamic Web TWAIN上传文件
创建controller
|
1
|
rails generate controller twainscanning home
|
把< Dynamic Web TWAIN directory >\Resources拷贝到< Rails Project >\public\Resources。
打开< Rails Project >\app\views\twainscanning\home.html.erb添加下面的代码:
|
1
2
3
4
5
6
7
8
9
10
11
12
13
14
15
16
17
18
19
20
21
22
23
24
25
26
27
28
29
30
31
32
33
34
35
36
37
38
39
40
41
42
43
44
45
46
47
48
49
50
51
52
53
54
55
56
57
58
59
60
61
62
63
64
65
66
67
68
69
70
71
72
73
74
75
76
77
78
79
80
81
82
83
84
85
86
87
88
89
90
91
92
93
94
95
96
97
98
99
100
101
102
|
<html>
<head>
<title>
DWT
with Ruby</title>
<script type=
"text/javascript"
src=
"Resources/dynamsoft.webtwain.initiate.js"
></script>
<script type=
"text/javascript"
src=
"Resources/dynamsoft.webtwain.config.js"
></script>
<style>
h1 {
font-size: 2em;
font-weight: bold;
color:
#777777;
text-align: center
}
table {
margin: auto;
}
</style>
</head>
<body>
<h1>
DWT
with Ruby
</h1>
<table>
<tr>
<td>
<!-- dwtcontrolContainer is the default div id
for
Dynamic Web
TWAIN
control.
If you need to rename the id, you should also change the id
in
dynamsoft.webtwain.config.js accordingly. -->
<div id=
"dwtcontrolContainer"
></div>
</td>
</tr>
<tr>
<td>
<input type=
"button"
value=
"Load Image"
onclick=
"btnLoad_onclick();"
/>
<input type=
"button"
value=
"Scan Image"
onclick=
"AcquireImage();"
/>
<input id=
"btnUpload"
type=
"button"
value=
"Upload Image"
onclick=
"btnUpload_onclick()"
>
</td>
</tr>
</table>
<!--Custom script goes here-->
<script type=
"text/javascript"
>
Dynamsoft.WebTwainEnv.RegisterEvent(
'OnWebTwainReady'
, Dynamsoft_OnReady);
var DWObject;
function Dynamsoft_OnReady() {
DWObject = Dynamsoft.WebTwainEnv.GetWebTwain(
'dwtcontrolContainer'
); // Get the Dynamic Web
TWAIN
object that is embeded
in
the div with id
'dwtcontrolContainer'
DWObject.Width =
480
; // Set the width of the Dynamic Web
TWAIN
Object
DWObject.Height =
640
; // Set the height of the Dynamic Web
TWAIN
Object
}
function btnLoad_onclick() {
var OnSuccess = function() {};
var OnFailure = function(errorCode, errorString) {};
DWObject.IfShowFileDialog =
true
;
DWObject.LoadImageEx(
""
, EnumDWT_ImageType.
IT_ALL
, OnSuccess, OnFailure);
}
function AcquireImage() {
if
(DWObject) {
DWObject.IfShowUI =
false
;
DWObject.IfDisableSourceAfterAcquire =
true
; // Scanner source will be disabled/closed automatically after the scan.
DWObject.SelectSource(); // Select a Data Source (a device like scanner) from the Data Source Manager.
DWObject.OpenSource(); // Open the source. You can set resolution, pixel type, etc. after this method. Please refer to the sample
'Scan'
->
'Custom Scan'
for
more info.
DWObject.AcquireImage(); // Acquire image(s) from the Data Source. Please
NOTE
this is a asynchronous method. In other words, it doesn't wait
for
the Data Source to come back.
}
}
function btnUpload_onclick() {
DWObject.HTTPPort =
3000
;
var CurrentPathName = unescape(location.pathname); // get current PathName
in
plain
ASCII
var CurrentPath = CurrentPathName.substring(
0
, CurrentPathName.lastIndexOf(
"/"
) +
1
);
var strActionPage = CurrentPath +
"upload/"
;
var strHostIP =
"localhost"
; // server
IP
e.g.
192
.
168
.
8
.
84
var OnSuccess = function(httpResponse) {
alert(
"Succesfully uploaded"
);
};
var OnFailure = function(errorCode, errorString, httpResponse) {
alert(httpResponse);
};
var date =
new
Date();
DWObject.HTTPUploadThroughPostEx(
strHostIP,
DWObject.CurrentImageIndexInBuffer,
strActionPage,
date.getTime() +
".jpg"
,
1
, //
JPEG
OnSuccess, OnFailure
);
}
</script>
</body>
</html>
|
打开< Rails Project >\app\controller\application_controler.rb注释掉:
|
1
2
3
4
5
|
class
ApplicationController < ActionController::Base
# Prevent CSRF attacks by raising an exception.
# For APIs, you may want to use :null_session instead.
#protect_from_forgery with: :exception
end
|
打开< Rails Project >\config\routes.rb 添加映射:
|
1
2
3
4
5
|
Rails.application.routes.draw
do
get
'twainscanning/home'
root
'twainscanning#home'
post
'upload/'
=>
'twainscanning#upload'
end
|
打开< Rails Project >\app\controller\twainscanning_controller.rb添加文件上传代码:
|
1
2
3
4
5
6
7
8
9
10
11
12
13
14
15
16
17
18
19
20
21
22
|
class
TwainscanningController < ApplicationController
def
home
end
def
upload
uploaded_io
=
params[:RemoteFile]
upload_dir
=
Rails.root.join(
'public'
,
'upload'
)
unless
Dir
.exist?(upload_dir)
Dir
.mkdir(upload_dir)
end
File
.
open
(Rails.root.join(
'public'
,
'upload'
, uploaded_io.original_filename),
'wb'
) do |
file
|
file
.write(uploaded_io.read)
end
respond_to do |
format
|
format
.html.
any
{ render text:
"Successfully uploaded!"
}
end
end
end
|
运行服务:


 1073
1073


 被折叠的 条评论
为什么被折叠?
被折叠的 条评论
为什么被折叠?
 到【灌水乐园】发言


