


关于MNIST 手写数字库和如何识别手写数字的文章有很多. 所以这篇文章将只是另一篇? 不, 我们将使用 TensorFlow. 但是 TensorFlow 有自己的 MNIST 的教程.
来吧,所以这一个将只是另一个?
当然不是, 我还没有发现有任何一篇文章介绍如何识别我们手写的数字.
MNIST中的数字看起来是这样的:

但是没人用白笔在黑纸上写字啊. 真正手写的数字用手机拍下来后看起来是这个样子:

如果直接用这个图像作为神经网络的输入, 你也许会得到一些随机的结果. 关于MNIST的每篇文章的最后一部分结果, 识别率至少是大于 85% ,但是你也许会得到 10% 的识别率(随机的).
那么如何提高自己手写的数字的识别精度呢?
MNIST 手写数字库概览
MNIST 数据集是包含了 60000 个训练集和 10000 个测试集. 所有图像都在一个 20*20 的包围盒, 并且在28*28 的图像的正中位置. 这是关于预处理的重要信息.
TensorFlow
TensorFlow 是一个开源的机器学习库.可以在GPU,CPU或者手机上运行. 读一读这里 关于MNIST的教程是有益的.
这里是一些教程里的代码:
"""
import tensorflow and the input_data script
"""
import tensorflow as tf
import input_data你可以从这里下载 input_data class
# create a MNIST_data folder with the MNIST dataset if necessary
mnist = input_data.read_data_sets("MNIST_data/", one_hot=True)

"""
a placeholder for our image data:
None stands for an unspecified number of images
784 = 28*28 pixel
"""
x = tf.placeholder("float", [None, 784])

# we need our weights for our neural net
W = tf.Variable(tf.zeros([784,10]))
# and the biases
b = tf.Variable(tf.zeros([10]))

"""
softmax provides a probability based output
we need to multiply the image values x and the weights
and add the biases
(the normal procedure, explained in previous articles)
"""
y = tf.nn.softmax(tf.matmul(x,W) + b)

"""
y_ will be filled with the real values
which we want to train (digits 0-9)
for an undefined number of images
"""
y_ = tf.placeholder("float", [None,10])

"""
we use the cross_entropy function
which we want to minimize to improve our model
"""
cross_entropy = -tf.reduce_sum(y_*tf.log(y))

"""
use a learning rate of 0.01
to minimize the cross_entropy error
"""
train_step = tf.train.GradientDescentOptimizer(0.01).minimize(cross_entropy)

# initialize all variables
init = tf.initialize_all_variables()

# create a session
sess = tf.Session()
sess.run(init)

# use 1000 batches with a size of 100 each to train our net
for i in range(1000):
  batch_xs, batch_ys = mnist.train.next_batch(100)
  # run the train_step function with the given image values (x) and the real output (y_)
  sess.run(train_step, feed_dict={x: batch_xs, y_: batch_ys})

"""
Let's get the accuracy of our model:
our model is correct if the index with the highest y value
is the same as in the real digit vector
The mean of the correct_prediction gives us the accuracy.
We need to run the accuracy function
with our test set (mnist.test)
We use the keys "images" and "labels" for x and y_
"""
correct_prediction = tf.equal(tf.argmax(y,1), tf.argmax(y_,1))
accuracy = tf.reduce_mean(tf.cast(correct_prediction, "float"))
print sess.run(accuracy, feed_dict={x: mnist.test.images, y_: mnist.test.labels})
这个例子可以获得大约 91% 的识别率. 现在我们想使用它来测试我们自己的真实数据.
预处理
最基本的就是把我们的数字缩放到 28×28 .
# create an array where we can store our 4 pictures
images = np.zeros((4,784))
# and the correct values
correct_vals = np.zeros((4,10))

# we want to test our images which you saw at the top of this page
i = 0
for no in [8,0,4,3]:
    # read the image
    gray = cv2.imread("img/blog/own_"+str(no)+".png", cv2.CV_LOAD_IMAGE_GRAYSCALE)

    # resize the images and invert it (black background)
    gray = cv2.resize(255-gray, (28, 28))

    # save the processed images
    cv2.imwrite("pro-img/image_"+str(no)+".png", gray)
    """
    all images in the training set have an range from 0-1
    and not from 0-255 so we divide our flatten images
    (a one dimensional vector with our 784 pixels)
    to use the same 0-1 based range
    """
    flatten = gray.flatten() / 255.0
    """
    we need to store the flatten image and generate
    the correct_vals array
    correct_val for the first digit (9) would be
    [0,0,0,0,0,0,0,0,0,1]
    """
    images[i] = flatten
    correct_val = np.zeros((10))
    correct_val[no] = 1
    correct_vals[i] = correct_val
    i += 1

"""
the prediction will be an array with four values,
which show the predicted number
"""
prediction = tf.argmax(y,1)
"""
we want to run the prediction and the accuracy function
using our generated arrays (images and correct_vals)
"""
print sess.run(prediction, feed_dict={x: images, y_: correct_vals})
print sess.run(accuracy, feed_dict={x: images, y_: correct_vals})
如果运行下这个基本的方法, 将会得到 0.25的识别率, 结果可能是 [3 5 2 3]. 多次运行可能会得到不同的结果,
但大部分都是错误的.

好吧, 很明显我们的图像看起来和训练用的不太一样. 这些白色数字在灰度背景上而不是黑色背景.
因此我们需要添加一行代码:
(thresh, gray) = cv2.threshold(gray, 128, 255, cv2.THRESH_BINARY | cv2.THRESH_OTSU)resize 图像
gray = cv2.resize(255-gray, (28, 28))
这次可以得到 50% 的识别率, 因为 0 是在图像的中心位置. 现在我们再重读下第一段关于MNIST的.这里有一个
重要信息, 数字应该在图像中心.
首先, 我们想把图像缩放到 20×20 的包围盒中. 因此我们应当把黑色边界去掉.
while np.sum(gray[0]) == 0:
    gray = gray[1:]

while np.sum(gray[:,0]) == 0:
    gray = np.delete(gray,0,1)

while np.sum(gray[-1]) == 0:
    gray = gray[:-1]

while np.sum(gray[:,-1]) == 0:
    gray = np.delete(gray,-1,1)

rows,cols = gray.shape
然后是缩放到 20*20
if rows > cols:
    factor = 20.0/rows
    rows = 20
    cols = int(round(cols*factor))
    gray = cv2.resize(gray, (cols,rows))
else:
    factor = 20.0/cols
    cols = 20
    rows = int(round(rows*factor))
    gray = cv2.resize(gray, (cols, rows))
但是最终我们需要 28*28的图像, 所以应当做加边处理
colsPadding = (int(math.ceil((28-cols)/2.0)),int(math.floor((28-cols)/2.0)))
rowsPadding = (int(math.ceil((28-rows)/2.0)),int(math.floor((28-rows)/2.0)))
gray = np.lib.pad(gray,(rowsPadding,colsPadding),'constant')
下一步是数字平移到图像中心.我们需要两个函数. 第一个是获取图像的质心.
def getBestShift(img):
    cy,cx = ndimage.measurements.center_of_mass(img)

    rows,cols = img.shape
    shiftx = np.round(cols/2.0-cx).astype(int)
    shifty = np.round(rows/2.0-cy).astype(int)

    return shiftx,shifty
第二个函数是在给定的方向平移图像. 我们的平移矩阵如下
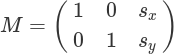
def shift(img,sx,sy):
    rows,cols = img.shape
    M = np.float32([[1,0,sx],[0,1,sy]])
    shifted = cv2.warpAffine(img,M,(cols,rows))
    return shifted
在for循环的最后一行之后
gray = np.lib.pad(gray,(rowsPadding,colsPadding),’constant’)我们需要添加两行
shiftx,shifty = getBestShift(gray)
shifted = shift(gray,shiftx,shifty)
gray = shifted
最终, 我们获得了 100% 的识别率. 当然, 我们使用的是非常小的测试集, 但是要看到预处理后的变化. 网络没有用没做预处理的图像训练.


 1万+
1万+

 被折叠的 条评论
为什么被折叠?
被折叠的 条评论
为什么被折叠?
 到【灌水乐园】发言


