如果一个ListView里面有多套布局(单个布局也行)的可以参考这个帖子:http://blog.csdn.net/fan7983377/article/details/54380588
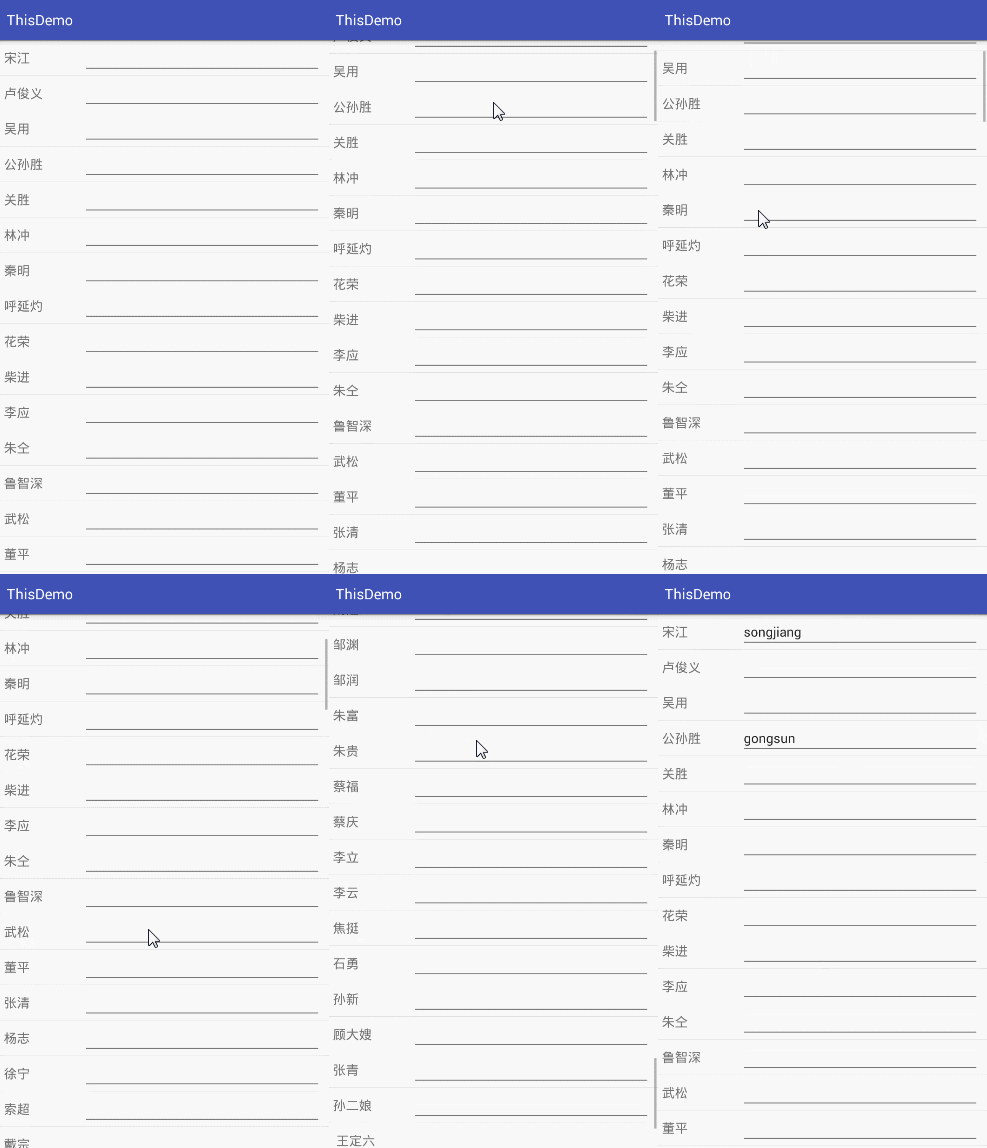
有这么一个需求,就是在ListView中,每个条目都有Edittext,需要把每个Edittext输入的数据保存到对应的bean中,想要的效果是这样的:

这样一看,也没什么难度嘛,顶多就是在adapter的getview中对Edittext设置个文本改变监听嘛,当文本改变就把数据存到bean中,于是,在adapter中写了这段代码:
private Context context;
private List<Bean> lists;
public MyAdapter(Context context, List<Bean> lists) {
this.context = context;
this.lists = lists;
}
@Override
public int getCount() {
return lists.size();
}
@Override
public Object getItem(int position) {
return null;
}
@Override
public long getItemId(int position) {
return 0;
}
@Override
public View getView(int position, View convertView, ViewGroup parent) {
final ViewHolder vh;
if (convertView == null) {
convertView = View.inflate(context,R.layout.item,null);
vh = new ViewHolder(convertView);
convertView.setTag(vh);
}else{
vh = (ViewHolder) convertView.getTag();
}
Bean bean = lists.get(position);
vh.tvname.setText(bean.getName());
vh.mEditText.addTextChangedListener(new TextWatcher() {
@Override
public void beforeTextChanged(CharSequence s, int start, int count, int after) {}
@Override
public void onTextChanged(CharSequence s, int start, int before, int count) {
bean.setInput(s+"");
}
@Override
public void afterTextChanged(Editable s) { }
});
if(!TextUtils.isEmpty(bean.getInput())){
vh.mEditText.setText(bean.getInput());
}else{
vh.mEditText.setText("");
}
return convertView;
}
public class ViewHolder{
TextView tvname;
EditText mEditText;
public ViewHolder(View convertView) {
tvname = (TextView) convertView.findViewById(R.id.tv_name);
mEditText = (EditText) convertView.findViewById(R.id.et_input);
}
}
- 1
- 2
- 3
- 4
- 5
- 6
- 7
- 8
- 9
- 10
- 11
- 12
- 13
- 14
- 15
- 16
- 17
- 18
- 19
- 20
- 21
- 22
- 23
- 24
- 25
- 26
- 27
- 28
- 29
- 30
- 31
- 32
- 33
- 34
- 35
- 36
- 37
- 38
- 39
- 40
- 41
- 42
- 43
- 44
- 45
- 46
- 47
- 48
- 49
- 50
- 51
- 52
- 53
- 54
- 55
- 56
- 57
- 58
- 59
- 60
- 61
- 62
- 63
- 64
- 65
- 66
- 67
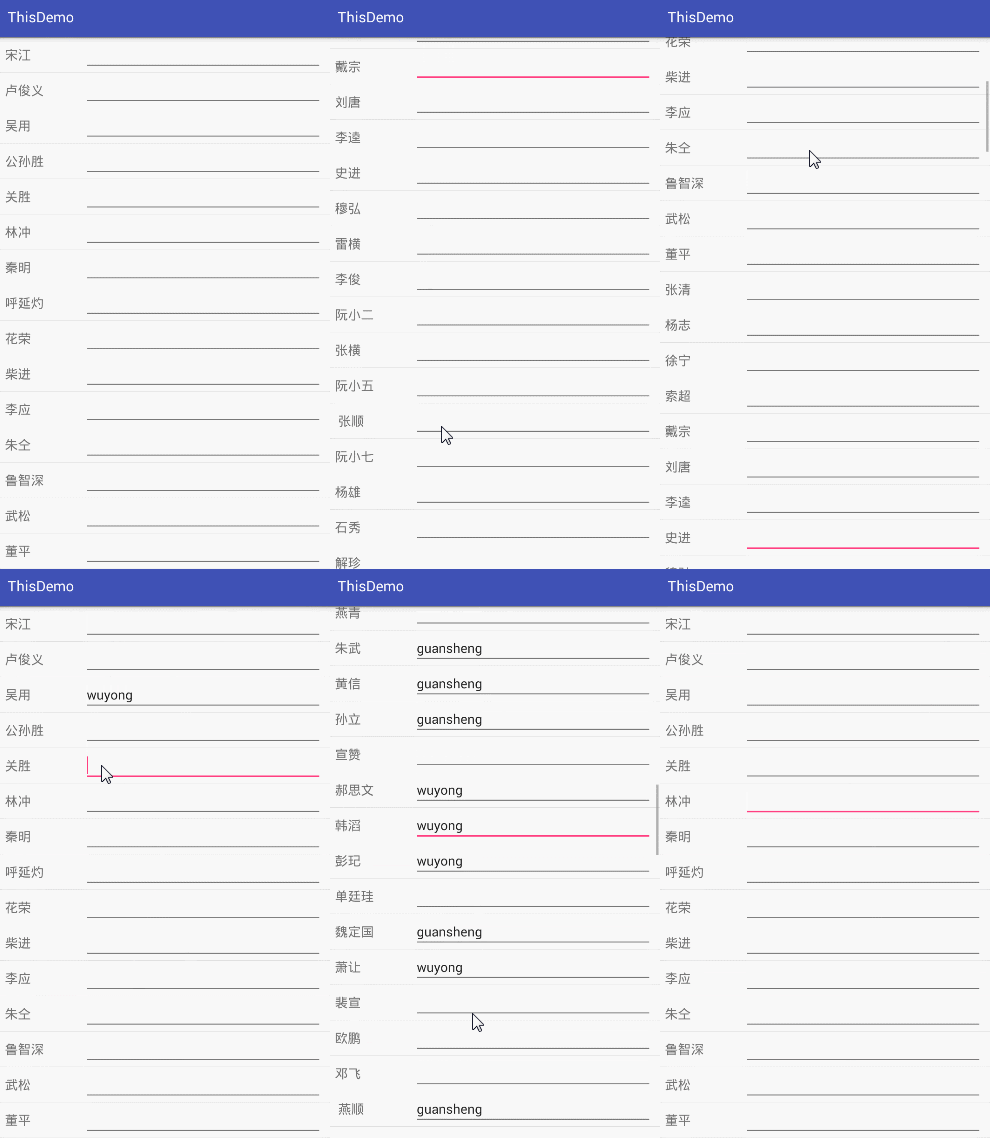
然后很愉快的编译运行,结果……….

发现运行后想要的效果跟想象中差距太大了,都乱套了,最后猜想应该是文本改变监听里面设置数据的问题,设置的不是当前控件所在position里面的bean,而是其他的Bean,于是,使用settag(),把bean绑定到当前的Edittext身上,adapter的getView改造如下(添加的是代码中空隙最大的两处!):
public View getView(int position, View convertView, ViewGroup parent) {
final ViewHolder vh;
if (convertView == null) {
convertView = View.inflate(context,R.layout.item,null);
vh = new ViewHolder(convertView);
convertView.setTag(vh);
}else{
vh = (ViewHolder) convertView.getTag();
}
final Bean bean = lists.get(position);
vh.tvname.setText(bean.getName());
vh.mEditText.setTag(bean);
vh.mEditText.addTextChangedListener(new TextWatcher() {
@Override
public void beforeTextChanged(CharSequence s, int start, int count, int after) {}
@Override
public void onTextChanged(CharSequence s, int start, int before, int count) {
Bean bean = (Bean) vh.mEditText.getTag();
bean.setInput(s+"");
}
@Override
public void afterTextChanged(Editable s) { }
});
if(!TextUtils.isEmpty(bean.getInput())){
vh.mEditText.setText(bean.getInput());
}else{
vh.mEditText.setText("");
}
return convertView;
}
- 1
- 2
- 3
- 4
- 5
- 6
- 7
- 8
- 9
- 10
- 11
- 12
- 13
- 14
- 15
- 16
- 17
- 18
- 19
- 20
- 21
- 22
- 23
- 24
- 25
- 26
- 27
- 28
- 29
- 30
- 31
- 32
- 33
- 34
- 35
- 36
- 37
- 38
- 39
- 40
- 41
- 42
- 43
- 44
- 45
- 1
- 2
- 3
- 4
- 5
- 6
- 7
- 8
- 9
- 10
- 11
- 12
- 13
- 14
- 15
- 16
- 17
- 18
- 19
- 20
- 21
- 22
- 23
- 24
- 25
- 26
- 27
- 28
- 29
- 30
- 31
- 32
- 33
- 34
- 35
- 36
- 37
- 38
- 39
- 40
- 41
- 42
- 43
- 44
- 45
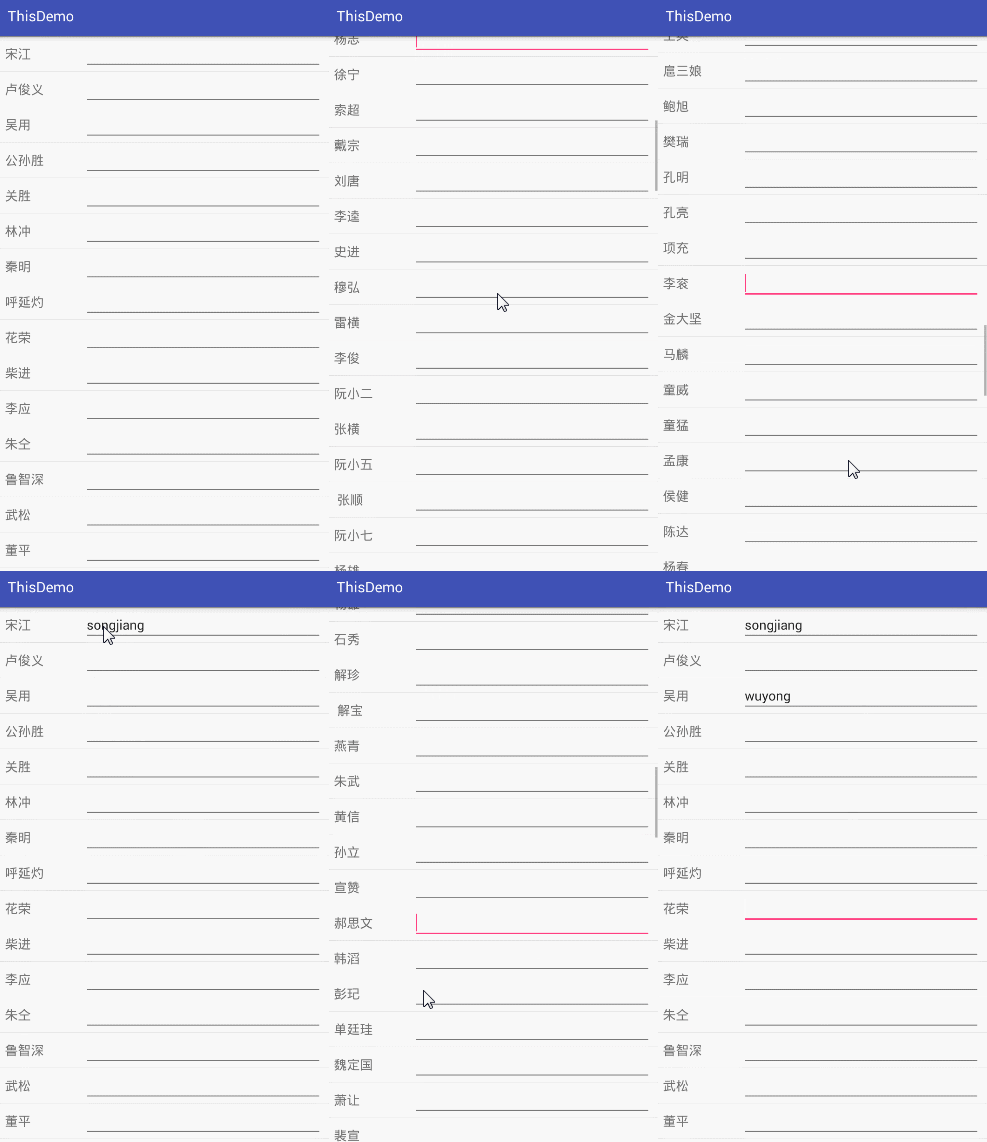
于是点击编译运行,效果如下:

恩,算是解决了显示混乱的问题,但模拟器上是好像Edittext的焦点出现了复用条目也跟着获取了焦点,(如上图红色底线代表有焦点),于是加了个清除焦点的属性EditText.clearFocus(),就解决了
public View getView(int position, View convertView, ViewGroup parent) {
final ViewHolder vh;
if (convertView == null) {
convertView = View.inflate(context,R.layout.item,null);
vh = new ViewHolder(convertView);
convertView.setTag(vh);
}else{
vh = (ViewHolder) convertView.getTag();
}
final Bean bean = lists.get(position);
vh.tvname.setText(bean.getName());
vh.mEditText.setTag(bean);
vh.mEditText.clearFocus();
vh.mEditText.addTextChangedListener(new TextWatcher() {
@Override
public void beforeTextChanged(CharSequence s, int start, int count, int after) {}
@Override
public void onTextChanged(CharSequence s, int start, int before, int count) {
Bean bean = (Bean) vh.mEditText.getTag();
bean.setInput(s+"");
}
@Override
public void afterTextChanged(Editable s) { }
});
if(!TextUtils.isEmpty(bean.getInput())){
vh.mEditText.setText(bean.getInput());
}else{
vh.mEditText.setText("");
}
return convertView;
}
- 1
- 2
- 3
- 4
- 5
- 6
- 7
- 8
- 9
- 10
- 11
- 12
- 13
- 14
- 15
- 16
- 17
- 18
- 19
- 20
- 21
- 22
- 23
- 24
- 25
- 26
- 27
- 28
- 29
- 30
- 31
- 32
- 33
- 34
- 35
- 36
- 37
- 38
- 39
- 40
- 41
- 42
- 43
- 44
- 1
- 2
- 3
- 4
- 5
- 6
- 7
- 8
- 9
- 10
- 11
- 12
- 13
- 14
- 15
- 16
- 17
- 18
- 19
- 20
- 21
- 22
- 23
- 24
- 25
- 26
- 27
- 28
- 29
- 30
- 31
- 32
- 33
- 34
- 35
- 36
- 37
- 38
- 39
- 40
- 41
- 42
- 43
- 44
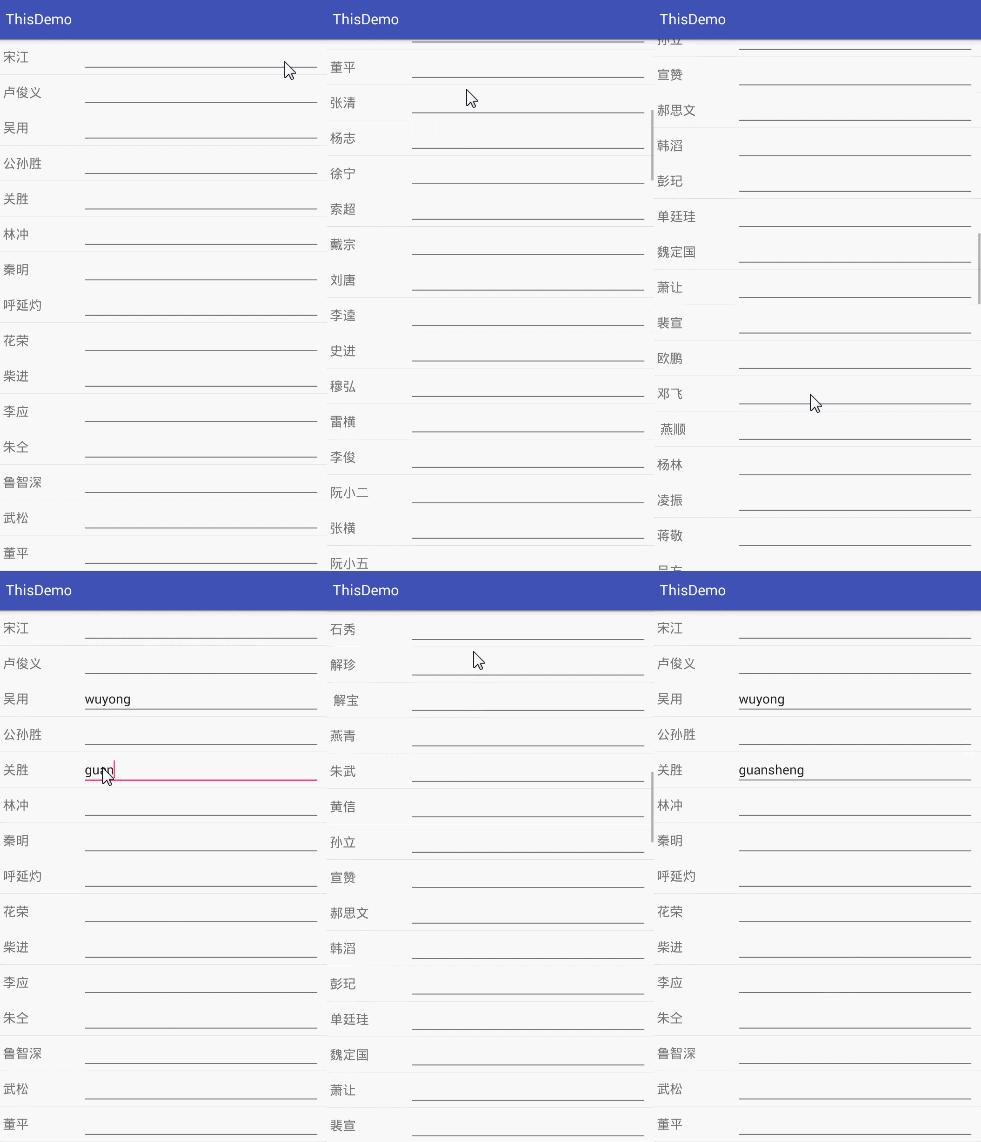
效果如下:

虽然模拟器上解决了,但是真机上测试的时候出现了点击Edittext输入框时虽然弹出了输入法,但是还得再次点击Edittext才能输入字符,这样也有点不利于用户体验,经过打log发现,当点击Edittext时,系统会默认刷新adapter,重新绘制下当前屏幕,导致第一次点击Edittext输入框时给清除了Edittext的焦点,所以,我们需要在清单文件中的当前activity里配置下弹出输入框禁止绘制当前屏幕的属性“Android:windowSoftInputMode=”stateAlwaysHidden|adjustPan””
<activity android:name=".MainActivity"
            android:windowSoftInputMode="stateAlwaysHidden|adjustPan"
            >
然后再次运行,点击输入框就弹出软键盘而当前输入框也能直接输入字符了,好了,终于解决了。(由于手机原因,没办法录效果图!)
当我们输入完一条后,往下滑动时发现,软键盘还在屏幕上,没有隐藏,我们还需要最后一步操作,给ListView设置滚动监听,当当前状态为滚动时,隐藏软键盘,代码如下:
listview.setOnScrollListener(new AbsListView.OnScrollListener() {
@Override
public void onScrollStateChanged(AbsListView view, int scrollState) {
switch (scrollState){
case AbsListView.OnScrollListener.SCROLL_STATE_IDLE:
break;
case AbsListView.OnScrollListener.SCROLL_STATE_TOUCH_SCROLL:
((InputMethodManager)getSystemService(INPUT_METHOD_SERVICE)).hideSoftInputFromWindow(MainActivity.this.getCurrentFocus().getWindowToken(), InputMethodManager.HIDE_NOT_ALWAYS);
break;
case AbsListView.OnScrollListener.SCROLL_STATE_FLING:
break;
}
}好了,完美解决,看似很简单的问题有的时候确实出乎我们的意料,不过,能解决他何尝不是一件很有成就感的事呢!


 785
785

 被折叠的 条评论
为什么被折叠?


