


http://blog.csdn.net/denl0918/article/details/54292262
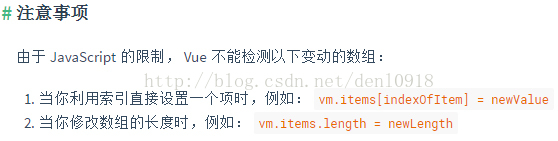
vue教程中有这样一个注意事项:
第一种具体情况如下:
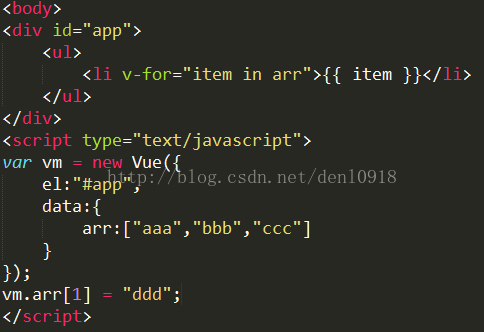
运行结果:

当利用索引改变数组某一项时,页面不会刷新。解决方法如下:
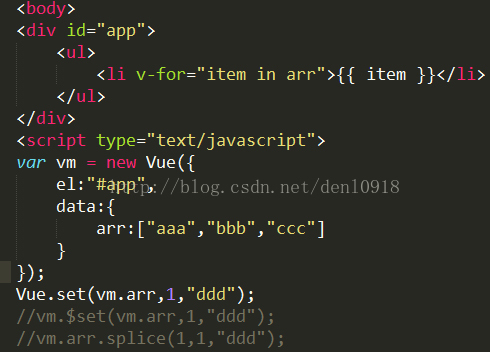
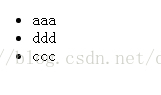
运行结果:
三种方式都可以解决,使用Vue.set、vm.$set()或者数组的splice方法。或者用 vm = JSON.parse(JSON.stringify(vm))
在做项目的过程中,有个发现,先上代码:
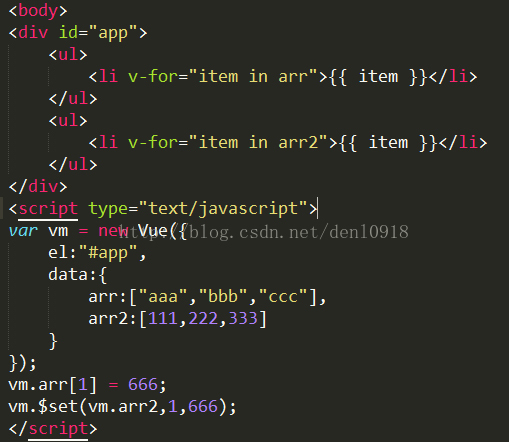
第一个数组通过利用下标改变第二项,第二个数组使用$set()方法改变第二项,根据上面的代码,我们会知道:第一个数组的第二项改变不会在页面更新,只有第二个数组的更改会在页面更新。然而结果却是:
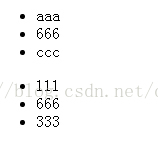
两个数组的的改变都在页面更新了。。
也就是说,$set()方法调用时,页面会全部更新一遍。


 324
324


 被折叠的 条评论
为什么被折叠?
被折叠的 条评论
为什么被折叠?
 到【灌水乐园】发言


