


人生中第一个真心想做的项目-XX福利社?♀️?
以前一直做得SSH的项目,19年了,还在对05年的项目改来改去,感觉我已经丧失了开发的乐趣。重复的复制粘贴,让我渐渐麻木。所以!我决定要完成我一开始学习编程时候的梦想,开发一款可以用手机、PC随时随地享受“快乐”的项目。
既然要开发自己的项目,那就用比较主流的技术,本文也算是一篇自我成长的学习手册吧。
一、后台:Spring Boot + MyBatis + Spring Cloud
后台我准备用Spring Boot + MyBatis + Spring Cloud(暂时先不考虑分布式)。
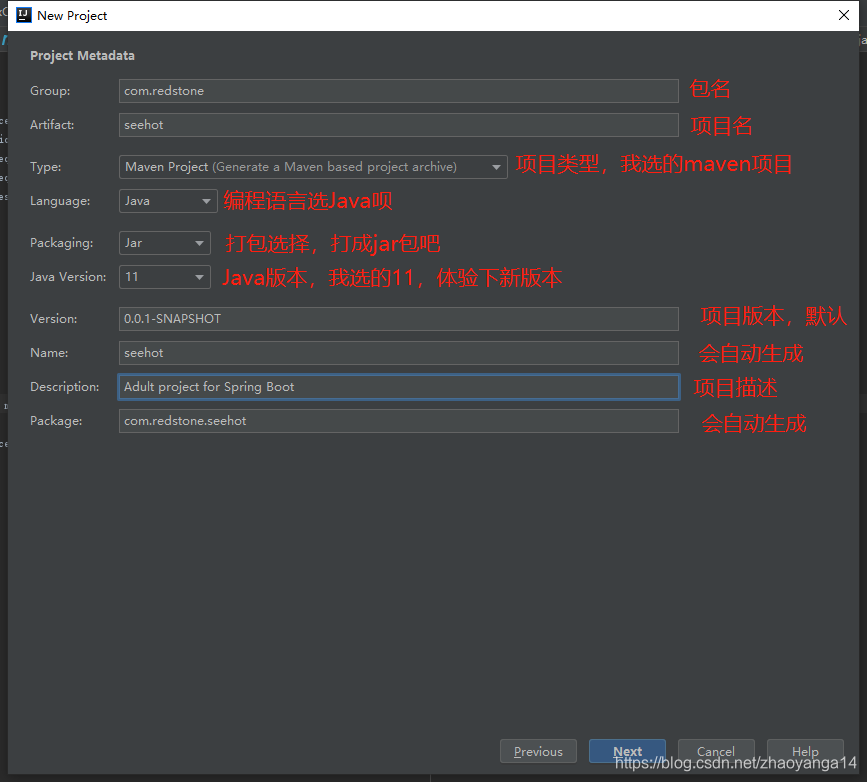
①新建一个Spring Boot项目
- 打开IDEA。
- 新建项目。
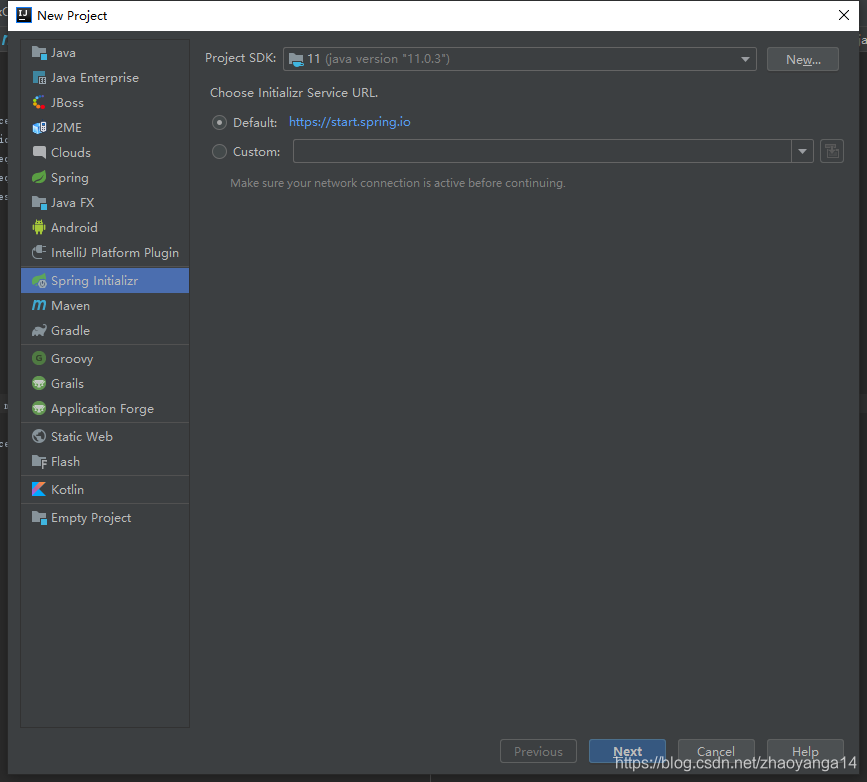
注:我的JDK是11,根据需要选择。
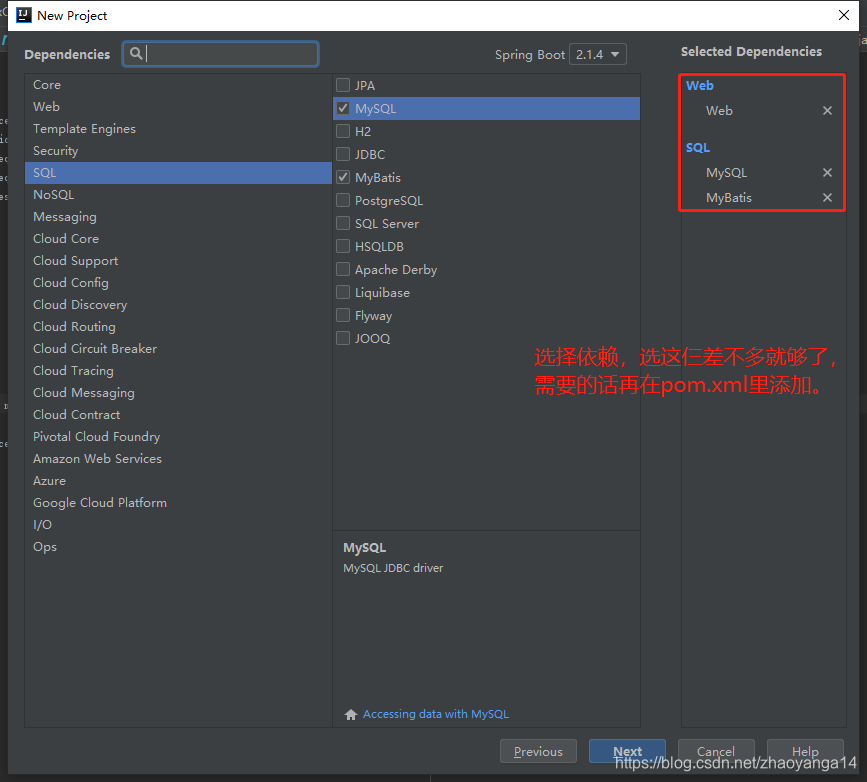
然后“Next”选择项目保存路径,再“Finish”就创建完成了。 - 配置项目Server和数据源:application.properties
# Server配置
server.port=8080
server.servlet.context-path=/back-seehot
server.servlet.session.timeout=10
server.tomcat.uri-encoding=UTF-8

# 数据源配置,我这里是阿里数据库,用本地即可
spring.datasource.url=jdbc:mysql://redstonesql2019.mysql.rds.aliyuncs.com/cloudservice?useUnicode=true&characterEncoding=utf-8
spring.datasource.username=root
spring.datasource.password=ffffff
spring.datasource.driver-class-name=com.mysql.cj.jdbc.Driver
spring.datasource.max-idle=10
spring.datasource.max-wait=10000
spring.datasource.min-idle=5
spring.datasource.initial-size=5

# mybatis配置,mapper.xml文件的路径
mybatis.mapperLocations=classpath:mappers/*.xml
# domain文件所在包的全名
mybatis.typeAliasesPackage=com.redstone.seehot.bean
这里有人可能会报一些异常:
//第一个异常
Loading class com.mysql.jdbc.Driver'. This is deprecated. The new driver class iscom.mysql.cj.jdbc.Driver’. The driver is automatically registered via the SPI and manual loading of the driver class is generally unnecessary.
意思是 mysqljdbc . driver被弃用了新的驱动类是“com.mysql.cjdbc.driver”。驱动程序通过SPI自动注册,而手动加载类通常是不必要的,解决方案如下:
//解决方法
把com.mysql.jdbc.Driver 改为com.mysql.cj.jdbc.Driver 即可
//第二个异常
java.sql.SQLException: The server time zone value ‘Öйú±ê׼ʱ¼ä’ is unrecognized or represents more than one time
提示系统时区出现错误,可以在MySQL中执行命令:
set global time_zone=’+8:00’
或者在数据库驱动的url后加上serverTimezone=UTC参数,即
jdbc:mysql://redstonesql2019.mysql.rds.aliyuncs.com/cloudservice?characterEncoding=utf8&serverTimezone=UTC
如果是在xml文件中配置数据源,且不是第一个,即
jdbc:mysql://redstonesql2019.mysql.rds.aliyuncs.com/cloudservice?characterEncoding=utf8&serverTimezone=UTC
这种写法是会报错的,会提示The reference to entity “serverTimezone” must end with the ‘;’ delimiter.
运行后控制台也会出现
对实体 “serverTimezone” 的引用必须以 ‘;’ 分隔符结尾。
的错误提示。
将代码改为
jdbc:mysql://redstonesql2019.mysql.rds.aliyuncs.com/cloudservice?characterEncoding=utf8&serverTimezone=UTC
即可。在xml的配置文件中 ;要用 & 代替。
- 写一个简单的访问数据库的Demo,证明后台配置没问题。
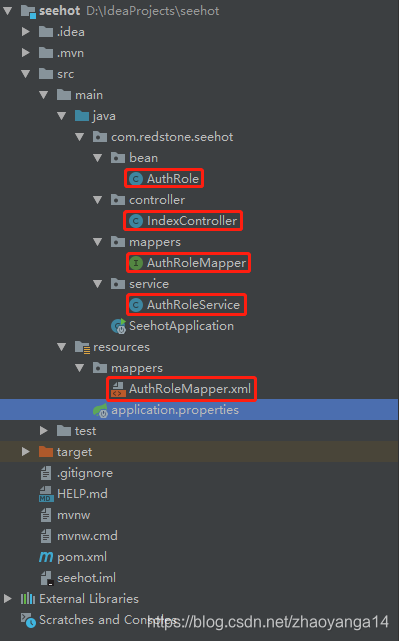
文件结构图,下面贴每个文件的源码。
AuthRoleMapper.xml
<?xml version="1.0" encoding="UTF-8" ?>
<!DOCTYPE mapper PUBLIC "-//mybatis.org//DTD Mapper 3.0//EN" "http://mybatis.org/dtd/mybatis-3-mapper.dtd" >
<mapper namespace="com.redstone.seehot.mappers.AuthRoleMapper" >

    <resultMap id="BaseResultMap" type="com.redstone.seehot.bean.AuthRole" >
        <id column="id" property="id" jdbcType="BIGINT" />
        <result column="role" property="role" jdbcType="VARCHAR" />
        <result column="name" property="name" jdbcType="VARCHAR" />
        <result column="description" property="description" jdbcType="VARCHAR" />
        <result column="createtime" property="createtime" jdbcType="TIMESTAMP" />
        <result column="updatetime" property="updatetime" jdbcType="TIMESTAMP" />
    </resultMap>

    <select id="selectAll" resultMap="BaseResultMap">
        select
             id, role, name, description, createtime, updatetime
        from auth_role
        order by id asc
    </select>

</mapper>
AuthRole.java
package com.redstone.seehot.bean;

import java.lang.reflect.Field;
import java.util.Date;

public class AuthRole {
    private Long id;
    private String role;
    private String name;
    private String description;
    private Date createtime;
    private Date updatetime;

    public Long getId() {
        return id;
    }

    public void setId(Long id) {
        this.id = id;
    }

    public String getRole() {
        return role;
    }

    public void setRole(String role) {
        this.role = role;
    }

    public String getName() {
        return name;
    }

    public void setName(String name) {
        this.name = name;
    }

    public String getDescription() {
        return description;
    }

    public void setDescription(String description) {
        this.description = description;
    }

    public Date getCreatetime() {
        return createtime;
    }

    public void setCreatetime(Date createtime) {
        this.createtime = createtime;
    }

    public Date getUpdatetime() {
        return updatetime;
    }

    public void setUpdatetime(Date updatetime) {
        this.updatetime = updatetime;
    }

    public void setValueByFieldName(String fieldName, Object value){
        try {
            Field field = this.getClass().getField(fieldName);
            boolean accessible = field.isAccessible();
            field.setAccessible(true);
            field.set(this, value);
            field.setAccessible(accessible);
        } catch (NoSuchFieldException e) {
            e.printStackTrace();
        } catch (IllegalAccessException e) {
            e.printStackTrace();
        }
    }

    public Object getValueByFieldName(String fieldName){
        Object value = null;
        try {
            Field field = this.getClass().getField(fieldName);
            boolean accessible = field.isAccessible();
            field.setAccessible(true);
            value = field.get(this);
            field.setAccessible(accessible);
        } catch (NoSuchFieldException e) {
            e.printStackTrace();
        } catch (IllegalAccessException e) {
            e.printStackTrace();
        }
        return value;
    }
}
IndexController.java
package com.redstone.seehot.controller;
import com.redstone.seehot.bean.AuthRole;
import com.redstone.seehot.service.AuthRoleService;
import org.springframework.beans.factory.annotation.Autowired;
import org.springframework.web.bind.annotation.RequestMapping;
import org.springframework.web.bind.annotation.RequestMethod;
import org.springframework.web.bind.annotation.RestController;
import java.util.List;
@RestController
@RequestMapping(value = "/authRole")
public class IndexController {
@Autowired
private AuthRoleService authRoleService;
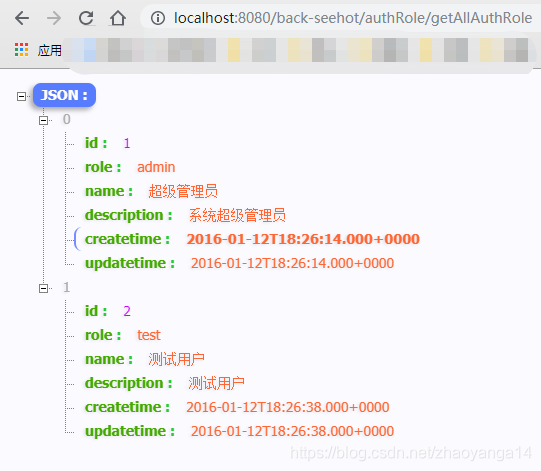
@RequestMapping(value = {"/getAllAuthRole"}, method = RequestMethod.GET)
public List<AuthRole> index(){
List<AuthRole> authRoles = authRoleService.getAllAuthRole();
return authRoles;
}
}
AuthRoleService.java
package com.redstone.seehot.service;

import com.redstone.seehot.bean.AuthRole;
import com.redstone.seehot.mappers.AuthRoleMapper;
import org.springframework.beans.factory.annotation.Autowired;
import org.springframework.stereotype.Service;

import java.util.List;

@Service
public class AuthRoleService {

    @Autowired
    private AuthRoleMapper authRoleMapper;//这里可能有红色下划线,不用管,有强迫症的可以增加忽视的注解或者在AuthRoleMapper类上加@Repository注解

    public List<AuthRole> getAllAuthRole(){
        return authRoleMapper.selectAll();
    }
}
AuthRoleMapper.java
package com.redstone.seehot.mappers;

import com.redstone.seehot.bean.AuthRole;
import org.apache.ibatis.annotations.Mapper;

import java.util.List;


public interface AuthRoleMapper {
    List<AuthRole> selectAll();
}
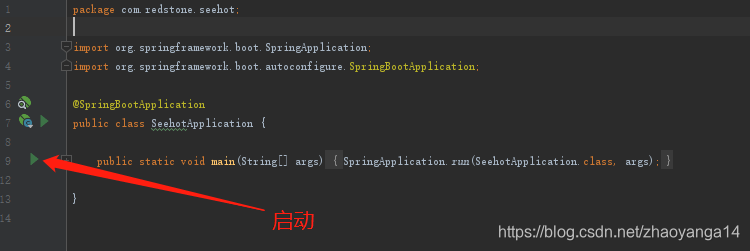
项目名Application.java-启动类
package com.redstone.seehot;

import org.mybatis.spring.annotation.MapperScan;
import org.springframework.boot.SpringApplication;
import org.springframework.boot.autoconfigure.SpringBootApplication;

/*这里要特别说明一下,@MapperScan的作用是告诉项目,Mapper的接口存放在哪里了。
以前的时候是不需要配置的,但不知道为何现在不加这个,会在启动项目时报“找不到***Mapper的bean”的错误。
不在这里加这个注解也可以,那就需要在每个***Mapper.java接口上,加上@Mapper的注解,效果一样。*/
@SpringBootApplication
@MapperScan("com.redstone.mappers")
public class SeehotApplication {

    public static void main(String[] args) {
        SpringApplication.run(SeehotApplication.class, args);
    }

}
- 启动项目
- 用浏览器访问下,看看成功了不。
二、前台:nginx + Vue
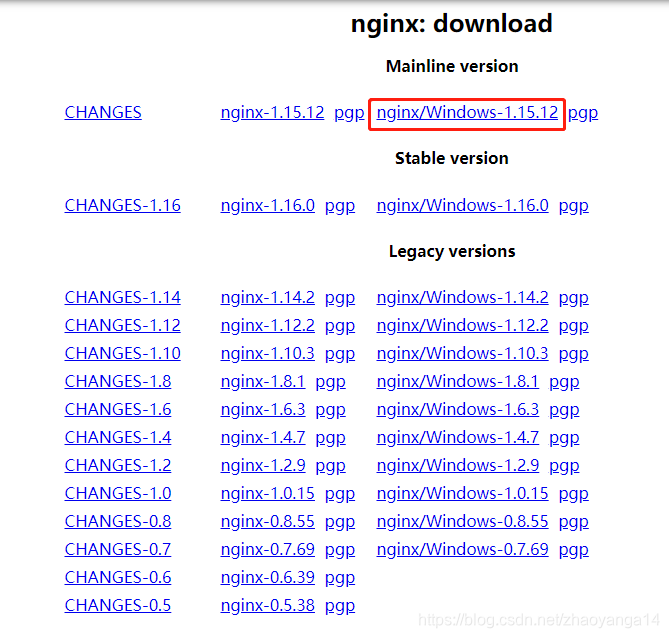
①下载并部署一个nginx服务。
- 下载nginx(这里以Windows为例):http://nginx.org/en/download.html
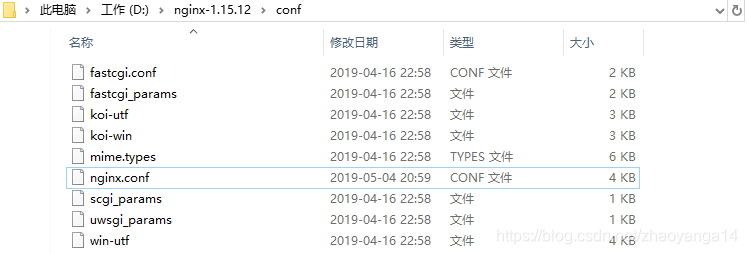
- 解压,配置nginx.conf文件
中文的位置是新增的。
worker_processes  1;

events {
    worker_connections  1024;
}

http {
    include       mime.types;
    default_type  application/octet-stream;

    sendfile        on;

    keepalive_timeout  65;

	#配置个后台服务IP
	upstream seehot.redstone.com{
		server 127.0.0.1:8080;
	}

    server {
    	#nginx默认:端口号是80,IP是localhost/127.0.0.1
        listen       80;
        server_name  localhost;

        #charset koi8-r;

        #配置个过滤器,当访问localhost/seehot/时触发,默认打开home.html(首页),且seehot这个名字要和前端项目的路径名保持一致。
		location /seehot/ {
            root   html;
            index  home.html index.htm;
        }

		#配置第二个过滤器,这个过滤器的目的是用在前端程序访问后台地址的时候
		location /back-seehot/ {
			#地址,注意协议不要错,这里的地址和上面配置的upstream保持一致
			proxy_pass        http://seehot.redstone.com;
			proxy_set_header   X-Real-IP        $remote_addr;
			proxy_set_header   Host             $host;
			proxy_set_header   X-Forwarded-For  $proxy_add_x_forwarded_for;
            client_max_body_size  100m;
		}

        #error_page  404              /404.html;

        # redirect server error pages to the static page /50x.html
        error_page   500 502 503 504  /50x.html;
        location = /50x.html {
            root   html;
        }
    }
}
配置完成之后,双击nginx根目录下的nginx.exe文件,就可以开启运行了。
- 接下来,我们写一个简单的前端Demo,测试下前后台传输是否正常。
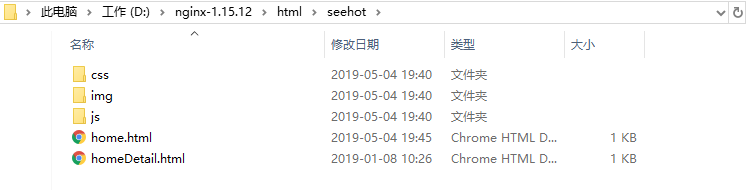
文件结构图,下面是主要文件的源码:
home.html
<!DOCTYPE html>
<html lang="en" style="font-size: 100px;">
<head>
	<meta charset="UTF-8">
    <meta name="viewport" content="width=device-width,initial-scale=1,minimum-scale=1,maximum-scale=1,user-scalable=no" />
	<title>用户信息</title>
	<link rel="stylesheet" href="css/home.css">
</head>
<body>
	<div class="title"><img src="img/deer.png" /></div>
	<div class="container">
		<table>
		<thead>
			<tr><th>ID</th><th>账号</th><th>昵称</th><th>描述</th></tr>
		</thead>
		<tbody id="content">
			<tr>
				<td>ID</td>
				<td>账号</td>
				<td>昵称</td>
				<td>描述</td>
		    </tr>
		</tbody>
		<table>
	</div>
	<div class="panel"></div>
</body>
<script src="js/jquery-1.12.2.js"></script>
<script src="js/common.js"></script>
<script src="js/home.js"></script>
<script>

</script>
</html>
home.js
$(function(){
	initData();
})

function initData(){
	$.ajax({
		type: "GET",
		url:"/back-seehot/authRole/getAllAuthRole",
		contentType:"application/json;charset=UTF-8",
		dataType: "json",
		success: function (res) {
			if("undefined" != typeof(res)){
				var list=res;
				if(list.length>0){
					$("#content").empty();
					var $html="";
					for (var i = 0; i < list.length; i++) {
						  var id=list[i].id;
						  var role=list[i].role;
						  var name=list[i].name;
						  var description=list[i].description;
						  $html=$html+"<tr><td>"+id+"</td><td>"+role+"</td><td>"+name+"</td><td>"+description+"</td></tr>";
					}
					$("#content").html($html);
				}
			}else{
					alert("无数据!");
			}
		}
	});
}
- 写好之后,浏览器访问测试!
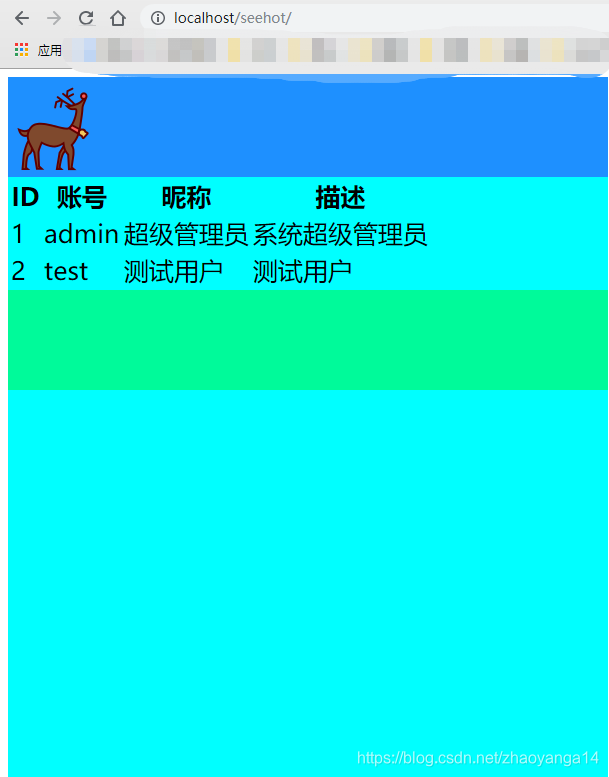
成功!


 2万+
2万+


 被折叠的 条评论
为什么被折叠?
被折叠的 条评论
为什么被折叠?
 到【灌水乐园】发言


