在Android studio的一个新建的Activity中添加Toolbar以及相应的功能添加

Toobar一般用在实现一个APP的很多页面的标题的时候会用到,实现的方法也有很多种。

注意:Toolbar需要在工程中引入appcompat-v7的兼容包,需要使用android.support.v7.widget.Toolbar进行开发。

一.单纯的在一个Activity中添加一个Toolbar,就是用这一次,可以通过以下步骤。

1.在Activity的xml布局文件中添加如下代码:

<android.support.v7.widget.Toolbar
    android:id="@+id/toolbarbar"
    android:layout_height="wrap_content"
    android:layout_width="match_parent"
    android:minHeight="?attr/actionBarSize"
    android:background="?attr/colorPrimary"
    app:navigationIcon="?attr/homeAsUpIndicator"/>
用于引入ToolBar后两句分别用于设置背景以及返回按钮。

2.在Java文件中加入如下代码:

Toolbar toolbar = (Toolbar) findViewById(R.id.toolbarbar);
setSupportActionBar(toolbar);

用于对Toolbar的声明,并且同时代替Actionbar的使用。

3.在Manifast.xml文件中加入如下代码:

<activity
    android:name=".ContentActivity"
    android:theme="@style/AppTheme.NoActionBar">

</activity>

这样就可以基本运行了。

提示:如果只是希望单纯的显示Toolbar的话,可以实现上面步骤。如果还需要添加其他的控件的话,最好是单独写一个Toolbar,然后引入(include),这样比较方便。比如:

<include
    android:id="@+id/toolbar"
    layout="@layout/back_actionbar" />

back_actionbar就是上面第一条的xml文件内容。

当然,单纯的添加一个Toolbar是不够的:还得进行更多功能的添加。


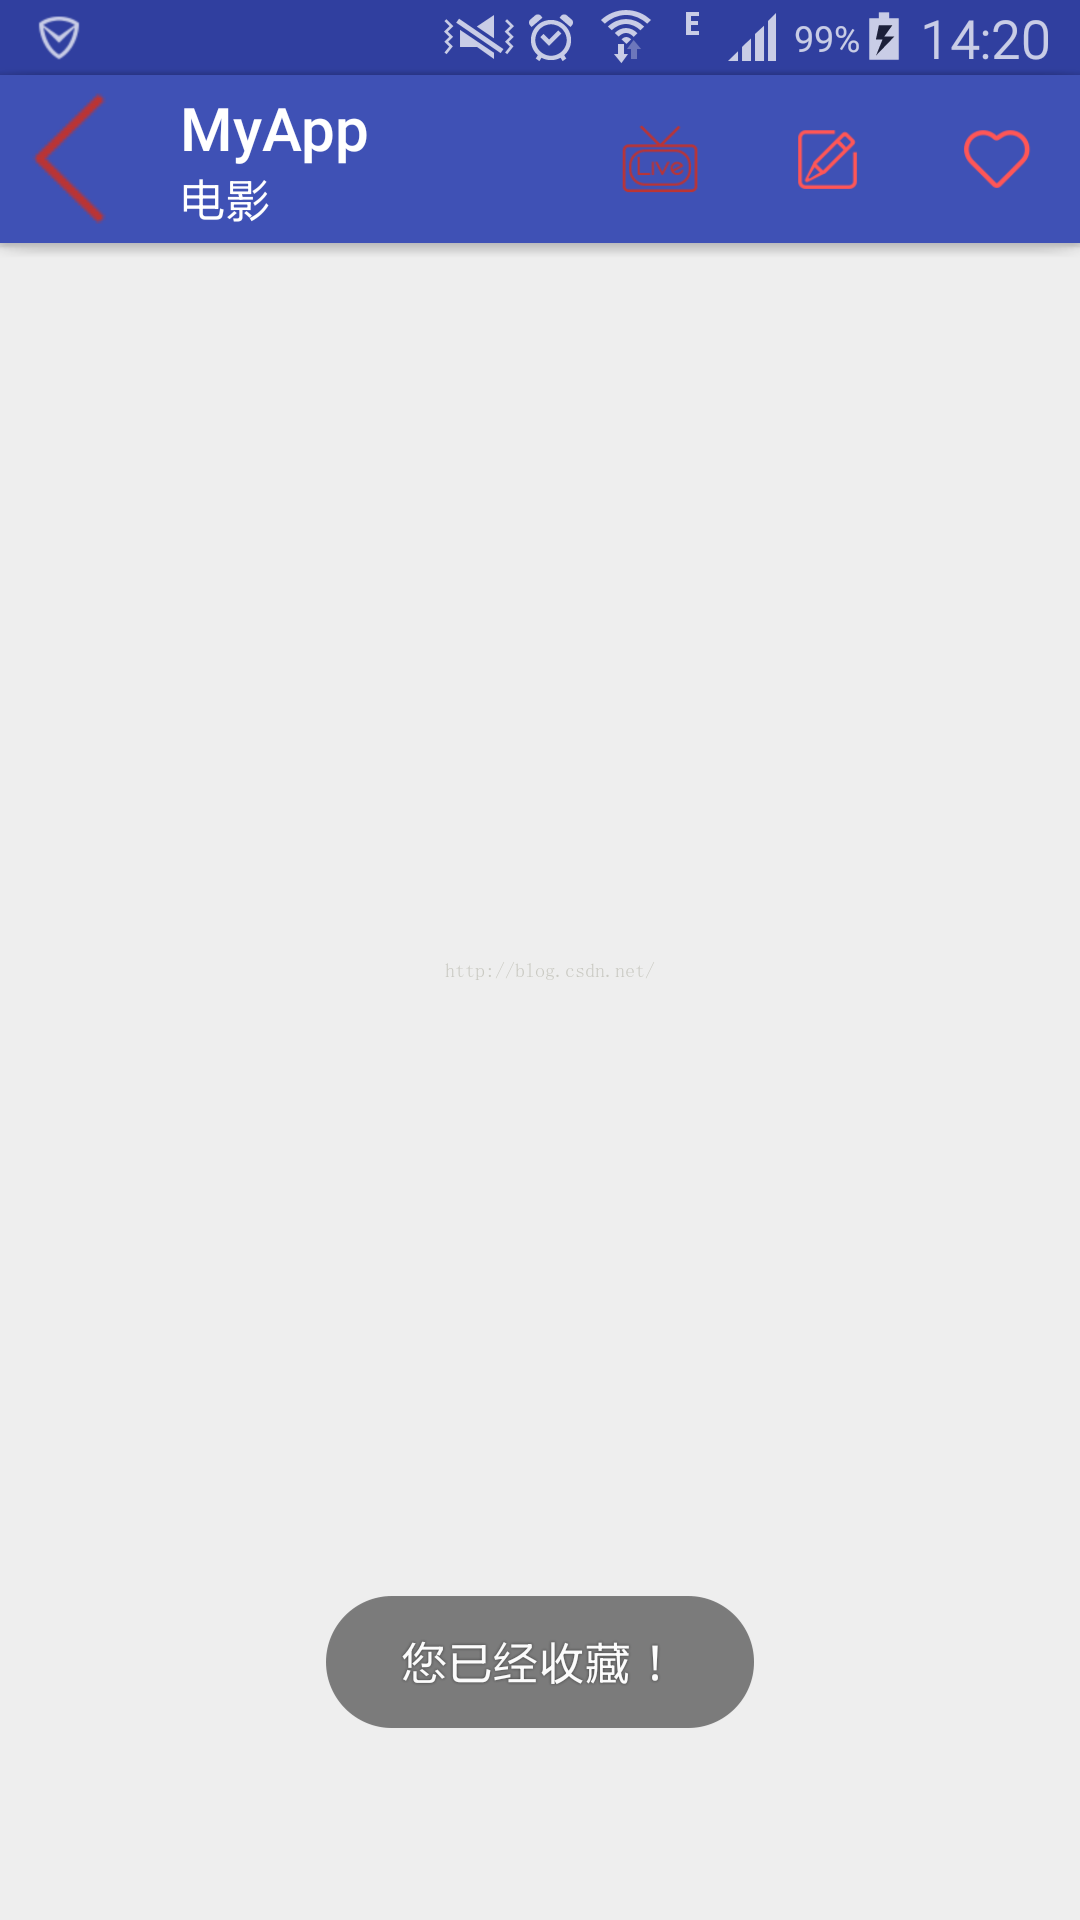
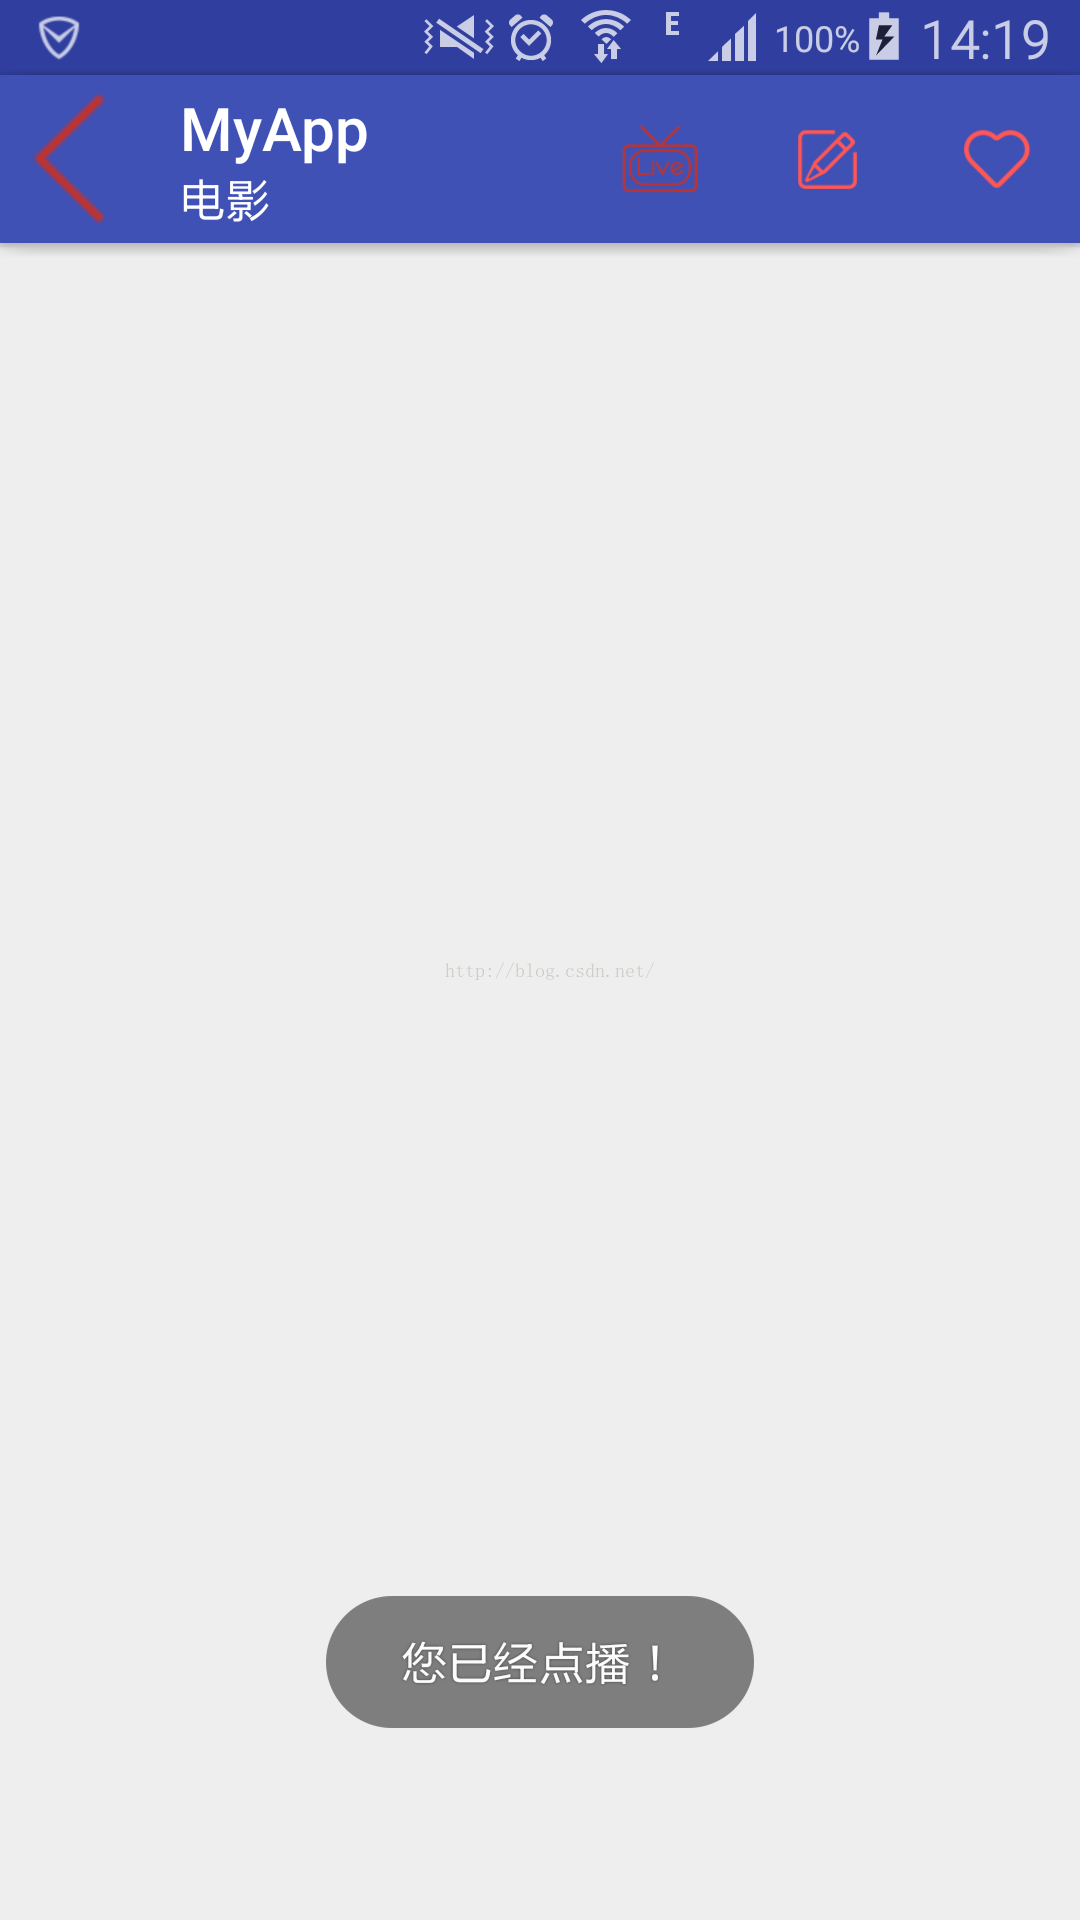
可以将Toobar做成如图所示样子。接下来我们一一实现。

从左到右依次是 up button的图标,主标题和副标题,以及标题栏按钮(用于点击,编辑等功能)。代码如下:

  • 1
    点赞
  • 7
    收藏
    觉得还不错? 一键收藏
  • 1
    评论
好的,下面我将为你提供一个简单的示例代码,演示如何在Android Studio动态添加项目的TabHost。 1. 首先,在XML布局文件添加TabHost组件: ```xml <TabHost android:id="@android:id/tabhost" android:layout_width="match_parent" android:layout_height="match_parent" android:layout_below="@+id/toolbar"> <LinearLayout android:layout_width="match_parent" android:layout_height="match_parent" android:orientation="vertical"> <TabWidget android:id="@android:id/tabs" android:layout_width="match_parent" android:layout_height="wrap_content" /> <FrameLayout android:id="@android:id/tabcontent" android:layout_width="match_parent" android:layout_height="match_parent" /> </LinearLayout> </TabHost> ``` 2. 在Java代码找到对应的TabHost组件并初始化: ```java TabHost tabHost = (TabHost) findViewById(android.R.id.tabhost); tabHost.setup(); ``` 3. 创建一个新的TabSpec对象,用于描述每个标签页: ```java TabHost.TabSpec spec; spec = tabHost.newTabSpec("tag1"); spec.setIndicator("Tab1"); spec.setContent(R.id.tab1); tabHost.addTab(spec); ``` 4. 重复步骤3,以添加其他标签页: ```java spec = tabHost.newTabSpec("tag2"); spec.setIndicator("Tab2"); spec.setContent(R.id.tab2); tabHost.addTab(spec); spec = tabHost.newTabSpec("tag3"); spec.setIndicator("Tab3"); spec.setContent(R.id.tab3); tabHost.addTab(spec); ``` 5. 最后,你可以在代码动态添加标签页: ```java TabHost.TabSpec spec = tabHost.newTabSpec("tag4"); spec.setIndicator("Tab4"); spec.setContent(new TabHost.TabContentFactory() { @Override public View createTabContent(String tag) { TextView textView = new TextView(MainActivity.this); textView.setText("This is Tab 4"); return textView; } }); tabHost.addTab(spec); ``` 这个示例演示了如何在Android Studio动态添加项目的TabHost。希望对你有所帮助!

“相关推荐”对你有帮助么?

  • 非常没帮助
  • 没帮助
  • 一般
  • 有帮助
  • 非常有帮助
提交
评论 1
添加红包

请填写红包祝福语或标题

红包个数最小为10个

红包金额最低5元

当前余额3.43前往充值 >
需支付:10.00
成就一亿技术人!
领取后你会自动成为博主和红包主的粉丝 规则
hope_wisdom
发出的红包
实付
使用余额支付
点击重新获取
扫码支付
钱包余额 0

抵扣说明:

1.余额是钱包充值的虚拟货币,按照1:1的比例进行支付金额的抵扣。
2.余额无法直接购买下载,可以购买VIP、付费专栏及课程。

余额充值