


自从使用github以来,一直都是在github网站在线上传文件到仓库中,但是有时因为网络或者电脑的原因上传失败。最重要的原因是我习惯本地编辑,完成以后再一起上传github。看过了几个教程,总结出最适合自己的比较简单的方法。

1. github在线上传文件夹
在线上传也可以上传完整的文件夹结构,直接拖拽到上传文件页面的框中即可。
1.1点击上传文件
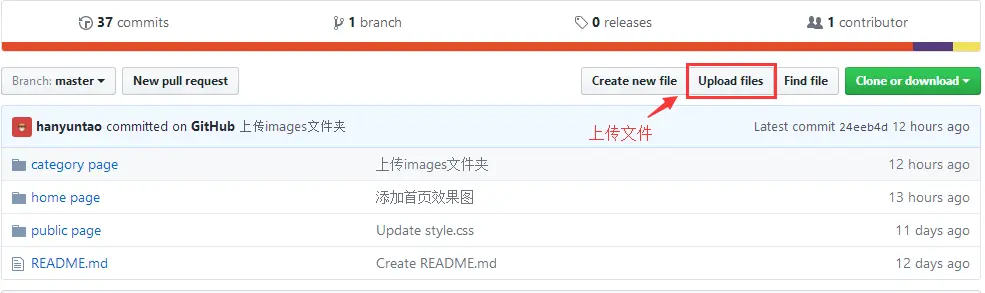
1.2 直接拖拽
直接拖拽即可上传文件夹及文件夹里面的文件。如果点击 choose your files 就只能上传单个文件。

2. 通过git工具上传本地文件夹(本地项目)
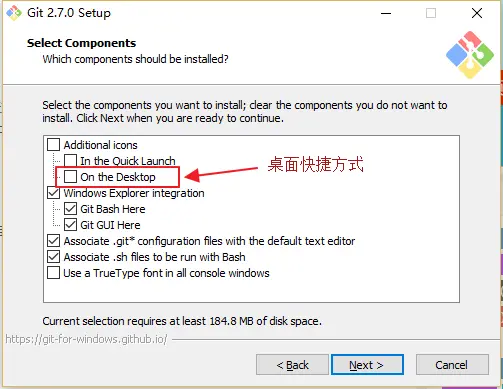
2.1 下载git工具

2.2 下载完成后安装完成,注意在安装过程中可以选择创建桌面快捷方式
2.3 绑定用户
打开git-bash.exe(直接在桌面上点击右键,或者点击开始按钮找到Git Bash)

在打开的GIt Bash中输入以下命令(用户和邮箱为你github注册的账号和邮箱)
$ git config --global user.name "hanyuntao"
$ git config --global user.email "hanyuntaocn@163.com"
2.4 设置SSH key(git中sshkey有何作用?)
2.4.1 生成ssh key
首先检查是否已生成密钥cd ~/.ssh,如果返回的ls有3个文件,则密钥已经生成。

如果没有密钥,则通过
$ ssh-keygen -t rsa -C "hanyuntaocn@163.com"生成,生成过程中一路按3次回车键就好了。(默认路径,默认没有密码登录)
生成成功后,去对应目录C:\Users\hyt.ssh里(hyt为电脑用户名,每个人不同)用记事本打开id_rsa.pub,得到ssh key公钥。

2.4.2 为github账号配置ssh key
切换到github,展开个人头像的小三角,点击settings,然后打开SSH keys菜单, 点击Add SSH key新增密钥,填上标题(最好跟本地仓库保持一致)。

接着将id_rsa.pub文件中key粘贴到此,最后Add key生成密钥吧。\
2.5 上传本地项目到github
2.5.1 创建一个本地项目
这是我自己创建的几个文件夹及文件。

2.5.2 建立本地仓库
1.首先进入text文件夹
cd d:text
2.执行指令:git init

初始化成功后你会发现项目里多了一个隐藏文件夹.git

3.执行指令:git add .
将所有文件添加到仓库

4.执行指令:git commit -m "提交文件"
双引号内是提交注释。

2.5.3 关联github仓库
1.到github text仓库复制仓库地址

2.执行指令:git remote add origin https://github.com/hanyuntao/text.git

5.
可以通过如下命令进行代码合并【注:pull=fetch+merge]
git pull --rebase origin master

执行上面代码后可以看到本地代码库中多了README.md文件

2.5.4 上传本地代码
执行指令:git push -u origin master

2.5.5完成了
可以看到我们的本地项目已经上传到了github上了。

注意:git是不能管理空的文件夹的,文件夹里必须有文件才能上传。


 350
350

 被折叠的 条评论
为什么被折叠?
被折叠的 条评论
为什么被折叠?
 到【灌水乐园】发言


