


http://www.rabbitmq.com/download.html
http://www.rabbitmq.com/install-rpm.html

[root@contoso ~]# wget http://packages.erlang-solutions.com/erlang-solutions-1.0-1.noarch.rpm
[root@contoso ~]# rpm -Uvh erlang-solutions-1.0-1.noarch.rpm
[root@contoso ~]# yum update
[root@contoso ~]# yum install -y erlang
[root@contoso ~]# cat > hello.erl
-module(hello).
-export([hello_world/0]).
hello_world() -> io:fwrite("hello, world\n").
[root@contoso ~]# erl
Erlang/OTP 21 [erts-10.0.3] [source] [64-bit] [smp:4:4] [ds:4:4:10] [async-threads:1] [hipe]

Eshell V10.0.3  (abort with ^G)
1> c(hello).
{ok,hello}
2> hello:hello_world().
hello, world
ok
3>
[root@contoso ~]# wget https://dl.bintray.com/rabbitmq/all/rabbitmq-server/3.7.7/rabbitmq-server-3.7.7-1.el7.noarch.rpm
[root@contoso ~]# yum install -y rabbitmq-server-3.7.7-1.el7.noarch.rpm
[root@contoso ~]# systemctl enable rabbitmq-server
[root@contoso ~]# systemctl restart rabbitmq-server
在CentOS-8-x86_64-1905-dvd1.iso镜像系统上安装更高版本的RabbitMQ,
我们依然使用erlang-solutions-1.0-1.noarch.rpm,亲自试过erlang-solutions-2.0-1.noarch.rpm但没有成功
[root@contoso ~]# wget https://dl.bintray.com/rabbitmq/all/rabbitmq-server/3.8.1/rabbitmq-server-3.8.1-1.el8.noarch.rpm
[root@contoso ~]# yum install -y rabbitmq-server-3.8.1-1.el8.noarch.rpm
[root@contoso ~]# systemctl enable rabbitmq-server
[root@contoso ~]# systemctl start rabbitmq-server
[root@contoso ~]# systemctl status rabbitmq-server
首先看看hostname输出,注意是contoso.com而不是contoso,所以服务才无法启动
[root@contoso ~]# hostname
contoso.com

通过以下命令可以进一步证明rabbitmq-server启动过程需要连接主机名contoso,但是contoso的主机名在此系统上没有设置
[root@contoso ~]# rabbitmqctl status
Status of node rabbit@contoso ...
Error: unable to perform an operation on node 'rabbit@contoso'. Please see diagnostics information and suggestions below.

Most common reasons for this are:

 * Target node is unreachable (e.g. due to hostname resolution, TCP connection or firewall issues)
 * CLI tool fails to authenticate with the server (e.g. due to CLI tool's Erlang cookie not matching that of the server)
 * Target node is not running

In addition to the diagnostics info below:

 * See the CLI, clustering and networking guides on http://rabbitmq.com/documentation.html to learn more
 * Consult server logs on node rabbit@contoso

DIAGNOSTICS
===========

attempted to contact: [rabbit@contoso]

rabbit@contoso:
  * unable to connect to epmd (port 4369) on contoso: address (cannot connect to host/port)


Current node details:
 * node name: rabbitmqcli66@contoso
 * effective user's home directory: /var/lib/rabbitmq
 * Erlang cookie hash: p5tKqEzeEvxH0+WQ75PYkA==

我们可以通过设置以下格式的/etc/hosts文件映射格式,自己添加2条本来就不存在的映射关系
contoso 127.0.0.1
contoso 192.168.10.13
其中192.168.10.13是本机真实的IP地址,这样就能解决rabbitmq-server无法启动的问题啦

[root@contoso ~]# cat /etc/hosts
::1         localhost localhost.localdomain localhost6 localhost6.localdomain6
127.0.0.1   localhost localhost.localdomain localhost4 localhost4.localdomain4 contoso contoso.com
192.168.10.13 contoso contoso.com
如果还是发现启动rabbitmq-server服务失败,那么就直接执行reboot指令重新启动系统解决!
[root@contoso ~]# systemctl restart rabbitmq-server
[root@contoso ~]# systemctl status rabbitmq-server
● rabbitmq-server.service - RabbitMQ broker
   Loaded: loaded (/usr/lib/systemd/system/rabbitmq-server.service; enabled; vendor preset: disabled)
   Active: active (running) since Sat 2018-07-21 15:54:21 CST; 31s ago
  Process: 39174 ExecStop=/usr/sbin/rabbitmqctl shutdown (code=exited, status=69)
 Main PID: 39286 (beam.smp)
   Status: "Initialized"
    Tasks: 90
   CGroup: /system.slice/rabbitmq-server.service
           ├─39286 /usr/lib64/erlang/erts-10.0.3/bin/beam.smp -W w -A 64 -MBas ageffcbf -MHas ageffcbf -MBlmb...
           ├─39596 erl_child_setup 1024
           ├─39617 inet_gethost 4
           └─39618 inet_gethost 4

Jul 21 15:54:20 contoso.com rabbitmq-server[39286]: ##  ##
Jul 21 15:54:20 contoso.com rabbitmq-server[39286]: ##  ##      RabbitMQ 3.7.7. Copyright (C) 2007-2018 Pi...nc.
Jul 21 15:54:20 contoso.com rabbitmq-server[39286]: ##########  Licensed under the MPL.  See http://www.ra...om/
Jul 21 15:54:20 contoso.com rabbitmq-server[39286]: ######  ##
Jul 21 15:54:20 contoso.com rabbitmq-server[39286]: ##########  Logs: /var/log/rabbitmq/rabbit@contoso.log
Jul 21 15:54:20 contoso.com rabbitmq-server[39286]: /var/log/rabbitmq/rabbit@contoso_upgrade.log
Jul 21 15:54:20 contoso.com rabbitmq-server[39286]: Starting broker...
Jul 21 15:54:21 contoso.com rabbitmq-server[39286]: systemd unit for activation check: "rabbitmq-server.service"
Jul 21 15:54:21 contoso.com systemd[1]: Started RabbitMQ broker.
Jul 21 15:54:21 contoso.com rabbitmq-server[39286]: completed with 0 plugins.
Hint: Some lines were ellipsized, use -l to show in full.
[root@contoso ~]#
[root@contoso ~]# systemctl status rabbitmq-server
[root@contoso ~]# rabbitmqctl status
Status of node rabbit@contoso ...
[{pid,39286},
 {running_applications,
     [{rabbit,"RabbitMQ","3.7.7"},
      {mnesia,"MNESIA  CXC 138 12","4.15.4"},
      {rabbit_common,
          "Modules shared by rabbitmq-server and rabbitmq-erlang-client",
          "3.7.7"},
      {ranch_proxy_protocol,"Ranch Proxy Protocol Transport","1.5.0"},
      {ranch,"Socket acceptor pool for TCP protocols.","1.5.0"},
      {ssl,"Erlang/OTP SSL application","9.0"},
      {public_key,"Public key infrastructure","1.6.1"},
      {crypto,"CRYPTO","4.3"},
      {asn1,"The Erlang ASN1 compiler version 5.0.6","5.0.6"},
      {os_mon,"CPO  CXC 138 46","2.4.5"},
      {jsx,"a streaming, evented json parsing toolkit","2.8.2"},
      {recon,"Diagnostic tools for production use","2.3.2"},
      {inets,"INETS  CXC 138 49","7.0"},
      {xmerl,"XML parser","1.3.17"},
      {lager,"Erlang logging framework","3.6.3"},
      {goldrush,"Erlang event stream processor","0.1.9"},
      {compiler,"ERTS  CXC 138 10","7.2.2"},
      {syntax_tools,"Syntax tools","2.1.5"},
      {syslog,"An RFC 3164 and RFC 5424 compliant logging framework.","3.4.2"},
      {sasl,"SASL  CXC 138 11","3.2"},
      {stdlib,"ERTS  CXC 138 10","3.5.1"},
      {kernel,"ERTS  CXC 138 10","6.0"}]},
 {os,{unix,linux}},
 {erlang_version,
     "Erlang/OTP 21 [erts-10.0.3] [source] [64-bit] [smp:4:4] [ds:4:4:10] [async-threads:64] [hipe]\n"},
 {memory,
     [{connection_readers,0},
      {connection_writers,0},
      {connection_channels,0},
      {connection_other,0},
      {queue_procs,0},
      {queue_slave_procs,0},
      {plugins,5892},
      {other_proc,21085464},
      {metrics,184596},
      {mgmt_db,0},
      {mnesia,73008},
      {other_ets,2421712},
      {binary,80872},
      {msg_index,28720},
      {code,20418905},
      {atom,1082561},
      {other_system,11138350},
      {allocated_unused,5808752},
      {reserved_unallocated,6766592},
      {strategy,rss},
      {total,[{erlang,56520080},{rss,69095424},{allocated,62328832}]}]},
 {alarms,[]},
 {listeners,[{clustering,25672,"::"},{amqp,5672,"::"}]},
 {vm_memory_calculation_strategy,rss},
 {vm_memory_high_watermark,0.4},
 {vm_memory_limit,1582514176},
 {disk_free_limit,50000000},
 {disk_free,36644401152},
 {file_descriptors,
     [{total_limit,924},{total_used,2},{sockets_limit,829},{sockets_used,0}]},
 {processes,[{limit,1048576},{used,214}]},
 {run_queue,1},
 {uptime,1474},
 {kernel,{net_ticktime,60}}]
[root@contoso ~]#
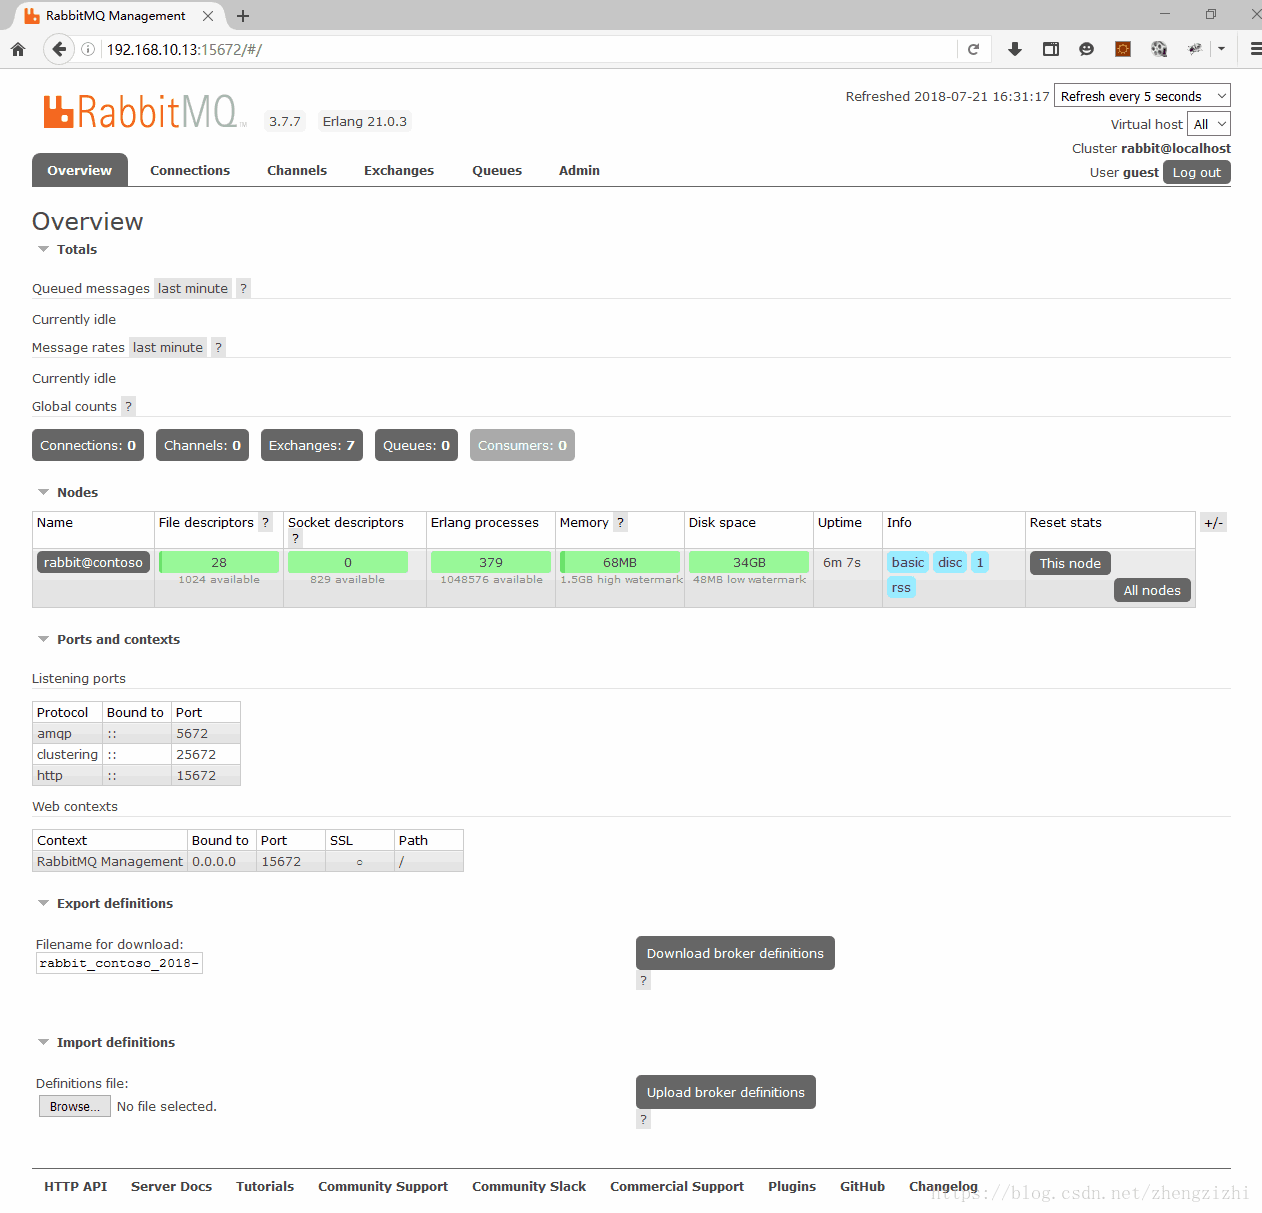
[root@contoso ~]# rabbitmq-plugins enable rabbitmq_management
[root@contoso ~]# rabbitmq-plugins enable rabbitmq_management
The following plugins have been configured:
  rabbitmq_management
  rabbitmq_management_agent
  rabbitmq_web_dispatch
Applying plugin configuration to rabbit@contoso...
The following plugins have been enabled:
  rabbitmq_management
  rabbitmq_management_agent
  rabbitmq_web_dispatch

started 3 plugins.
[root@contoso ~]#
http://127.0.0.1:15672
一个是环境变量的配置文件 rabbitmq-env.conf ;
一个是配置信息的配置文件 rabbitmq.config;
注意,这两个文件默认是没有的,如果需要必须自己创建。
rabbitmq-env.conf
这个文件的位置是确定和不能改变的,位于:/etc/rabbitmq目录下(这个目录需要自己创建)。
文件的内容包括了RabbitMQ的一些环境变量,常用的有:
#RABBITMQ_NODE_PORT= //端口号
#HOSTNAME=
RABBITMQ_NODENAME=mq
RABBITMQ_CONFIG_FILE= //配置文件的路径
RABBITMQ_MNESIA_BASE=/rabbitmq/data //需要使用的MNESIA数据库的路径
RABBITMQ_LOG_BASE=/rabbitmq/log //log的路径
RABBITMQ_PLUGINS_DIR=/rabbitmq/plugins //插件的路径
rabbitmq 添加远程访问功能
[root@contoso ~]# cat > /etc/rabbitmq/rabbitmq.config
[{rabbit, [{loopback_users, []}]}].
[root@contoso ~]# systemctl restart rabbitmq-server
[root@contoso ~]# systemctl status rabbitmq-server
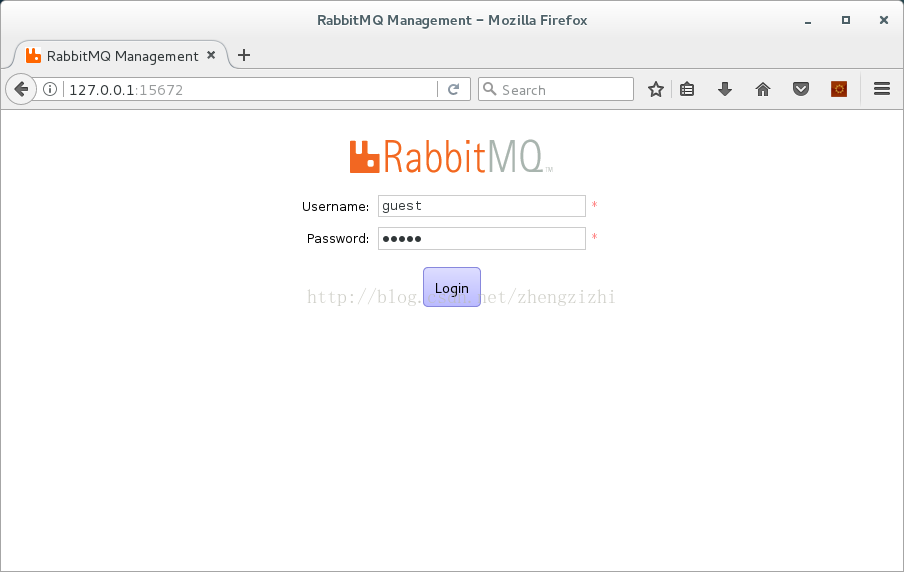
我们现在可以使用一组用户名/密码 guest/guest 登录啦
http://127.0.0.1:15672/api/
RabbitMQ Management HTTP API
Introduction
Apart from this help page, all URIs will serve only resources of type application/json, and will require HTTP basic authentication (using the standard RabbitMQ user database). The default user is guest/guest.
Many URIs require the name of a virtual host as part of the path, since names only uniquely identify objects within a virtual host. As the default virtual host is called "/", this will need to be encoded as "%2f".
PUTing a resource creates it. The JSON object you upload must have certain mandatory keys (documented below) and may have optional keys. Other keys are ignored. Missing mandatory keys constitute an error.
Since bindings do not have names or IDs in AMQP we synthesise one based on all its properties. Since predicting this name is hard in the general case, you can also create bindings by POSTing to a factory URI. See the example below.
Many URIs return lists. Such URIs can have the query string parameters sort and sort_reverse added. sort allows you to select a primary field to sort by, and sort_reverse will reverse the sort order if set to true. The sort parameter can contain subfields separated by dots. This allows you to sort by a nested component of the listed items; it does not allow you to sort by more than one field. See the example below.
You can also restrict what information is returned per item with the columns parameter. This is a comma-separated list of subfields separated by dots. See the example below.
Most of the GET queries return many fields per object. See the separate stats documentation.
Examples
A few quick examples for Windows and Unix, using the command line tool curl:
Get a list of vhosts:
:: Windows
C:\> curl -i -u guest:guest http://localhost:15672/api/vhosts
# Unix
$ curl -i -u guest:guest http://localhost:15672/api/vhosts
HTTP/1.1 200 OK
Server: MochiWeb/1.1 WebMachine/1.10.0 (never breaks eye contact)
Date: Mon, 16 Sep 2013 12:00:02 GMT
Content-Type: application/json
Content-Length: 30
[{"name":"/","tracing":false}]
Get a list of channels, fast publishers first, restricting the info items we get back:
:: Windows
C:\> curl -i -u guest:guest "http://localhost:15672/api/channels?sort=message_stats.publish_details.rate&sort_reverse=true&columns=name,message_stats.publish_details.rate,message_stats.deliver_get_details.rate"
# Unix
$ curl -i -u guest:guest 'http://localhost:15672/api/channels?sort=message_stats.publish_details.rate&sort_reverse=true&columns=name,message_stats.publish_details.rate,message_stats.deliver_get_details.rate'
HTTP/1.1 200 OK
Server: MochiWeb/1.1 WebMachine/1.10.0 (never breaks eye contact)
Date: Mon, 16 Sep 2013 12:01:17 GMT
Content-Type: application/json
Content-Length: 219
Cache-Control: no-cache
[{"message_stats":{"publish_details":{"rate" ... (remainder elided)
Create a new vhost:
:: Windows
C:\> curl -i -u guest:guest -H "content-type:application/json" ^
-XPUT http://localhost:15672/api/vhosts/foo
# Unix
$ curl -i -u guest:guest -H "content-type:application/json" \
-XPUT http://localhost:15672/api/vhosts/foo
HTTP/1.1 204 No Content
Server: MochiWeb/1.1 WebMachine/1.10.0 (never breaks eye contact)
Date: Mon, 16 Sep 2013 12:03:00 GMT
Content-Type: application/json
Content-Length: 0
Note: you must specify application/json as the mime type.
Note: the name of the object is not needed in the JSON object uploaded, since it is in the URI. As a virtual host has no properties apart from its name, this means you do not need to specify a body at all!
Create a new exchange in the default virtual host:
:: Windows
C:\> curl -i -u guest:guest -H "content-type:application/json" ^
-XPUT -d"{""type"":""direct"",""durable"":true}" ^
http://localhost:15672/api/exchanges/%2f/my-new-exchange
# Unix
$ curl -i -u guest:guest -H "content-type:application/json" \
-XPUT -d'{"type":"direct","durable":true}' \
http://localhost:15672/api/exchanges/%2f/my-new-exchange
HTTP/1.1 204 No Content
Server: MochiWeb/1.1 WebMachine/1.10.0 (never breaks eye contact)
Date: Mon, 16 Sep 2013 12:04:00 GMT
Content-Type: application/json
Content-Length: 0
Note: we never return a body in response to a PUT or DELETE, unless it fails.
And delete it again:
:: Windows
C:\> curl -i -u guest:guest -H "content-type:application/json" ^
-XDELETE http://localhost:15672/api/exchanges/%2f/my-new-exchange
# Unix
$ curl -i -u guest:guest -H "content-type:application/json" \
-XDELETE http://localhost:15672/api/exchanges/%2f/my-new-exchange
HTTP/1.1 204 No Content
Server: MochiWeb/1.1 WebMachine/1.10.0 (never breaks eye contact)
Date: Mon, 16 Sep 2013 12:05:30 GMT
Content-Type: application/json
Content-Length: 0
在CentOS8系统上,默认集成的Python版本就是2.7.15,所以下面与安装Python2.7.15这个版本的步骤全部跳过,我们直接使用

如下方式直接安装get-pip.py
[root@contoso ~]# python -V
Python 2.7.15
[root@contoso ~]#  curl "https://bootstrap.pypa.io/get-pip.py" -o "get-pip.py"
[root@contoso ~]#  python get-pip.py
[root@contoso ~]# python -V
Python 2.7.5
1. 安装 gcc
首先确保你已经安装了gcc包在你的系统上,如果你还没有安装gcc,可以使用下面的命令来安装:
[root@contoso ~]# yum install -y gcc openssl-devel bzip2-devel
2. 下载 python 2.7.15
[root@contoso ~]# cd /usr/src
[root@contoso src]# wget https://www.python.org/ftp/python/2.7.15/Python-2.7.15.tgz
[root@contoso src]# ls
debug kernels Python-2.7.15.tgz
[root@contoso src]# tar xzf Python-2.7.15.tgz
3. 安装 python 2.7.15
[root@contoso src]# cd Python-2.7.15
[root@contoso Python-2.7.15]# ./configure --enable-optimizations
make altinstall命令用来防止把默认的2.7.5版本可执行程序/usr/bin/python覆盖掉,意思是保留默认版本的python
4. 查看python版本,python-2.7.15和python-2.7.5两个版本都是全局命令
[root@contoso ~]# /usr/bin/python -V
Python 2.7.5
[root@contoso ~]# python -V
Python 2.7.5
[root@contoso ~]# /usr/local/bin/python2.7 -V
Python 2.7.15
[root@contoso ~]# python2.7 -V
Python 2.7.15
警告:不要重写或链接默认版Python二进制可执行程序/usr/bin/python,这可能会损坏系统,因为默认版已经与CentOS系统深度集成啦。
5. 安装python-2.7.15版模块管理工具
PIP是安装和管理python模块的有用工具。让我们安装python版的PIP工具。
[root@contoso Python-2.7.15]# curl "https://bootstrap.pypa.io/get-pip.py" -o "get-pip.py"
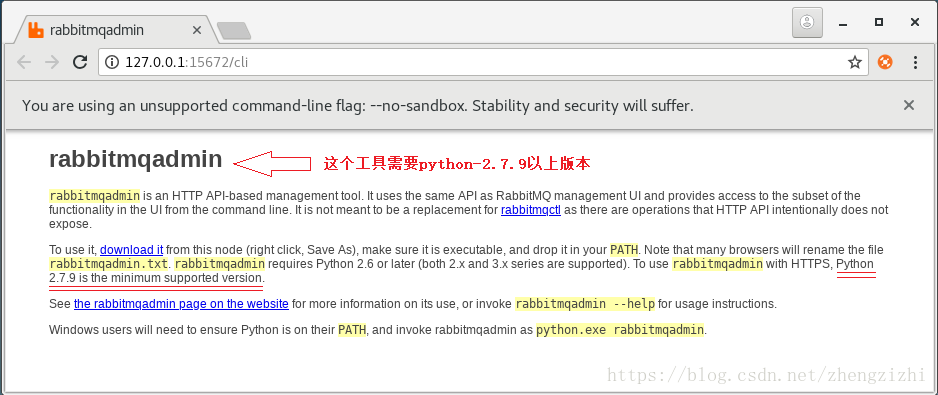
[root@contoso Python-2.7.15]# python2.7 get-pip.pyAlternatively, you can download the version of rabbitmqadmin which corresponds with the management plugin version 3.8.1 from GitHub.
https://www.rabbitmq.com/management-cli.html
[root@contoso ~]# wget https://raw.githubusercontent.com/rabbitmq/rabbitmq-management/v3.8.1/bin/rabbitmqadmin
[root@contoso ~]# mv rabbitmqadmin /usr/local/bin/
[root@contoso ~]# chmod 755 /usr/local/bin/rabbitmqadmin
[root@contoso ~]# rabbitmqadmin --help
Usage
=====
rabbitmqadmin [options] subcommand
Options
=======
--help, -h show this help message and exit
--config=CONFIG, -c CONFIG
configuration file [default: ~/.rabbitmqadmin.conf]
--node=NODE, -N NODE node described in the configuration file [default:
'default' only if configuration file is specified]
--host=HOST, -H HOST connect to host HOST [default: localhost]
--port=PORT, -P PORT connect to port PORT [default: 15672]
--path-prefix=PATH_PREFIX
use specific URI path prefix for the RabbitMQ HTTP
API. /api and operation path will be appended to it.
(default: blank string) [default: ]
--vhost=VHOST, -V VHOST
connect to vhost VHOST [default: all vhosts for list,
'/' for declare]
--username=USERNAME, -u USERNAME
connect using username USERNAME [default: guest]
--password=PASSWORD, -p PASSWORD
connect using password PASSWORD [default: guest]
--base-uri=URI, -U URI connect using a base HTTP API URI. /api and operation
path will be appended to it. Path will be ignored.
--vhost has to be provided separately.
--quiet, -q suppress status messages [default: True]
--ssl, -s connect with ssl [default: False]
--ssl-key-file=SSL_KEY_FILE
PEM format key file for SSL
--ssl-cert-file=SSL_CERT_FILE
PEM format certificate file for SSL
--ssl-ca-cert-file=SSL_CA_CERT_FILE
PEM format CA certificate file for SSL
--ssl-disable-hostname-verification
Disables peer hostname verification
--ssl-insecure, -k Disables all SSL validations like curl's '-k' argument
--format=FORMAT, -f FORMAT
format for listing commands - one of [raw_json, long,
pretty_json, kvp, tsv, table, bash] [default: table]
--sort=SORT, -S SORT sort key for listing queries
--sort-reverse, -R reverse the sort order
--depth=DEPTH, -d DEPTH
maximum depth to recurse for listing tables [default:
1]
--bash-completion Print bash completion script [default: False]
--version Display version and exit
More Help
=========
For more help use the help subcommand:
rabbitmqadmin help subcommands # For a list of available subcommands
rabbitmqadmin help config # For help with the configuration file
[root@contoso ~]#


 2317
2317


 被折叠的 条评论
为什么被折叠?
被折叠的 条评论
为什么被折叠?
 到【灌水乐园】发言


