


一.背景
最近在做一个项目的时候,由于涉及到需要将一个系统的基础数据全量同步到另外一个系统中去,结果一看,基础数据有十几万条,作为小白的我,使用单元测试,写了一段代码,直接采用了MP(Mybaties-Plus)自带的saveBatch()方法,将基础数据导入到新的系统中去,但是后面涉及多次修正基础数据的情况,导致,每次重新插入数据或者更新的时候,都需要花费十几分钟的时间,后面想着以下的方案进行了优化。
其实针对自带的saveBatch()方法插入很慢,一般都是由于数据库连接url上没有配置批量操作的属性,只需要在url上加上如下属性即可,如下:
rewriteBatchedStatements=true在配置数据库连接信息的时候,配置类似如下:
jdbc:mysql://数据库地址/数据库名?useUnicode=true&characterEncoding=UTF8&allowMultiQueries=true&rewriteBatchedStatements=true加上之后,你就会发现,saveBatch的速度直线提升,效果还是很不错的,一万条数据估计也就在几百毫秒。
接下来的文章都是设置在rewriteBatchedStatements=false情况下,且MP(Mybaties-Plus)为3.5.3.1版本下进行测试的。
二.优化方法
如果在 rewriteBatchedStatements=false情况下,使用自带的方法,插入几十万数据是比较慢的,我们先讲解自带的方法,再讲解MP给我们自定义空间的自定义方法,然后在加入一些多线程的情况下进行的测试和方案比较。
2.1 Mybaties-plus自带的批量saveBatch()方法
直接上代码
实体类如下:
@Data
@TableName("test_user")
public class TestUser implements Serializable {
    private String id;
    private String name;
    private String managerId;
    private String salary;
    private String age;
    private String departId;
    private String remark;
    private String province;
}
Mapper如下:
public interface TestUserMapper extends BaseMapper<TestUser> {
}
Service如下:
public interface ITestUserService extends IService<TestUser> {
}

@Service
public class TestUserServiceImpl extends ServiceImpl<TestUserMapper, TestUser> implements ITestUserService {
}接下来我使用单元测试的方法,构造200000条数据,测试Mybaties-Plus自带的saveBatch()方法,代码如下:
@RunWith(SpringRunner.class)
@SpringBootTest(webEnvironment = SpringBootTest.WebEnvironment.RANDOM_PORT,classes = JeecgSystemApplication.class)
public class UserTest {
@Autowired
private ITestUserService userService;
@Test
public void testInsertBatch(){
List<TestUser> userList = new ArrayList<>();
for(int i = 0; i < 199999; i++){
TestUser user = new TestUser();
user.setName("张三");
user.setAge("20");
user.setProvince("重庆市");
user.setSalary("200000");
user.setRemark("diitch");
userList.add(user);
}
long s = System.currentTimeMillis();
userService.saveBatch(userList);
System.out.println("保存200000条数据消耗" + (System.currentTimeMillis() - s) + "ms");
}
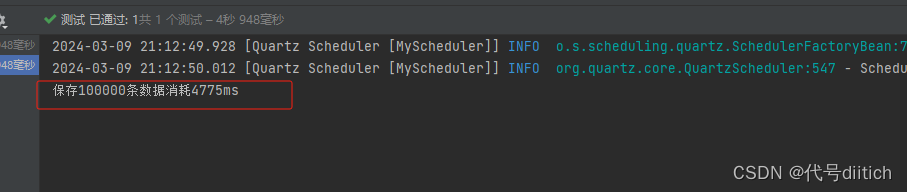
}测试结果如下,大概需要10s中的时间:

我们可以跟踪源码,它的实现如下:
default boolean saveBatch(Collection<T> entityList) {
      return this.saveBatch(entityList, 1000);
  }

public boolean saveBatch(Collection<T> entityList, int batchSize) {
       String sqlStatement = this.getSqlStatement(SqlMethod.INSERT_ONE);
       return this.executeBatch(entityList, batchSize, (sqlSession, entity) -> {
           sqlSession.insert(sqlStatement, entity);
       });
   }

public static <E> boolean executeBatch(Class<?> entityClass, Log log, Collection<E> list, int batchSize, BiConsumer<SqlSession, E> consumer) {
  Assert.isFalse(batchSize < 1, "batchSize must not be less than one", new Object[0]);
  return !CollectionUtils.isEmpty(list) && executeBatch(entityClass, log, (sqlSession) -> {
      int size = list.size();
      int idxLimit = Math.min(batchSize, size);
      int i = 1;

      for(Iterator var7 = list.iterator(); var7.hasNext(); ++i) {   ## 循环执行
          E element = var7.next();
          consumer.accept(sqlSession, element);
          if (i == idxLimit) {
              sqlSession.flushStatements();
              idxLimit = Math.min(idxLimit + batchSize, size);
          }
      }

  });
}
2.2 自定义批量插入或者更新的方法
直接上代码,首先我们自定义一个RootMapper,继承BaseMapper,自定义自己的批量插入或者更新方法,如下:
import com.baomidou.mybatisplus.core.mapper.BaseMapper;
import org.apache.ibatis.annotations.Param;
import java.util.Collection;

/**
 * @author diitich
 * @param <T>
 */
public interface RootMapper<T> extends BaseMapper<T> {

    /**
     * 批量新增
     * @param batchList
     * @return
     */
    int insertBatch(@Param("list") Collection<T> batchList);

    /**
     * 批量跟新
     * @param batchList
     * @return
     */
    int updateBatch(@Param("list")Collection<T> batchList);

}定义InsertBatchColumn 继承 AbstractMethod ,下面基本就是一些通用的写法,不同的Mybatis-plus有一点点区别,本文用的版本为3.5.3.1版本,代码如下:
import com.baomidou.mybatisplus.annotation.IdType;
import com.baomidou.mybatisplus.core.enums.SqlMethod;
import com.baomidou.mybatisplus.core.injector.AbstractMethod;
import com.baomidou.mybatisplus.core.metadata.TableFieldInfo;
import com.baomidou.mybatisplus.core.metadata.TableInfo;
import com.baomidou.mybatisplus.core.metadata.TableInfoHelper;
import com.baomidou.mybatisplus.core.toolkit.sql.SqlScriptUtils;
import lombok.Setter;
import lombok.experimental.Accessors;
import lombok.extern.slf4j.Slf4j;
import org.apache.ibatis.executor.keygen.Jdbc3KeyGenerator;
import org.apache.ibatis.executor.keygen.KeyGenerator;
import org.apache.ibatis.executor.keygen.NoKeyGenerator;
import org.apache.ibatis.mapping.MappedStatement;
import org.apache.ibatis.mapping.SqlSource;
import java.util.List;
import java.util.function.Predicate;

@Slf4j
public class InsertBatchColumn extends AbstractMethod {

    @Setter
    @Accessors(chain = true)
    private Predicate<TableFieldInfo> predicate;

    public InsertBatchColumn() {
        super("insertBatch");
    }

    public InsertBatchColumn(Predicate<TableFieldInfo> predicate) {
        // 此处的名称必须与后续的RootMapper的新增方法名称一致
        super("insertBatch");
        this.predicate = predicate;
    }

    @SuppressWarnings("Duplicates")
    @Override
    public MappedStatement injectMappedStatement(Class<?> mapperClass, Class<?> modelClass, TableInfo tableInfo) {
        KeyGenerator keyGenerator = NoKeyGenerator.INSTANCE;
        SqlMethod sqlMethod = SqlMethod.INSERT_ONE;
        List<TableFieldInfo> fieldList = tableInfo.getFieldList();
        String insertSqlColumn = tableInfo.getKeyInsertSqlColumn(true,false) +
                this.filterTableFieldInfo(fieldList, predicate, TableFieldInfo::getInsertSqlColumn, EMPTY);
        String columnScript = LEFT_BRACKET + insertSqlColumn.substring(0, insertSqlColumn.length() - 1) + RIGHT_BRACKET;
        String insertSqlProperty = tableInfo.getKeyInsertSqlProperty(true,ENTITY_DOT, false) +
                this.filterTableFieldInfo(fieldList, predicate, i -> i.getInsertSqlProperty(ENTITY_DOT), EMPTY);
        insertSqlProperty = LEFT_BRACKET + insertSqlProperty.substring(0, insertSqlProperty.length() - 1) + RIGHT_BRACKET;
        String valuesScript = SqlScriptUtils.convertForeach(insertSqlProperty, "list", null, ENTITY, COMMA);
        String keyProperty = null;
        String keyColumn = null;
        // 表包含主键处理逻辑,如果不包含主键当普通字段处理
        if (tableInfo.havePK()) {
            if (tableInfo.getIdType() == IdType.AUTO) {
                /* 自增主键 */
                keyGenerator = Jdbc3KeyGenerator.INSTANCE;
                keyProperty = tableInfo.getKeyProperty();
                keyColumn = tableInfo.getKeyColumn();
            } else {
                if (null != tableInfo.getKeySequence()) {
                    keyGenerator = TableInfoHelper.genKeyGenerator(modelClass.getName(), tableInfo, builderAssistant);
                    keyProperty = tableInfo.getKeyProperty();
                    keyColumn = tableInfo.getKeyColumn();
                }
            }
        }
        String sql = String.format(sqlMethod.getSql(), tableInfo.getTableName(), columnScript, valuesScript);
        SqlSource sqlSource = languageDriver.createSqlSource(configuration, sql, modelClass);
        // 注意第三个参数,需要与后续的RootMapper里面新增方法名称要一致,不然会报无法绑定异常
        return this.addInsertMappedStatement(mapperClass, modelClass, "insertBatch", sqlSource, keyGenerator, keyProperty, keyColumn);
    }
}
定义 UpdateBatchColumn 继承 AbstractMethod ,代码如下:
import com.baomidou.mybatisplus.core.injector.AbstractMethod;
import com.baomidou.mybatisplus.core.metadata.TableInfo;
import org.apache.ibatis.mapping.MappedStatement;
import org.apache.ibatis.mapping.SqlSource;

public class UpdateBatchColumn extends AbstractMethod {

    public UpdateBatchColumn(String methodName) {
        super(methodName);
    }

    @SuppressWarnings("Duplicates")
    @Override
    public MappedStatement injectMappedStatement(Class<?> mapperClass, Class<?> modelClass, TableInfo tableInfo) {
        String sql = "<script>\n<foreach collection=\"list\" item=\"item\" separator=\";\">\nupdate %s %s where %s=#{%s} %s\n</foreach>\n</script>";
        String additional = tableInfo.isWithVersion() ? tableInfo.getVersionFieldInfo().getVersionOli("item", "item.") : "" + tableInfo.getLogicDeleteSql(true, true);
        String setSql = sqlSet(tableInfo.isWithLogicDelete(), false, tableInfo, false, "item", "item.");
        String sqlResult = String.format(sql, tableInfo.getTableName(), setSql, tableInfo.getKeyColumn(), "item." + tableInfo.getKeyProperty(), additional);
        SqlSource sqlSource = languageDriver.createSqlSource(configuration, sqlResult, modelClass);
        // 第三个参数必须和RootMapper的自定义方法名一致
        return this.addUpdateMappedStatement(mapperClass, modelClass, "updateBatch", sqlSource);
}自定义sql注入,MysqlInjector继承DefaultSqlInjector,代码如下:
import com.baomidou.mybatisplus.core.injector.AbstractMethod;
import com.baomidou.mybatisplus.core.injector.DefaultSqlInjector;
import com.baomidou.mybatisplus.core.metadata.TableInfo;
import java.util.List;

public class MysqlInjector extends DefaultSqlInjector {
    @Override
    public List<AbstractMethod> getMethodList(Class<?> mapperClass, TableInfo tableInfo) {
        List<AbstractMethod> methods = super.getMethodList(mapperClass,tableInfo);
        // 自定义的insert SQL注入器
        methods.add(new InsertBatchColumn());
        // 自定义的update SQL注入器,参数需要与RootMapper的批量update名称一致
        methods.add(new UpdateBatchColumn("updateBatch"));
        return methods;
    }
}
定义MybatiesPlus的配置文件,将 MysqlInjector 注入进去,代码如下:
import org.jeecg.common.sqlinject.MysqlInjector;
import org.springframework.context.annotation.Bean;
import org.springframework.context.annotation.Configuration;

@Configuration
public class MybatiesPlusConfig {
    @Bean
    public MysqlInjector sqlInjector(){
        return new MysqlInjector();
    }
}
接下来我们还是使用单元测试,构造200000万条数据,当然我们不能一次性插入20万条数据,进行分段插入,代码如下:
public interface TestUserMapper extends RootMapper<TestUser> {
}
@RunWith(SpringRunner.class)
@SpringBootTest(webEnvironment = SpringBootTest.WebEnvironment.RANDOM_PORT,classes = JeecgSystemApplication.class)
public class UserTest {
@Autowired
private TestUserMapper testUserMapper;
/**
* 测试自定义批量新增
*/
@Test
public void testInsertBatchCustom(){
List<TestUser> userList = new ArrayList<>();
int batchSize = 5000; // 每批次插入的数据量
long s = System.currentTimeMillis();
for(int i = 0; i < 199999; i++){
TestUser user = new TestUser();
user.setName("张三");
user.setAge("20");
user.setProvince("重庆市");
user.setSalary("200000");
user.setRemark("diitch");
userList.add(user);
// 达到批次大小时进行插入
if(userList.size() == batchSize){
testUserMapper.insertBatch(userList);
userList.clear(); // 清空列表,准备下一批数据
}
}
// 插入剩余数据
if(!userList.isEmpty()){
testUserMapper.insertBatch(userList);
}
System.out.println("保存200000条数据消耗" + (System.currentTimeMillis() - s) + "ms");
}
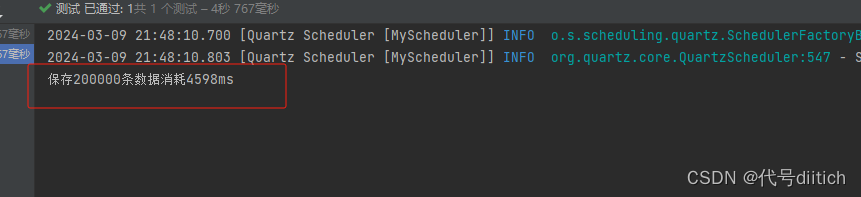
}上面的代码我们设置了一次性批量插入batchSize = 5000,执行结果如下,大概需要4~5秒,batchSize值设置不同,执行效率稍微有点不同:
2.3 多线程更新 + MP自带saveBatch()方法
上面我们讲了自定义批量插入大概能提升一倍的性能,接下来我们使用多线程方式更新数据,首先我们先测试使用5个线程插入20万条数据,使用Mybaties-plus自带的saveBatch()方法更新,直接上代码:
import org.jeecg.JeecgSystemApplication;
import org.jeecg.modules.demo.test.entity.TestUser;
import org.jeecg.modules.demo.test.mapper.TestUserMapper;
import org.jeecg.modules.demo.test.service.ITestUserService;
import org.junit.Test;
import org.junit.runner.RunWith;
import org.springframework.beans.factory.annotation.Autowired;
import org.springframework.boot.test.context.SpringBootTest;
import org.springframework.test.context.junit4.SpringRunner;
import java.util.*;
import java.util.concurrent.ExecutorService;
import java.util.concurrent.Executors;
import java.util.concurrent.Future;
@RunWith(SpringRunner.class)
@SpringBootTest(webEnvironment = SpringBootTest.WebEnvironment.RANDOM_PORT,classes = JeecgSystemApplication.class)
public class UserTest {
@Autowired
private ITestUserService userService;
@Autowired
private TestUserMapper testUserMapper;
@Test
public void testInsertBatchMulThreadSaveBatch() throws Exception{
int totalRecords = 199999;
int batchSize = 5000;
int threadCount = 5; // 可以根据实际情况调整线程数量
ExecutorService executor = Executors.newFixedThreadPool(threadCount);
List<Future<Void>> futures = new ArrayList<>();
long s = System.currentTimeMillis();
for (int i = 0; i < totalRecords; i += batchSize) {
int startIndex = i;
int endIndex = Math.min(i + batchSize, totalRecords);
List<TestUser> batchList = new ArrayList<>();
for (int j = startIndex; j < endIndex; j++) {
TestUser user = new TestUser();
user.setName("张三");
user.setAge("20");
user.setProvince("重庆市");
user.setSalary("200000");
user.setRemark("diitch");
batchList.add(user);
}
Future<Void> future = executor.submit(() -> {
userService.saveBatch(batchList);
return null;
});
futures.add(future);
}
// 等待所有线程执行完成
for (Future<Void> future : futures) {
future.get();
}
executor.shutdown();
System.out.println("保存200000条数据消耗" + (System.currentTimeMillis() - s) + "ms");
}
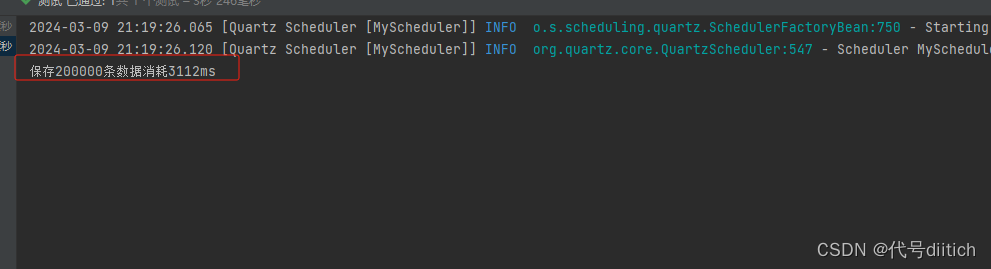
}执行结果如下,大概需要3s多:
2.4 多线程 + 自定义批量插入方法
接下来我们还是使用5个线程来插入数据,只是使用我们自己定义的批量插入方法来插入数据,代码如下:
import org.jeecg.JeecgSystemApplication;
import org.jeecg.modules.demo.test.entity.TestUser;
import org.jeecg.modules.demo.test.mapper.TestUserMapper;
import org.jeecg.modules.demo.test.service.ITestUserService;
import org.junit.Test;
import org.junit.runner.RunWith;
import org.springframework.beans.factory.annotation.Autowired;
import org.springframework.boot.test.context.SpringBootTest;
import org.springframework.test.context.junit4.SpringRunner;
import java.util.*;
import java.util.concurrent.ExecutorService;
import java.util.concurrent.Executors;
import java.util.concurrent.Future;
import java.util.stream.Collectors;
@RunWith(SpringRunner.class)
@SpringBootTest(webEnvironment = SpringBootTest.WebEnvironment.RANDOM_PORT,classes = JeecgSystemApplication.class)
public class UserTest {
@Autowired
private ITestUserService userService;
@Autowired
private TestUserMapper testUserMapper;
@Test
public voidtestInsertBatchMulThreadCustom() throws Exception{
int totalRecords = 199999;
int batchSize = 5000;
int threadCount = 5;
ExecutorService executor = Executors.newFixedThreadPool(threadCount);
List<Future<Void>> futures = new ArrayList<>();
Set<String> insertedData = Collections.synchronizedSet(new HashSet<>());
long s = System.currentTimeMillis();
for (int i = 0; i < totalRecords; i += batchSize) {
int startIndex = i;
int endIndex = Math.min(i + batchSize, totalRecords);
List<TestUser> batchList = new ArrayList<>();
for (int j = startIndex; j < endIndex; j++) {
TestUser user = new TestUser();
user.setName("张三");
user.setAge("20");
user.setProvince("重庆市");
user.setSalary("200000");
user.setRemark("diitch");
batchList.add(user);
}
List<TestUser> filteredList = batchList.stream()
.filter(user -> !insertedData.contains(user.getName()))
.collect(Collectors.toList());
Future<Void> future = executor.submit(() -> {
testUserMapper.insertBatch(filteredList);
filteredList.forEach(user -> insertedData.add(user.getName()));
return null;
});
futures.add(future);
}
// 等待所有线程执行完成
for (Future<Void> future : futures) {
future.get();
}
executor.shutdown();
System.out.println("保存200000条数据消耗" + (System.currentTimeMillis() - s) + "ms");
}
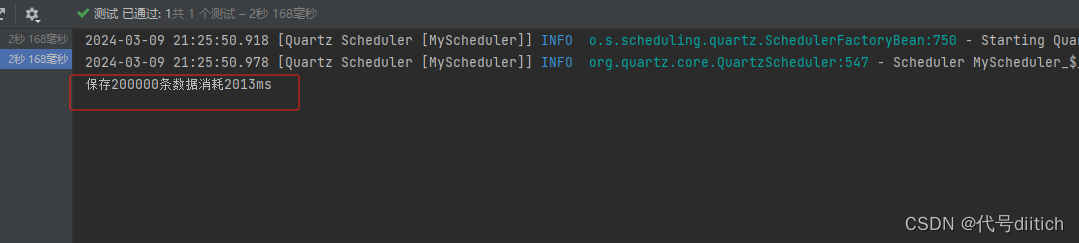
}执行结果如下,大概需要2s左右时间
三.总结
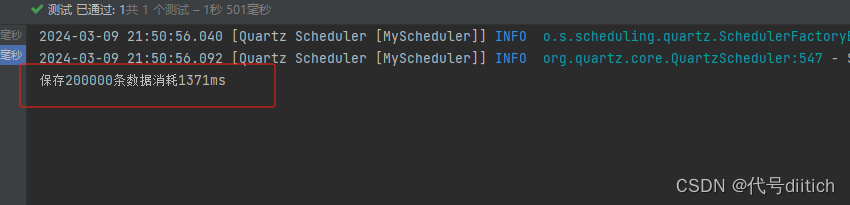
一般我们设置rewriteBatchedStatements=true时,批量插入功能已经相对较快,如果还满足不了需求,我们可以使用多线程进行批量插入,下面是在设置rewriteBatchedStatements=true时,插入20万条数据saveBatch()以及 saveBatch + 多线程的方式的执行结果:
单独的saveBatch()方法,差不多也是4秒多,也达到了我们自定义的批量插入方法性能:
saveBatch() + 多线程的方法,执行结果如下,大概只需要1秒多,比我们自定义批量插入 + 多线程方法还要快:
来源:https://blog.csdn.net/m0_37742400

1.微服务全做错了!谷歌提出新方法,成本直接降9倍!
最近面试BAT,整理一份面试资料《Java面试BAT通关手册》,覆盖了Java核心技术、JVM、Java并发、SSM、微服务、数据库、数据结构等等。
获取方式:点“在看”,关注公众号并回复 666 领取,更多内容陆续奉上。
明天见(。・ω・。)


 3161
3161


 被折叠的 条评论
为什么被折叠?
被折叠的 条评论
为什么被折叠?
 到【灌水乐园】发言


