


Following on from myprevious guide on how to create a VMware virtual machine running Vanilla OS X El Capitan in Windows, I’ve decided to write a similar guide for creating a VirtualBox El Capitan VM.
The virtual machine should be useful for testing El Capitan and also for creating installers for use on a real machine/hackintosh.
There are other tutorials and videos on the net about running OS X on Windows machines using pre-made VMDK disk images but you can never guarantee what else is in there….
I’ve gathered info for this guide from several threads in the Multibooting and Virtualisation section of this forum and also the wider internet eg
@colt2 HOW TO: Create a bootable El Capitan ISO for VMware
@E:V:Ahttp://forum.xda-dev...430&postcount=6
@Tech Reviews video tutorialhttps://www.youtube....h?v=t7X07U63lwg.
Requirements
- Intel PC with four or more CPU cores running Windows 7 X64 or later OS (2 or more cores needed for OS X)
- 4GB or more RAM (2GB or more will be needed for OS X)
- Hard Disk with at least 40GB free for Virtual Machine
- Oracle VM VirtualBox v 5.0.10
- Install OS X El Capitan app and Mac or Hack to prepare installation iso
- 16GB or largerexFAT formatted USB stick to transfer El Capitan iso from Mac/Hack to Host PC
Prepare Installation ISO on your Mac or Hack
1. On your Mac or Hack, download "Install OS X El Capitan.app" from the App Store into your Applications folder.
2. Download and unzip the CECI.tool (attached to this post) into your ~/Downloads folder. The commands in this executable script are shown below for informational purposes. Note: you will need approx 16GB of free space on your hard disk for the script to complete.(博主注: CSDN博客不能贴附件,请拷贝粘贴下面的命令,下同)
  #!/bin/bash

 # Mount the Installer image
 hdiutil attach /Applications/Install\ OS\ X\ El\ Capitan.app/Contents/SharedSupport/InstallESD.dmg -noverify -nobrowse -mountpoint /Volumes/install_app

 # Create El Capitan sparseimage of 7316mb with a Single Partition - Apple Partition Map
 hdiutil create -o /tmp/ElCapitan -size 7316m -layout SPUD -fs HFS+J -type SPARSE

 # Mount the El Capitan sparseimage
 hdiutil attach /tmp/ElCapitan.sparseimage -noverify -nobrowse -mountpoint /Volumes/install_build

 # Restore the Base System into the El Capitan Blank sparseimage
 asr restore -source /Volumes/install_app/BaseSystem.dmg -target /Volumes/install_build -noprompt -noverify -erase

 # Remove Packages link and replace with actual files
 rm /Volumes/OS\ X\ Base\ System/System/Installation/Packages
 cp -rp /Volumes/install_app/Packages /Volumes/OS\ X\ Base\ System/System/Installation/

 # Copy El Capitan installer dependencies
 cp -rp /Volumes/install_app/BaseSystem.chunklist /Volumes/OS\ X\ Base\ System/BaseSystem.chunklist
 cp -rp /Volumes/install_app/BaseSystem.dmg /Volumes/OS\ X\ Base\ System/BaseSystem.dmg

 # Unmount the installer image
 hdiutil detach /Volumes/install_app

 # Unmount the Base System image
 hdiutil detach /Volumes/OS\ X\ Base\ System/

 # Optimise Sparseimage Size
 hdiutil compact /tmp/ElCapitan.sparseimage
 hdiutil resize -size min /tmp/ElCapitan.sparseimage

 # Convert the ElCapitan spareseimage to ISO/CD master
  hdiutil convert /tmp/ElCapitan.sparseimage -format UDTO -o /tmp/ElCapitan.iso

 # Rename the ElCapitan ISO image and move it to the desktop
  mv /tmp/ElCapitan.iso.cdr ~/Desktop/'EC 10.11.0.iso'

 # Delete ElCapitan.sparseimage file
  rm -f /tmp/ElCapitan.sparseimage
3. Open OS X terminal, then run the following commands to execute the script:
cd downloads
chmod +x CECI.tool
./CECI.tool
4. At the end of the process, you will have an El Capitan iso on your desktop - copy this onto an exFAT formatted USB for use on the PC Host later.
Create an El Capitan Virtual Machine in VirtualBox
1. Open the VirtualBox program and click the "New" button to create a new VM.
2. Select Mac OS X and Mac OS X 10.11 El Capitan (64 -bit) for Operating System type and version. I named my Virtual Machine "El_Capitan", then clicked next...

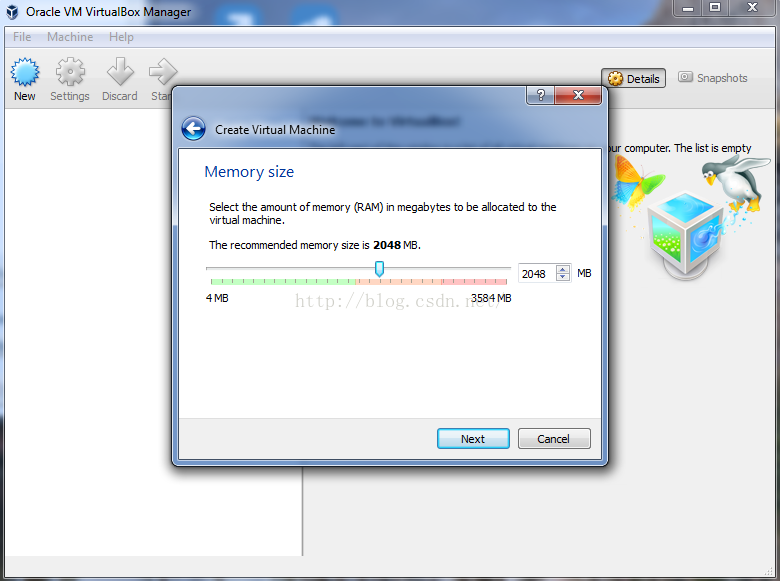
3. Leave the Memory size at the recommended 2048 MB, then click next.
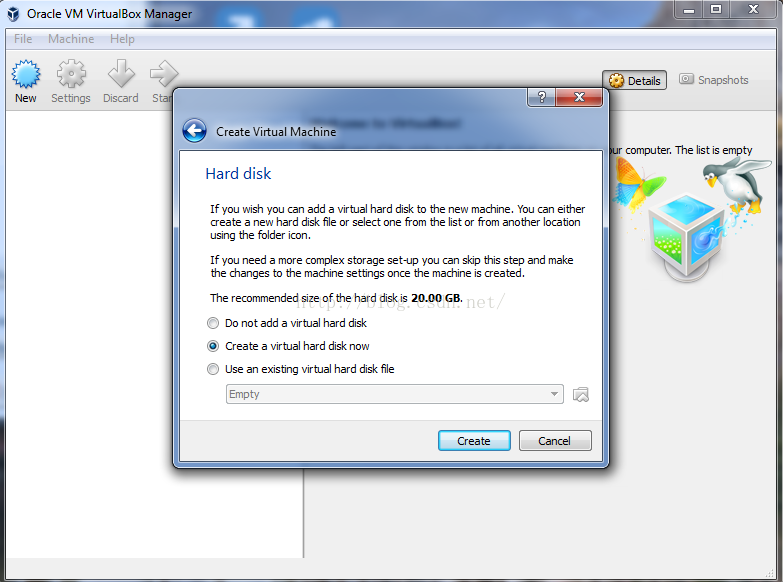
4. Choose to "Create a virtual hard disk now", then click the create button.
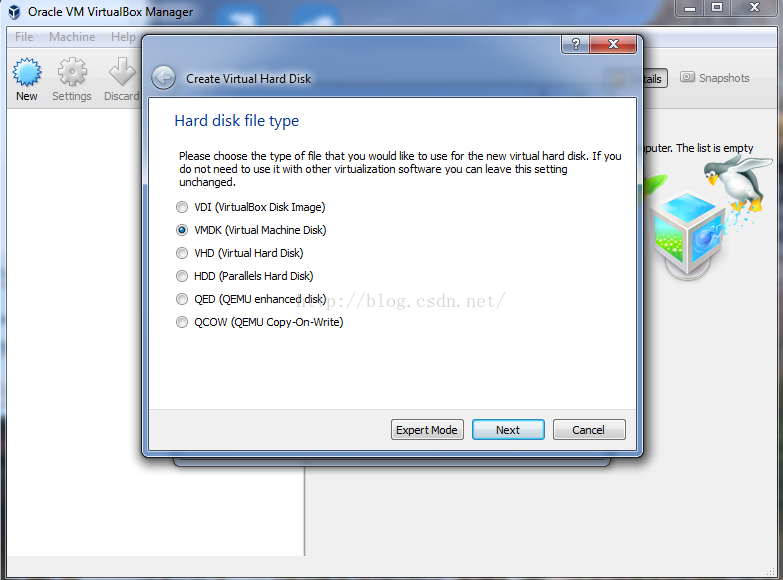
5. For the hard disk file type, the default is VDI (VirtualBox Disk Image) but I have selected VMDK for inter-operability with VMWare. Click next...
6. For Storage on physical hard disk, I have chosen the default Dynamically allocated (grows larger to a set limit as you need more disk space).

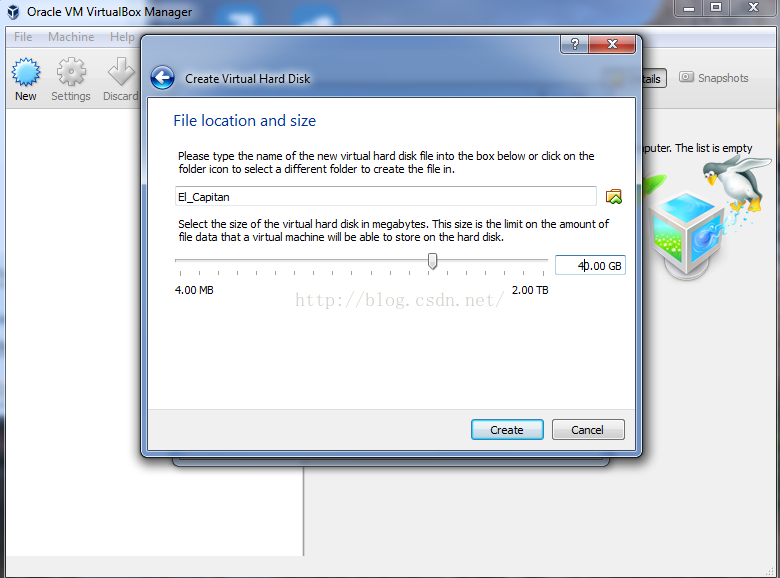
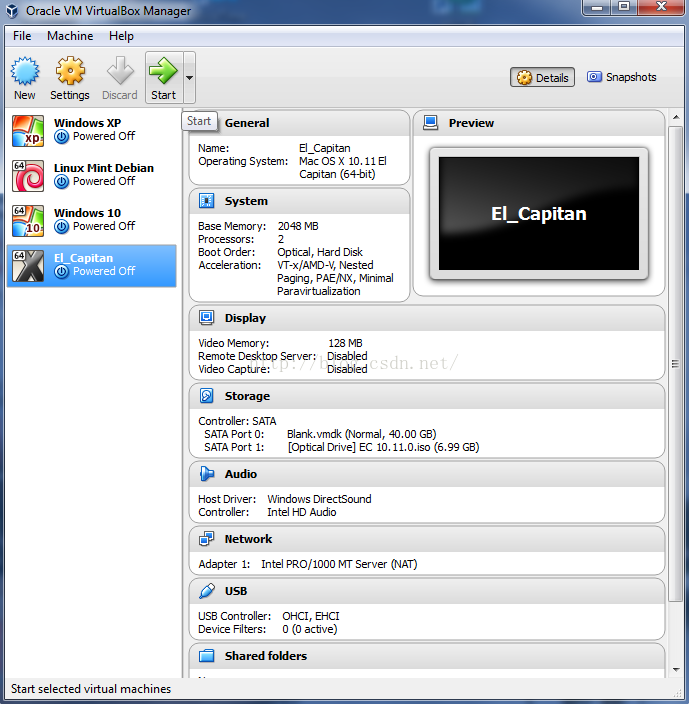
7. On the File location and size screen, you can set the location of the new virtual hard disk and its size - I recommend changing disk size to 40GB or larger. When you click the create button, you will now see your new VM in the VirtualBox main GUI.
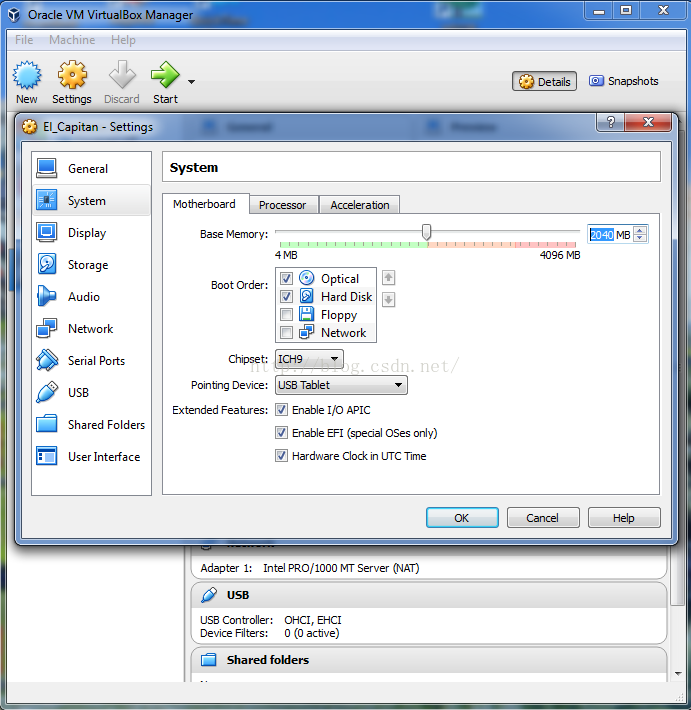
8. Click the settings button on the Main Menu to tweak a few settings....
a. On the System/Motherboard tab in Boot Order, you can uncheck the Floppy Drive (who has these now?)
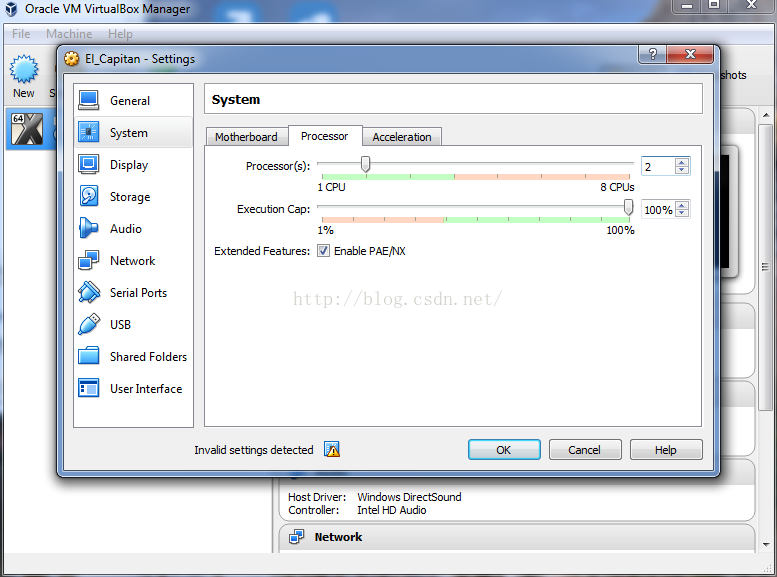
b. On the System/Processor tab, you can increase the allocated CPU cores to 2
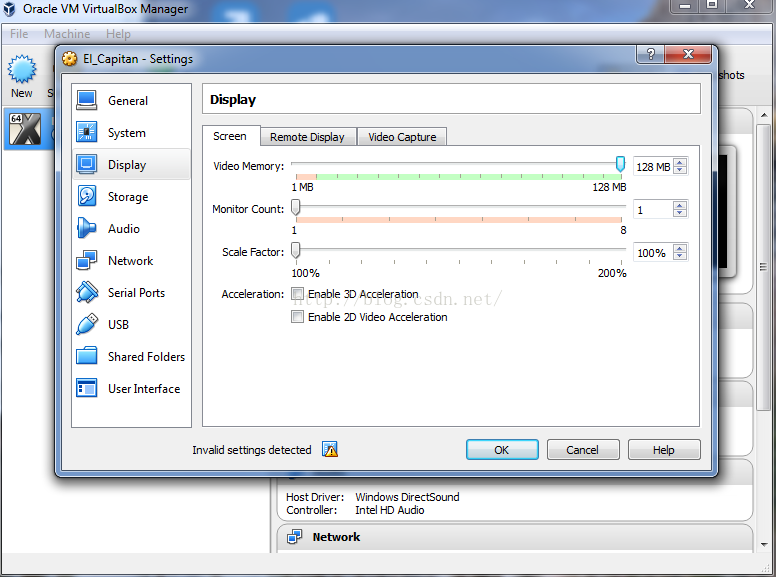
c. On the Display tab, you can increase the allocated Video Memory to 128MB
d. On the Storage tab, click on the icon of the Optical Drive and select "Choose Virtual Optical Disk File".
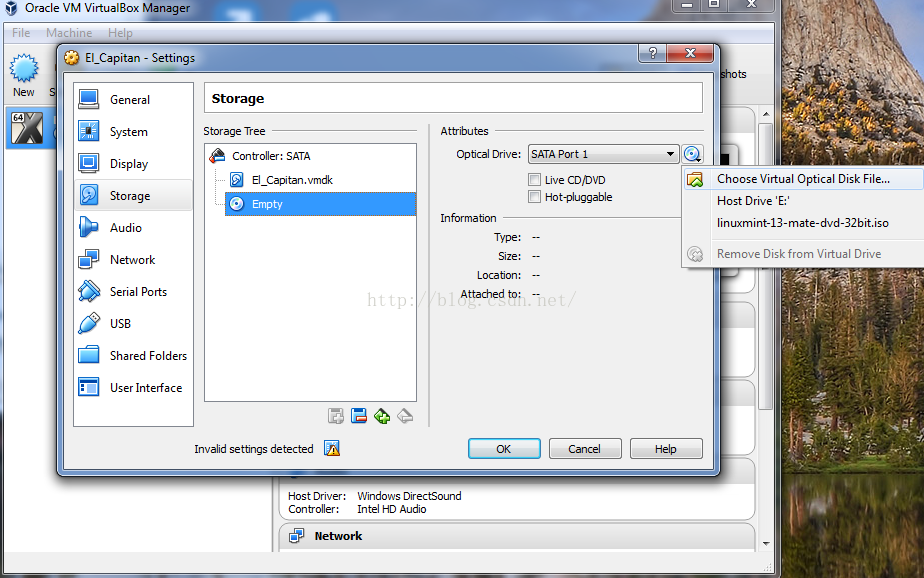
Navigate and select the El Capitan ISO we created earlier...

e. Click the OK button to finalise the VM settings.
Patch El Capitan vbox configuration file with iMac11,3 DMI Settings and Spoofing a Lynnfield i5 750 CPU
1. From the start menu, type cmd and click run as administrator to open an administrative command prompt. Make sure the VirtualBox program is closed.

2. Choose a Mac Model similar to your host system, then type the following lines, followed by <enter> after each line...
Eg iMac11,3
cd "C:\Program Files\Oracle\VirtualBox\"
VBoxManage setextradata "El_Capitan" "VBoxInternal/Devices/efi/0/Config/DmiSystemProduct" "iMac11,3"
VBoxManage setextradata "El_Capitan" "VBoxInternal/Devices/efi/0/Config/DmiSystemVersion" "1.0"
VBoxManage setextradata "El_Capitan" "VBoxInternal/Devices/efi/0/Config/DmiBoardProduct" "Mac-F2238BAE"
VBoxManage setextradata "El_Capitan" "VBoxInternal/Devices/smc/0/Config/DeviceKey" "ourhardworkbythesewordsguardedpleasedontsteal(c)AppleComputerInc"
VBoxManage setextradata "El_Capitan" "VBoxInternal/Devices/smc/0/Config/GetKeyFromRealSMC" 1
MacBookPro11,3
cd "C:\Program Files\Oracle\VirtualBox\"
VBoxManage setextradata "El_Capitan" "VBoxInternal/Devices/efi/0/Config/DmiSystemProduct" "MacBookPro11,3"
VBoxManage setextradata "El_Capitan" "VBoxInternal/Devices/efi/0/Config/DmiSystemVersion" "1.0"
VBoxManage setextradata "El_Capitan" "VBoxInternal/Devices/efi/0/Config/DmiBoardProduct" "Mac-2BD1B31983FE1663"
VBoxManage setextradata "El_Capitan" "VBoxInternal/Devices/smc/0/Config/DeviceKey" "ourhardworkbythesewordsguardedpleasedontsteal(c)AppleComputerInc"
VBoxManage setextradata "El_Capitan" "VBoxInternal/Devices/smc/0/Config/GetKeyFromRealSMC" 1
Macmini6,2
cd "C:\Program Files\Oracle\VirtualBox\"
VBoxManage setextradata "El_Capitan" "VBoxInternal/Devices/efi/0/Config/DmiSystemProduct" "Macmini6,2"
VBoxManage setextradata "El_Capitan" "VBoxInternal/Devices/efi/0/Config/DmiSystemVersion" "1.0"
VBoxManage setextradata "El_Capitan" "VBoxInternal/Devices/efi/0/Config/DmiBoardProduct" "Mac-F65AE981FFA204ED"
VBoxManage setextradata "El_Capitan" "VBoxInternal/Devices/smc/0/Config/DeviceKey" "ourhardworkbythesewordsguardedpleasedontsteal(c)AppleComputerInc"
VBoxManage setextradata "El_Capitan" "VBoxInternal/Devices/smc/0/Config/GetKeyFromRealSMC" 1
3. Optional- For some host systems eg those with Haswell CPUs, you might have to spoof an older CPU to avoid VirtualBox errors. You can try from one of the following if this happens:
To spoof Lynnfield i5 750 CPUVBoxManage.exe modifyvm "El_Capitan" --cpuidset 00000001 000106e5 00100800 0098e3fd bfebfbffTo spoof IvyBridge i7-3770 CPU
VBoxManage.exe modifyvm "El_Capitan" --cpuidset 00000001 000306a9 04100800 7fbae3ff bfebfbff4. Close the command prompt window.
Installation of El Capitan
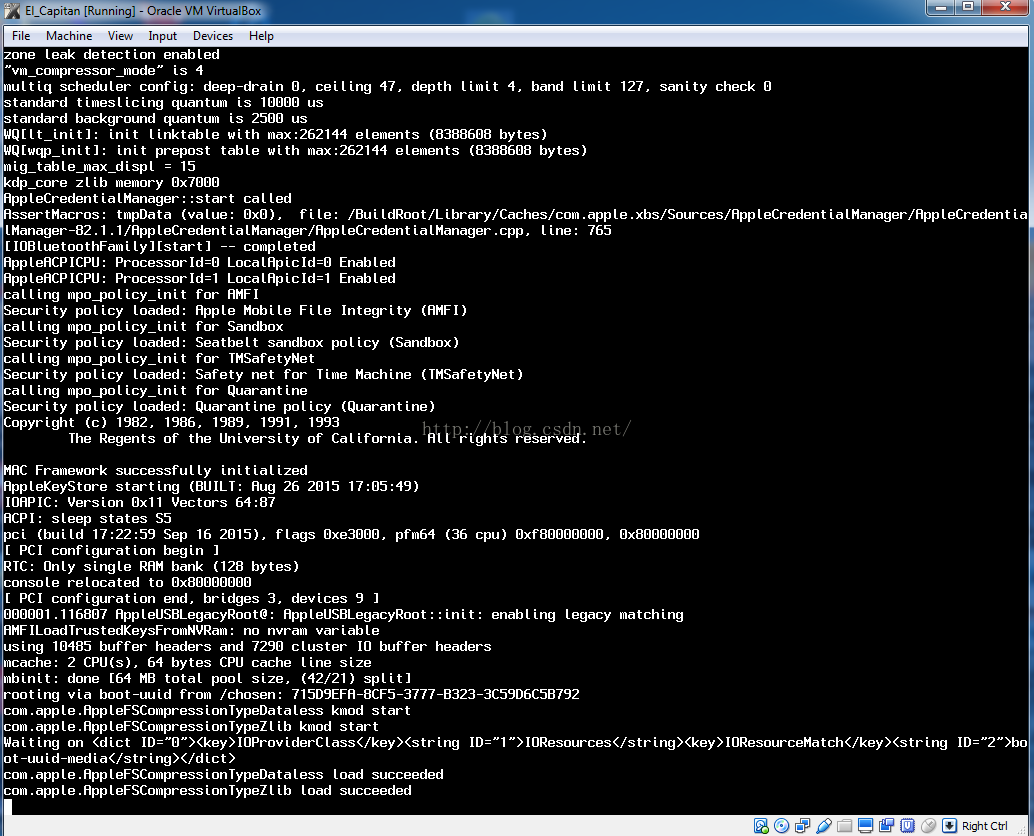
We are now ready to start the El_Capitan Virtual Machine....
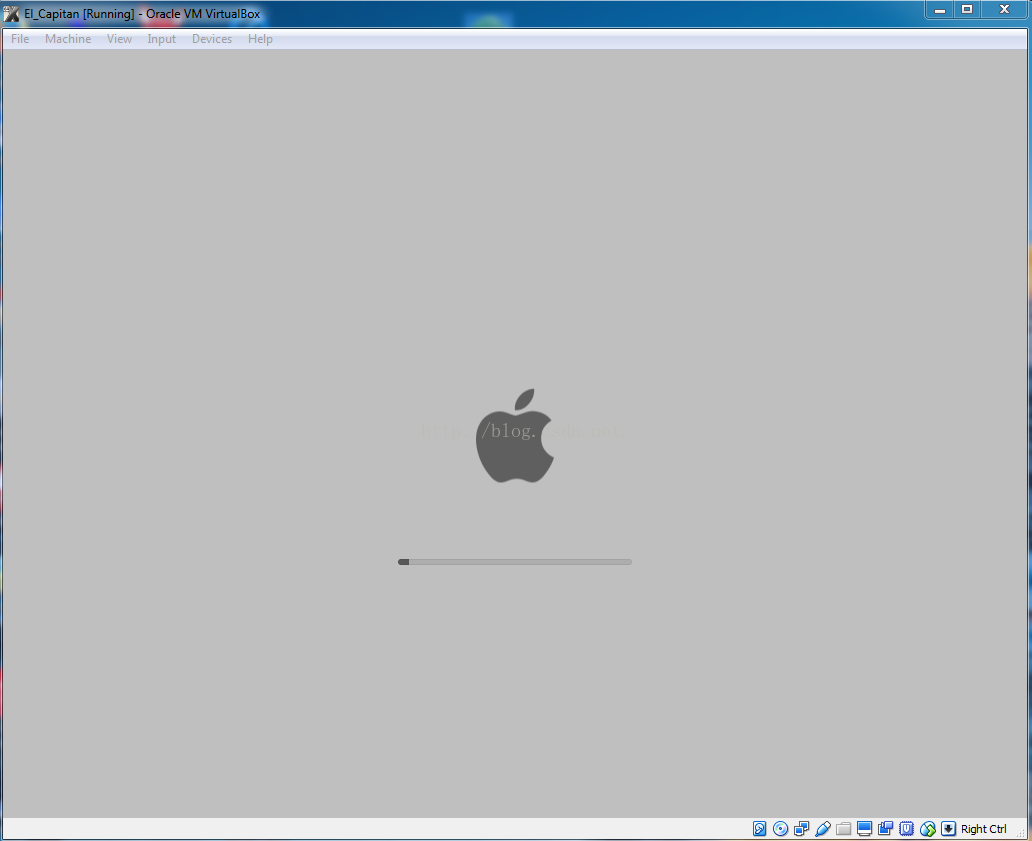
Installation should be relatively straight forward, just following the prompts of the OS X installer:
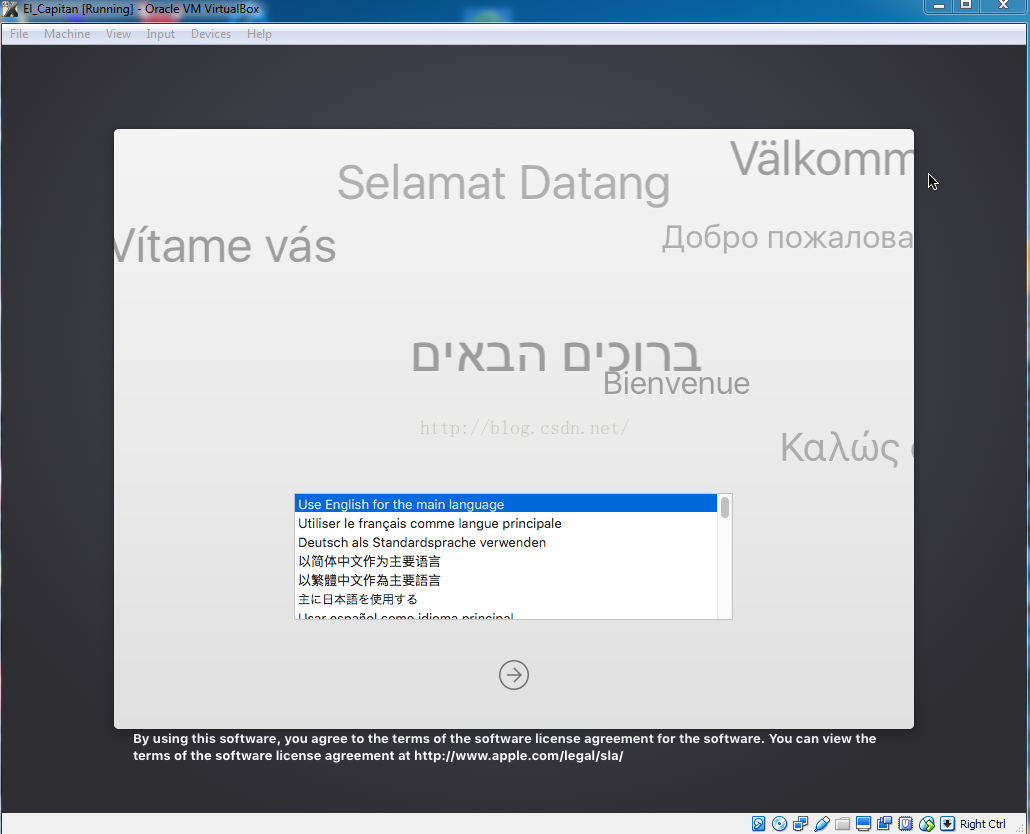
1. Select language, agree to legal terms
2. Use Disk Utility from the Utilities Menu to erase and format the virtual hard drive as a single partition GUID Mac OS X Extended. I named my drive "Macintosh HD" but you can enter whatever you like eg El_Capitan.

3. Quit DU and choose Macintosh HD to install El Capitan on.
4. After 20-30 min (depending on how fast your system is), the installation will complete. At this point, unmount the El Capitan ISO by clicking theDevicesmenu from the VM window, click Optical Drives, then chooseRemove disk from virtual drive. The VM is now ready to reboot into OS X from the virtual hard drive.
5. At the welcome screen, choose your country and keyboard layout. You can skip transfer information, location services and logging in with your Apple ID if you wish…
6. Create a User Account and select your Time Zone. You can skip sending diagnostics and usage data to Apple….
7. Finally, you will arrive at the El Capitan Desktop.

8. Network/internet and audio should work OOB but on my system, the sounds were distorted. Unfortunately, there is no QE/CI and the VM resolution will be fixed without the ability to dynamically resize the VM window (no VirtualBox additions for OS X guests atm).
Customization with VBoxManage
1. You can change the default resolution of 1024*768 (after shutting down the VM) with the VBoxManage command from the Windows Administrative Command Prompt:
cd "C:\Program Files\Oracle\VirtualBox\"
VBoxManage setextradata "El_Capitan" "VBoxInternal2/EfiGopMode" N (Where N can be one of 0,1,2,3,4,5)
referring to the 640x480, 800x600, 1024x768, 1280x1024, 1440x900, 1920x1200 screen resolution respectively.
2. Adding serials and other SMBIOS details for the System Information Screen
VBoxManage setextradata "El_Capitan" "VBoxInternal/Devices/efi/0/Config/DmiSystemSerial" "W8#######B6"
VBoxManage setextradata "El_Capitan" "VBoxInternal/Devices/efi/0/Config/DmiBoardSerial" "W8#########1A"
VBoxManage setextradata "El_Capitan" "VBoxInternal/Devices/efi/0/Config/DmiSystemVendor" "Apple Inc."
VBoxManage setextradata "El_Capitan" "VBoxInternal/Devices/efi/0/Config/DmiSystemFamily" "iMac"
VBoxManage setextradata "El_Capitan" "VBoxInternal/Devices/efi/0/Config/DmiBIOSVersion" "IM112.0057.03B"
A listing of known issues with Mac OS X guests can be found in the VirtualBox Manual - linkhttps://www.virtualb...anual/ch14.html.
Vanilla Mavericks and Yosemite, Snow Leopard from Retail DVD.
The same VM settings for El Capitan will also boot and run vanilla installations of OS X Mavericks and Yosemite . Attached to this post are installer scripts to create bootable Mavericks (CMI.tool) and Yosemite (CYI.tool) ISOs for VirtualBox and VMware.
With the respective OS X installer apps in the Applications folder, download and run the installer tools using terminal ie
To create a Mavericks ISO on your desktop
#!/bin/bash

 # Mount the Installer image
 hdiutil attach /Applications/Install\ OS\ X\ Mavericks.app/Contents/SharedSupport/InstallESD.dmg -noverify -nobrowse -mountpoint /Volumes/install_app

 # Create Mavericks sparseimage of 7316mb with a Single Partition - Apple Partition Map
 hdiutil create -o /tmp/Mavericks -size 7316m -layout SPUD -fs HFS+J -type SPARSE

 # Mount the Mavericks sparseimage
 hdiutil attach /tmp/Mavericks.sparseimage -noverify -nobrowse -mountpoint /Volumes/install_build

 # Restore the Base System into the Mavericks Blank sparseimage
 asr restore -source /Volumes/install_app/BaseSystem.dmg -target /Volumes/install_build -noprompt -noverify -erase

 # Remove Packages link and replace with actual files
 rm /Volumes/OS\ X\ Base\ System/System/Installation/Packages
 cp -rp /Volumes/install_app/Packages /Volumes/OS\ X\ Base\ System/System/Installation/

 # Unmount the installer image
 hdiutil detach /Volumes/install_app

 # Unmount the Base System image
 hdiutil detach /Volumes/OS\ X\ Base\ System/

 # Optimise Sparseimage Size
 hdiutil compact /tmp/Mavericks.sparseimage
 hdiutil resize -size min /tmp/Mavericks.sparseimage

 # Convert the Mavericks spareseimage to ISO/CD master
  hdiutil convert /tmp/Mavericks.sparseimage -format UDTO -o /tmp/Mavericks.iso

 # Rename the Mavericks ISO image and move it to the desktop
  mv /tmp/Mavericks.iso.cdr ~/Desktop/'Mavericks.iso'

 # Delete Mavericks.sparseimage file
  rm -f /tmp/Mavericks.sparseimage
cd downloads
chmod +x CMI.tool
./CMI.toolTo create a Yosemite ISO on your desktop
#!/bin/bash

 # Mount the Installer image
 hdiutil attach /Applications/Install\ OS\ X\ Yosemite.app/Contents/SharedSupport/InstallESD.dmg -noverify -nobrowse -mountpoint /Volumes/install_app

 # Create Yosemite sparseimage of 7316mb with a Single Partition - Apple Partition Map
 hdiutil create -o /tmp/Yosemite -size 7316m -layout SPUD -fs HFS+J -type SPARSE

 # Mount the Yosemite sparseimage
 hdiutil attach /tmp/Yosemite.sparseimage -noverify -nobrowse -mountpoint /Volumes/install_build

 # Restore the Base System into the Yosemite Blank sparseimage
 asr restore -source /Volumes/install_app/BaseSystem.dmg -target /Volumes/install_build -noprompt -noverify -erase

 # Remove Packages link and replace with actual files
 rm /Volumes/OS\ X\ Base\ System/System/Installation/Packages
 cp -rp /Volumes/install_app/Packages /Volumes/OS\ X\ Base\ System/System/Installation/

 # Copy Yosemite installer dependencies
 cp -rp /Volumes/install_app/BaseSystem.chunklist /Volumes/OS\ X\ Base\ System/BaseSystem.chunklist
 cp -rp /Volumes/install_app/BaseSystem.dmg /Volumes/OS\ X\ Base\ System/BaseSystem.dmg

 # Unmount the installer image
 hdiutil detach /Volumes/install_app

 # Unmount the Base System image
 hdiutil detach /Volumes/OS\ X\ Base\ System/

 # Optimise Sparseimage Size
 hdiutil compact /tmp/Yosemite.sparseimage
 hdiutil resize -size min /tmp/Yosemite.sparseimage

 # Convert the Yosemite spareseimage to ISO/CD master
  hdiutil convert /tmp/Yosemite.sparseimage -format UDTO -o /tmp/Yosemite.iso

 # Rename the Yosemite ISO image and move it to the desktop
  mv /tmp/Yosemite.iso.cdr ~/Desktop/'Yosemite.iso'

 # Delete Yosemite.sparseimage file
  rm -f /tmp/Yosemite.sparseimage
cd downloads
chmod +x CYI.tool
./CYI.toolHere is a screenshot of the VM running Mavericks 10.9.5...
 Finally,
those without a Mac/Hack to prepare the install media can purchase a retail Snow Leopard DVD directly from Apple and install OSX 10.6.3 on their virtual machines (Snow Leopard, Lion and Mountain Lion run quite happily in VirtualBox with
1 CPU, 1-2 GB of RAM and the rest of the settings unchanged from above). Once you update by combo update to SL 10.6.8, you can directly download El Capitan from the App Store for free
Finally,
those without a Mac/Hack to prepare the install media can purchase a retail Snow Leopard DVD directly from Apple and install OSX 10.6.3 on their virtual machines (Snow Leopard, Lion and Mountain Lion run quite happily in VirtualBox with
1 CPU, 1-2 GB of RAM and the rest of the settings unchanged from above). Once you update by combo update to SL 10.6.8, you can directly download El Capitan from the App Store for free
 .
.
 Good luck and enjoy
Source: http://www.insanelymac.com/forum/topic/309654-run-vanilla-os-x-el-capitan-yosemite-or-mavericks-in-virtualbox-5010-on-a-windows-host/


 1万+
1万+


 被折叠的 条评论
为什么被折叠?
被折叠的 条评论
为什么被折叠?
 到【灌水乐园】发言


