


描述:
通过struts2实现多图片上传。
我使用的版本是2.2.1,使用的包有如下几个:
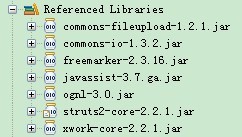
具体实现:
1. 创建上传图片的页面
fileUpload.jsp
- <%@ page language="java" import="java.util.*" pageEncoding="UTF-8"%>
- <%@ taglib prefix="s" uri="/struts-tags" %>
- <%
- String path = request.getContextPath();
- String basePath = request.getScheme()+"://"+request.getServerName()+":"+request.getServerPort()+path+"/";
- %>
- <!DOCTYPE HTML PUBLIC "-//W3C//DTD HTML 4.01 Transitional//EN">
- <html>
- <head>
- <base href="<%=basePath%>">
- <title>My JSP 'fileUpLoad.jsp' starting page</title>
- <meta http-equiv="pragma" content="no-cache">
- <meta http-equiv="cache-control" content="no-cache">
- <meta http-equiv="expires" content="0">
- <meta http-equiv="keywords" content="keyword1,keyword2,keyword3">
- <meta http-equiv="description" content="This is my page">
- <!--
- <link rel="stylesheet" type="text/css" href="styles.css" mce_href="styles.css">
- -->
- </head>
- <body>
- <center>
- <s:form action ="fileUpload" method ="POST" enctype ="multipart/form-data" >
- <s:fielderror />
- <s:file name ="myFile" label ="Image File1"/>
- <s:file name ="myFile" label ="Image File2"/>
- <s:file name ="myFile" label ="Image File3"/>
- <s:textfield name ="caption" label ="Caption" />
- <s:submit/>
- </s:form>
- </center>
- </body>
- </html>
在FileUpload.jsp中,先将表单的提交方式设为POST,然后将enctype设为multipart/form-data,这并没有什么特别之处。接下来,<s:file/>标志将文件上传控件绑定到Action的myFile属性,因为要上传多张图片我们就暂且添加三个file
注意这三个file的name属性要相同。
2. 创建处理图片上传的action
FileUploadAction.java
- package com.ywjava.action;
- import java.io.BufferedInputStream;
- import java.io.BufferedOutputStream;
- import java.io.File;
- import java.io.FileInputStream;
- import java.io.FileOutputStream;
- import java.io.InputStream;
- import java.io.OutputStream;
- import java.util.ArrayList;
- import java.util.Date;
- import java.util.List;
- import org.apache.struts2.ServletActionContext;
- import com.opensymphony.xwork2.ActionSupport;
- public class FileUploadAction extends ActionSupport {
- private static final long serialVersionUID = 572146812454l;
- private static final int BUFFER_SIZE = 16 * 1024;
- private List<File> myFile = new ArrayList<File>();
- private List<String> contentType = new ArrayList<String>();
- private List<String> fileName = new ArrayList<String>(); //文件名
- private List<String> imageFileName = new ArrayList<String>();
- private String caption;
- private static void copy(File src, File dst) {
- try {
- InputStream in = null;
- OutputStream out = null;
- try {
- in = new BufferedInputStream(new FileInputStream(src),
- BUFFER_SIZE);
- out = new BufferedOutputStream(new FileOutputStream(dst),
- BUFFER_SIZE);
- byte[] buffer = new byte[BUFFER_SIZE];
- while (in.read(buffer) > 0) {
- out.write(buffer);
- }
- } finally {
- if (null != in) {
- in.close();
- }
- if (null != out) {
- out.close();
- }
- }
- } catch (Exception e) {
- e.printStackTrace();
- }
- }
- private static String getExtention(String fileName) {
- int pos = fileName.lastIndexOf(".");
- return fileName.substring(pos);
- }
- @Override
- public String execute() {
- if (myFile == null)
- return INPUT;
- for (int i = 0; i < myFile.size(); i++) {
- imageFileName.add(new Date().getTime()+ getExtention(this.getMyFileFileName().get(i))) ;
- File imageFile = new File(ServletActionContext.getServletContext() //得到图片保存的位置(根据root来得到图片保存的路径在tomcat下的该工程里)
- .getRealPath("UploadImages")
- + "/" + imageFileName);
- copy(myFile.get(i), imageFile); //把图片写入到上面设置的路径里
- }
- return SUCCESS;
- }
- public List<File> getMyFile() {
- return myFile;
- }
- public void setMyFile(List<File> myFile) {
- this.myFile = myFile;
- }
- public List<String> getContentType() {
- return contentType;
- }
- public void setContentType(List<String> contentType) {
- this.contentType = contentType;
- }
- public List<String> getMyFileFileName() {
- return fileName;
- }
- public void setMyFileFileName(List<String> fileName) {
- this.fileName = fileName;
- }
- public List<String> getImageFileName() {
- return imageFileName;
- }
- public void setImageFileName(List<String> imageFileName) {
- this.imageFileName = imageFileName;
- }
- public String getCaption() {
- return caption;
- }
- public void setCaption(String caption) {
- this.caption = caption;
- }
- public static int getBufferSize() {
- return BUFFER_SIZE;
- }
- }
在FileUploadAction中我分别写了setMyFileContentType、setMyFileFileName、setMyFile和setCaption四个Setter方法,
后两者很容易明白,分别对应FileUpload.jsp中的<s:file/>和<s:textfield/>标志。但是前两者并没有显式地与任何的页面标志绑定,
那么它们的值又是从何而来的呢?其实,<s:file/>标志不仅仅是绑定到myFile,
还有myFileContentType(上传文件的MIME类型)和myFileFileName(上传文件的文件名,该文件名不包括文件的路径)。
因此,<s:file name="xxx" />对应Action类里面的xxx、xxxContentType和xxxFileName三个属性。
FileUploadAction作用是将浏览器上传的文件拷贝到WEB应用程序的
UploadImages文件夹下,新文件的名称是由系统时间与上传文件的后缀组成,
该名称将被赋给imageFileName属性,以便上传成功的跳转页面使用。
3. 创建显示图片的页面
showUpload.jsp
- <%@ page language="java" import="java.util.*" pageEncoding="UTF-8"%>
- <%@ taglib prefix="s" uri="/struts-tags" %>
- <%
- String path = request.getContextPath();
- String basePath = request.getScheme()+"://"+request.getServerName()+":"+request.getServerPort()+path+"/";
- %>
- <!DOCTYPE HTML PUBLIC "-//W3C//DTD HTML 4.01 Transitional//EN">
- <html>
- <head>
- <base href="<%=basePath%>">
- <title>Show Image</title>
- <meta http-equiv="pragma" content="no-cache">
- <meta http-equiv="cache-control" content="no-cache">
- <meta http-equiv="expires" content="0">
- <meta http-equiv="keywords" content="keyword1,keyword2,keyword3">
- <meta http-equiv="description" content="This is my page">
- <!--
- <link rel="stylesheet" type="text/css" href="styles.css" mce_href="styles.css">
- -->
- </head>
- <body>
- <s:iterator value="imageFileName" status="length">
- <div
- style="padding: 3px; border: solid 1px #cccccc; text-align: center">
- <img src='UploadImages/<s:property value ="imageFileName" /> ' />
- <br />
- <s:property value="caption" />
- </div>
- </s:iterator>
- <s:property value ="caption" />
- </body>
- </html>
4.Action配置文件
Struts.xml
- <?xml version="1.0" encoding="UTF-8" ?>
- <!DOCTYPE struts PUBLIC
- "-//Apache Software Foundation//DTD Struts Configuration 2.0//EN"
- "http://struts.apache.org/dtds/struts-2.0.dtd">
- <struts>
- <constant name="struts.enable.DynamicMethodInvocation" value="false" />
- <constant name="struts.devMode" value="false" />
- <!-- 指定国际化资源文件的baseName为messageResource -->
- <constant name="struts.custom.i18n.resources" value="messageResource" />
- <!-- 设置该应用使用的解码集 -->
- <constant name="struts.i18n.encoding" value="utf-8" />
- <!-- 上传的全部图片的最大限制-->
- <constant name="struts.multipart.maxSize" value="1024102400" />
- <!-- 临时存放文件的路径 -->
- <constant name="struts.multipart.saveDir" value="d:/test" />
- <package name="index" namespace="/" extends="struts-default">
- <action name="index" class="com.ywjava.action.IndexAction">
- <result>
- /WEB-INF/page/fileUpLoad.jsp
- </result>
- </action>
- <action name="fileUpload" class="com.ywjava.action.FileUploadAction">
- <!-- 限制图片的格式和图片的大小 -->
- <interceptor-ref name="fileUpload">
- <param name="allowedTypes">
- image/bmp,image/png,image/gif,image/jpeg,image/pjpeg
- </param>
- </interceptor-ref>
- <!-- 默认的拦截器,必须要写 -->
- <interceptor-ref name="defaultStack" />
- <result name="input"> /WEB-INF/page/fileUpLoad.jsp</result>
- <result name="success">/WEB-INF/page/showUpload.jsp</result>
- </action>
- </package>
- <!--
- <constant name="struts.multipart.saveDir" value="d:/test"></constant>
- -->
- <!-- Add packages here -->
- </struts>
Action配置文件里所做的配置都有注释,不明白的地方看下注释
另外因为做了国际化处理所以需要一个国际化配置的文件
放在src目录下
5.国际化配置文件
messageResource_zh_CN.properties(只配置了中文的)
struts.messages.error.content.type.not.allowed=/u4E0A/u4F20/u7C7B/u578B/u9519/u8BEF
struts.messages.error.file.too.large=/u4E0A/u4F20/u6587/u4EF6/u592A/u5927
总结:struts2上传图片利用了fileUpload拦截器而变的简单,主要是在action中做相应处理获取文件的相应信息。


 640
640

 被折叠的 条评论
为什么被折叠?
被折叠的 条评论
为什么被折叠?
 到【灌水乐园】发言


