


继续前面的学习,这一次我们加入MySQL数据库和JPA。
配置:
pom.xml文件
<!-- 添加Mysql和JPA-->
        <dependency>
        <groupId>org.springframework.boot</groupId>
        <artifactId>spring-boot-starter-data-jpa</artifactId>
        </dependency>
        <dependency>
            <groupId>mysql</groupId>
            <artifactId>mysql-connector-java</artifactId>
        </dependency>
spring.datasource.url = jdbc:mysql://localhost:3306/spring_boot
spring.datasource.username = root
spring.datasource.password = root
spring.datasource.driverClassName = com.mysql.jdbc.Driver


# Specify the DBMS
spring.jpa.database = MYSQL
# Show or not log for each sql query
spring.jpa.show-sql = true
# Hibernate ddl auto (create, create-drop, update)
spring.jpa.hibernate.ddl-auto = update
# Naming strategy
spring.jpa.hibernate.naming-strategy = org.hibernate.cfg.ImprovedNamingStrategy

# stripped before adding them to the entity manager)
spring.jpa.properties.hibernate.dialect = org.hibernate.dialect.MySQL5Dialect
package com.seawater.bean;
import javax.persistence.*;
import javax.validation.constraints.NotNull;
/**
* Created by zhouhs on 2016/12/30.
*/
@Entity
@Table(name = "user")
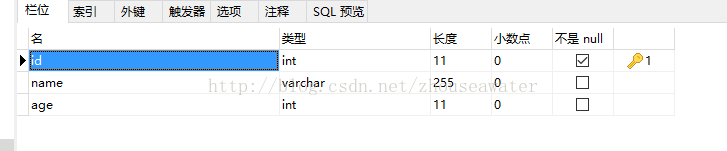
public class User {
@Id
@GeneratedValue(strategy = GenerationType.AUTO)
private Long id;
private String name;
private int age;
public Long getId() {
return id;
}
public void setId(Long id) {
this.id = id;
}
public String getName() {
return name;
}
public void setName(String name) {
this.name = name;
}
public int getAge() {
return age;
}
public void setAge(int age) {
this.age = age;
}
}
package com.seawater.controller;
import com.seawater.Dao.UserDao;
import com.seawater.bean.User;
import io.swagger.annotations.Api;
import io.swagger.annotations.ApiImplicitParam;
import io.swagger.annotations.ApiImplicitParams;
import io.swagger.annotations.ApiOperation;
import org.springframework.web.bind.annotation.RequestMapping;
import org.springframework.web.bind.annotation.RequestMethod;
import org.springframework.web.bind.annotation.RequestParam;
import org.springframework.web.bind.annotation.RestController;
import javax.annotation.Resource;
/**
* Created by zhouhs on 2016/12/30.
*/
@RestController
@RequestMapping(value = "/user")
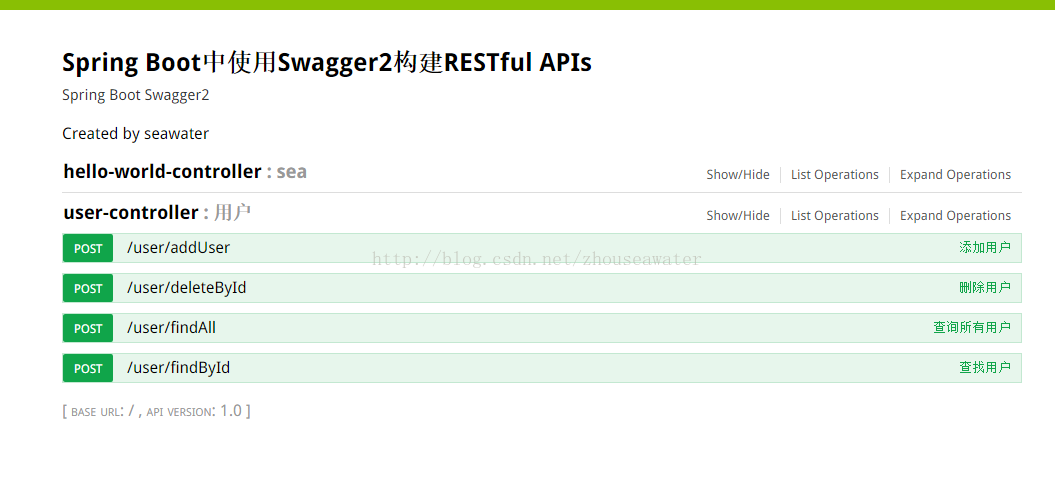
@Api(description = "用户")
public class UserController {
@Resource
UserDao userDAO;
@ApiOperation(value = "添加用户")
@ApiImplicitParams({
@ApiImplicitParam(name = "name" , value = "name" , paramType = "query" , required = true ),
@ApiImplicitParam(name = "age" , value = "age" , paramType = "query" , required = true )
})
@RequestMapping(value = "/addUser" , method = RequestMethod.POST)
public String addUser(@RequestParam(value = "name") String name,@RequestParam(value = "age") int age){
User user = new User();
user.setName(name);
user.setAge(age);
userDAO.save(user);
return "add user success !";
}
@ApiOperation(value = "查找用户")
@ApiImplicitParam(name = "id" , value = "id" , paramType = "query" , required = true , dataType = "int")
@RequestMapping(value = "/findById" , method = RequestMethod.POST)
public String findById(@RequestParam(value = "id") Long id){
User user = userDAO.findById(id);
if(user == null){
return "error";
}else{
return "name:" + user.getName() + " , age:" + user.getAge();
}
}
@ApiOperation(value = "查询所有用户")
@RequestMapping(value = "/findAll" , method = RequestMethod.POST)
public Iterable findAll(){
Iterable<User> userList = userDAO.findAll();
return userList;
}
@ApiOperation(value = "删除用户")
@ApiImplicitParam(name = "id" , value = "id" , paramType = "query" , required = true , dataType = "int")
@RequestMapping(value = "/deleteById" , method = RequestMethod.POST)
public String deleteById(@RequestParam(value = "id") Long id){
userDAO.delete(id);
return "delete success !";
}
}
UserDao:
package com.seawater.Dao;

import com.seawater.bean.User;
import org.springframework.data.repository.CrudRepository;

/**
 * Created by zhouhs on 2016/12/30.
 */
public interface UserDao extends CrudRepository<User, Long> {

    public User findById(Long id);

}
结果:
方法我就不一一操作了。
源码地址(项目中的源码可能会更多哦,需要自己找到对应源码):


 1074
1074


 被折叠的 条评论
为什么被折叠?
被折叠的 条评论
为什么被折叠?
 到【灌水乐园】发言


