


转载请说明原出处,谢谢~·http://blog.csdn.net/zhuhongshu/article/details/39396223
我笔记本使用的是win7系统,开发的duilib程序一直都使用微软雅黑字体,昨天在xp系统下测试时发现由于xp下没有微软雅黑字体而导致duilib使用了默认的宋体字,瞬间感觉界面不协调了。解决这个问题的方法就是让程序自带自己使用的字体,并且在运行时加载这个字体。以前从来没关心过这个问题。
比较简单的方法就是在程序运行时把字体文件拷贝到系统的Fonts目录下,让系统自动安装这个字体,但是这样就会修改系统的文件,这可能并不是用户需要的东西。翻了翻MSDN得知了AddFontResource和CreateScalableFontResource这两个API,使用他们可以让程序加载任意路径的字体而不必拷贝到系统路径。于是写了一个AddFont类来加载一个字体,代码如下:
#pragma once

#ifdef UNICODE
typedef wstring tstring;
#else
typedef string	tstring;
#endif

class CAddFont
{
public:
	CAddFont(void);
	~CAddFont(void);
       /*
        * @param filePath:字体文件相对本程序的路径,不需要加前缀\\,和后缀名
	* @param fontName:字体的名称,如宋体,微软雅黑
        */
	bool AddFont(LPCTSTR szfilePath, LPCTSTR szFontName);

	LPCTSTR GetFontName() const;
private:
	tstring	 m_strFilePath;
	tstring	 m_strFontName;
};
#include "duilib.h"
// duilib.h中已经包含如下头文件
// #include "Windows.h"
// #include "string"
// #include "tchar.h"
// using namespace std;
#include "AddFont.h"


CAddFont::CAddFont(void)
{
	TCHAR szCurrentPath[MAX_PATH] = {0};
	GetCurrentDirectory(MAX_PATH, szCurrentPath);
	m_strFilePath = szCurrentPath;
	m_strFilePath += _T("\\");
}


CAddFont::~CAddFont(void)
{
	wstring strFont = m_strFilePath;
	wstring strFontPath = m_strFilePath;
	strFont += _T(".FOT");
	strFontPath +=  _T(".TTF");

	RemoveFontResource(strFontPath.c_str());
	DeleteFile(strFont.c_str());
}

bool CAddFont::AddFont(LPCTSTR szfilePath, LPCTSTR szFontName)
{
	m_strFilePath += szfilePath;

	wstring strFont = m_strFilePath;
	wstring strFontPath = m_strFilePath;
	strFont += _T(".FOT");
	strFontPath +=  _T(".TTF");

	BOOL bResult = CreateScalableFontResource(0,  strFont.c_str(),  strFontPath.c_str(),  NULL);
	if (bResult == FALSE)
	{
		DUI__Trace(_T("错误码为:%d"), GetLastError()); //这里使用了duilib自带的调试函数
		::MessageBox(NULL, _T("失败"), _T("提示"), 0);  //实际使用时建议注释此行代码
		return false;
	}

	int nResult = AddFontResource(strFontPath.c_str());
	if (nResult == 0)
	{
		::MessageBox(NULL, _T("失败"), _T("提示2"), 0);  //实际使用时建议注释此行代码
		return false;
	}

	::SendMessage(HWND_BROADCAST,WM_FONTCHANGE,0,0);
	m_strFontName = szFontName;

	return true;
}

LPCTSTR CAddFont::GetFontName() const
{
	return m_strFontName.c_str();
}
使用起来很简单,声明一个CAddFont变量。然后调用AddFont方法就可以了(需要注意的就是,应该在窗体创建之前就调用这个方法,因为窗体的创建过程中就会去解析xml并且创建字体对象,如果在窗体创建之后再调用,就已经迟了)
CAddFont addFont;
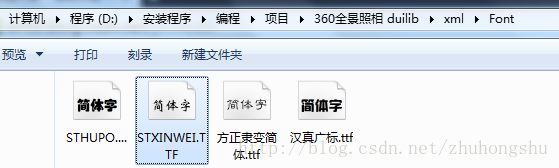
同时把”华文新魏“字体文件“STXINWEI.ttf"放到了Font目录里,然后在_tWinMain里加入这行代码就可以了。
addFont.AddFont(_T("Font\\STXINWEI"), _T("华文新魏"));这时就可以直接在编写xml文件时使用这个字体了,效果如下:

总结:
我这里只是简单随手的封装了一个CAddFont类来做可行性测试,实际这个类的代码写的并不好,读者可以封装一个更好的,支持添加并管理多个字体。实际还有两个更好的API叫AddFontResourceEx和AddFontMemResourceEx,以后有机会再写。如果代码有错误,请联系我
Redrain QQ:491646717 2014.9.19


 3206
3206


 被折叠的 条评论
为什么被折叠?
被折叠的 条评论
为什么被折叠?
 到【灌水乐园】发言


