


今天整合了一些资源,做了一个Nginx+Tomcat+Redis的案例,使部署的web项目能够承载较大的访问压力,Nginx实现负载均衡,并使用Redis实现session共享;
如下拓扑图:
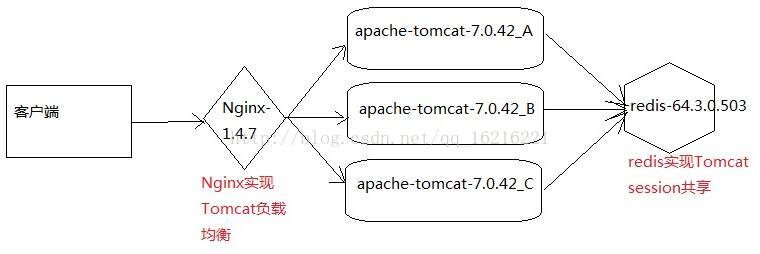
各版本如图所示
========================================
开启项目说明:
操作系统:win7_64
反向代理:Nginx_1.4.7
Tomcat:apache-tomcat-7.0.42
复制三份:
apache-tomcat-7.0.42_A;
apache-tomcat-7.0.42_B;
apache-tomcat-7.0.42_C
Redis:redis-64.3.0.503
JDK:1.8
重要:
Redis实现session共享时,需要的三个重要jar包:
tomcat-redis-session-manager1.2.jar
commons-pool2-2.2.jar
jedis-2.6.1.jar
==========================================
步骤一:
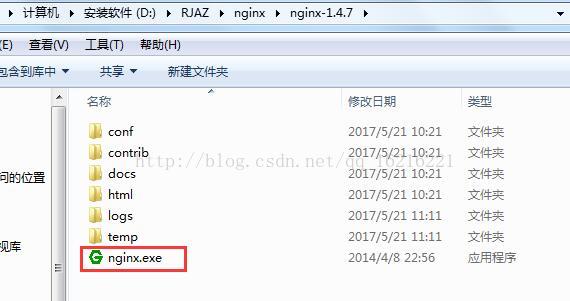
安装Nginx:
我使用的Nginx为绿色版本,双击即可开启
(命令启动,重新加载等请参考:http://blog.csdn.net/qq_16216221/article/details/72597388)
修改 nginx.conf 配置文件,多个Tomcat服务器都是在这里配置:
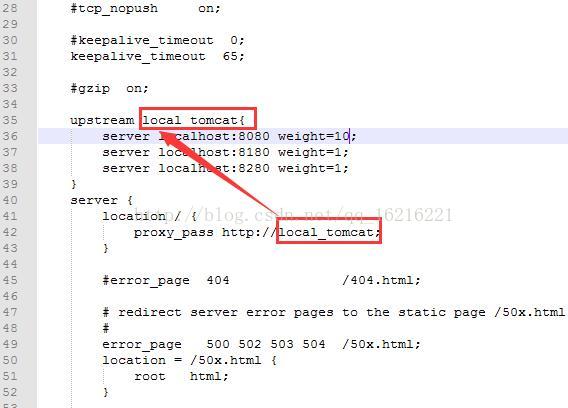
upstream中的localhost前面不能加:http://, location中proxy_pass里的:http:// 不能省略
weight为访问权重,数值越高,访问的机会也越高。
以上Nginx配置只是简单配置,请根据自己的项目情况,做详细配置。
步骤二:
部署Tomcat服务器:
apache-tomcat-7.0.42_A;
apache-tomcat-7.0.42_B;
apache-tomcat-7.0.42_C
1:apache-tomcat-7.0.42_A 部署:
server.xml注意三个地方,本服务器使用默认配置:
<Server port="8005" shutdown="SHUTDOWN">
<Connector port="8080" protocol="HTTP/1.1"
connectionTimeout="20000"
redirectPort="8443" />
<Connector port="8009" protocol="AJP/1.3" redirectPort="8443" />
context.xml添加session共享的配置,去注释,全贴出来,方便观看和黏贴:
其中的password="123456"是redis的访问密码,很多帖子都没有提到,让我耽误很多时间,怎么设置redis的访问密码呢?请继续往下看。。。
当然,访问路径和端口号也需要配置正确。
-
<?xml version='1.0' encoding='utf-8'?> -
<Context> -
<WatchedResource>WEB-INF/web.xml</WatchedResource> -
<!-- tomcat-redis-session共享配置 --> -
<Valve className="com.orangefunction.tomcat.redissessions.RedisSessionHandlerValve" /> -
<Manager className="com.orangefunction.tomcat.redissessions.RedisSessionManager" -
host="localhost" -
port="6379" -
password="123456" -
database="0" -
maxInactiveInterval="60" /> -
</Context>
2:apache-tomcat-7.0.42_B 部署:
server.xml修改三个地方的端口号:
<Server port="8105" shutdown="SHUTDOWN">
<Connector port="8180" protocol="HTTP/1.1"
connectionTimeout="20000"
redirectPort="8443" />
<Connector port="8109" protocol="AJP/1.3" redirectPort="8443" />
context.xml添加session共享的配置同apache-tomcat-7.0.42_A服务器的配置:
3:apache-tomcat-7.0.42_C 部署:
server.xml修改三个地方的端口号:
<Server port="8205" shutdown="SHUTDOWN">
<Connector port="8280" protocol="HTTP/1.1"
connectionTimeout="20000"
redirectPort="8443" />
<Connector port="8209" protocol="AJP/1.3" redirectPort="8443" />
context.xml添加session共享的配置同apache-tomcat-7.0.42_A服务器的配置:
步骤三:
部署测试web项目,编写首页测试代码:index.jsp
apache-tomcat-7.0.42_A服务器中web项目的代码:
相信大家都能明白代码中意思,第一次访问,不管是访问哪一个Tomcat,都会输出:new session:AAA111
刷新请求,理论上就应该输出:old session:AAA111,如果不是,那就是你的会话不是一个session。
为了有所区分,能够知道我们访问了哪一台服务器,我们添加标注信息。当然,保存和访问的session信息是一致的。
-
<body> -
<% -
HttpSession mySession = request.getSession(false); -
if(mySession.getAttribute("appname") == null){ -
mySession = request.getSession(true); -
mySession.setAttribute("appname", "AAA111"); -
out.println("new session:"+mySession.getAttribute("appname")); -
}else{ -
out.println("old session:"+mySession.getAttribute("appname")); -
} -
%> -
<br> -
AAAAAAAAAAAAAAAAAAAAAAAAAAAAAA标注是:A tomcat<br> -
</body>
apache-tomcat-7.0.42_B服务器中web项目的代码:
-
<body> -
<% -
HttpSession mySession = request.getSession(false); -
if(mySession.getAttribute("appname") == null){ -
mySession = request.getSession(true); -
mySession.setAttribute("appname", "AAA111"); -
out.println("new session:"+mySession.getAttribute("appname")); -
}else{ -
out.println("old session:"+mySession.getAttribute("appname")); -
} -
%> -
<br> -
BBBBBBBBBBBBBBBBBBBBBBBBBBBBBBB标注是:B tomcat<br> -
</body>
apache-tomcat-7.0.42_C服务器中web项目的代码:
-
<body> -
<% -
HttpSession mySession = request.getSession(false); -
if(mySession.getAttribute("appname") == null){ -
mySession = request.getSession(true); -
mySession.setAttribute("appname", "AAA111"); -
out.println("new session:"+mySession.getAttribute("appname")); -
}else{ -
out.println("old session:"+mySession.getAttribute("appname")); -
} -
%> -
<br> -
CCCCCCCCCCCCCCCCCCCCCCCCCCCCCCCCCCC标注是:C tomcat <br> -
</body>
将web项目打成war包,放到tomcat的webapps目录下即可。
步骤四:
redis安装和配置:
下载:redis-64.3.0.503版本的解压包,我的是绿色版,解压即可用,如下所示:
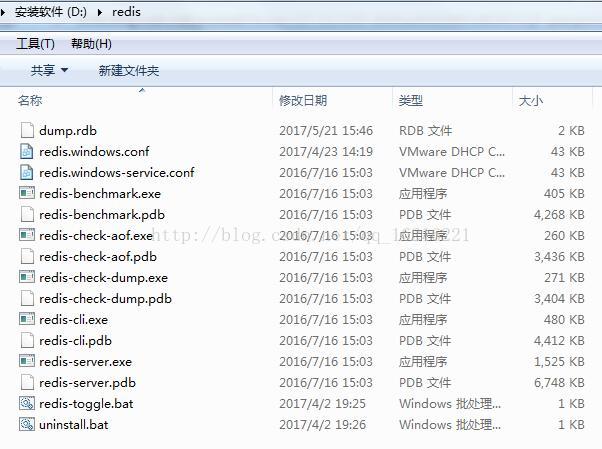
修改redis.windows.conf配置文件:
添加访问密码:行前不能有空格,否则报错。
-
# requirepass foobared -
requirepass 123456
启动Redis即可,session的保存不需要我们处理。
ok,准备工作到此结束,下面就是见证奇迹的时刻:
启动Nginx,三个tomcat,redis
阿弥陀佛保佑。。。
打开浏览器:输入:http://localhost/TestDemo/;localhost 访问的是我们的Nginx,它会随机分配到具体的tomcat上 ;TestDemo为我的web项目名称。
第一次访问:Nginx为我分配到apache-tomcat-7.0.42_C服务器,并输出:new ...,说明之前没有这个session,创建后并输出。

再刷新几次浏览器,看效果:
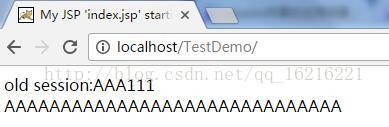
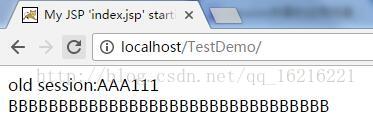
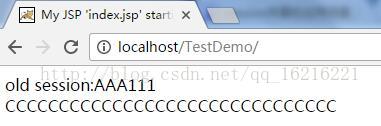
效果大家也看到了,这就是负载均衡和session共享。
涉及到的资源统一放到,欢迎下载:
稍后会贴出连接
==============完==================


 9465
9465


 被折叠的 条评论
为什么被折叠?
被折叠的 条评论
为什么被折叠?
 到【灌水乐园】发言


