


一:如何在官网下载Spring需要的依赖包
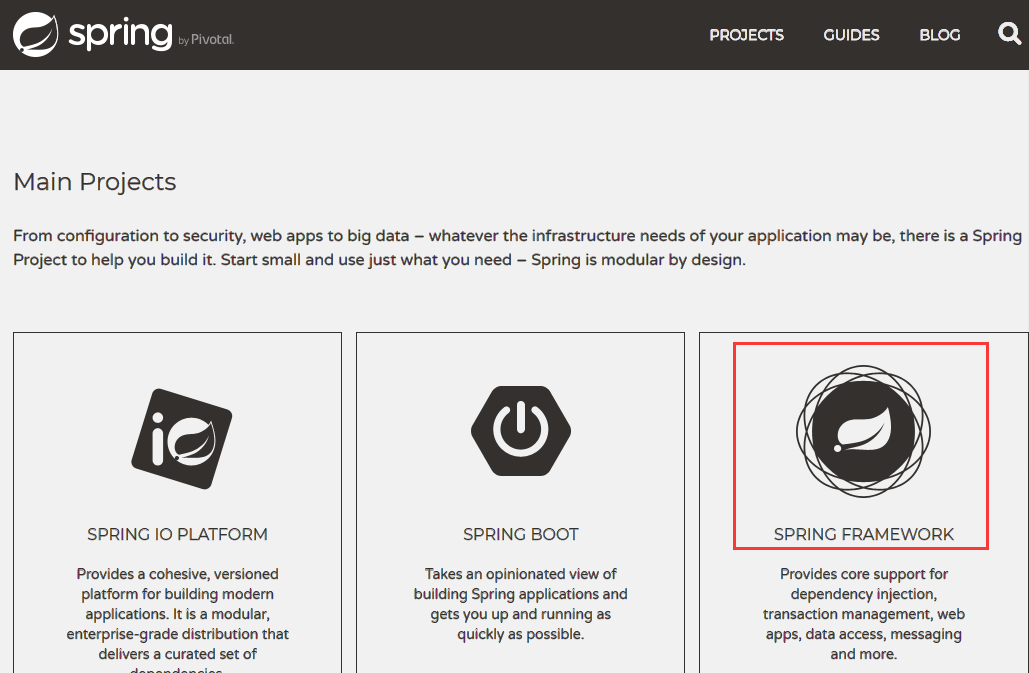
1:打开Spring官网,https://spring.io/,然后点击projects

2:找到Spring framework ,点击进去
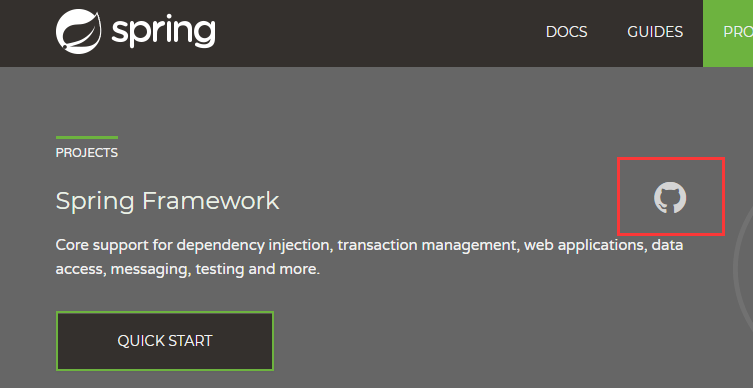
3:找到github点击,改版之后是由github托管的
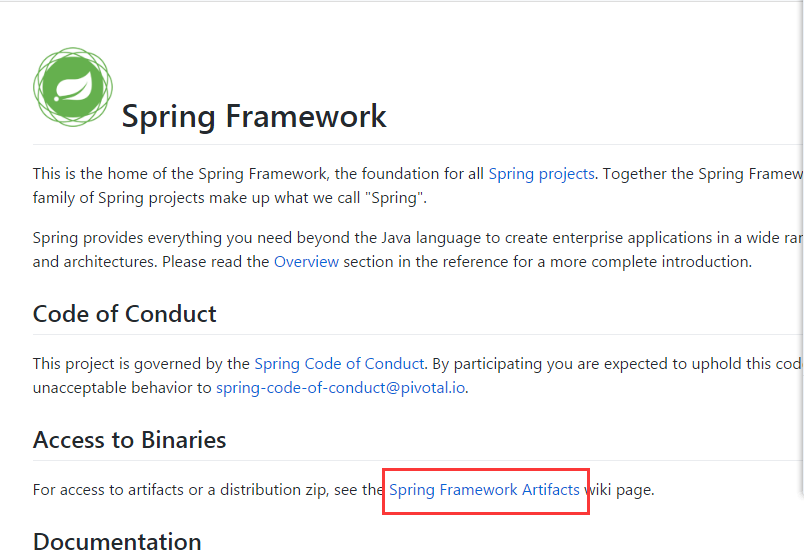
4:往下拉,找到Spring Framework Artifacts模块,点击进去
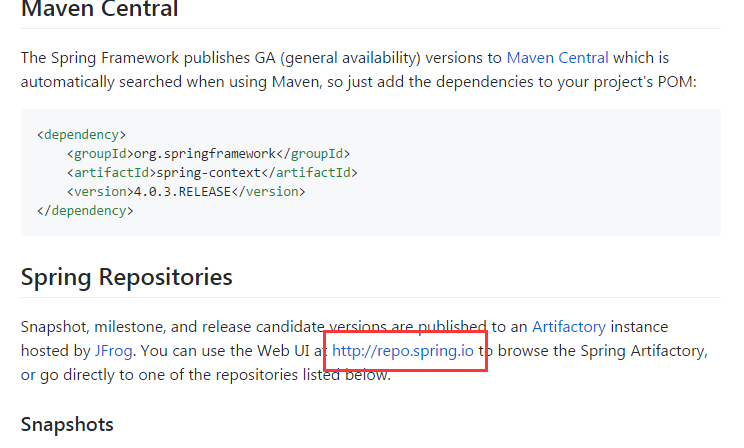
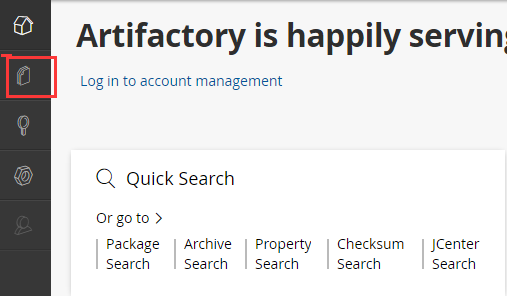
5:往下拉,找到http://repo.spring.io模块,点击进去
6:在该页面的左侧,找到标签artifacts,点击如图
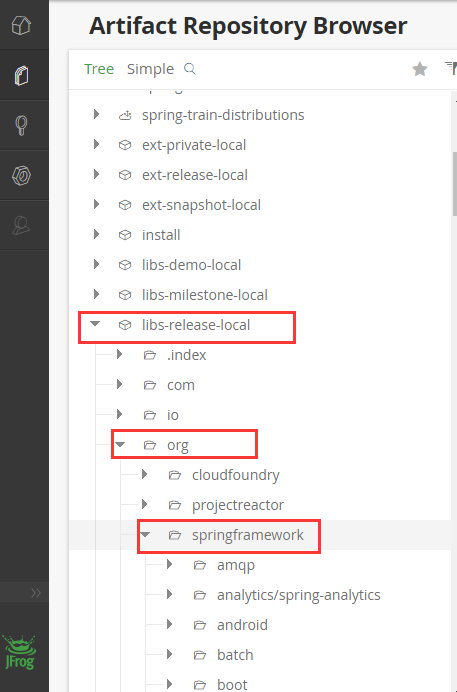
7:继续在该页面的左侧,找到libs-release-local,选择org,选择springframeworker,在选择spring,就能看到相关版本
8:找到需要的版本,展开选择dist.zip文件,选择下载按钮就ok啦

也可以直接通过该链接下载 http://repo.spring.io/release/org/springframework/spring/
二:依赖包包准备好了之后,配置第一个Spring HelloWorld
1:在Window->Preferences->Java->Build Path->User Libraries->New添加一个用户包的库,这里这么做的原因是Spring包比较多,我们这样做,配置一次后,以后每个工程要用直接添加该库就行了
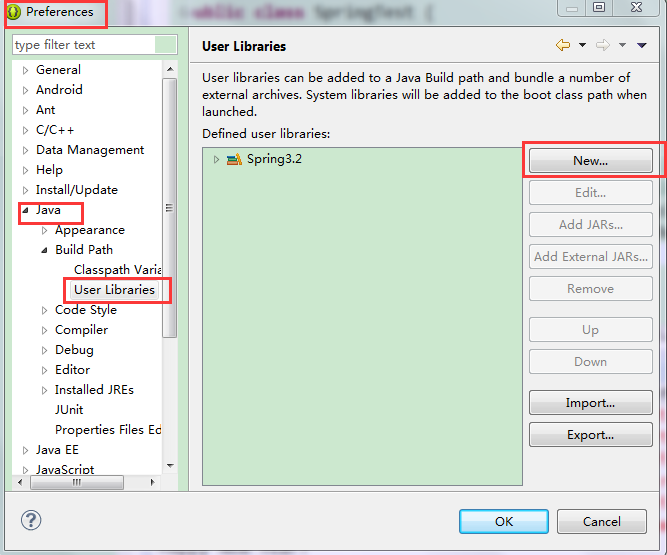
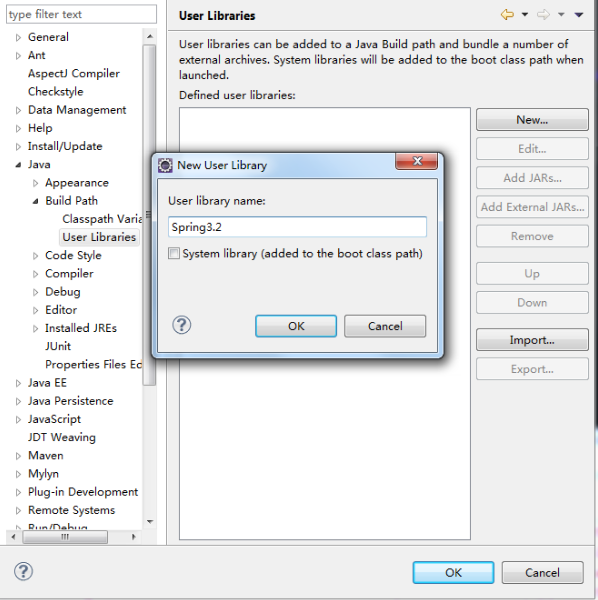
命名为Spring3.2,点击OK
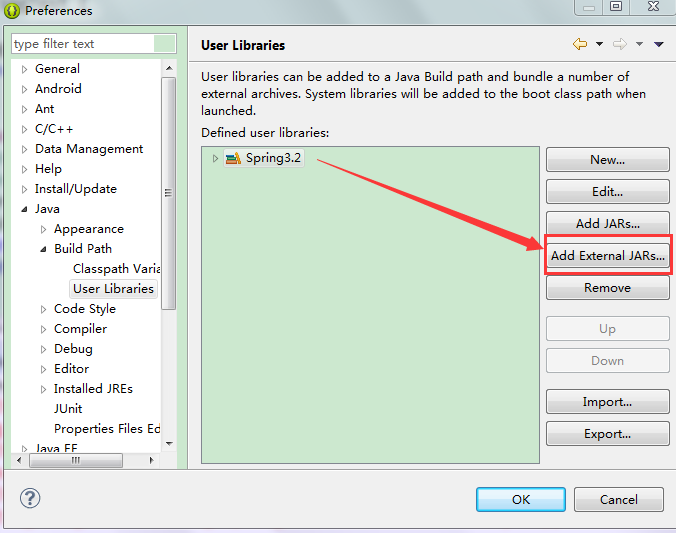
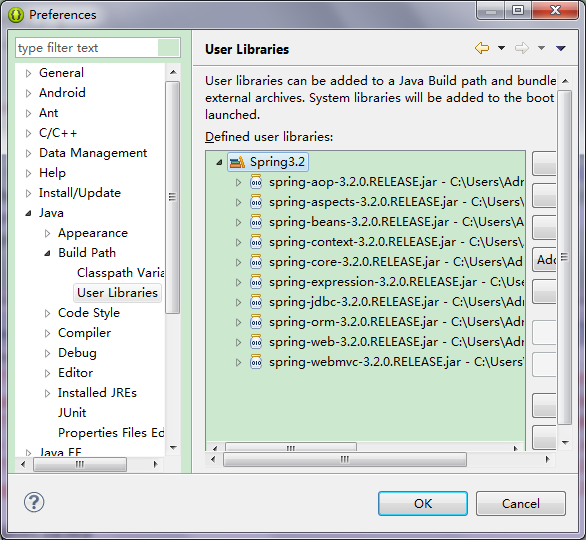
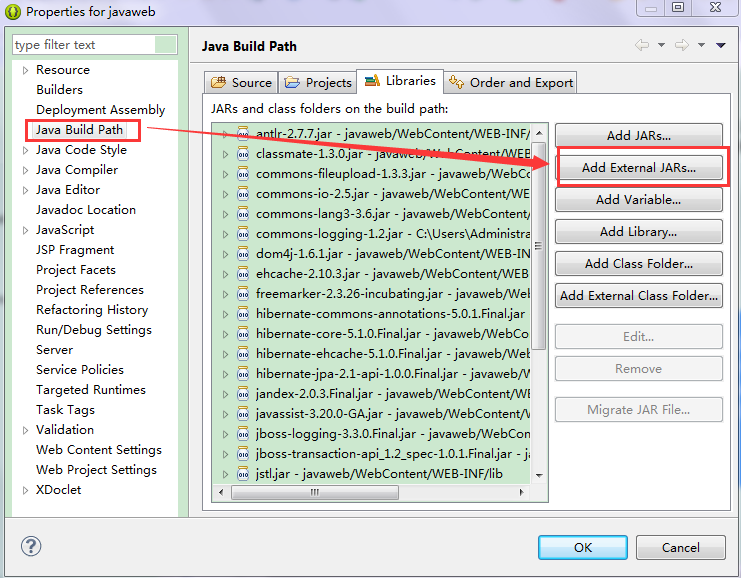
点击Add External JARS.在跳出的窗口中选择Spring libs的包所在的位置(看你的解压位置),把用到的JAR都添加进来,添加成功后如图:
2:添加到工程中来:选择新建的工程-》Properties->Java Build Path->Add library
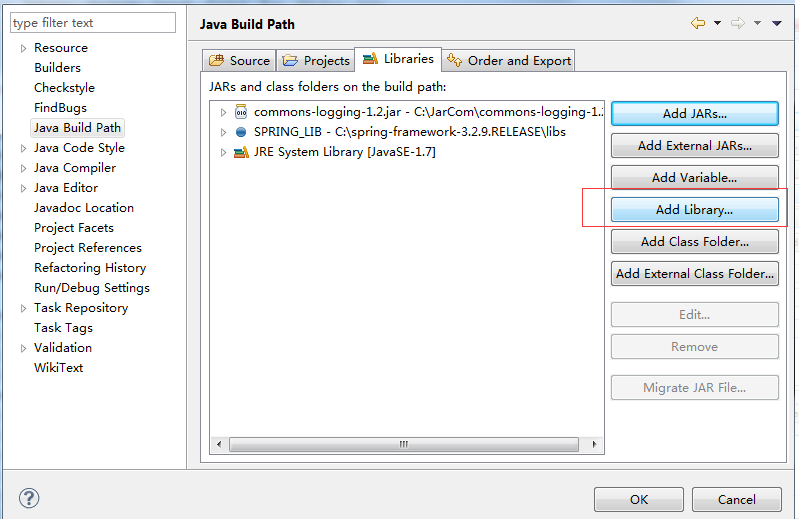
在跳出的窗口中选择User Library

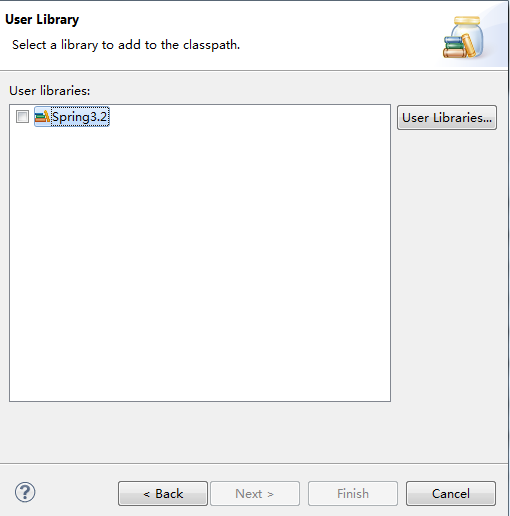
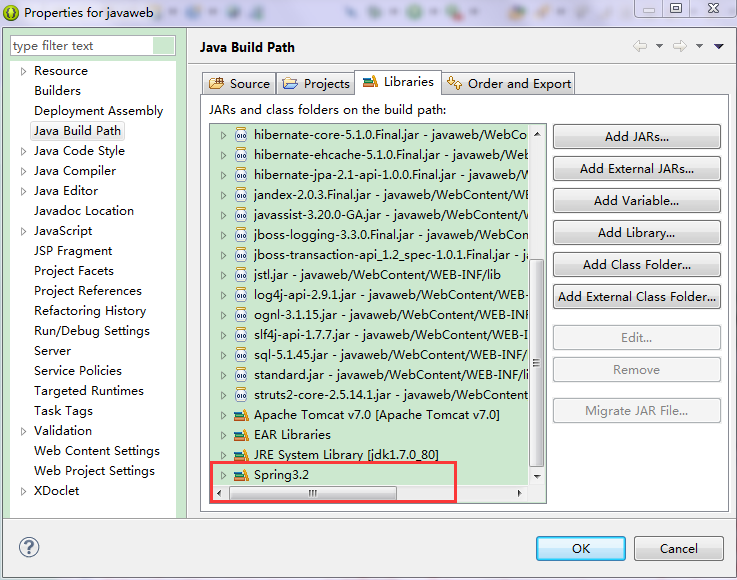
然后又会跳出一个窗口,这时就可以选择我们之前配置的用户库的包Spring3.2了,把沟打上
添加成功
三:开始Spring HelloWorld编程
1:在建立一个HelloWorld.java
package com.spring;

public class HelloWorld {
    private String info;

    public String getInfo() {
        return info;
    }

    public void setInfo(String info) {
        this.info = info;
    }
}
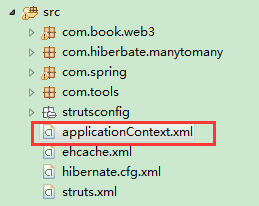
2:在src根目录下直接创建xml文件,命名为applicationContext.xml,编写该配置文件
<?xml version="1.0" encoding="UTF-8"?>
<beans
    xmlns="http://www.springframework.org/schema/beans"
    xmlns:xsi="http://www.w3.org/2001/XMLSchema-instance"
    xmlns:p="http://www.springframework.org/schema/p"
    xsi:schemaLocation="http://www.springframework.org/schema/beans http://www.springframework.org/schema/beans/spring-beans-3.0.xsd">
    <!-- 配置需要被Spring管理的Bean(创建,创建后放在了Spring IOC容器里面)-->
    <bean id="hello" class="com.spring.HelloWorld">
        <!-- 配置该Bean需要注入的属性(是通过属性set方法来注入的) -->
        <property name="info" value="Happy New Year!"/>
    </bean>
</beans>
3:在入口java类中测试函数
public static void main(String[] args) {
		//获取Spring的ApplicationContext配置文件,注入IOC容器中
        //(Map: key:String, bean标签的id属性值 ==>value:Object, bean标签class属性所指类的实例)
        BeanFactory factory = new ClassPathXmlApplicationContext("applicationContext.xml");
        HelloWorld hw1 = (HelloWorld)factory.getBean("hello");//map.get("hello")
        System.out.println(hw1.getInfo());
        System.out.println(hw1);

     }
然后运行,发现会报如下错误:
Exception in thread "main" java.lang.NoClassDefFoundError: org/apache/commons/logging/LogFactory
	at org.springframework.context.support.AbstractApplicationContext.<init>(AbstractApplicationContext.java:164)
	at org.springframework.context.support.AbstractRefreshableApplicationContext.<init>(AbstractRefreshableApplicationContext.java:90)
	at org.springframework.context.support.AbstractRefreshableConfigApplicationContext.<init>(AbstractRefreshableConfigApplicationContext.java:59)
	at org.springframework.context.support.AbstractXmlApplicationContext.<init>(AbstractXmlApplicationContext.java:61)
	at org.springframework.context.support.ClassPathXmlApplicationContext.<init>(ClassPathXmlApplicationContext.java:136)
	at org.springframework.context.support.ClassPathXmlApplicationContext.<init>(ClassPathXmlApplicationContext.java:83)
	at com.spring.SpringTest.main(SpringTest.java:15)
Caused by: java.lang.ClassNotFoundException: org.apache.commons.logging.LogFactory
	at java.net.URLClassLoader$1.run(URLClassLoader.java:366)
	at java.net.URLClassLoader$1.run(URLClassLoader.java:355)
	at java.security.AccessController.doPrivileged(Native Method)
	at java.net.URLClassLoader.findClass(URLClassLoader.java:354)
	at java.lang.ClassLoader.loadClass(ClassLoader.java:425)
	at sun.misc.Launcher$AppClassLoader.loadClass(Launcher.java:308)
	at java.lang.ClassLoader.loadClass(ClassLoader.java:358)
	... 7 more
该错误是由于没有添加commons-logging依赖包
四:添加 commons-logging依赖包
选择工程-》Properties->Java Build Path->Add library
然后选择commons-logging所在的包就可以了
commons-logging包的下载地址为:http://commons.apache.org/proper/commons-logging/download_logging.cgi
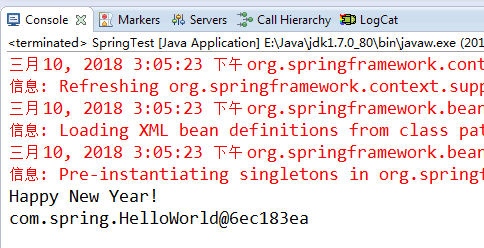
重新运行就ok啦,控制台显示结果为


 被折叠的 条评论
为什么被折叠?
被折叠的 条评论
为什么被折叠?
 到【灌水乐园】发言


