


经过前几篇博客的介绍,我们已经学会了如何使用hexo,如何进行静态网站的生成和部署hexo d -g,下面本节将会带领大家学习一下hexo博客的一些基础信息的设置和博客美化。
1.设置网站的基本信息
在根目录下的_config.xml中修改。(注意区别于themes下主题的_config.xml文件)
| 参数 | 描述 |
|---|---|
| title | 网站标题 |
| subtitle | 网站副标题 |
| description | 网站描述 |
| author | 作者名 |
| language | 网站语言 |
| timezone | 网站使用的时区 |
| url | 网站url,如果您的网站是放于二级目录,类似于www.iots.vip/blog, 则请将URL设置为https://www.iots.vip/blog 同时root设置为/blog/ |
| root | 网站根目录 |
前3个参数主要用于SEO优化。 这里将我的hexo博客 的这部分配置信息列出如下,各位朋友可以参照本博客来修改:
#配置文件中注释符号为'#',这里为了方便查看,使用'//'做注释,实际中,请使用'#'注释,望悉知。
# Site
title: CallMejacky's blog
subtitle: Maker & Developer
description: This is a blog in order to record my learning and growth.
author: CallMeJacky
language: zh-Hans                	//中文,汉字
timezone: Asia/Beijing            	//时区:亚洲,北京
url: https://www.iots.vip
root: /
2.设置yilia主题配置信息
2.1 设置站点缩略图
yilia主题中,需要指定favicon图标,即站点缩略图标。设置步骤如下:
favicon: img/favicon.ico
- 找到hexo下的themes->yilia->_config.yml文件,找到下面的条目,并修改;
- 制作32*32大小的ico缩略图,这里推荐一个在线网站;
- 将制作好的ico图片复制到yilia主题文件夹的source文件夹中的img文件夹;
- 重新生成和部署:
hexo d -g。
这里需要注意的是,由于浏览器会默认缓存静态的内容,对于hexo生成的静态网站,尤其严重,手动清理往往也无法清理干净,这里笔者推荐使用强制刷新ctrl+f5。
2.2 设置个人头像
#你的头像url
avatar: /img/user_img.jpg
2.3 设置显示目录
增加文章目录 TOC(table of content ),方便阅读文章, 在 themes/yilia/_config.ym中进行配置 toc: 2即可,它会将你 Markdown 语法的标题,生成目录,目录查看在右下角。
# 目录设定:0-不显示目录; 1-文章对应的md文件里有toc:true属性,才有目录; 2-所有文章均显示目录
toc: 2
2.4 设置404页面
GitHub Pages 自定义404页面非常容易,直接在Hexo/source目录下创建自己的404.html就可以。但是自定义404页面仅对绑定顶级域名的项目才起作用,GitHub默认分配的二级域名是不起作用的,使用hexo server在本机调试也是不起作用的。其实,404页面可以做更多有意义的事,来做个404公益项目吧,做点有意义的事情,例如可以设置为下面的公益内容:
<html>
    <head>
         <meta http-equiv="Content-Type" content="text/html; charset="UTF-8" />
         <title>公益404</title>
    </head>
    <body>
         <script type="text/javascript" src="http://www.qq.com/404/search_children.js" charset="utf-8" homePageUrl="http://fml710.xyz/" homePageName="回到我的主页"></script>
    </body>
</html>
注:
- 页面有个链接默认是返回腾讯网,改修“homePageUrl”、“homePageName”两个参数,可定制化,
homePageUrl=“http://yoursite.com/yourPage.html” homePageName=“回到我的主页”
- 本地查看的话,中 一定要加 http-equiv=“Content-Type” content="text/html; 否则中文乱码,content-type:text/html。这将告诉浏览器准备接受一个 HTML 文档。
2.5 设置博客信息
hexo new '博客标题'会自动为我们生成如下信息:
title: 测试
date: 2019-10-03 03:51:31
tags:
在yilia中的效果如下:
2.6 统计字数
以下部分内容转载自:Hexo+yilia主题网站进阶教程
2.6.1 安装 hexo-wordcount
在博客根目录下打开Git Bash Here 输入命令下面命令:
npm i --save hexo-wordcount
2.6.2 添加配置文件
在themeshexo-theme-yilialayout_partialpost目录下下创建word.ejs文件(模板文件):
<div style="margin-top:10px;">
<span class="post-time">
<span class="post-meta-item-icon">
<i class="fa fa-keyboard-o"></i>
<span class="post-meta-item-text"> 字数统计: </span>
<span class="post-count"><%= wordcount(post.content) %>字</span>
</span>
</span>
<span class="post-time">
|
<span class="post-meta-item-icon">
<i class="fa fa-hourglass-half"></i>
<span class="post-meta-item-text"> 阅读时长: </span>
<span class="post-count"><%= min2read(post.content) %>分</span>
</span>
</span>
</div>
然后在themeshexo-theme-yilialayout_partial/article.ejs中添加
<div class="article-inner">
	<% if (post.link || post.title){ %>
		<header class="article-header">
        	<%- partial('post/title', {class_name: 'article-title'}) %>
        	<% if (!post.noDate){ %>
       	 <%- partial('post/date', {class_name: 'archive-article-date', date_format: null}) %>
        	 <!-- 需要添加的位置 -->
        	 <!-- 开始添加字数统计-->
        	<% if(theme.word_count && !post.no_word_count){%>
          	<%- partial('post/word') %>
          	<% } %>
          	<!-- 添加完成 -->
        <% } %>
		</header>
2.6.3 开启功能
在项目根目录的_config.yml中添加下面代码:
#是否开启字数统计
#不需要使用,直接设置值为false,或注释掉
word_count: true
一切配置完成就能看到项目中出现的文章字数以及建议阅读时长。
2.7 网站访问数量
不蒜子使用IP的方式统计访问量,官网界面如下:
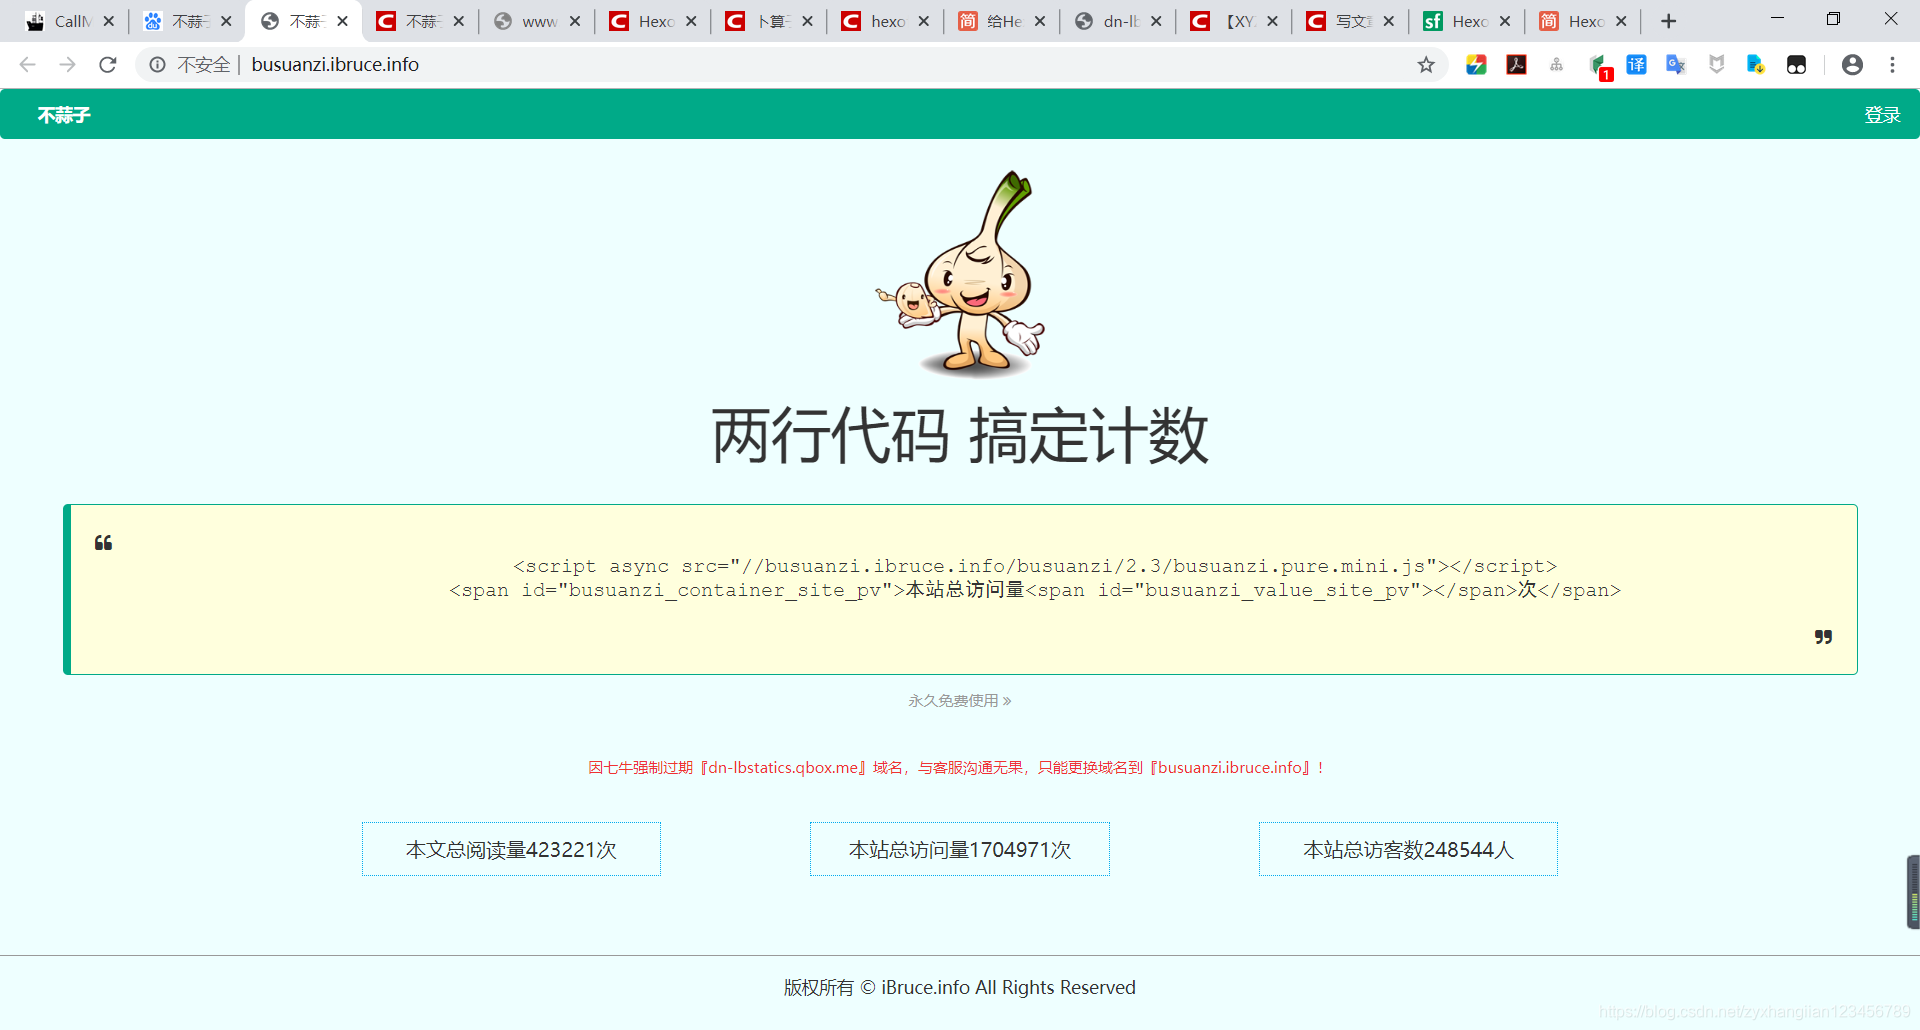
静态网站建站现在有很多快速的技术和平台,但静态是优点也有缺点,由于是静态的,一些动态的内容如评论、计数等等模块就需要借助外来平台。“不蒜子”与百度统计谷歌分析等有区别:“不蒜子”可直接将访问次数显示在您在网页上(也可不显示);对于已经上线一段时间的网站,“不蒜子”允许您初始化首次数据。
2.7.1 引入不蒜子
在themes/yilia/_config.yml中添加属性:
#开启不算子访问统计
busuanzi:
  enable: true
2.7.2 添加不算子网站访问量统计脚本
将下面代码添加在 themes/yilia/layout/_partial/footer.ejs的末尾:
<script async src="//busuanzi.ibruce.info/busuanzi/2.3/busuanzi.pure.mini.js"></script>
在themeshexo-theme-yilialayout_partial/footer.ejs末尾与其上面的之间放入代码:
<% if (theme.busuanzi && theme.busuanzi.enable){ %>
        <!-- 不蒜子统计 -->
        <span id="busuanzi_container_site_pv">
                本站总访问量<span id="busuanzi_value_site_pv"></span>次
        </span>
        <span class="post-meta-divider">|</span>
        <span id="busuanzi_container_site_uv" style='display:none'>
                本站访客数<span id="busuanzi_value_site_uv"></span>人
        </span>
        <script async src="/busuanzi.ibruce.info/busuanzi/2.3/busuanzi.pure.mini.js"></script>
  <% } %>
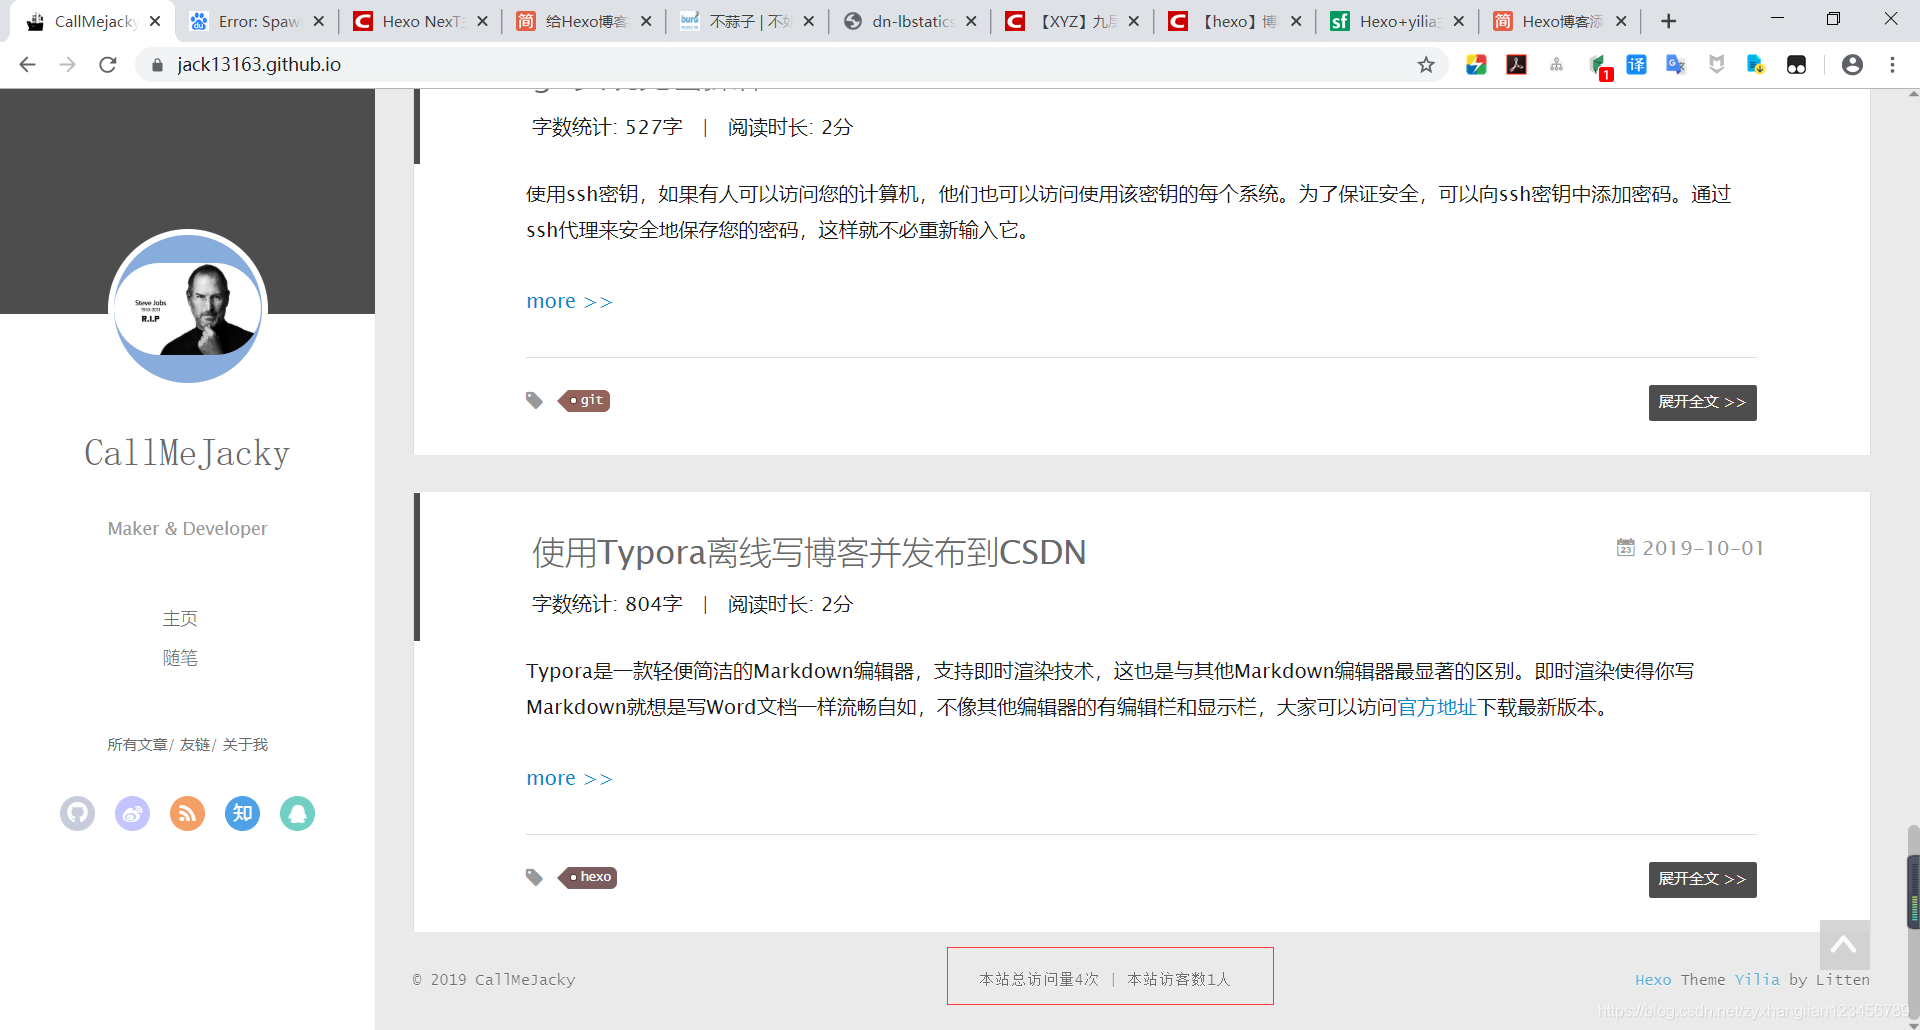
总浏览量和访客量显示效果如下:
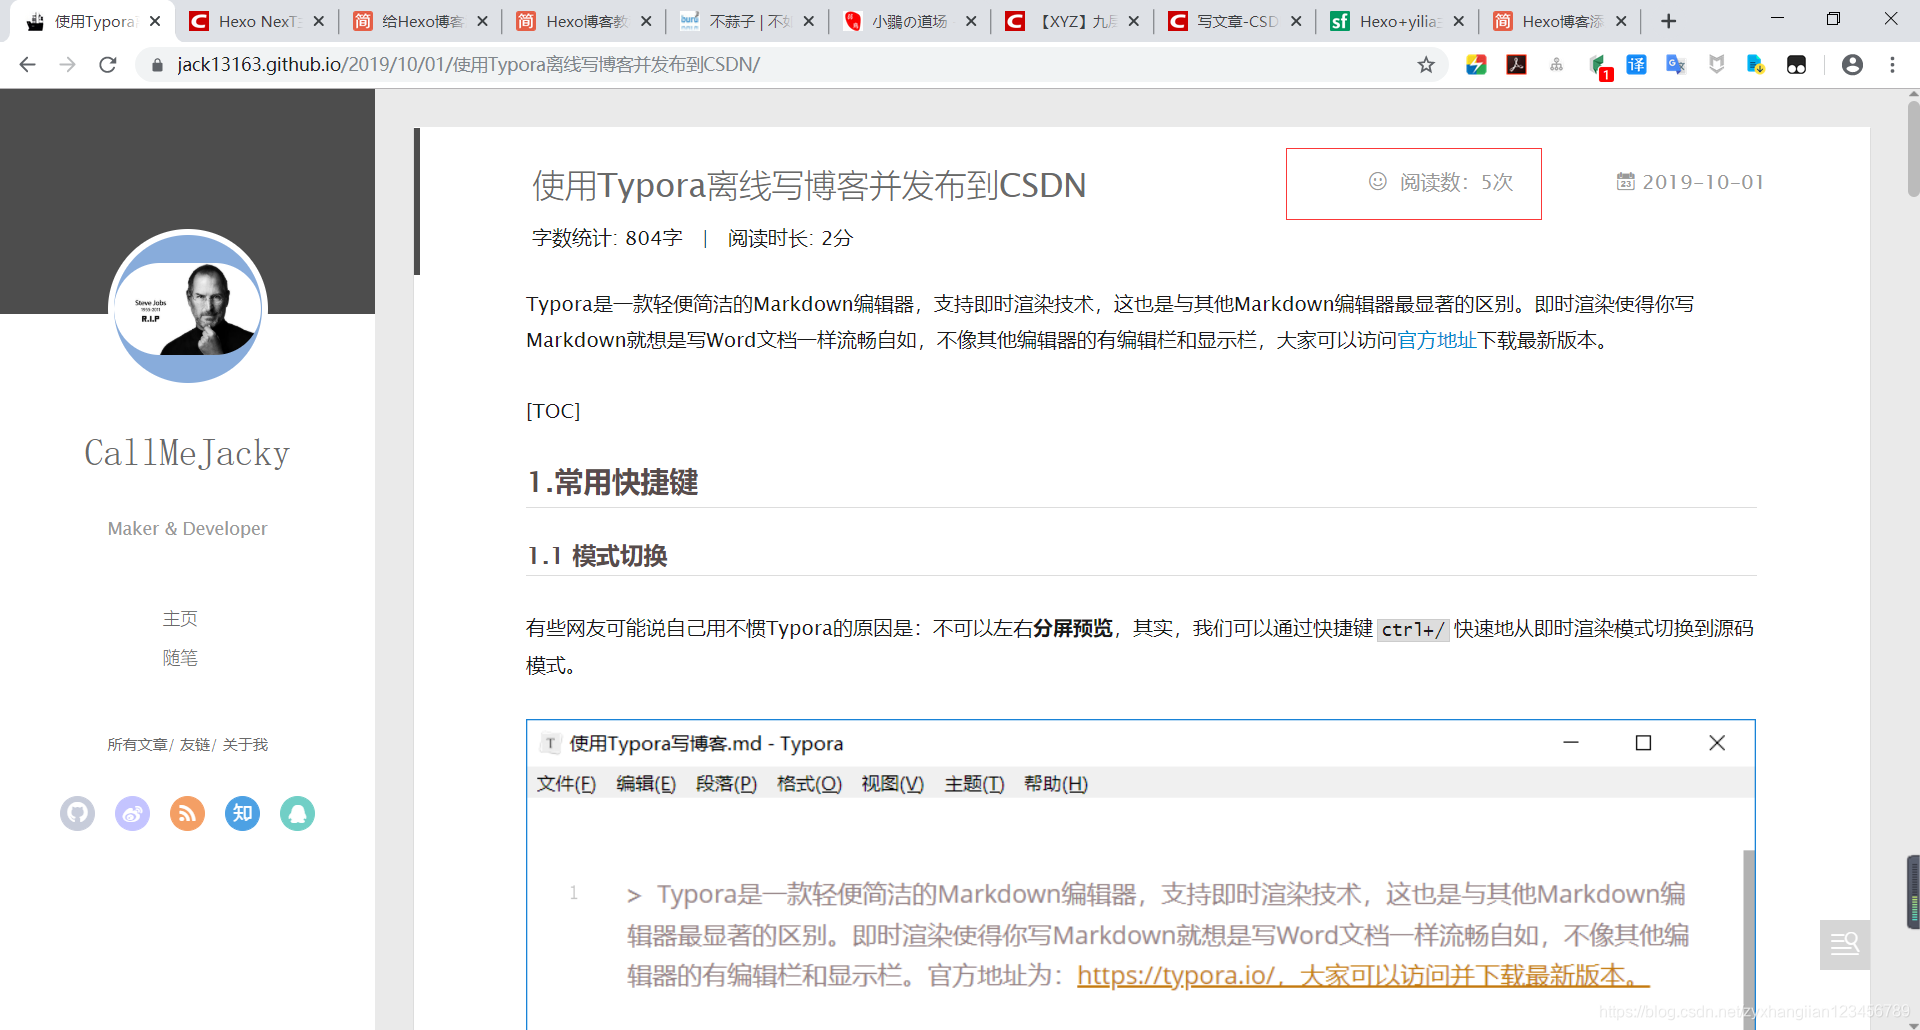
2.7.3 添加文章阅读量统计脚本
根据不同的需求,你看你需要在不同的位置显示你的文章阅读量,此处以在右上角的日期区域添加文章阅读量为例。首先,在themes/yilia/layout/_partial/post/date.ejs 原有代码的开头(不需要把新代码放入原代码块中,而是和原代码独立的两块)加入:
<% if (theme.busuanzi && theme.busuanzi.enable && !index){ %>
        <!-- 不蒜子统计 -->
        <span id="busuanzi_container_page_pv" style='display:none' class="<%= class_name %>">
              <i class="icon-smile icon"></i> 阅读数:<span id="busuanzi_value_page_pv"></span>次
        </span>
<% } %>
然后通过hex g生成新的文件,在进行hexo d提交到github平台,刷新页面就能看到你添加的效果了。
2.8 添加版权声明
在themes/yilia/layout/_partial/article.ejs文件中的themes/yilia/layout/_partial/article.ejs中 在 <% if ((theme.reward_type === 2 || (theme.reward_type === 1 && post.reward)) && !index){ %>上边插入如下代码:
<!--添加代码开始-->
<%
var sUrl = url.replace(/index\.html$/, '');
sUrl = /^(http:|https:)\/\//.test(sUrl) ? sUrl : 'https:' + sUrl;
%>
<% if ((theme.declare_type === 2 || (theme.declare_type === 1 && post.declare)) && !index){ %>
<div class="declare">
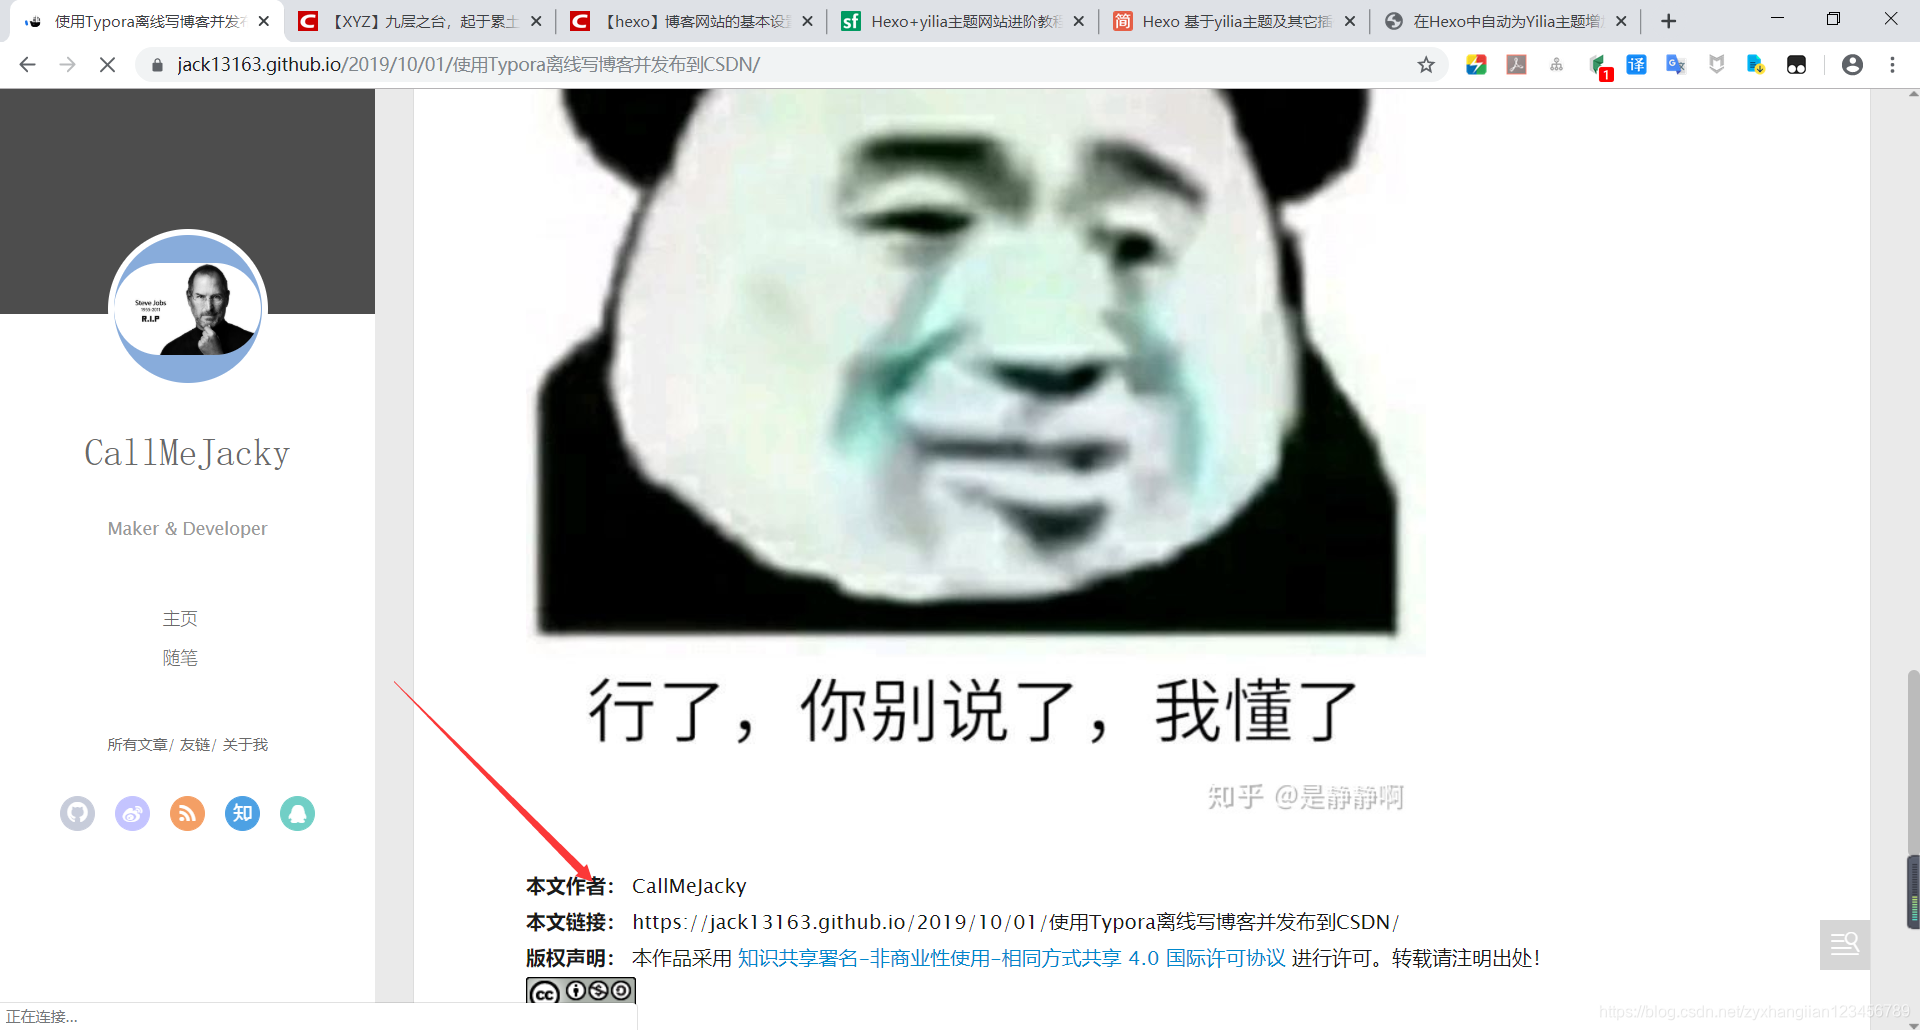
<strong>本文作者:</strong>
<% if(config.author != undefined){ %>
<%= config.author%>
<% }else{%>
<font color="#5b10b0"></font>
<%}%>
<br>
<strong>本文链接:</strong>
<%= sUrl%>
<br>
<strong>版权声明:</strong>
本作品采用
<a rel="license" href="<%= theme.licensee_url%>"><%= theme.licensee_name%></a>
进行许可。转载请注明出处!
<% if(theme.licensee_img != undefined){ %>
<br>
<a rel="license" href="<%= theme.licensee_url%>"><img alt="知识共享许可协议" style="border-width:0" src="<%= theme.licensee_img%>"/></a>
<% } %>
</div>
<% } else {%>
<div class="declare" hidden="hidden"></div>
<% } %>
然后修改themes/yilia/_config.yml配置文件,在配置文件中添加:
## 版权声明
declare_type: 2  #版权基础设定:0-关闭声明; 1-文章对应的md文件里有declare: true属性,才有版权声明; 2-所有文章均有版权声明
licensee_url: https://creativecommons.org/licenses/by-nc-sa/4.0/          # 当前应用的版权协议地址。
licensee_name: '知识共享署名-非商业性使用-相同方式共享 4.0 国际许可协议'  # 版权协议的名称
licensee_img: https://i.creativecommons.org/l/by-nc-sa/4.0/88x31.png      # 版权协议的Logo
在找到你项目根目录下的_config.yml配置文件,填写url地址:
# URL
## If your site is put in a subdirectory, set url as 'http://yoursite.com/child' and root as '/child/'
url: https://jack13163.github.io
提交就ok了,效果图如下:


 2199
2199


 被折叠的 条评论
为什么被折叠?
被折叠的 条评论
为什么被折叠?
 到【灌水乐园】发言


