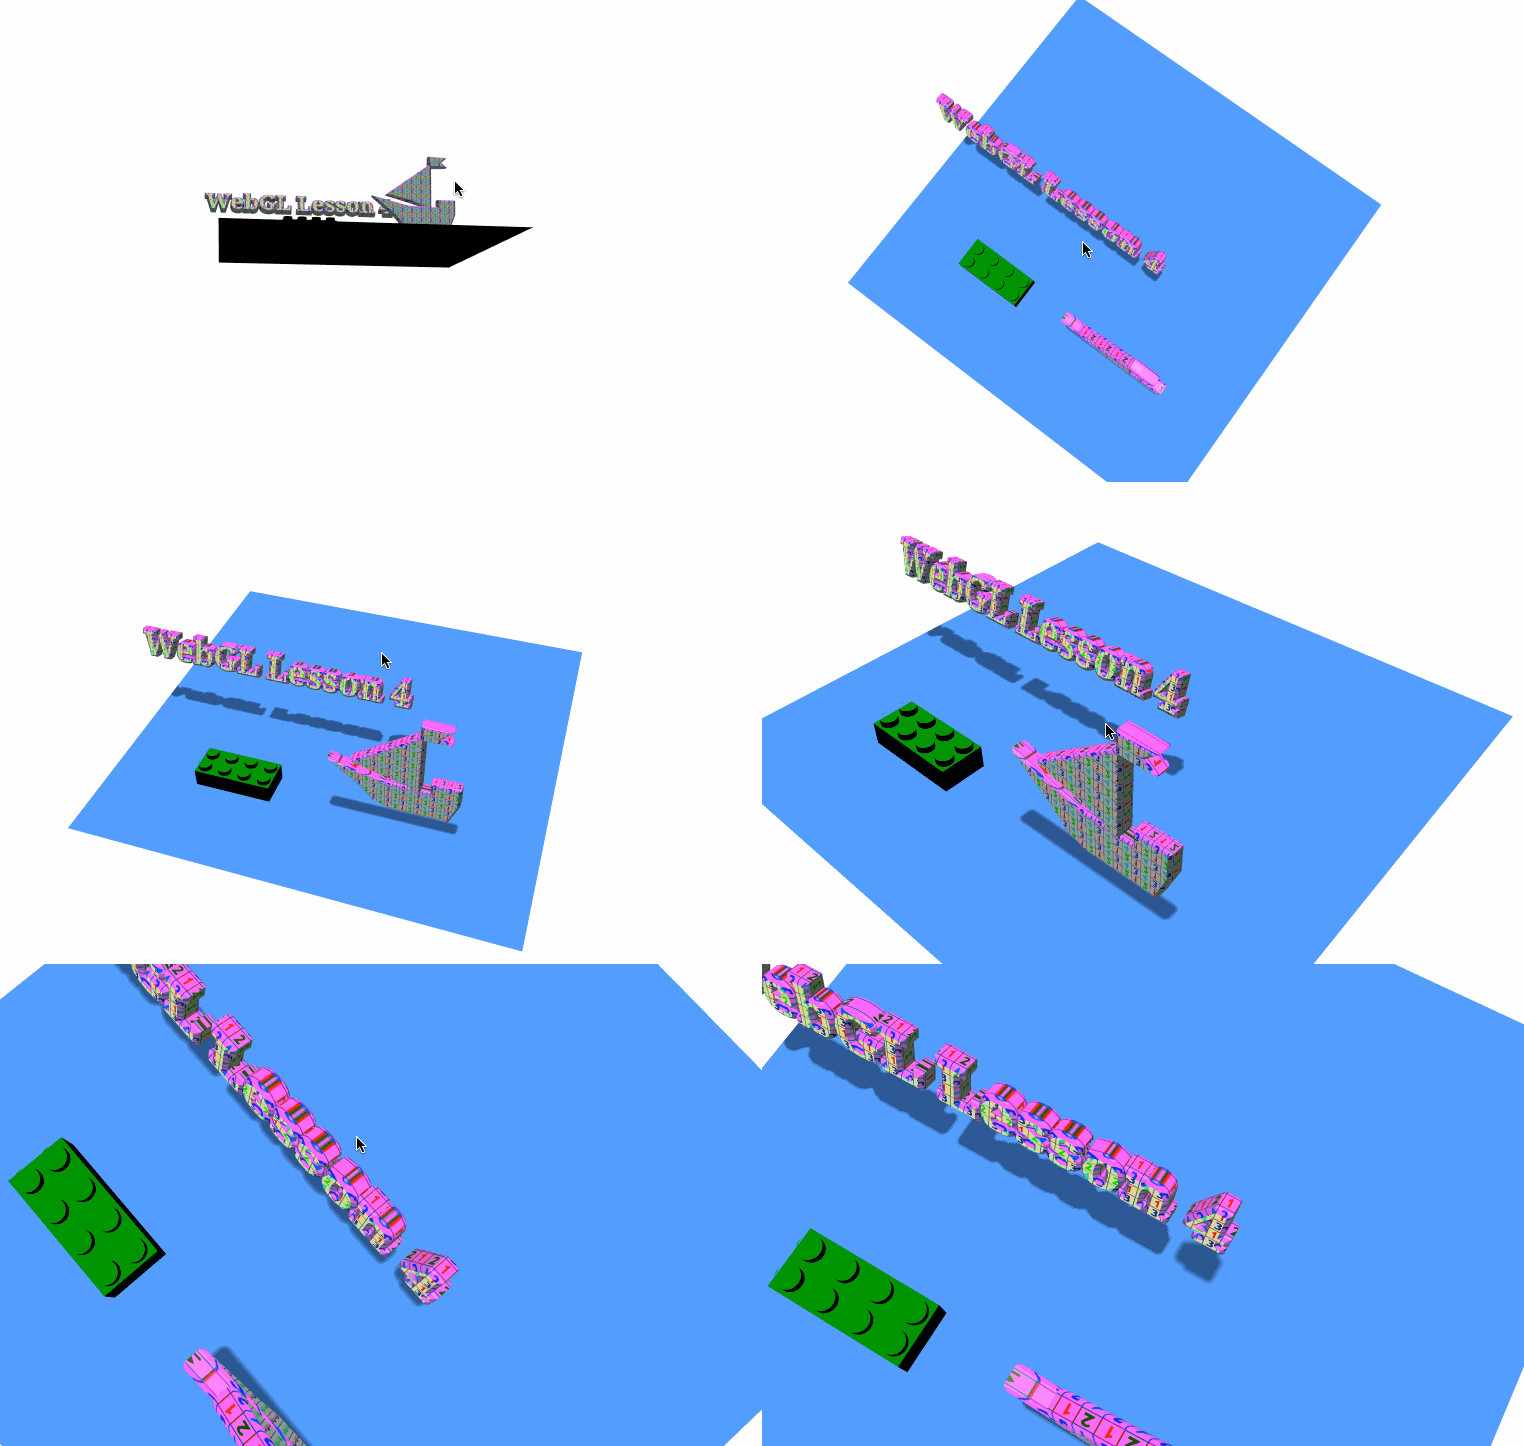
今天我们继续我们的课程webGL 的学习,在该课程中我们将向大家展示如何给一个场景添加一个3D文字,如何设计出二维形状,把3D模型加载在OBJLoader现场。但这个过程是非常困难的.下面就具体来看一下.
#HTML代码
这部分还是跟之前的一样.
<!DOCTYPE html>
<html lang="en" >
    <head>
        <meta charset="utf-8" />
        <meta name="author" content="Script Tutorials" />
        <title>WebGL With Three.js - Lesson 4 | Script Tutorials</title>
        <meta name="viewport" content="width=device-width, initial-scale=1.0, maximum-scale=1.0, user-scalable=no">
        <link href="css/main.css" rel="stylesheet" type="text/css" />
    </head>
    <body>
        <script src="js/three.min.js"></script>
        <script src="js/THREEx.WindowResize.js"></script>
        <script src="js/OrbitControls.js"></script>
        <script src="js/fonts/font1.js"></script>
        <script src="js/OBJLoader.js"></script>
        <script src="js/stats.min.js"></script>
        <script src="js/script.js"></script>
    </body>
</html>
#Javascript实现
首先,我们来创建一个简单的场景(scene, camera, renderer, controls, light and ground):
// load texture
var texture = THREE.ImageUtils.loadTexture('texture.png');
texture.repeat.set(0.03, 0.03);
texture.wrapS = texture.wrapT = THREE.RepeatWrapping;
texture.anisotropy = 16;
texture.needsUpdate = true;

var lesson4 = {
    scene: null,
    camera: null,
    renderer: null,
    container: null,
    controls: null,
    clock: null,
    stats: null,

    init: function() { // Initialization

        // create main scene
        this.scene = new THREE.Scene();

        var SCREEN_WIDTH = window.innerWidth,
            SCREEN_HEIGHT = window.innerHeight;

        // prepare camera
        var VIEW_ANGLE = 45, ASPECT = SCREEN_WIDTH / SCREEN_HEIGHT, NEAR = 1, FAR = 10000;
        this.camera = new THREE.PerspectiveCamera( VIEW_ANGLE, ASPECT, NEAR, FAR);
        this.scene.add(this.camera);
        this.camera.position.set(0, 400, 800);
        this.camera.lookAt(new THREE.Vector3(0,0,0));

        // prepare renderer
        this.renderer = new THREE.WebGLRenderer({antialias:true, alpha: false});
        this.renderer.setSize(SCREEN_WIDTH, SCREEN_HEIGHT);
        this.renderer.setClearColor(0xffffff);

        this.renderer.shadowMapEnabled = true;
        this.renderer.shadowMapSoft = true;

        // prepare container
        this.container = document.createElement('div');
        document.body.appendChild(this.container);
        this.container.appendChild(this.renderer.domElement);

        // events
        THREEx.WindowResize(this.renderer, this.camera);

        // prepare controls (OrbitControls)
        this.controls = new THREE.OrbitControls(this.camera, this.renderer.domElement);
        this.controls.target = new THREE.Vector3(0, 0, 0);

        // prepare clock
        this.clock = new THREE.Clock();

        // prepare stats
        this.stats = new Stats();
        this.stats.domElement.style.position = 'absolute';
        this.stats.domElement.style.bottom = '0px';
        this.stats.domElement.style.zIndex = 10;
        this.container.appendChild( this.stats.domElement );

        // add directional light
        var dLight = new THREE.DirectionalLight(0xffffff);
        dLight.position.set(0, 1000, 0);
        dLight.castShadow = true;
        // dLight.shadowCameraVisible = true;
        this.scene.add(dLight);

        // add simple ground
        var groundGeometry = new THREE.PlaneGeometry(1000, 1000, 1, 1);
        ground = new THREE.Mesh(groundGeometry, new THREE.MeshLambertMaterial({
            color: 0x4489FE, side: THREE.DoubleSide
        }));
        ground.position.y = -20;
        ground.rotation.x = - Math.PI / 2;
        ground.receiveShadow = true;
        this.scene.add(ground);

    },
};

// Animate the scene
function animate() {
    requestAnimationFrame(animate);
    render();
    update();
}

// Update controls and stats
function update() {
    lesson4.controls.update(lesson4.clock.getDelta());
    lesson4.stats.update();
}

// Render the scene
function render() {
    if (lesson4.renderer) {
        lesson4.renderer.render(lesson4.scene, lesson4.camera);
    }
}

// Initialize lesson on page load
function initializeLesson() {
    lesson4.init();
    animate();
}

if (window.addEventListener)
    window.addEventListener('load', initializeLesson, false);
else if (window.attachEvent)
    window.attachEvent('onload', initializeLesson);
else window.onload = initializeLesson;
#添加3D文本(3D text)
以显示在3D enviromnemt文本的最佳方式是使用一个就绪3D字形(对于three.js所)。一般情况下,有很多网站,你可以下载字体,但我们需要特别的JavaScript的字体(typefaced字体)。本网站可以帮助您自定义字体转换为JavaScript的字体(上传您的字体,点击“转换”,然后按照步骤,直到它让你下载的结果)。但是,在写这篇教程的时候,这个服务不可用,所以我只好用现成的字体来创建我们的演示。要绘制我准备了以下功能的三维文字:
draw3dText: function(x, y, z, text) {

    // prepare text geometry
    var textGeometry = new THREE.TextGeometry(text, {
        size: 60, // Font size
        height: 20, // Font height (depth)
        font: 'droid serif', // Font family
        weight: 'bold', // Font weight
        style: 'normal', // Font style
        curveSegments: 1, // Amount of curve segments
        bevelThickness: 5, // Bevel thickness
        bevelSize: 5, // Bevel size
        bevelEnabled: true, // Enable/Disable the bevel
        material: 0, // Main material
        extrudeMaterial: 1 // Side (extrude) material
    });

    // prepare two materials
    var materialFront = new THREE.MeshPhongMaterial({ map: texture, color: 0xffff00, emissive: 0x888888 });
    var materialSide = new THREE.MeshPhongMaterial({ map: texture, color: 0xff00ff, emissive: 0x444444 });

    // create mesh object
    var textMaterial = new THREE.MeshFaceMaterial([ materialFront, materialSide ]);
    var textMesh = new THREE.Mesh(textGeometry, textMaterial);
    textMesh.castShadow = true;

    // place the mesh in the certain position, rotate it and add to the scene
    textMesh.position.set(x, y, z);
    textMesh.rotation.x = -0.3;
    this.scene.add(textMesh);
}
#ExtrudeGeometry
这个类允许我们从二维路径形状打造立体几何一个3d效果。下面连看今天的演示:
drawCustomObject: function(x, y, z) {

    // prepare points for custom shape (ship)
    var objectPoints = [
        new THREE.Vector2 (275, 265),
        new THREE.Vector2 (205, 240),
        new THREE.Vector2 (125, 220),
        new THREE.Vector2 (274, 115),
        new THREE.Vector2 (275, 85),
        new THREE.Vector2 (330, 85),
        new THREE.Vector2 (310, 100),
        new THREE.Vector2 (330, 115),
        new THREE.Vector2 (275, 115),
        new THREE.Vector2 (274, 266),
        new THREE.Vector2 (305, 266),
        new THREE.Vector2 (305, 240),
        new THREE.Vector2 (360, 240),
        new THREE.Vector2 (360, 285),
        new THREE.Vector2 (340, 335),
        new THREE.Vector2 (215, 335),
        new THREE.Vector2 (175, 320),
        new THREE.Vector2 (150, 290),
        new THREE.Vector2 (75, 230),
        new THREE.Vector2 (200, 264),
        new THREE.Vector2 (274, 264),
    ];

    // prepare shape
    var objectShape = new THREE.Shape(objectPoints);

    var extrusionSettings = {
        amount: 20,
        curveSegments: 1, // Amount of curve segments
        bevelThickness: 5, // Bevel thickness
        bevelSize: 5, // Bevel size
        bevelEnabled: true, // Enable/Disable the bevel
        material: 0, // Main material
        extrudeMaterial: 1 // Side (extrude) material
    };

    // prepare ship geometry
    var objectGeometry = new THREE.ExtrudeGeometry( objectShape, extrusionSettings );

    // prepare two materials
    var materialFront = new THREE.MeshPhongMaterial({ map: texture, color: 0xffff00, emissive: 0x888888 });
    var materialSide = new THREE.MeshPhongMaterial({ map: texture, color: 0xff00ff, emissive: 0x444444 });

    // create mesh object of the ship
    var objectMaterial = new THREE.MeshFaceMaterial([ materialFront, materialSide ]);
    var objectMesh = new THREE.Mesh( objectGeometry, objectMaterial );
    objectMesh.castShadow = true;

    // place the object in the certain position, rotate it and add to the scene
    objectMesh.position.set(x, y, z);
    objectMesh.rotation.x = Math.PI;
    this.scene.add(objectMesh);
}
#OBJLoader
我留下了最有趣的结束 - 加载准备OBJ车型。有现成三维物体的数量庞大(在不同的网站)的事实,你可以添加到您的场景,并three.js所赋予我们通过使用OBJLoader这个类:
loadObjFile: function(x, y, z) {

    // prepare new OBJLoader and load the 'legoBrick.obj' model
    var loader = new THREE.OBJLoader();
    loader.load('legoBrick.obj', function(object) {

        // apply custom material for all children
        var legoMat = new THREE.MeshLambertMaterial({ color: 0x008800 });
        object.traverse( function (child) {
            if (child instanceof THREE.Mesh) {
                child.material = legoMat;
                child.material.needsUpdate = true;
            }
        });

        // place the object in the certain position, rotate, scale and add to the scene
        object.position.x = x;
        object.position.y = y;
        object.position.z = z;
        object.rotation.y = Math.PI/2;
        object.scale.set(40, 40, 40);
        lesson4.scene.add(object);
    });
}
###结束
未完继续
源码下载请关注我的微信公众号


 2354
2354


 被折叠的 条评论
为什么被折叠?


