


这里介绍如何进行Bing Maps的开发。首先我们需要在我们的程序中引入Bing Map的SDK。具体方法,这里推荐一个链接<win8>使用Bing地图。这样一个hello world便出来了。这里主要介绍一些基本的API,进行一些基础性的开发。
在整个开发中,给我感触最深的是,在网上资料稀少的情况下,查看研究Bing Map给出的API是最有效的方法(Map API)。也许API的注释是模棱两可,但只要我们去试,便能了解这些方法的功能。
如果遇到hello world不能显示地图,在C#文件中类的构造方法中添加myMap.HomeRegion = "US"(myMap是XAML中定义的Map,具体见下面的示例代码)
using Windows.UI;
using Windows.UI.Popups;
using Windows.UI.Xaml;
using Windows.UI.Xaml.Controls;
using Windows.UI.Xaml.Controls.Primitives;
using Windows.UI.Xaml.Data;
using Windows.UI.Xaml.Input;
using Windows.UI.Xaml.Media;
using Windows.UI.Xaml.Navigation;

// “空白页”项模板在 http://go.microsoft.com/fwlink/?LinkId=234238 上有介绍

namespace demo02
{

    /// <summary>
    /// 可用于自身或导航至 Frame 内部的空白页。
    /// </summary>
    public sealed partial class BingMap : Page
    {
        public BingMap()
        {
            this.InitializeComponent();
            myMap.HomeRegion = "US";
		}
	}

}
(一)添加图钉:
<Page
    x:Class="demo02.BingMap"
    xmlns="http://schemas.microsoft.com/winfx/2006/xaml/presentation"
    xmlns:x="http://schemas.microsoft.com/winfx/2006/xaml"
    xmlns:local="using:demo02"
    xmlns:d="http://schemas.microsoft.com/expression/blend/2008"
    xmlns:mc="http://schemas.openxmlformats.org/markup-compatibility/2006"
    xmlns:bm="using:Bing.Maps"
    xmlns:m="clr-namespace:Microsoft.Maps.MapControl.WPF;assembly=Microsoft.Maps.MapControl.WPF"
    mc:Ignorable="d">

    <Grid Background="{ThemeResource ApplicationPageBackgroundThemeBrush}">
        <bm:Map Credentials="AjOotBEFXeb3VJcFYETEqh3TesW_gf0_r5n54lBYg7pHBZWpVGuMusmccZXyMx--" x:Name="myMap">

            <bm:Map.Center>
                <bm:Location Latitude="37.52" Longitude="121.39" />
            </bm:Map.Center>

            <bm:Map.Children>

                <bm:Pushpin Tapped="JinanTapped" >
                    <bm:MapLayer.Position>
                        <bm:Location Latitude="36.65" Longitude="117" />
                    </bm:MapLayer.Position>
                </bm:Pushpin>

                <bm:Pushpin Tapped="BeijingTapped">
                    <bm:MapLayer.Position>
                        <bm:Location Latitude="39.92" Longitude="116.46" />
                    </bm:MapLayer.Position>
                </bm:Pushpin>

                <bm:Pushpin Tapped="GuangzhouTapped">
                    <bm:MapLayer.Position>
                        <bm:Location Latitude="23.16" Longitude="113.23" />

                    </bm:MapLayer.Position>
                </bm:Pushpin>

            </bm:Map.Children>

        </bm:Map>
    </Grid>

</Page>
xmlns:bm="using:Bing.Maps"将SDK引入程序。Pushpin是图钉,Tapped是点击该图钉触发的方法,方法在C#文件中定义。Location的属性有经纬度,这是图钉在地图上的坐标。除了在XAML中静态设置图钉,我们还可以通过编程动态添加。
using Bing.Maps;
using demo02.DataStructure;
using System;
using System.Collections.Generic;
using System.IO;
using System.Linq;
using System.Runtime.InteropServices.WindowsRuntime;
using Windows.Foundation;
using Windows.Foundation.Collections;
using Windows.UI;
using Windows.UI.Popups;
using Windows.UI.Xaml;
using Windows.UI.Xaml.Controls;
using Windows.UI.Xaml.Controls.Primitives;
using Windows.UI.Xaml.Data;
using Windows.UI.Xaml.Input;
using Windows.UI.Xaml.Media;
using Windows.UI.Xaml.Navigation;
// “空白页”项模板在 http://go.microsoft.com/fwlink/?LinkId=234238 上有介绍
namespace demo02
{
/// <summary>
/// 可用于自身或导航至 Frame 内部的空白页。
/// </summary>
public sealed partial class BingMap : Page
{
public BingMap()
{
this.InitializeComponent();
myMap.HomeRegion = "US";
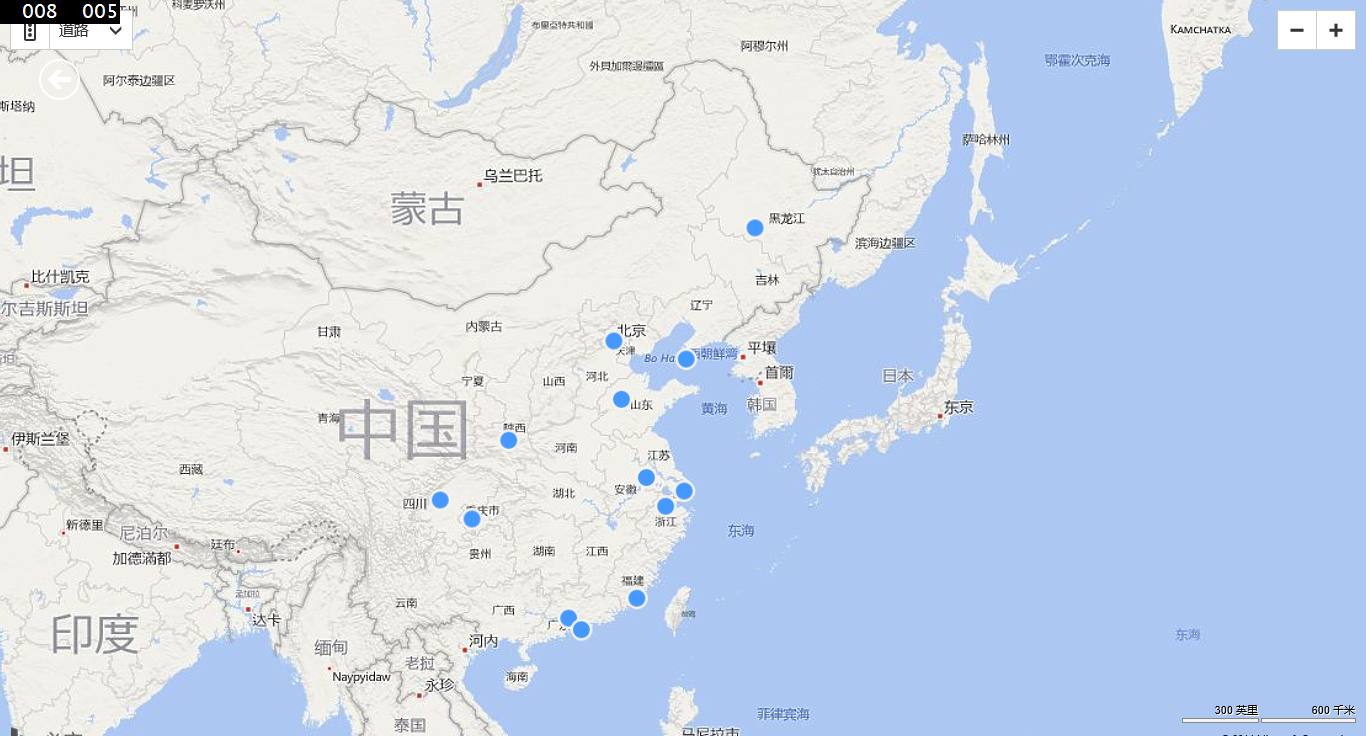
myMap.SetZoomLevel(4.3, MapAnimationDuration.None); // 设置缩放尺度,这样地图便会放大到想要的区域,现在整个画面显示的是中国地区
//用代码标注图钉
//用图钉标注华北区
var pushpin = new Pushpin();
ToolTipService.SetToolTip(pushpin, "北京"); //鼠标放在图钉上会出现的文字提示
MapLayer.SetPosition(pushpin, new Location(39.92, 116.46)); //图钉的经纬度
pushpin.Tapped += BJTapped; //点击图钉触发的方法
myMap.Children.Add(pushpin);
}
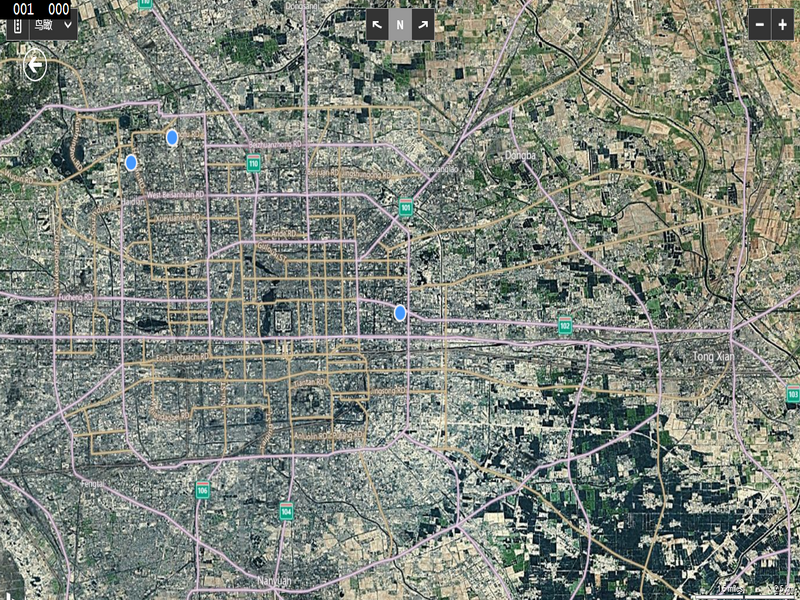
private void BJTapped(object sender, Windows.UI.Xaml.Input.TappedRoutedEventArgs e)
{
myMap.MapType = MapType.Birdseye; //设置鸟瞰模式
Location location = new Location();
//北京经纬度
location.Latitude = 39.92;
location.Longitude = 116.46;
myMap.SetView(location, 12); //将视图放大到北京地区
//用图钉标注北京大学
var pushpin = new Pushpin();
ToolTipService.SetToolTip(pushpin, "Peking University 北京大学");
MapLayer.SetPosition(pushpin, new Location(39.9890077, 116.302251));
myMap.Children.Add(pushpin);
//用图钉标注清华大学
var pushpin01 = new Pushpin();
ToolTipService.SetToolTip(pushpin01, "Tsinghua University 清华大学");
MapLayer.SetPosition(pushpin01, new Location(40.000531, 116.326319));
myMap.Children.Add(pushpin01);
}
}
}
也许对于鼠标移到图钉上的文字显示的样式不满意,比如某个图钉是一个景点,当我们将鼠标移到它上面是时,最好能出现照片。这时可借助样式Style。
在App.xaml中添加如下:
<Style TargetType="ToolTip"  x:Key="okStyle">
                <Setter Property="Background" Value="Transparent" />
                <Setter Property="BorderBrush" Value="Transparent" />
                <Setter Property="BorderThickness" Value="0" />
                <Setter Property="Template">
                    <Setter.Value>
                        <ControlTemplate>
                            <Border CornerRadius="5">
                                <Border.Background>
                                    <SolidColorBrush Color="Black" Opacity="0.5"/>
                                </Border.Background>
                                <ContentPresenter Margin="5">
                                    <ContentPresenter.Content>
                                        <StackPanel Margin="5" MaxWidth="200" MinHeight="80">
                                            <TextBlock Text="山东大学 SHANDONG UNIVERSITY"  FontSize="12" Foreground="White"/>
                                            <Image Source="Images/EC/SD/SDU/sdu.jpg" Grid.ColumnSpan="5" Margin="0,0,0,10" Stretch="Fill" />
                                        </StackPanel>
                                    </ContentPresenter.Content>
                                </ContentPresenter>
                            </Border>
                        </ControlTemplate>
                    </Setter.Value>
                </Setter>
            </Style>
位置是:
<Application
    x:Class="demo02.App"
    xmlns="http://schemas.microsoft.com/winfx/2006/xaml/presentation"
    xmlns:x="http://schemas.microsoft.com/winfx/2006/xaml"
    xmlns:local="using:demo02"
    xmlns:RssData="using:demo02.EasyAccess.RssReader"
    xmlns:localData="using:demo02.Data">

    <Application.Resources>
        <!-- 应用程序特定的资源-->

        <!--<x:String x:Key="AppName">WhereWeGo</x:String>-->

        <ResourceDictionary>
            <ResourceDictionary.MergedDictionaries>
                <!--
                    Styles that define common aspects of the platform look and feel
                    Required by Visual Studio project and item templates
                 -->
                <!--<ResourceDictionary Source="Common/StandardStyles.xaml"/>-->

                <!-- Add app resurces to this resource dictionary -->
                <ResourceDictionary>
                    <RssData:FeedDataSource x:Key="feedDataSource"/>

                    <!-- Add the DateConverter here. -->
                    <!--<RssData:DateConverter x:Key="dateConverter" />-->

                </ResourceDictionary>

            </ResourceDictionary.MergedDictionaries>
            <Style TargetType="ToolTip"  x:Key="okStyle">
                <Setter Property="Background" Value="Transparent" />
                <Setter Property="BorderBrush" Value="Transparent" />
                <Setter Property="BorderThickness" Value="0" />
                <Setter Property="Template">
                    <Setter.Value>
                        <ControlTemplate>
                            <Border CornerRadius="5">
                                <Border.Background>
                                    <SolidColorBrush Color="Black" Opacity="0.5"/>
                                </Border.Background>
                                <ContentPresenter Margin="5">
                                    <ContentPresenter.Content>
                                        <StackPanel Margin="5" MaxWidth="200" MinHeight="80">
                                            <TextBlock Text="山东大学 SHANDONG UNIVERSITY"  FontSize="12" Foreground="White"/>
                                            <Image Source="Images/EC/SD/SDU/sdu.jpg" Grid.ColumnSpan="5" Margin="0,0,0,10" Stretch="Fill" />
                                        </StackPanel>
                                    </ContentPresenter.Content>
                                </ContentPresenter>
                            </Border>
                        </ControlTemplate>
                    </Setter.Value>
                </Setter>
            </Style>
        </ResourceDictionary>
    </Application.Resources>
</Application>
这样样式便定义好了,接下来看如何使用:
//用图钉标注山东大学36.677549,117.054218
            var pushpin = new Pushpin();
            //ToolTipService.SetToolTip(pushpin, "山东大学");

            ToolTipService.SetToolTip(pushpin, new ToolTip()
            {
                Style = Application.Current.Resources["okStyle"] as Style
            });

            MapLayer.SetPosition(pushpin, new Location(36.677549, 117.054218));
            pushpin.Tapped += SDU01Tapped;
            myMap.Children.Add(pushpin);
(二)连线:
有了点,下面是线,能描绘出一块指定区域。下面的代码将山大济南六个校区连接起来。(PS:可以通过谷歌地图获得某个地点的API,方法是将鼠标放在某个地点,右键选择“这是哪里?”便会在搜索框中出现精确的经纬度)
//连接六大校区
            MapLayer mPinLayer = new MapLayer();
            myMap.Children.Add(mPinLayer);
            MapShapeLayer mShapeLayer = new MapShapeLayer();
            myMap.ShapeLayers.Add(mShapeLayer);

			//定义要连接起来的点
            LocationCollection mPolyShapeLocations01 = new LocationCollection();
            mPolyShapeLocations01.Add(new Location(36.666818, 117.133137)); //软件园
            mPolyShapeLocations01.Add(new Location(36.68525, 117.060184)); //洪家楼
            mPolyShapeLocations01.Add(new Location(36.678625, 117.050547)); //中心
            mPolyShapeLocations01.Add(new Location(36.650681, 117.013094)); //趵突泉
            mPolyShapeLocations01.Add(new Location(36.650414, 117.022868)); //千佛山
            mPolyShapeLocations01.Add(new Location(36.602489, 117.049045)); //兴隆山
            mPolyShapeLocations01.Add(new Location(36.666818, 117.133137)); //软件园

            for (int i = 0; i < mPolyShapeLocations01.Count; i++)
            {
                Pushpin pin = new Pushpin();
                pin.Text = i.ToString();
                mPinLayer.Children.Add(pin);
                MapLayer.SetPosition(pin, mPolyShapeLocations01[i]);
            }

			//MapPolylines是连线的API,将上面定义的点连接起来
            MapPolyline polyline01 = new MapPolyline();
            polyline01.Color = Windows.UI.Colors.Red;
            polyline01.Locations = mPolyShapeLocations01;
            polyline01.Width = 5.0;


            mShapeLayer.Shapes.Add(polyline01);


 127
127

 被折叠的 条评论
为什么被折叠?
被折叠的 条评论
为什么被折叠?
 到【灌水乐园】发言


