


响应链机制是开发中很重要的概念,在一些事件的处理中需要对响应链的传递有深入的了解,我们才能对事件的传递有更好的控制。今天我们继续来研究下响应链,并实现一个很简单的功能。示例代码已经上传至 https://github.com/chenyufeng1991/HitTest ,可以进行下载调试。要实现的一个很简单的功能就是:透过顶部视图,让底部视图来响应点击事件,这也会响应链使用中非常重要的应用。下面也会涉及一些不同的案例。用到最常用的方法为hitTest:withEvent和pointInside:withEvent.
【重写子视图】
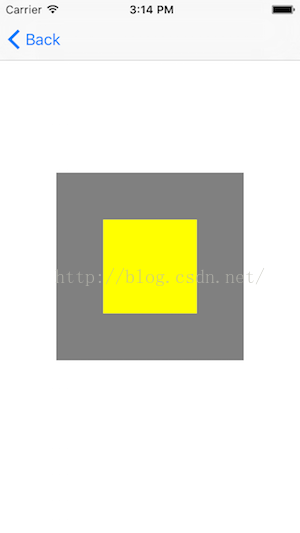
灰色区域是底部视图,黄色区域是顶部视图,我分别给这两个视图添加了点击手势。现在我通过使用hitTest:withEvent:方法来控制响应链,无论我点击黄色区域还是灰色区域,都由底部视图来响应。其中黄色区域是灰色区域的子视图。
(1)我自定义顶部黄色视图,继承自UIView,然后重写hitTest,实现如下:
#import "RewriteView.h"

@implementation RewriteView

- (UIView *)hitTest:(CGPoint)point withEvent:(UIEvent *)event
{
    UIView *view = [super hitTest:point withEvent:event];
    if (view == self)
    {
        return nil;
    }

    return [super hitTest:point withEvent:event];
}

@end
简单解释下代码:
当view == self时,表示点击区域在self上,其中这里黄色区域是RewriteView的对象,然后返回nil, 表示自己不做响应,交给父视图去响应。由于这里父视图是灰色区域,所以由父视图来响应点击。
(2)VC中的实现如下:
#import "RewriteTopViewController.h"
#import "Masonry.h"
#import "RewriteView.h"

@interface RewriteTopViewController ()

@end

@implementation RewriteTopViewController

- (void)viewDidLoad
{
    [super viewDidLoad];

    UIView *bottomView = [[UIView alloc] initWithFrame:CGRectMake(100, 100, 200, 200)];
    bottomView.backgroundColor = [UIColor grayColor];
    bottomView.tag = 101;
    [self.view addSubview:bottomView];
    [bottomView mas_makeConstraints:^(MASConstraintMaker *make) {
        make.center.equalTo(self.view);
        make.width.equalTo(@200);
        make.height.equalTo(@200);
    }];
    UITapGestureRecognizer *bottomTap = [[UITapGestureRecognizer alloc] initWithTarget:self action:@selector(tapBottomView:)];
    [bottomView addGestureRecognizer:bottomTap];

    RewriteView *topView = [[RewriteView alloc] initWithFrame:CGRectMake(100, 100, 100, 100)];
    topView.backgroundColor = [UIColor yellowColor];
    topView.tag = 102;
    [bottomView addSubview:topView];
    [topView mas_makeConstraints:^(MASConstraintMaker *make) {
        make.center.equalTo(bottomView);
        make.height.equalTo(@100);
        make.width.equalTo(@100);
    }];
    UITapGestureRecognizer *topTap = [[UITapGestureRecognizer alloc] initWithTarget:self action:@selector(tapTopView:)];
    [topView addGestureRecognizer:topTap];

}

- (void)tapBottomView:(id)sender
{
    NSLog(@"%s",__FUNCTION__);
}

- (void)tapTopView:(id)sender
{
    NSLog(@"%s",__FUNCTION__);
}

@end
请注意代码中topView是由RewriteView定义的,bottomView是UIView定义的。 运行以上代码,我们会发现,最后所有的点击事件都落在了灰色底部区域,相当于透过了黄色区域。黄色区域必须继承自UIView,然后重写hitTest方法。
---------------------------------------------------------------------------------------------------------------------------------------------------------
1. 对于触摸事件,首先要找到能够响应该事件的对象,iOS是用hit_testing来找到哪个视图被触摸了,也就是以keyWindow为起点,hit-test view为终点,逐级调用hitTest:withEvent。 网上大神画了下面这幅图:
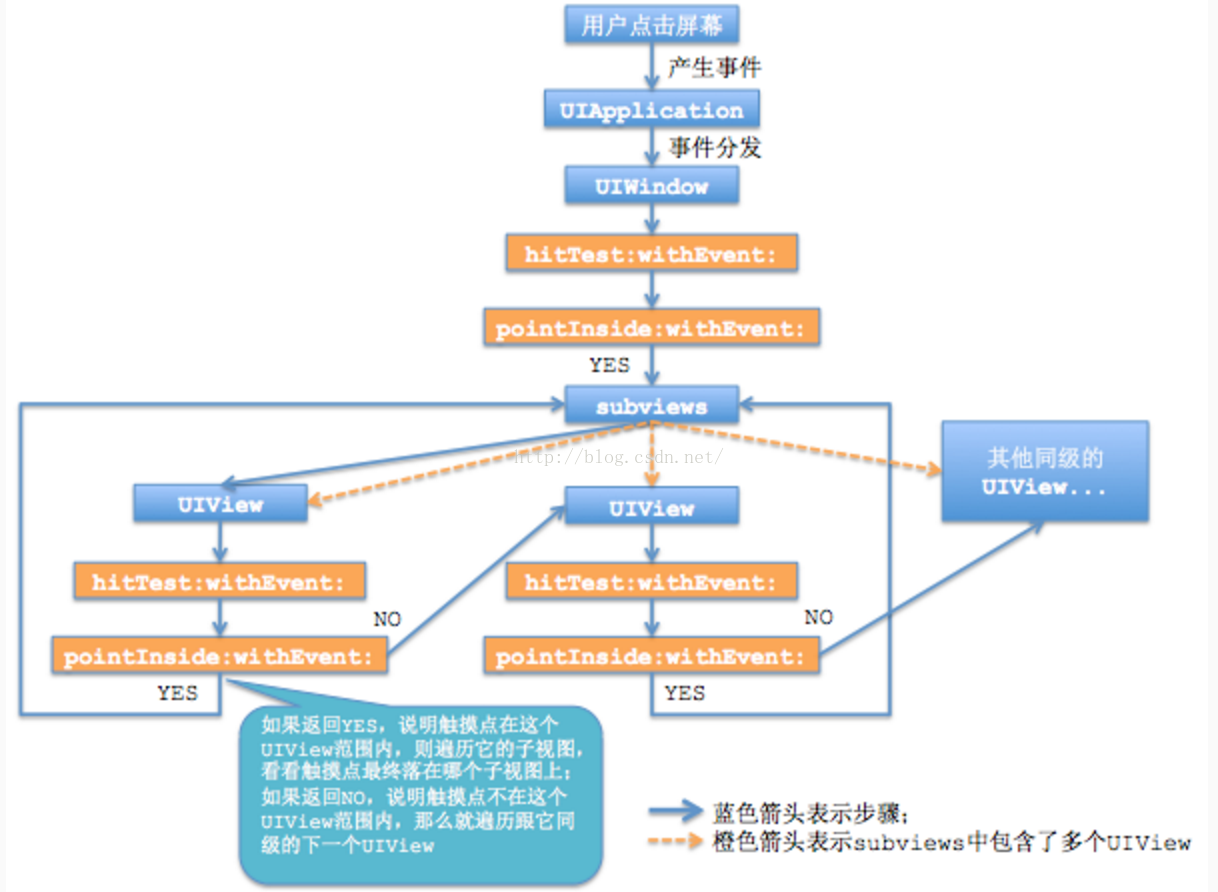
hitTest:withEvent方法的处理流程:
先调用pointInside:withEvent:判断触摸点是否在当前视图内。
-- 如果返回YES,那么该视图的所有子视图调用hitTest:withEvent,调用顺序由层级低到高(top-->bottom)依次调用。
-- 如果返回NO,那么hitTest:withEvent返回nil,该视图的所有子视图的分支全部被忽略(表示根本不可能在该视图内)。
● 如果某视图的pointInside:withEvent:返回YES,并且它的所有子视图hitTest:withEvent:都返回nil,或者该视图没有子视图,那么该视图的hitTest:withEvent:返回自己self。
● 如果子视图的hitTest:withEvent:返回非空对象,那么当前视图的hitTest:withEvent也返回这个对象,也就是沿原路回退,最终将hit-test view传递给keyWindow进行响应。
● 以下视图的hitTest-withEvent:方法会返回nil,导致自身和其所有子视图不能被hit-testing发现,无法响应触摸事件:
隐藏(hidden=YES)的视图;
禁止用户操作(userInteractionEnabled = NO)的视图;
alpha<0.01的视图;
视图超出父视图的区域;
-- 既然系统通过hitTest:withEvent:做传递链取回hit-test view,那么我们可以在其中一环修改传递回的对象,从而改变正常的事件响应链。
2.触摸事件的传递是从父控件传递到子控件。即树状结构的根节点向叶子节点递归传递。
也就是说,如果父控件不能接收触摸事件那么子控件就不可能接收到触摸事件。
3.事件的传递是从上到下(父控件到子控件),事件的响应是从下到上(子控件到父控件)。
4.对于一个View,hitTest为什么会调用两次?
因为一次是消息传递时,还有一次是响应时。分别是入栈出栈操作,父View先入栈,后出栈。
5.不管视图能不能处理事件,只要点击了视图就会产生事件,关键看该事件是由谁来处理。也就是说,如果视图不能处理事件,点击视图,还是会产生一个触摸事件,只是该事件不会由被点击的视图处理而已。
6. 如果设置父控件的透明度或者hidden,会直接影响到子控件的透明度的hidden,如果父控件的透明度为0或者hidden=YES,那么子控件也是不可见的。同上1.
7.技巧:想让谁成为最合适的view就重写谁自己的父控件的hitTest:withEvent:方法返回指定的子控件(我下面会实现该案例),或者重写自己的hitTest:withEvent:方法return self. 但是,建议在父控件的hitTest:withEvent:中返回子控件作为最合适的view。
8.return nil的含义:
hitTest:withEvent:中return nil的意思是调用当前的hitTest:withEvent:方法的view不是合适的view,子控件也不是合适的view。如果同级的兄弟控件也没有合适的view,那么最合适的view就是父控件。
9.[self.view convertPoint:point fromView:self]
把self.view的坐标系从self转换到自己的坐标系。然后就可以通过手动调用pointInside来判断是否在某个view内。
【重写父视图】
重写父视图来对子视图控制响应事件是我们推荐的方式。
(1)RewriteSuperView继承自UIView,重写hitTest
RewriteSuperView.h
#import <UIKit/UIKit.h>

@interface RewriteSuperView : UIView

@property (nonatomic, strong) UIView *bottom;

@end
其中bottom等下是传进来的引用。
RewriteSuperView.m
#import "RewriteSuperView.h"

@implementation RewriteSuperView

- (UIView *)hitTest:(CGPoint)point withEvent:(UIEvent *)event
{
    NSLog(@"tag=====%ld",self.tag);
    CGPoint bottomPoint = [self.bottom convertPoint:point fromView:self];
    if ([self.bottom pointInside:bottomPoint withEvent:event])
    {
        return self.bottom;
    }

    return [super hitTest:point withEvent:event];
}


@end
这几行代码的意思是:检测点击区域是否是在bottom区域,如果是,则直接使用bottom响应点击,否则调用父类的hitTest,按正常的传递响应。
#import "RewriteSuperViewController.h"
#import "RewriteSuperView.h"
#import "Masonry.h"

@interface RewriteSuperViewController ()

@end

@implementation RewriteSuperViewController

- (void)viewDidLoad
{
    [super viewDidLoad];

    RewriteSuperView *containerView = [[RewriteSuperView alloc] initWithFrame:CGRectMake(0, 0, 320, 568)];
    containerView.backgroundColor = [UIColor colorWithWhite:0.667 alpha:1.000];
    containerView.tag = 100;
    [self.view addSubview:containerView];
    [containerView mas_makeConstraints:^(MASConstraintMaker *make) {
        make.edges.equalTo(self.view);
    }];

    UIView *bottomView = [[UIView alloc] initWithFrame:CGRectMake(100, 100, 200, 200)];
    bottomView.backgroundColor = [UIColor redColor];
    bottomView.tag = 101;
    [containerView addSubview:bottomView];
    [bottomView mas_makeConstraints:^(MASConstraintMaker *make) {
        make.center.equalTo(containerView);
        make.width.equalTo(@100);
        make.height.equalTo(@100);
    }];
    UITapGestureRecognizer *bottomTap = [[UITapGestureRecognizer alloc] initWithTarget:self action:@selector(tapBottomView:)];
    [bottomView addGestureRecognizer:bottomTap];

    UIView *topView = [[UIView alloc] initWithFrame:CGRectMake(100, 100, 100, 100)];
    topView.backgroundColor = [UIColor yellowColor];
    topView.tag = 102;
    [containerView addSubview:topView];
    [topView mas_makeConstraints:^(MASConstraintMaker *make) {
        make.center.equalTo(containerView);
        make.height.equalTo(@200);
        make.width.equalTo(@200);
    }];
    UITapGestureRecognizer *topTap = [[UITapGestureRecognizer alloc] initWithTarget:self action:@selector(tapTopView:)];
    [topView addGestureRecognizer:topTap];

    containerView.bottom = bottomView;
}

- (void)tapBottomView:(id)sender
{
    NSLog(@"%s",__FUNCTION__);
}

- (void)tapTopView:(id)sender
{
    NSLog(@"%s",__FUNCTION__);
}

@end
注意这里只有底部灰色区域containerView是RewriteSuperView, 并且传递红色bottomView的引用,让其可以在hitTest中进行检测。
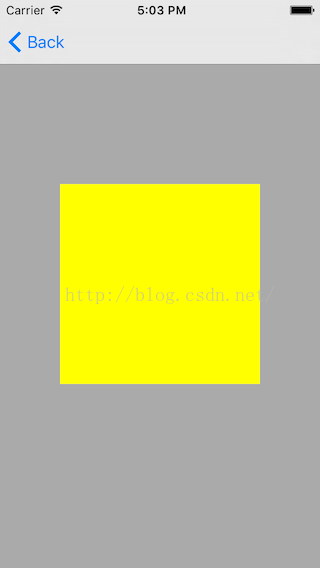
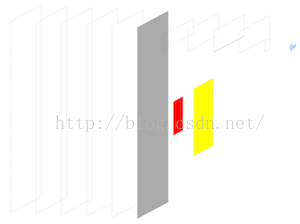
其中灰色的背景是父视图,黄色的是顶部视图,红色的在底部,黄色和红色都是灰色的子视图,黄色覆盖红色。我们通过视图层次调试来看一下:
该案例的实现结果就是在黄色区域点击,如果点击区域落在红色区域,那么红色的点击手势会响应;如果是在红色区域之外,黄色区域之内,那么黄色的点击手势会响应。
下面这张图是苹果官方文档中的示例图:
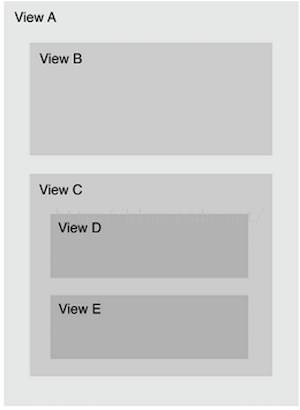
官方解释如下:
- The touch is within the bounds of view A, so it checks subviews B and C.
- The touch is not within the bounds of view B, but it’s within the bounds of view C, so it checks subviews D and E.
- The touch is not within the bounds of view D, but it’s within the bounds of view E.View E is the lowest view in the view hierarchy that contains the touch, so it becomes the hit-test view.


 427
427


 被折叠的 条评论
为什么被折叠?
被折叠的 条评论
为什么被折叠?
 到【灌水乐园】发言


