


安装好Ubuntu17.04后,是一台空白的Ubuntu。网络安装的时候选择的是NET模式,后来和宿主机不通我就改成桥接模式了。
1、设置root密码
sudo passwd root
然后输入两次密码就可以
2、配置网络环境
刚开始装好之后ip是动态分配,现在修改成静态ip
sudo vim /etc/network/interfaces 修改这个文件就ok
auto lo
iface lo inet loopback
auto ens33
iface ens33 inet static
address 192.168.1.155
netmask 255.255.255.0
gateway 192.168.1.1
dns-nameserver 8.8.8.8
修改方法:在原文件后面追加6行就可以,就是上面的后6行
然后安装网络工具:
sudo apt install net-tools
再使用命令ifconfig就可以看见刚配置的ip
•测试: ping www.baidu.com 通的话就ok
3、更新源
sudo apt-get update
源保存的文件为:/etc/apt/sources.list
-
安装ssh服务,我的习惯一般就是远程连接,没有打开ubuntu的图形界面(个人习惯,可以忽略)
sudo apt-get install openssh-client openssh-server
这样一来就可以使用ssh服务来连接了。
查看ssh服务状态:service ssh status/start/stop/restart
安装常用软件
2.Vim
sudo apt-get install vim
3.Tree
sudo apt-get install tree
4.Git
sudo apt-get install git
搭建LAMP
1.安装Apache
sudo apt-get install apache2
•测试: 浏览器访问http://Ubuntu的IP,出现It Works!网页。
•查看状态: service apache2 status/start/stop/restart
•Web目录: /var/www
•安装目录: /etc/apache2/
•全局配置: /etc/apache2/apache2.conf
•监听端口: /etc/apache2/ports.conf
•虚拟主机: /etc/apache2/sites-enabled/000-default.conf
2.安装MySQL
sudo apt-get install mysql-server mysql-client
•测试:mysql -u root -p
•查看状态:service mysql status/start/stop/retart
•查看监听端口的情况:netstat -tunpl 或 netstat -tap
3.安装PHP
sudo apt-get install php7.0
•测试:php7.0 -v
4.安装其他模块
sudo apt-get install libapache2-mod-php7.0
sudo apt-get install php7.0-mysql
•重启服务
◦service apache2 restart
◦service mysql restart
•测试Apache能否解析PHP
◦新建文件:vim /var/www/html/phpinfo.php
◦文件中写:<?php echo phpinfo();?> 然后保存退出
◦浏览器访问:http://ubuntu地址/phpinfo.php,出现PHP Version网页
5.修改权限
sudo chmod 755 /var/www
6.安装phpMyAdmin
sudo apt-get install phpmyadmin
•安装:选择apache2,点击确定。下一步选择是要配置数据库,并输入密码。
•创建phpMyAdmin快捷方式:sudo ln -s /usr/share/phpmyadmin /var/www/html
•启用Apache mod_rewrite模块:sudo a2enmod rewrite
•重启服务:
◦service php7.0-fpm restart
◦service apache2 restart
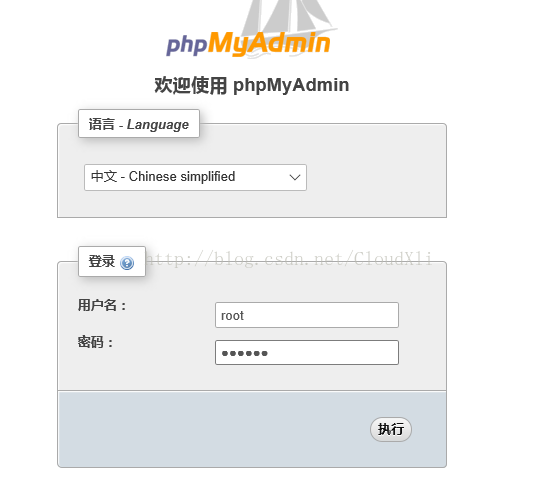
•测试:浏览器访问:http://ubuntu地址/phpmyadmin
就是有了一个界面化的管理平台。
7.配置Apache
sudo vim /etc/apache2/apache2.conf
•在文件最后面添加如下的两行:
•AddType application/x-httpd-php .php .htm .html
•AddDefaultCharset UTF-8
•重启Apache服务
service apache2 restart
安装python包
1.pip
sudo apt-get install python-pip
2.Django
sudo pip install django
测试:import django
3.安装MySQL-python
sudo apt-get install libmysqld-dev
sudo pip install MySQL-python
测试:import MySQLdb
常见问题
1.Secure SSH Client连接出错
•错误:algorithm negotiation failed
•解决:
◦修改sshd的配置文件: vim /etc/ssh/sshd_config
◦在配置文件中添加:
Ciphers aes128-cbc,aes192-cbc,aes256-cbc,aes128-ctr,aes192-ctr,aes256-ctr,3des-cbc,arcfour128,arcfour256,arcfour,blowfish-cbc,cast128-cbc
MACs hmac-md5,hmac-sha1,umac-64@openssh.com,hmac-ripemd160,hmac-sha1-96,hmac-md5-96
KexAlgorithms diffie-hellman-group1-sha1,diffie-hellman-group14-sha1,diffie-hellman-group-exchange-sha1,diffie-hellman-group-exchange-sha256,ecdh-sha2-nistp256,ecdh-sha2-nistp384,ecdh-sha2-nistp521,diffie-hellman-group1-sha1,curve25519-sha256@libssh.org
◦重启sshd服务: service ssh restart
2.Xshell或Xftp中文乱码
•Xshell:文件->属性->终端->编码->UTF-8>
•Xftp:文件->属性->选项->选中使用UTF-8编码
3.安装MySQL出错
•错误:
下列软件包有未满足的依赖关系:
mysql-client : 依赖: mysql-client-5.5 但是它将不会被安装
mysql-server : 依赖: mysql-server-5.5 但是它将不会被安装
E: 无法修正错误,因为您要求某些软件包保持现状,就是它们破坏了软件包间的依赖关系。
•解决:两种解决方法
1.使用Ubuntu自带的下载源,不要使用其他源(如网易)
2.手动安装
◦下载MySQL:http://dev.mysql.com/downloads/mysql/
◦使用FTP工具上传到Ubuntu
◦解压: tar -xvf mysql-server_5.7.13-1ubuntu16.04_i386.deb-bundle.tar
◦安装:
sudo dpkg -i libmysqlclient20_5.7.15-1ubuntu16.04_amd64.deb libmysqlclient-dev_5.7.15-1ubuntu16.04_amd64.deb libmysqld-dev_5.7.15-1ubuntu16.04_amd64.deb mysql-common_5.7.15-1ubuntu16.04_amd64.deb mysql-community-source_5.7.15-1ubuntu16.04_amd64.deb mysql-community-client_5.7.15-1ubuntu16.04_amd64.deb mysql-client_5.7.15-1ubuntu16.04_amd64.deb mysql-community-server_5.7.15-1ubuntu16.04_amd64.deb mysql-server_5.7.15-1ubuntu16.04_amd64.deb
4.安装pip出错
解决:可改用如下命令:
sudo apt-get install python-pip python-dev build-essential
sudo pip install --upgrade pip
sudo pip install --upgrade virtualenv
5.安装Django超时报错
•解决
•设置超时时间:sudo pip install django --default-timeout 100
•或者使用其他下载源:pip install web.py -i
6.安装MySQL-python报错
•错误:EnvironmentError: mysql_config not found
•解决:
•sudo apt-get install libmysqld-dev
•安装MySQL-python:pip install MySQL-python
7.更新Python库
pip install --upgrade 库名


 2万+
2万+


 被折叠的 条评论
为什么被折叠?
被折叠的 条评论
为什么被折叠?
 到【灌水乐园】发言


