When editing native JNI code in an Android project using the Android NDK you may configure Eclipse to automatically rebuild your project when editing native code, just as it does for java. The below steps shows how to perform the necessary configuration (note that this requires revision 4 or later of the NDK - previous revisions does not contain the necessary ndk-build binary):
Start by right clicking on your android project (named hello-neon in the below screenshots) with JNI resources, and select Properties. In the resulting dialog, choose the Builders entry in the list to the left and press the New... button:

A new dialog will open presenting a list of builder types. Select the Program type and press the OK button:

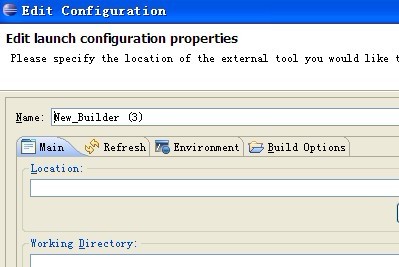
In the Main tab, fill in the following:
-
Name:
- NDK Builder Location:
- /opt/android-ndk/ndk-build (or wherever your ndk-build binary is). You may use a variable as in ${system_property:user.home}/lib/android-ndk/ndk-build Working Directory:
-
${workspace_loc:/hello-neon} (replace hello-neon with your project name. Press the
Browse Workspace...button to select it graphically)
The result should look something like the below:

Now continue with the refresh tab. Make sure the two checkboxes Refresh resources upon completion. and Recursively include sub-foldersare checked. Choose the Specific resources radio button and press the Specify Resources... button:

Since the ndk-build process will generate files in the lib folder, we want Eclipse to discover changes made there without having to refresh manually. So select the lib folder in the project (create one if necessary) and press the Finish button:

Now skip the Environment tab and go to the final Build Options tab. Make sure the Run the builder: During auto builds checkbox is checked.

Since the NDK build only needs to happen when editing files in the jni folder, check that folder and press the Finish button.

Now finally press OK in the builder configuration dialog - the new NDK builder should now be up and running. Try editing any file in the jni folder and check that the Console view produces output from the build process:


 589
589


 被折叠的 条评论
为什么被折叠?


