


准备工作
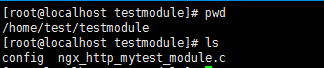
nginx模块需要用C(或者C++)语言来编码实现,每个模块都要有自己的名字。我们这里把编写的HTTP模块命名为ngx_http_mytest_module,源代码文件命名为ngx_http_mytest_module.c。
定义自己的HTTP模块
定义HTTP模块的方式很简单,例如:
ngx_module_t ngx_http_mytest_module;ngx_module_t是一个nginx模块的数据结构,如下所示:
typedef struct ngx_module_s ngx_module_t;
struct ngx_module_s {
    // 分类的模块计数器
    // nginx模块可以分为四种:core、event、http和mail
    // 每个模块都会各自计数,ctx_index就是每个模块在其所属类组的计数
    ngx_uint_t ctx_index;

    // 模块计数器,按照每个模块在ngx_modules[]数组中的声明顺序
    // 从0开始依次给每个模块赋值
    ngx_uint_t index;

    // 保留变量,暂未使用
    ngx_uint_t spare0;
    ngx_uint_t spare1;
    ngx_uint_t spare2;
    ngx_uint_t spare3;

    ngx_uint_t version;  // nginx模块版本

    // 模块的上下文,不同种类的模块有不同的上下文,因此实现了四种结构体
    void *ctx;

    ngx_command_t *commands;  // 处理模块中的配置项

    ngx_uint_t type;  // 模块类型,用于区分core,event,http和mail

    ngx_int_t  (*init_master)(ngx_log_t *log);  // 初始化master时执行
    ngx_int_t  (*init_module)(ngx_cycle_t *cycle);  // 初始化module时执行
    ngx_int_t  (*init_process)(ngx_cycle_t *cycle);  // 初始化process时执行
    ngx_int_t  (*init_thread)(ngx_cycle_t *cycle);   // 初始化thread时执行
    void (*exit_thread)(ngx_cycle_t *cycle);  // 退出thread时执行
    void (*exit_process)(ngx_cycle_t *cycle);  // 退出process时执行
    void (*exit_master)(ngx_cycle_t *cycle);  // 退出master时执行

    // 以下变量是保留字段,暂未使用
    uintptr_t  spare_hook0;
    uintptr_t  spare_hook1;
    uintptr_t  spare_hook2;
    uintptr_t  spare_hook3;
    uintptr_t  spare_hook4;
    uintptr_t  spare_hook5;
    uintptr_t  spare_hook6;
    uintptr_t  spare_hook7;
};

该结构体在初始化时,需要用到两个宏定义:
#define NGX_MODULE_V1    0, 0, 0, 0, 0, 0, 1                // 初始化前七个成员
#define NGX_MODULE_V1_PADDING 0, 0, 0, 0, 0, 0, 0, 0 // 初始化后八个成员 定义HTTP模块时,最重要的是要设置ctx和commands这两个成员:
(1)我们首先来定义mytest配置项的处理,并设置在出现mytest配置后的解析方法ngx_http_mytest,如下所示:
static ngx_command_t ngx_http_mytest_commands[] = {
    {
        ngx_string("mytest"),
NGX_HTTP_MAIN_CONF|NGX_HTTP_SRV_CONF|NGX_HTTP_LOC_CONF|NGX_HTTP_LMT_CONF|NGX_CONF_NOARGS,
        ngx_http_mytest,
        NGX_HTTP_LOC_CONF_OFFSET,
        0,
        NULL
    },

    ngx_null_command
};

static char *ngx_http_mytest(ngx_conf_t *cf, ngx_command_t *cmd, void *conf)
{
    ngx_http_core_loc_conf_t *clcf;
    // 找到mytest配置项所属的配置块
    clcf = ngx_http_conf_get_module_loc_conf(cf, ngx_http-core_module);
    // ngx_http_mytest_handler方法处理请求
    clcf->handler = ngx_http_mytest_handler;
    return NGX_CONF_OK;
}
(2)对于HTTP类型的模块来说,ngx_module_t中的ctx指针必须指向ngx_http_module_t接口。我们当前只是开发一个简单的模块,如果没有什么工作是必须在HTTP框架初始化时完成的,那就不必实现ngx_http_module_t中的8个回调方法,可以像下面这样定义ngx_http_module_t接口:
static ngx_http_module_t ngx_http_mytest_module_ctx = {
    NULL,  /* preconfiguration */
    NULL,  /* postconfiguration */

    NULL,  /* create main configuration */
    NULL,  /* init main configuration */

    NULL,  /* create server configuration */
    NULL,  /* merge server configuration */

    NULL,  /* create location configration */
    NULL,  /* merge location configration */
};
最后,我们来定义mytest模块:
ngx_module_t  ngx_http_mytest_module = {
    NGX_MODULE_V1,
    &ngx_http_mytest_module_ctx,   /* module context */
    ngx_http_mytest_commands,      /* module directives */
    NGX_HTTP_MODULE,               /* module type */
    NULL,                          /* init master */
    NULL,                          /* init module */
    NULL,                          /* init process */
    NULL,                          /* init thread */
    NULL,                          /* exit thread */
    NULL,                          /* exit process */
    NULL,                          /* exit master */
    NGX_MODULE_V1_PADDING
};
这样,mytest模块在编译时就会被加入到ngx_modules全局数组中。
完整的ngx_http_mytest_handler处理方法
static ngx_int_t ngx_http_mytest_handler(ngx_http_request_t *r)
{
// 必须是GET或HEAD方法,否则返回405 not allowed
if (!(r->method & (NGX_HTTP_GET | NGX_HTTP_HEAD))) {
return NGX_HTTP_NOT_ALLOWED;
}
// 丢弃请求中的包体(如果不想处理就丢弃掉)
// 它的意义在于:有些客户端可能会一直试图发送包体,而如果HTTP模块
// 不接收发来的TCP流,有可能造成客户端发送超时
ngx_int_t rc = ngx_http_discard_request_body(r);
if (rc != NGX_OK) {
return rc;
}
// 设置返回的Content-Type
ngx_str_t type = ngx_string("text/plain");
// 返回的包体内容
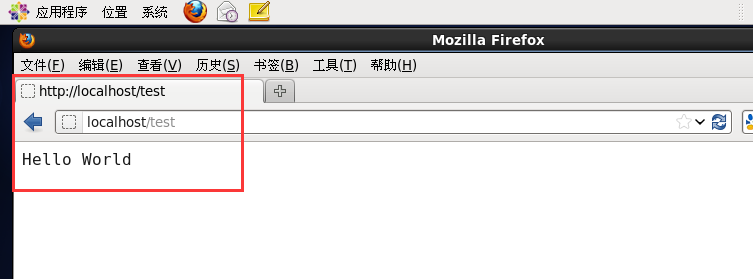
ngx_str_t response = ngx_string("Hello World");
// 设置返回状态码
r->headers_out.status = NGX_HTTP_OK;
// 响应包是有包体内容的,需要设置Content-Length长度
r->headers_out.content_length_n = response.len;
// 设置Content-Type
r->headers_out.content_type = type;
// 发送HTTP头部
rc = ngx_http_send_header(r);
if (rc == NGX_ERROR || rc > NGX_OK || r->header_only) {
return rc;
}
// 构造ngx_buf_t结构体准备发送包体
ngx_buf_t *b;
b = ngx_create_temp_buf(r->pool, response.len);
if (b == NULL) {
return NGX_HTTP_INTERNAL_SERVER_ERROR;
}
// 将包体内容即Hello World复制到ngx_buf_t所指向的内存
ngx_memcpy(b->pos, response.data, response.len);
// 一定要设置好last指针
b->last = b->pos + response.len;
// 声明这是最后一块缓冲区
b->last_buf = 1;
// 构造发送时的ngx_chain_t结构体
ngx_chain_t out;
// 赋值ngx_buf_t
out.buf = b;
// 设置next为NULL
out.next = NULL;
// 最后一步为发送包体
// 发送结束后HTTP框架会调用ngx_http_finalize_request方法结束请求
return ngx_http_output_filter(r, &out);
}将编写的HTTP模块编译进nginx
为了让HTTP模块正常工作,首先需要把它编译进nginx。
nginx提供的一种简单的编译方式是:首先把源代码文件全部放到一个目录下,同时在该目录中编写一个文件用于通知nginx如何编译本模块,这个文件名必须为config。
config文件的写法:
如果只想开发一个HTTP模块,那么config文件中需要定义以下三个变量:
(1)ngx_addon_name:仅在configure执行时使用,一般设置为模块名称;
(2)HTTP_MODULES:保存所有的HTTP模块名称,每个模块间由空格相连;
(3)NGX_ADDON_SRCS:用于指定新模块的源代码,多个待编译的源代码之间可以用空格相连。注意,在设置这个变量时可以使用$ngx_addon_dir变量,它等价于configure执行时--add-module=PATH的PATH参数。

对于我们的mytest模块,可以这样编写config文件:

ngx_addon_name=ngx_http_mytest_module
HTTP_MODULES="$HTTP_MODULES ngx_http_mytest_module"
NGX_ADDON_SRCS="$NGX_ADDON_SRCS $ngx_addon_dir/ngx_http_mytest_module.c"
这样,只要在configure脚本执行时加入参数–add-module=PATH(PATH就是我们的源代码和config文件的保存目录),就可以在执行正常编译安装流程时完成nginx编译工作。
上述方法是最方便的,但有时我们需要更灵活的方式,比如重新决定各个模块的顺序或者在编译源代码时加入一些独特的编译选项,我们可以在执行configure后,对生成的objs/ngx_modules.c和objs/Makefile文件直接进行修改。(此种方法需慎用,不正确的修改可能导致nginx运作不正常,此处不详述)
完整代码
config文件:
ngx_addon_name=ngx_http_mytest_module
HTTP_MODULES="$HTTP_MODULES ngx_http_mytest_module"
NGX_ADDON_SRCS="$NGX_ADDON_SRCS $ngx_addon_dir/ngx_http_mytest_module.c"
源代码 ngx_http_mytest_module.c
#include <ngx_config.h>
#include <ngx_core.h>
#include <ngx_http.h>

static ngx_int_t ngx_http_mytest_handler(ngx_http_request_t *r);

static char *
ngx_http_mytest(ngx_conf_t *cf, ngx_command_t *cmd, void *conf);

static ngx_command_t ngx_http_mytest_commands[] = {
    {
        ngx_string("mytest"),         NGX_HTTP_MAIN_CONF|NGX_HTTP_SRV_CONF|NGX_HTTP_LOC_CONF|NGX_HTTP_LMT_CONF|NGX_CONF_NOARGS,
        ngx_http_mytest,
        NGX_HTTP_LOC_CONF_OFFSET,
        0,
        NULL
    },
    ngx_null_command
};

static ngx_http_module_t ngx_http_mytest_module_ctx = {
    NULL,
    NULL,
    NULL,
    NULL,
    NULL,
    NULL,
    NULL,
    NULL
};

ngx_module_t ngx_http_mytest_module = {
    NGX_MODULE_V1,
    &ngx_http_mytest_module_ctx,
    ngx_http_mytest_commands,
    NGX_HTTP_MODULE,
    NULL,
    NULL,
    NULL,
    NULL,
    NULL,
    NULL,
    NULL,
    NGX_MODULE_V1_PADDING
};

static char *
ngx_http_mytest(ngx_conf_t *cf, ngx_command_t *cmd, void *conf)
{
    ngx_http_core_loc_conf_t *clcf;

    clcf = ngx_http_conf_get_module_loc_conf(cf, ngx_http_core_module);

    clcf->handler = ngx_http_mytest_handler;

    return NGX_CONF_OK;
}

static ngx_int_t ngx_http_mytest_handler(ngx_http_request_t *r)
{
    if (!(r->method & (NGX_HTTP_GET | NGX_HTTP_HEAD))) {
        return NGX_HTTP_NOT_ALLOWED;
    }

    ngx_int_t rc = ngx_http_discard_request_body(r);
    if (rc != NGX_OK) {
        return rc;
    }

    ngx_str_t type = ngx_string("text/plain");
    ngx_str_t response = ngx_string("Hello World");
    r->headers_out.status = NGX_HTTP_OK;
    r->headers_out.content_length_n = response.len;
    r->headers_out.content_type = type;

    rc = ngx_http_send_header(r);
    if (rc == NGX_ERROR || rc > NGX_OK || r->header_only) {
        return rc;
    }

    ngx_buf_t *b;
    b = ngx_create_temp_buf(r->pool, response.len);
    if (b == NULL) {
        return NGX_HTTP_INTERNAL_SERVER_ERROR;
    }

    ngx_memcpy(b->pos, response.data, response.len);
    b->last = b->pos + response.len;
    b->last_buf = 1;

    ngx_chain_t out;
    out.buf = b;
    out.next = NULL;

    return ngx_http_output_filter(r, &out);
} 
编译及测试结果
编译:
./configure --prefix=/usr/local/nginx(指定安装部署后的根目录) --add-module=/home/test/testmodule(新模块存放目录)

make

make install 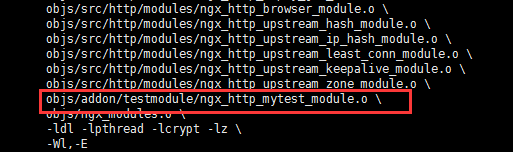
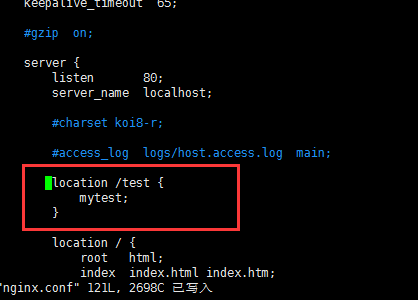
修改配置文件:
配置文件位于/usr/local/nginx/conf/nginx.conf,做如下修改:
location /test {
    mytest;
}
测试结果:
参考资料:
陶辉.深入理解Nginx 模块开发与架构解析.北京:机械工业出版社,2013


 2094
2094


 被折叠的 条评论
为什么被折叠?
被折叠的 条评论
为什么被折叠?
 到【灌水乐园】发言


