


很多时候,android提供的控件并不能满足实际开发的需要,而系统自然也提供了自定义控件的方法供开发者使用,下面就介绍一个简单的自定义控件TopBar(应用标题栏)的开发过程。
第一步:新建一个android项目
第二步:在res/values下新建一个attrs.xml的文件用来声明自定义控件的属性
第三步:也是最重要的一步,新建自定义控件类TopBar
package com.topbar.test;

import android.annotation.SuppressLint;
import android.content.Context;
import android.content.res.TypedArray;
import android.graphics.Color;
import android.graphics.drawable.Drawable;
import android.util.AttributeSet;
import android.view.Gravity;
import android.view.View;
import android.view.ViewGroup;
import android.widget.Button;
import android.widget.RelativeLayout;
import android.widget.TextView;

public class TopBar extends RelativeLayout {
	private Button leftButton;
	private Button rightButton;
	private TextView title;

	private String leftText;
	private float leftTextSize;
	private int leftTextColor;
	private Drawable leftBackground;

	private String rightText;
	private float rightTextSize;
	private int rightTextColor;
	private Drawable rightBackground;

	private String titleText;
	private float titleTextSize;
	private int titleTextColor;

	private LayoutParams leftParams, rightParams, titleParams;

	//实现自定义控件的点击事件
	public interface topBarOnclickListener{
		public void leftClick();
		public void rightClick();
	}

	private topBarOnclickListener listener;

	public void setTopBarOnclickListener(topBarOnclickListener listener){
		this.listener = listener;
	}

	@SuppressLint("NewApi")
	//在xml中要使用的自定义控件必须使用具有AttributesSet的构造方法
	public TopBar(Context context, AttributeSet attrs) {
		super(context, attrs);
		//得到TopBar的declare-styleable
		TypedArray ta = context.obtainStyledAttributes(attrs,
				R.styleable.Topbar);
		//得到在xml中设置的属性值
		leftTextColor = ta.getColor(R.styleable.Topbar_leftTextColor, 0);
		leftBackground = ta.getDrawable(R.styleable.Topbar_leftBackground);
		leftText = ta.getString(R.styleable.Topbar_leftText);
		leftTextSize = ta.getDimension(R.styleable.Topbar_leftTextSize, 0);

		rightTextColor = ta.getColor(R.styleable.Topbar_rightTextColor, 0);
		rightBackground = ta.getDrawable(R.styleable.Topbar_rightBackground);
		rightText = ta.getString(R.styleable.Topbar_rightText);
		rightTextSize = ta.getDimension(R.styleable.Topbar_rightTextSize, 0);

		titleText = ta.getString(R.styleable.Topbar_titleText);
		titleTextColor = ta.getColor(R.styleable.Topbar_titleTextColor, 0);
		titleTextSize = ta.getDimension(R.styleable.Topbar_titleTextSize, 0);

		ta.recycle();

		leftButton = new Button(context);
		rightButton = new Button(context);
		title = new TextView(context);
		//为自定义控件中的控件设置属性
		leftButton.setText(leftText);
		leftButton.setTextColor(leftTextColor);
		leftButton.setTextSize(leftTextSize);
		leftButton.setBackground(leftBackground);

		rightButton.setText(rightText);
		rightButton.setTextColor(rightTextColor);
		rightButton.setTextSize(rightTextSize);
		rightButton.setBackground(rightBackground);

		title.setText(titleText);
		title.setTextColor(titleTextColor);
		title.setTextSize(titleTextSize);
		title.setGravity(Gravity.CENTER);

		setBackgroundColor(Color.GRAY);
		//为自定义控件中的控件设置布局属性
		leftParams = new LayoutParams(ViewGroup.LayoutParams.WRAP_CONTENT,
				LayoutParams.WRAP_CONTENT);
		leftParams.addRule(RelativeLayout.ALIGN_PARENT_LEFT, TRUE);

		addView(leftButton, leftParams);

		rightParams = new LayoutParams(ViewGroup.LayoutParams.WRAP_CONTENT,
				LayoutParams.WRAP_CONTENT);
		rightParams.addRule(RelativeLayout.ALIGN_PARENT_RIGHT, TRUE);

		addView(rightButton, rightParams);

		titleParams = new LayoutParams(ViewGroup.LayoutParams.WRAP_CONTENT,
				LayoutParams.WRAP_CONTENT);
		titleParams.addRule(RelativeLayout.CENTER_IN_PARENT, TRUE);

		addView(title, titleParams);

		leftButton.setOnClickListener(new OnClickListener() {

			@Override
			public void onClick(View arg0) {

				listener.leftClick();
			}
		});
		rightButton.setOnClickListener(new OnClickListener() {

			@Override
			public void onClick(View arg0) {
				// TODO Auto-generated method stub
				listener.rightClick();
			}
		});
	}
}
第四步:在activity_main.xml中添加TopBar控件并设置属性
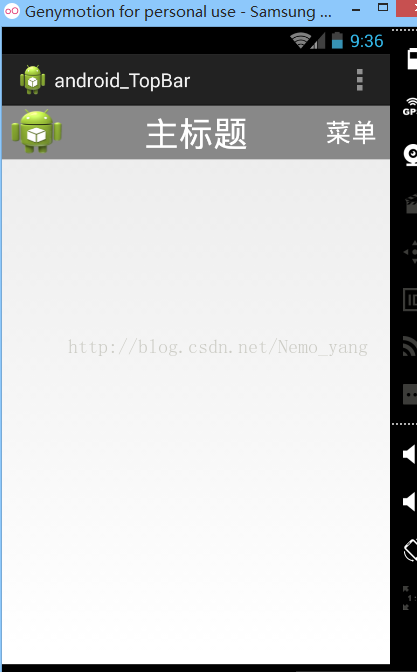
至此,TopBar自定义控件编写完成。看看效果图,虽然比较丑,但功能已经实现了


 1316
1316

 被折叠的 条评论
为什么被折叠?
被折叠的 条评论
为什么被折叠?
 到【灌水乐园】发言


