


 本文介绍SpringBoot项目的快速启动方法及核心特点,包括如何创建独立的Java应用和Web应用,使用默认配置实现快速开发,以及非功能性特性的集成。文中详细展示了如何搭建SpringBoot环境,并通过实例说明了配置文件的使用。
Spring Boot 项目旨在简化创建产品级的 Spring应用和服务。你可通过它来选择不同的Spring平台。可创建独立的Java应用和Web应用,同时提供了命令行工具来允许'spring scripts'.
该项目主要的目的是:
l 为 Spring 的开发提供了更快更广泛的快速上手
l 使用默认方式实现快速开发
l 提供大多数项目所需的非功能特性,诸如:嵌入式服务器、安全、心跳检查、外部配置等
Spring Boot 不生成代码,完全无需 XML配置。
Spirng boot可以以jar包的形式独立运行,运行一个Spring boot项目只需通过java -jar xx.jar来运行,Spring boot还内嵌了servlet容器,提供一系列的starter pom 来简化maven的依赖加载,Spirng boot还会自动配置spring ,提供基于http、ssh、telnet对运行的项目进行监控
Quick Start
可以通过spring官网来生成

上面那里 项目中使用的技术 那里是搜索的
具体有哪些可以查看下面

然后直接将生成的项目导入到ide中就OK了
除了自动生成的,也可以自己创建一个maven项目
pom.xml
<project xmlns="http://maven.apache.org/POM/4.0.0" xmlns:xsi="http://www.w3.org/2001/XMLSchema-instance"
	xsi:schemaLocation="http://maven.apache.org/POM/4.0.0 http://maven.apache.org/xsd/maven-4.0.0.xsd">
	<modelVersion>4.0.0</modelVersion>

	<groupId>com.ibigsea</groupId>
	<artifactId>bootdemo</artifactId>
	<version>0.0.1-SNAPSHOT</version>
	<packaging>jar</packaging>

	<name>bootdemo</name>
	<url>http://maven.apache.org</url>

	<properties>
		<project.build.sourceEncoding>UTF-8</project.build.sourceEncoding>
		<boot.version>1.3.1.RELEASE</boot.version>
	</properties>

	<dependencies>
		<dependency>
			<groupId>org.springframework.boot</groupId>
			<artifactId>spring-boot-starter-web</artifactId>
			<version>${boot.version}</version>
		</dependency>
		<dependency>
			<groupId>org.springframework.boot</groupId>
			<artifactId>spring-boot-starter-test</artifactId>
			<version>${boot.version}</version>
			<scope>test</scope>
		</dependency>
	</dependencies>

	<build>
		<plugins>
			<plugin>
				<groupId>org.springframework.boot</groupId>
				<artifactId>spring-boot-maven-plugin</artifactId>
			</plugin>
		</plugins>
	</build>
</project>
然后创建一个普通的类
package com.ibigsea.bootdemo;

import org.springframework.boot.SpringApplication;
import org.springframework.boot.autoconfigure.SpringBootApplication;
import org.springframework.web.bind.annotation.RequestMapping;
import org.springframework.web.bind.annotation.RestController;

/**
 * 是Spring Boot项目的核心注解,主要是开启自动配置
 */
@SpringBootApplication // same as @Configuration @EnableAutoConfiguration @ComponentScan
@RestController
public class App {

	@RequestMapping("/")
	public String index(){
		return "Hello Spring Boot";
	}

	public static void main(String[] args) {
		SpringApplication.run(App.class, args);
	}
}
运行就可以访问到了

基本配置
Spirng boot通常都有一个入口类,入口类一个main方法.
@SpringBootApplication 是Spring Boot的核心注解,并且是一个组合注解
这个注解相当于@Configuration,@EnableAutoConfiguration和@ComponentScan

http://dailycode.daoapp.io/spring-boot-annotations/
@EnableAutoConfiguration 注解会根据类路径中的jar包依赖为当前项目进行自动配置
For example:
添加spring-boot-starter-web依赖,会自动添加tomcat和spring mvc的依赖,那么Spring Boot会对Tomcat和SpirngMVC进行自动配置
修改默认启动图案
在resources下面放一个banner.txt文件


也可以关闭这个图案

Spring Boot配置文件
Spring Boot使用一个全局配置文件,application.properties或application.yml放置在src/main/resources下面或者类路径的/config下面

在默认情况下spring boot 使用/为访问路径 使用8080为 默认端口
新增application.properties
server.port=8081
server.context-path=/demo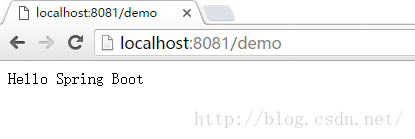
Starter pom是可以包含应用中的一个方便的依赖关系描述集合,例如,如果你想使用Spring和JPA进行数据库访问,只需要在你的项目中包含spring-boot-starter-data-jpa依赖,然后你就可以开始了。
具体资料:
https://github.com/spring-projects/spring-boot/tree/master/spring-boot-starters
Spirng Boot 通过 @ImportResource注解来加载xml配置
例如
@ImportResource({"classpath*:spring-*.xml", "classpath*:*-context.xml"})除了在application.properties 文件中添加配置信息以外,还可以通过命令行来进行配置
java -jar bootdemo.jar --server.port=8081 


 4202
4202

 被折叠的 条评论
为什么被折叠?
被折叠的 条评论
为什么被折叠?
 到【灌水乐园】发言


