


 本文详细介绍了如何在MyBatis中实现生产厂家信息的修改功能,包括Mapper映射文件的配置、DAO层的实现、Service层及Controller层的编写,并展示了完整的前端页面与交互流程。
上一次我们做了生产厂家的新增,下面我们来做一下生产厂家的修改
回顾一下我们的FactoryMapper.xml:
可以看到,我们的添加模块并没有添加动态SQL语句(判定各种条件等),我们在写insert的时候我们一般都是所有字段新增,所以我们没有用动态SQL语句。但是“修改”并不是所有字段都修改的,所以我们的修改配置语句需要使用动态SQL语句。
我们在FactoryMapper.xml继续来添加“修改”的配置语句:
我们的Mapper映射文件写完,接下来我们开始写dao层
这里我们依然不用写dao,因为我们继承了BaseDaoImpl,它已经写好了update方法了,回顾一下:
我们下面来写service层:
在FactoryService中我们加入以下方法
下面来写Controller层,在FactoryController中添加下面的方法:
我们的jsp视图里面使用的是常规的标签,如C标签和JSTL标签,原因是如果我们要项目复用,但是用的框架不一样,如果我们之前用的struts2的框架,jsp中使用的是struts2的s标签,这个时候转成springmvc框架就要换标签,不太好,所以这里我们使用通用的标签。
修改页面jFactoryUpdate.jsp:
我们在jFactoryList.jsp页面加一个“修改”的按钮:
下面我们来测试:
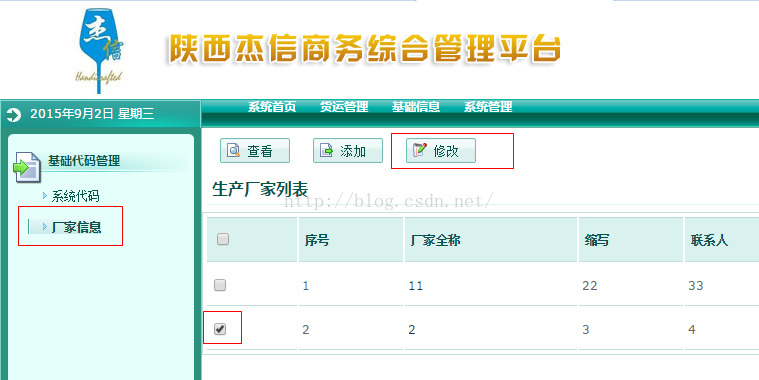
点击修改按钮,如
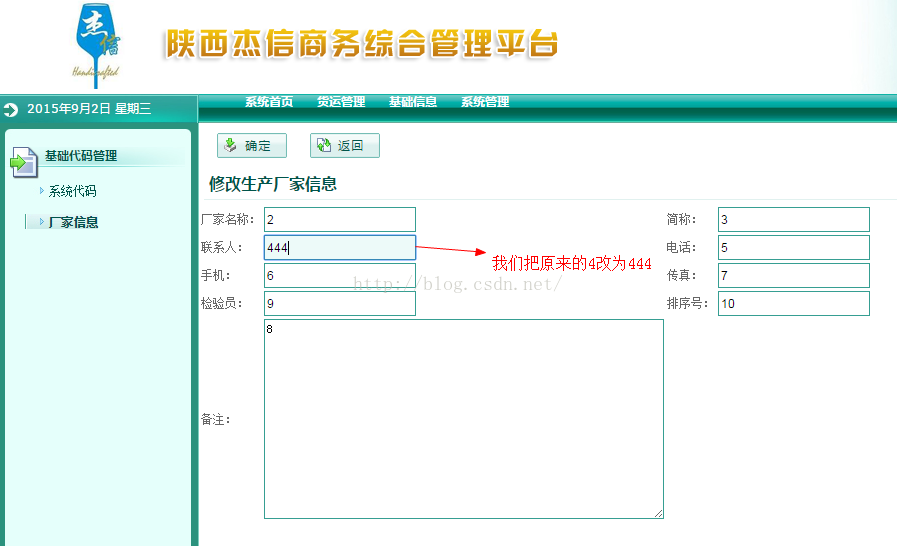
然后修改某个信息,这里我们修改联系人(把4改为444),如
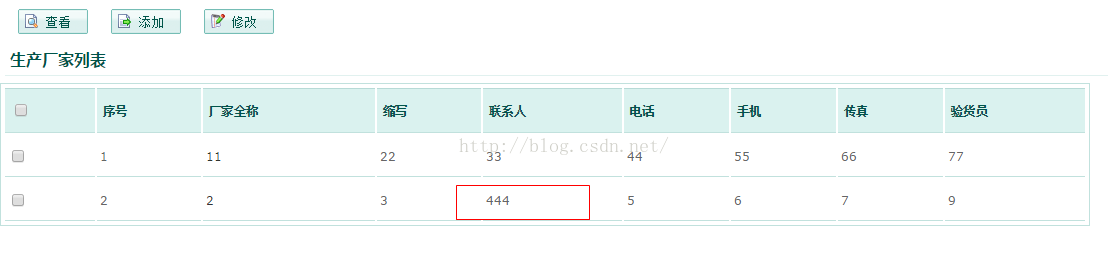
点击确定,在列表中查看我们修改后的结果,如
回顾一下我们的FactoryMapper.xml:
<?xml version="1.0" encoding="UTF-8"?>
<!DOCTYPE mapper
PUBLIC "-//mybatis.org//DTD Mapper 3.0//EN"
"http://mybatis.org/dtd/mybatis-3-mapper.dtd">


<mapper namespace="cn.hpu.jk.mapper.FactoryMapper">
	<!-- resultMap映射 -->
	<resultMap type="cn.hpu.jk.domain.Factory" id="factoryRM">
		<!-- 主键 -->
		<id property="id" column="FACTORY_ID"/>
		<!-- 一般属性 -->
		<result property="fullName" column="FULL_NAME"/>
		<result property="factoryName" column="FACTORY_NAME"/>
		<result property="contacts" column="CONTACTS"/>
		<result property="phone" column="PHONE"/>
		<result property="mobile" column="MOBILE"/>
		<result property="fax" column="FAX"/>
		<result property="cnote" column="CNOTE"/>
		<result property="inspector" column="INSPECTOR"/>
		<result property="orderNo" column="ORDER_NO"/>

		<result property="createBy" column="CREATE_BY"/>
		<result property="creatDept" column="CREATE_DEPT"/>
		<result property="creatTime" column="CREATE_TIME"/>

	</resultMap>

	<!-- 查询 -->
	<select id="find" parameterType="map" resultMap="factoryRM">
		select * from factory_c
		where 1=1
	</select>

	<!-- 新增 oracle jbdc驱动当这个值为null时,必须告诉它当前字段
	默认值的类型jdbcType=VARCHAR(MyBatis定义),Mysql不用写-->
	<insert id="insert" parameterType="cn.hpu.jk.domain.Factory">
		insert into factory_c
		(FACTORY_ID,FULL_NAME,FACTORY_NAME,CONTACTS,PHONE,MOBILE,FAX,CNOTE,
		INSPECTOR,ORDER_NO,CREATE_BY,CREATE_DEPT,CREATE_TIME)
		values
		(	#{id},
			#{fullName,jdbcType=VARCHAR},
			#{factoryName,jdbcType=VARCHAR},
			#{contacts,jdbcType=VARCHAR},
			#{phone,jdbcType=VARCHAR},
			#{mobile,jdbcType=VARCHAR},
			#{fax,jdbcType=VARCHAR},
			#{cnote,jdbcType=VARCHAR},
			#{inspector,jdbcType=VARCHAR},
			#{orderNo,jdbcType=INTEGER},
			#{createBy,jdbcType=VARCHAR},
			#{creatDept,jdbcType=VARCHAR},
			#{creatTime,jdbcType=TIMESTAMP}
		)
	</insert>

</mapper>
可以看到,我们的添加模块并没有添加动态SQL语句(判定各种条件等),我们在写insert的时候我们一般都是所有字段新增,所以我们没有用动态SQL语句。但是“修改”并不是所有字段都修改的,所以我们的修改配置语句需要使用动态SQL语句。
我们在FactoryMapper.xml继续来添加“修改”的配置语句:
<!-- 修改语句 -->
<update id="update" parameterType="cn.hpu.jk.domain.Factory">
	update factory_c
	<set>
 	   <if test="fullName != null">FULL_NAME=#{fullName,jdbcType=VARCHAR},</if>
 	   <if test="factoryName != null">FACTORY_NAME=#{factoryName,jdbcType=VARCHAR},</if>
 	   <if test="contacts != null">CONTACTS=#{contacts,jdbcType=VARCHAR},</if>
 	   <if test="phone != null">PHONE=#{phone,jdbcType=VARCHAR},</if>
 	   <if test="mobile != null">MOBILE=#{mobile,jdbcType=VARCHAR},</if>
 	   <if test="fax != null">FAX=#{fax,jdbcType=VARCHAR},</if>
 	   <if test="cnote != null">CNOTE=#{cnote,jdbcType=VARCHAR},</if>
 	   <if test="inspector != null">INSPECTOR=#{inspector,jdbcType=VARCHAR},</if>
 	   <if test="orderNo != null">ORDER_NO=#{orderNo,jdbcType=INTEGER},</if>
	</set>
	where FACTORY_ID=#{id}
</update>


<!-- 查询一个 -->
<select id="get" parameterType="string" resultMap="factoryRM">
	select * from factory_c
	where factory_id=#{id}
</select>
我们的Mapper映射文件写完,接下来我们开始写dao层
这里我们依然不用写dao,因为我们继承了BaseDaoImpl,它已经写好了update方法了,回顾一下:
package cn.hpu.jk.dao.impl;

import java.io.Serializable;
import java.util.List;
import java.util.Map;


import org.apache.ibatis.session.SqlSessionFactory;
import org.mybatis.spring.support.SqlSessionDaoSupport;
import org.springframework.beans.factory.annotation.Autowired;


import cn.hpu.jk.dao.BaseDao;
import cn.hpu.jk.pagination.Page;


public abstract class BaseDaoImpl<T> extends SqlSessionDaoSupport implements BaseDao<T>{
	@Autowired
	//mybatis-spring 1.0无需此方法;mybatis-spring1.2必须注入。
	public void setSqlSessionFactory(SqlSessionFactory sqlSessionFactory){
		super.setSqlSessionFactory(sqlSessionFactory);
	}

	private String ns;		//命名空间
	public String getNs() {
		return ns;
	}
	public void setNs(String ns) {
		this.ns = ns;
	}

	public List<T> findPage(Page page){
		List<T> oList = this.getSqlSession().selectList(ns + ".findPage", page);
		return oList;
	}


	public List<T> find(Map map) {
		List<T> oList = this.getSqlSession().selectList(ns + ".find", map);
		return oList;
	}
	public T get(Serializable id) {
		return this.getSqlSession().selectOne(ns + ".get", id);
	}


	public void insert(T entity) {
		this.getSqlSession().insert(ns + ".insert", entity);
	}


	public void update(T entity) {
		this.getSqlSession().update(ns + ".update", entity);
	}


	public void deleteById(Serializable id) {
		this.getSqlSession().delete(ns + ".deleteById", id);
	}


	public void delete(Serializable[] ids) {
		this.getSqlSession().delete(ns + ".delete", ids);
	}
}
我们下面来写service层:
在FactoryService中我们加入以下方法
@Override
public void update(Factory factory) {

	factoryDao.update(factory);
}


@Override
public Factory get(Serializable id) {
	return factoryDao.get(id);
}
下面来写Controller层,在FactoryController中添加下面的方法:
//转向修改界面
@RequestMapping("/basicinfo/factory/toupdate.action")
public String toupdate(String id,Model model){
	Factory obj=factoryService.get(id);
	model.addAttribute("obj", obj);
	return "/baseinfo/factory/jFactoryUpdate.jsp";
}


//修改保存
@RequestMapping("/basicinfo/factory/update.action")
public String update(Factory factory){
	factoryService.update(factory);
	return "redirect:/basicinfo/factory/list.action";
}
我们的jsp视图里面使用的是常规的标签,如C标签和JSTL标签,原因是如果我们要项目复用,但是用的框架不一样,如果我们之前用的struts2的框架,jsp中使用的是struts2的s标签,这个时候转成springmvc框架就要换标签,不太好,所以这里我们使用通用的标签。
修改页面jFactoryUpdate.jsp:
<%@ page language="java" pageEncoding="UTF-8"%>
<%@ include file="../../base.jsp"%>
<html xmlns="http://www.w3.org/1999/xhtml">
<head>
    <title>修改厂家信息</title>
</head>
<body>
	<form method="post">
	<input type="hidden" name="id" value="${obj.id}"/>
	<div id="menubar">
		<div id="middleMenubar">
			<div id="innerMenubar">
	    		<div id="navMenubar">
					<ul>
					<li id="save"><a href="#" onclick="formSubmit('update.action','_self');">确定</a></li>
					<li id="back"><a href="list.action">返回</a></li>
					</ul>
	    		</div>
			</div>
		</div>
	</div>

	<div class="textbox" id="centerTextbox">

	    <div class="textbox-header">
	    <div class="textbox-inner-header">
	    <div class="textbox-title">
			修改生产厂家信息
	    </div>
	    </div>
	    </div>
	<div>
	    <div>
			<table class="commonTable" cellspacing="1">
		        <tr>
		            <td class="columnTitle_mustbe">厂家名称:</td>
		            <td class="tableContent"><input type="text" name="fullName" value="${obj.fullName }"/></td>
		            <td class="columnTitle_mustbe">简称:</td>
		            <td class="tableContent"><input type="text" name="factoryName" value="${obj.factoryName }"/></td>
		        </tr>

		        <tr>
		            <td class="columnTitle_mustbe">联系人:</td>
		            <td class="tableContent"><input type="text" name="contacts" value="${obj.contacts }"/></td>
		            <td class="columnTitle_mustbe">电话:</td>
		            <td class="tableContent"><input type="text" name="phone" value="${obj.phone }"/></td>
		        </tr>

		        <tr>
		            <td class="columnTitle_mustbe">手机:</td>
		            <td class="tableContent"><input type="text" name="mobile" value="${obj.mobile }"/></td>
		            <td class="columnTitle_mustbe">传真:</td>
		            <td class="tableContent"><input type="text" name="fax" value="${obj.fax }"/></td>
		        </tr>

		         <tr>
		            <td class="columnTitle_mustbe">检验员:</td>
		            <td class="tableContent"><input type="text" name="inspector" value="${obj.inspector }"/></td>
		            <td class="columnTitle_mustbe">排序号:</td>
		            <td class="tableContent"><input type="text" name="orderNo" value="${obj.orderNo }"/></td>
		        </tr>

		        <tr>
		            <td class="columnTitle_mustbe">备注:</td>
		            <td class="tableContent"><textarea  name="cnote" style="height:200px;width: 400px">${obj.cnote }</textarea></td>
		        </tr>
			</table>
		</div>
	</div>

	</form>
</body>
</html>
我们在jFactoryList.jsp页面加一个“修改”的按钮:
<li id="update"><a href="#" onclick="formSubmit('toupdate.action','_self');this.blur();">修改</a></li>下面我们来测试:
点击修改按钮,如
然后修改某个信息,这里我们修改联系人(把4改为444),如
点击确定,在列表中查看我们修改后的结果,如
发现修改成功!我们的修改功能编写完毕!
转载请注明出处:http://blog.csdn.net/acmman/article/details/48293635


 163
163

 被折叠的 条评论
为什么被折叠?
被折叠的 条评论
为什么被折叠?
 到【灌水乐园】发言


