


Android开发中遇到很多地方需要drawable资源,而drawable的种类繁多,比如shape绘制纯色图片,.9.png图片适应拉伸。当我们充分了解drawable的子类后,就会发现,原来可以如此简单。
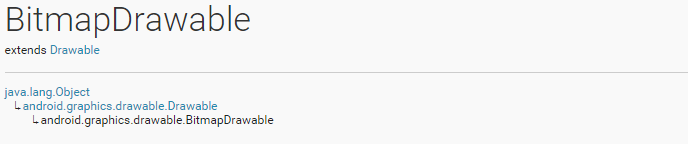
- BitmapDrawable
- NinePathDrawable
- LayerDrawable
- StateListDrawable
- LevelDrawable
- TransitionDrawable
- Inset Drawable
- ClipDrawable
- ScaleDrawable
- ShapeDrawable ….
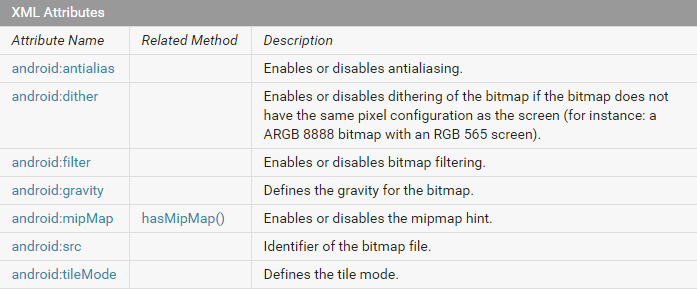
android:antialias:抗锯齿,canvas 绘图对位图进行了选择,会出现锯齿,通常解决办法是通过Paint mPaint=new Paint();调用 mPaint.setAntiAlias()方法。android:filter用于对位图进行过滤波处理。android:dither:图像的抖动处理,当每个颜色值以低于8位表示时,对应图像做抖动处理可以实现在可显示颜色总数比较低时还保持较好的显示效果.android:mipMap hasMipMap()这里的提一下drawable和mipMap的区别,android studio开发工具里面:原生图片放在mipmap 里面, drawable主要放一些放一些自定义形状和按钮变色之类的xml。google强烈建议使用mipmap装图片。把图片放到mipmaps可以提高系统渲染图片的速度,提高图片质量,减少GPU压力。android:tileMode平铺,xml实例如下:
<bitmap
    xmlns:android="http://schemas.android.com/apk/res/android"
    android:src="@drawable/test"
    android:tileMode="repeat"
    android:dither="true" />
代码调用如下:
Bitmap mBitmap = BitmapFactory.decodeResource(mContext.getResources(), R.drawable.ic_launcher);
BitmapDrawable mBitmapDrawable = new BitmapDrawable(mBitmap);
mBitmapDrawable.setTileModeXY(TileMode.REPEAT , TileMode.REPEAT );
mBitmapDrawable.setDither(true);
mLayout.setBackgroundDrawable(mBitmapDrawable);
这里的TileMode类源自Shader类里面的枚举类型,源代码如下:
 public enum TileMode {
        /**
         * replicate the edge color if the shader draws outside of its
         * original bounds
         */
        CLAMP   (0),
        /**
         * repeat the shader's image horizontally and vertically
         */
        REPEAT  (1),
        /**
         * repeat the shader's image horizontally and vertically, alternating
         * mirror images so that adjacent images always seam
         */
        MIRROR  (2);

        TileMode(int nativeInt) {
            this.nativeInt = nativeInt;
        }
        final int nativeInt;
    }
BitmapDrawable构造函数
android.graphics.drawable
public class BitmapDrawable extends Drawable{

    // public static final int DENSITY_DEFAULT = DENSITY_MEDIUM=160;
    private int mTargetDensity = DisplayMetrics.DENSITY_DEFAULT;

    public BitmapDrawable() {
        mBitmapState = new BitmapState((Bitmap) null);
    }
    public BitmapDrawable(Resources res) {
        mBitmapState = new BitmapState((Bitmap) null);
        mBitmapState.mTargetDensity = mTargetDensity;
    }
    public BitmapDrawable(Bitmap bitmap) {
        this(new BitmapState(bitmap), null);
    }
    public BitmapDrawable(Resources res, Bitmap bitmap) {
        this(new BitmapState(bitmap), res);
        mBitmapState.mTargetDensity = mTargetDensity;
    }
    public BitmapDrawable(String filepath) {
        this(new BitmapState(BitmapFactory.decodeFile(filepath)), null);
        if (mBitmapState.mBitmap == null) {
            android.util.Log.w("BitmapDrawable", "BitmapDrawable cannot decode " + filepath);
        }
    }
    public BitmapDrawable(Resources res, String filepath) {
        this(new BitmapState(BitmapFactory.decodeFile(filepath)), null);
        mBitmapState.mTargetDensity = mTargetDensity;
        if (mBitmapState.mBitmap == null) {
            android.util.Log.w("BitmapDrawable", "BitmapDrawable cannot decode " + filepath);
        }
    }
    public BitmapDrawable(java.io.InputStream is) {
        this(new BitmapState(BitmapFactory.decodeStream(is)), null);
        if (mBitmapState.mBitmap == null) {
            android.util.Log.w("BitmapDrawable", "BitmapDrawable cannot decode " + is);
        }
    }
    public BitmapDrawable(Resources res, java.io.InputStream is) {
        this(new BitmapState(BitmapFactory.decodeStream(is)), null);
        mBitmapState.mTargetDensity = mTargetDensity;
        if (mBitmapState.mBitmap == null) {
            android.util.Log.w("BitmapDrawable", "BitmapDrawable cannot decode " + is);
        }
    }
    /**
     * The one constructor to rule them all. This is called by all public
     * constructors to set the state and initialize local properties.
     */
    private BitmapDrawable(BitmapState state, Resources res) {
        mBitmapState = state;

        initializeWithState(mBitmapState, res);
    }

}
这里都调用了一个BitmapState的类,而BitmapState extends Drawable.ConstantState。重写其抽象方法
 public static abstract class ConstantState {
        /**
         * Create a new drawable without supplying resources the caller
         * is running in.  Note that using this means the density-dependent
         * drawables (like bitmaps) will not be able to update their target
         * density correctly. One should use {@link #newDrawable(Resources)}
         * instead to provide a resource.
         */
        public abstract Drawable newDrawable();

        /**
         * Create a new Drawable instance from its constant state.  This
         * must be implemented for drawables that change based on the target
         * density of their caller (that is depending on whether it is
         * in compatibility mode).
         */
        public Drawable newDrawable(Resources res) {
            return newDrawable();
        }

        /**
         * Create a new Drawable instance from its constant state. This must be
         * implemented for drawables that can have a theme applied.
         */
        public Drawable newDrawable(Resources res, Theme theme) {
            return newDrawable(null);
        }

        /**
         * Return a bit mask of configuration changes that will impact
         * this drawable (and thus require completely reloading it).
         */
        public abstract int getChangingConfigurations();

        /**
         * @return Total pixel count
         * @hide
         */
        public int addAtlasableBitmaps(Collection<Bitmap> atlasList) {
            return 0;
        }

        /** @hide */
        protected final boolean isAtlasable(Bitmap bitmap) {
            return bitmap != null && bitmap.getConfig() == Bitmap.Config.ARGB_8888;
        }

        /**
         * Return whether this constant state can have a theme applied.
         */
        public boolean canApplyTheme() {
            return false;
        }
    }
得到BitmapDrawable instance后,可动态设置attr, BitmapDrawable的在new的时候,重写Drawable的私有空方法,重写测量后设置Paint的shader
    /**
     * Override this in your subclass to change appearance if you vary based on
     * the bounds.
     */
    protected void onBoundsChange(Rect bounds) {}


    @Override
    protected void onBoundsChange(Rect bounds) {
        mDstRectAndInsetsDirty = true;

        final Shader shader = mBitmapState.mPaint.getShader();
        if (shader != null) {
            if (needMirroring()) {
                updateMirrorMatrix(bounds.right - bounds.left);
                shader.setLocalMatrix(mMirrorMatrix);
                mBitmapState.mPaint.setShader(shader);
            } else {
                if (mMirrorMatrix != null) {
                    mMirrorMatrix = null;
                    shader.setLocalMatrix(Matrix.IDENTITY_MATRIX);
                    mBitmapState.mPaint.setShader(shader);
                }
            }
        }
    }
getIntrinsicHeight()和getIntrinsicWidth()方法获取BitmapDrawable的宽高,即按照比例缩放后实际大小值。同时需要注意BitmapDrawable(Bitmap mBitmap)已经被弃用,如果延用该方法可能会出现问题mTargetDensity默认的是160,当mBitmap的density>160的时候,bitmap.getWidth() != bitmapDrawable.getIntrinsicWidth().解决办法是传入Resources或者调用setTargetDensity()方法,这样就没问题了。public 构造方法都调用自身的private构造方法,该方法内调用initializeWithState(mBitmapState, res)对mTargetDensity重新赋值,方法如下:
    /**
     * Initializes local dynamic properties from state. This should be called
     * after significant state changes, e.g. from the One True Constructor and
     * after inflating or applying a theme.
     */
    private void initializeWithState(BitmapState state, Resources res) {
        if (res != null) {
            mTargetDensity = res.getDisplayMetrics().densityDpi;
        } else {
            mTargetDensity = state.mTargetDensity;
        }

        mTintFilter = updateTintFilter(mTintFilter, state.mTint, state.mTintMode);
        computeBitmapSize();
    }
下面是一个代码调用实例
@Override
    protected void onCreate(Bundle savedInstanceState) {
        super.onCreate(savedInstanceState);
        setContentView(R.layout.activity_main);
        image=(ImageView)findViewById(R.id.image);
        image.setBackground(getBitmapDrawable());
    }

    private Drawable getBitmapDrawable() {

        BitmapDrawable mBitmapDrawable=new BitmapDrawable(getResources(),BitmapFactory.decodeResource(getResources(), R.drawable.anglebaby));

        mBitmapDrawable.setAlpha(1000);
        mBitmapDrawable.setAntiAlias(true);
        mBitmapDrawable.setDither(true);
        mBitmapDrawable.setFilterBitmap(true);
        mBitmapDrawable.setTileModeXY(TileMode.REPEAT,TileMode.REPEAT);
        mBitmapDrawable.setColorFilter(Color.parseColor("#40FF0000"), Mode.SRC_ATOP);

        return mBitmapDrawable;

    }
NinePatchDrawable该类与BitmapDrawable大同小异,NinePatchDrawable构造方法要传入NinePath和byte[],对指定区域进行屏幕的左右上下拉伸,也可以直接用sdk自带的工具制作.9图片。下面是代码调用实例:
private Drawable getNinePatchDrawable() {
        Bitmap mBitmap=BitmapFactory.decodeResource(getResources(), R.drawable.anglebabye);
        NinePatchDrawable mNinePatchDrawable=new NinePatchDrawable(getResources(), new NinePatch(mBitmap, mBitmap.getNinePatchChunk()));

        mNinePatchDrawable.setAlpha(1000);
        mNinePatchDrawable.setDither(true);
        mNinePatchDrawable.setFilterBitmap(true);
        mNinePatchDrawable.setTintMode(Mode.SRC_ATOP);//API 21
        mNinePatchDrawable.setColorFilter(Color.parseColor("#40FF0000"), Mode.SRC_ATOP);

        return mNinePatchDrawable;
    }

    /**
     * Private constructor that must received an already allocated native bitmap
     * int (pointer).
     */
    @SuppressWarnings({"UnusedDeclaration"}) // called from JNI
    Bitmap(long nativeBitmap, byte[] buffer, int width, int height, int density,
            boolean isMutable, boolean requestPremultiplied,
            byte[] ninePatchChunk, NinePatch.InsetStruct ninePatchInsets) {
        if (nativeBitmap == 0) {
            throw new RuntimeException("internal error: native bitmap is 0");
        }

        mWidth = width;
        mHeight = height;
        mIsMutable = isMutable;
        mRequestPremultiplied = requestPremultiplied;
        mBuffer = buffer;

        // we delete this in our finalizer
        mNativeBitmap = nativeBitmap;

        mNinePatchChunk = ninePatchChunk;
        mNinePatchInsets = ninePatchInsets;
        if (density >= 0) {
            mDensity = density;
        }

        int nativeAllocationByteCount = buffer == null ? getByteCount() : 0;
        mFinalizer = new BitmapFinalizer(nativeBitmap, nativeAllocationByteCount);
    }
       ...mBitmap.getNinePatchChunk()>mNinePatchChunk对应这块的传值暂不涉及...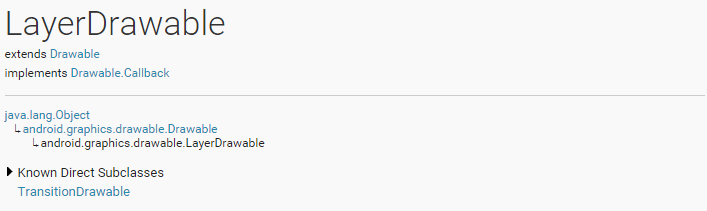
官方xml实例如下:
<?xml version="1.0" encoding="utf-8"?>
<layer-list xmlns:android="http://schemas.android.com/apk/res/android">
    <item>
      <bitmap android:src="@drawable/android_red"
        android:gravity="center" />
    </item>
    <item android:top="10dp" android:left="10dp">
      <bitmap android:src="@drawable/android_green"
        android:gravity="center" />
    </item>
    <item android:top="20dp" android:left="20dp">
      <bitmap android:src="@drawable/android_blue"
        android:gravity="center" />
    </item>
</layer-list>

<ImageView
    android:layout_height="wrap_content"
    android:layout_width="wrap_content"
    android:src="@drawable/layers" />
LayerDrawable类继承Drawable 实现Drawable的Callback方法invalidateDrawable、 scheduleDrawable、unscheduleDrawable;先了解LayerDrawable的构造方法:
 public LayerDrawable(Drawable[] layers) {
        this(layers, null);
    }
 LayerDrawable(Drawable[] layers, LayerState state) {
        this(state, null);

        final int length = layers.length;
        final ChildDrawable[] r = new ChildDrawable[length];
        for (int i = 0; i < length; i++) {
            r[i] = new ChildDrawable();
            r[i].mDrawable = layers[i];
            layers[i].setCallback(this);
            mLayerState.mChildrenChangingConfigurations |= layers[i].getChangingConfigurations();
        }
        mLayerState.mNum = length;
        mLayerState.mChildren = r;

        ensurePadding();
    }
  LayerDrawable() {
        this((LayerState) null, null);
    }

  LayerDrawable(LayerState state, Resources res) {
        mLayerState = createConstantState(state, res);
        if (mLayerState.mNum > 0) {
            ensurePadding();
        }
    }
LayerState的Configuration重新赋值后,调用ensurePadding计算四个方向的padding值。inflate方法里面通过TypeArray获取自定义属性重新赋值
/**
* Initializes the constant state from the values in the typed array.
*/
private void updateStateFromTypedArray(TypedArray a) {
final LayerState state = mLayerState;
// Account for any configuration changes.
state.mChangingConfigurations |= a.getChangingConfigurations();
// Extract the theme attributes, if any.
state.mThemeAttrs = a.extractThemeAttrs();
mOpacityOverride = a.getInt(R.styleable.LayerDrawable_opacity, mOpacityOverride);
state.mAutoMirrored = a.getBoolean(R.styleable.LayerDrawable_autoMirrored,
state.mAutoMirrored);
state.mPaddingMode = a.getInteger(R.styleable.LayerDrawable_paddingMode,
state.mPaddingMode);
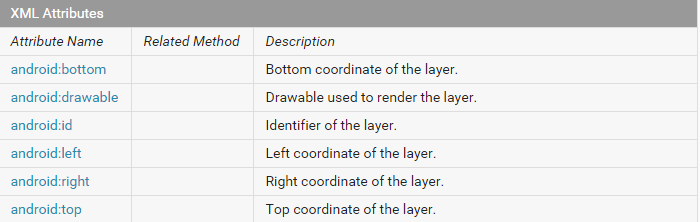
}再调用inflateLayers方法,XmlPullParser解析后调用 updateLayerFromTypedArray(layer, a),获取xml的属性值,方法如下:
 private void updateLayerFromTypedArray(ChildDrawable layer, TypedArray a) {
        final LayerState state = mLayerState;

        // Account for any configuration changes.
        state.mChildrenChangingConfigurations |= a.getChangingConfigurations();

        // Extract the theme attributes, if any.
        layer.mThemeAttrs = a.extractThemeAttrs();

        layer.mInsetL = a.getDimensionPixelOffset(
                R.styleable.LayerDrawableItem_left, layer.mInsetL);
        layer.mInsetT = a.getDimensionPixelOffset(
                R.styleable.LayerDrawableItem_top, layer.mInsetT);
        layer.mInsetR = a.getDimensionPixelOffset(
                R.styleable.LayerDrawableItem_right, layer.mInsetR);
        layer.mInsetB = a.getDimensionPixelOffset(
                R.styleable.LayerDrawableItem_bottom, layer.mInsetB);
        layer.mId = a.getResourceId(R.styleable.LayerDrawableItem_id, layer.mId);

        final Drawable dr = a.getDrawable(R.styleable.LayerDrawableItem_drawable);
        if (dr != null) {
            layer.mDrawable = dr;
        }
    }
Drawable的padding值判断是否需要刷新,如果Padding值发生变化,就return true
/**
     * Refreshes the cached padding values for the specified child.
     *
     * @return true if the child's padding has changed
     */
    private boolean refreshChildPadding(int i, ChildDrawable r) {
        final Rect rect = mTmpRect;
        r.mDrawable.getPadding(rect);
        if (rect.left != mPaddingL[i] || rect.top != mPaddingT[i] ||
                rect.right != mPaddingR[i] || rect.bottom != mPaddingB[i]) {
            mPaddingL[i] = rect.left;
            mPaddingT[i] = rect.top;
            mPaddingR[i] = rect.right;
            mPaddingB[i] = rect.bottom;
            return true;
        }
        return false;
    }
onDraw方法把图片集合绘制到画布,其他方法都大同小异,暂不贴了。
    @Override
    public void draw(Canvas canvas) {
        final ChildDrawable[] array = mLayerState.mChildren;
        final int N = mLayerState.mNum;
        for (int i = 0; i < N; i++) {
            array[i].mDrawable.draw(canvas);
        }
    }
代码调用LayerDrawable实例直接new 传入Drawable数组即可。不过需要注意:getResource.getDrawable(int id)一过时, 废弃方法:getDrawable(int id)替代方法:getDrawable(int id, Resources.Theme theme), 废弃原因:在JELLY_BEAN(Android 4.1版本)以前,id是另一个Drawable资源的别名, 则该方法不能正确地获取到正确配置density。density与实际资源的density不等,缩放会出问题。StateListDrawable与LayerDrawable相差不大,StatListDrawable的对应xml实例如下:
<?xml version="1.0" encoding="utf-8"?>
<selector xmlns:android="http://schemas.android.com/apk/res/android"
    android:constantSize=["true" | "false"]
    android:dither=["true" | "false"]
    android:variablePadding=["true" | "false"] >
    <item
        android:drawable="@[package:]drawable/drawable_resource"
        android:state_pressed=["true" | "false"]
        android:state_focused=["true" | "false"]
        android:state_hovered=["true" | "false"]
        android:state_selected=["true" | "false"]
        android:state_checkable=["true" | "false"]
        android:state_checked=["true" | "false"]
        android:state_enabled=["true" | "false"]
        android:state_activated=["true" | "false"]
        android:state_window_focused=["true" | "false"] />
</selector>
我们一起常用的selector控制点击效果,说白了就是一个StateListDrawable,代码调用可以直接使用StateListDrawable提供的方法:
  /**
     * Add a new image/string ID to the set of images.
     *
     * @param stateSet - An array of resource Ids to associate with the image.
     *                 Switch to this image by calling setState().
     * @param drawable -The image to show.
     */
    public void addState(int[] stateSet, Drawable drawable) {
        if (drawable != null) {
            mStateListState.addStateSet(stateSet, drawable);
            // in case the new state matches our current state...
            onStateChange(getState());
        }
    }
代码调用实例如下:
StateListDrawable mStateListDrawable=new StateListDrawable();
mStateListDrawable.addState(new int[]{android.R.attr.state_focused}, getDrawable(R.drawable.shape_red));
mStateListDrawable.addState(new int[]{android.R.attr.state_pressed}, getDrawable(R.drawable.shape_white));
mStateListDrawable.addState(new int[]{android.R.attr.state_selected}, getDrawable(R.drawable.shape_red));
mStateListDrawable.addState(new int[]{},getDrawable(R.drawable.shape_white));//默认
image.setBackground(mStateListDrawable);
LevelListDrawable原理同上,xml实例:
<?xml version="1.0" encoding="utf-8"?>
<level-list xmlns:android="http://schemas.android.com/apk/res/android" >
    <item
        android:drawable="@drawable/status_off"
        android:maxLevel="0" />
    <item
        android:drawable="@drawable/status_on"
        android:maxLevel="1" />
</level-list>
LevelDrawable默认的level值为0,如果没有和0匹配的level,那么就不显示Drawable。level匹配以maxLevel值优先。例如:如果有个item1:minLevel:1,maxLevel:2,item2:minLevel:2,maxLevel:3。 mLevelDrawable.setLevel(2);那么会匹配第一个item1。代码调用实例如下:
@SuppressLint("NewApi")
    private Drawable getLevelListDrawable() {
        // TODO Auto-generated method stub
        LevelListDrawable mLevelListDrawable=new LevelListDrawable();
        mLevelListDrawable.addLevel(1, 2, getDrawable(R.drawable.shape_red));
        mLevelListDrawable.addLevel(2, 3, getDrawable(R.drawable.shape_white));
        mLevelListDrawable.setLevel(2);
        return mLevelListDrawable;
    }
TransitionDrawable是LayerDrawable的直接子类,公开动画startTransition(int duration)方法,源码如下:
/**
     * Begin the second layer on top of the first layer.
     *
     * @param durationMillis The length of the transition in milliseconds
     */
    public void startTransition(int durationMillis) {
        mFrom = 0;
        mTo = 255;
        mAlpha = 0;
        mDuration = mOriginalDuration = durationMillis;
        mReverse = false;
        mTransitionState = TRANSITION_STARTING;
        invalidateSelf();
    }
这里提供一个图片加载的渐变效果如下:
private void fadeInDisplay(ImageView imageView, Bitmap bitmap) {

        final TransitionDrawable transitionDrawable = new TransitionDrawable(
                new Drawable[] { TRANSPARENT_DRAWABLE,
                        new BitmapDrawable(imageView.getResources(), bitmap) });
        imageView.setBackground(transitionDrawable);
        transitionDrawable.startTransition(200);
    }
    private static final ColorDrawable TRANSPARENT_DRAWABLE = new ColorDrawable(
            android.R.color.transparent);
InsetDrawable也有和LayerDrawable相似的属性,构造方法:
  public InsetDrawable(Drawable drawable, int inset) {
        this(drawable, inset, inset, inset, inset);
    }

    public InsetDrawable(Drawable drawable, int insetLeft, int insetTop,
                         int insetRight, int insetBottom) {
        this(null, null);
  }
  private InsetDrawable(InsetState state, Resources res) {
        mState = new InsetState(state, this, res);
  }
  final static class InsetState extends ConstantState {
     ....
 }
下面是代码调用和xml实例
InsetDrawable mInsetDrawable=new InsetDrawable(getDrawable(R.drawable.shape_red), 20, 30, 30, 20);

<?xml version="1.0" encoding="utf-8"?>
<inset xmlns:android="http://schemas.android.com/apk/res/android"
    android:drawable="@drawable/shape_red"
    android:insetTop="10dp"
    android:insetRight="10dp"
    android:insetLeft="10dp" />
ClipDrawable就比较有意思了,可以用来制作图片进度,动态setLevel()控制图片块的显示,xml实例:
<?xml version="1.0" encoding="utf-8"?>
<clip xmlns:android="http://schemas.android.com/apk/res/android"
    android:drawable="@drawable/ic_launcher"
    android:clipOrientation="horizontal"
    android:gravity="left" />
new ClipDrawable传入参数orientation参照:ClipDrawable.HORIZONTAL/VERTICAL.当level为0时,截取的图片片段为空;当level为10000时,截取整张图片.下面是代码调用实例:
ClipDrawable mClipDrawable=new ClipDrawable(getDrawable(R.drawable.ic_launcher), Gravity.CENTER, ClipDrawable.HORIZONTAL);
image.setImageDrawable(mClipDrawable);
image.setLevel(100);
ScaleDrawable对于drawable资源进行尺寸变换,xml调用实例:
<?xml version="1.0" encoding="utf-8"?>
<scale xmlns:android="http://schemas.android.com/apk/res/android"
    android:drawable="@drawable/logo"
    android:scaleGravity="center_vertical|center_horizontal"
    android:scaleHeight="80%"
    android:scaleWidth="80%" />
ScaleDrawable构造方法
 public ScaleDrawable(Drawable drawable, int gravity, float scaleWidth, float scaleHeight) {
        this(null, null);

        mState.mDrawable = drawable;
        mState.mGravity = gravity;
        mState.mScaleWidth = scaleWidth;
        mState.mScaleHeight = scaleHeight;

        if (drawable != null) {
            drawable.setCallback(this);
        }
    }
代码调用实例:
ScaleDrawable mScaleDrawable=new ScaleDrawable(drawable, gravity, scaleWidth, scaleHeight);
mScaleDrawable.setLevel(1);//leve=0时,Drawable资源不可见
AnimationDrawable可用于播放帧动画,官方提供的animation-list.xml调用实例:
<animation-list android:id="@+id/selected" android:oneshot="false">
    <item android:drawable="@drawable/wheel0" android:duration="50" />
    <item android:drawable="@drawable/wheel1" android:duration="50" />
    <item android:drawable="@drawable/wheel2" android:duration="50" />
    <item android:drawable="@drawable/wheel3" android:duration="50" />
    <item android:drawable="@drawable/wheel4" android:duration="50" />
    <item android:drawable="@drawable/wheel5" android:duration="50" />
 </animation-list>
在activity里面或AnimationDrawable实例后调用start方法即可,需要注意的是在onCreate方法里面最好不调用start,代码调用实例:
@Override
    public void onWindowFocusChanged(boolean hasFocus) {
        // TODO Auto-generated method stub
        super.onWindowFocusChanged(hasFocus);
        mAnimationDrawable=new AnimationDrawable();
        mAnimationDrawable.addFrame(getDrawable(R.drawable.shape_red), 1000);
        mAnimationDrawable.addFrame(getDrawable(R.drawable.shape_white), 2000);
        image.setImageDrawable(mAnimationDrawable);
        if(hasFocus){
            mAnimationDrawable.start();
        }
    }
RotateDrawable可旋转的Drawable,在应用里面相机拍照后获取保留下来的图片可能是反向的,这里就可以用RotateDrawable旋转角度,setFromDegrees 、setToDegrees控制旋转角度,setPivotY 、setPivotX控制旋转的轴,比如(50%,50%)中心旋转,下面是调用的相关实例:
<?xml version="1.0" encoding="utf-8"?>
<rotate xmlns:android="http://schemas.android.com/apk/res/android"
    android:drawable="@drawable/image"
    android:visible="true"
    android:fromDegrees="0"
    android:toDegrees="180"
    android:pivotX="50%"
    android:pivotY="50%">
</rotate>
ShapeDrawable 这个就比较熟悉了,我们常用shape绘制图形纯色背景,规则如下:
<?xml version="1.0" encoding="utf-8"?>
<shape
    xmlns:android="http://schemas.android.com/apk/res/android"
    android:shape=["rectangle" | "oval" | "line" | "ring"] >
    <corners
        android:radius="integer"
        android:topLeftRadius="integer"
        android:topRightRadius="integer"
        android:bottomLeftRadius="integer"
        android:bottomRightRadius="integer" />
    <gradient
        android:angle="integer"
        android:centerX="integer"
        android:centerY="integer"
        android:centerColor="integer"
        android:endColor="color"
        android:gradientRadius="integer"
        android:startColor="color"
        android:type=["linear" | "radial" | "sweep"]
        android:useLevel=["true" | "false"] />
    <padding
        android:left="integer"
        android:top="integer"
        android:right="integer"
        android:bottom="integer" />
    <size
        android:width="integer"
        android:height="integer" />
    <solid
        android:color="color" />
    <stroke
        android:width="integer"
        android:color="color"
        android:dashWidth="integer"
        android:dashGap="integer" />
</shape>
此处解析标签如下:
 /**
     * Subclasses override this to parse custom subelements. If you handle it,
     * return true, else return <em>super.inflateTag(...)</em>.
     */
    protected boolean inflateTag(String name, Resources r, XmlPullParser parser,
            AttributeSet attrs) {

        if ("padding".equals(name)) {
            TypedArray a = r.obtainAttributes(attrs,
                    com.android.internal.R.styleable.ShapeDrawablePadding);
            setPadding(
                    a.getDimensionPixelOffset(
                            com.android.internal.R.styleable.ShapeDrawablePadding_left, 0),
                    a.getDimensionPixelOffset(
                            com.android.internal.R.styleable.ShapeDrawablePadding_top, 0),
                    a.getDimensionPixelOffset(
                            com.android.internal.R.styleable.ShapeDrawablePadding_right, 0),
                    a.getDimensionPixelOffset(
                            com.android.internal.R.styleable.ShapeDrawablePadding_bottom, 0));
            a.recycle();
            return true;
        }

        return false;
    }
此处解析width 、height、color、dither等相关属性
  private void updateStateFromTypedArray(TypedArray a) {
        final ShapeState state = mShapeState;
        final Paint paint = state.mPaint;

        // Account for any configuration changes.
        state.mChangingConfigurations |= a.getChangingConfigurations();

        // Extract the theme attributes, if any.
        state.mThemeAttrs = a.extractThemeAttrs();

        int color = paint.getColor();
        color = a.getColor(R.styleable.ShapeDrawable_color, color);
        paint.setColor(color);

        boolean dither = paint.isDither();
        dither = a.getBoolean(R.styleable.ShapeDrawable_dither, dither);
        paint.setDither(dither);

        setIntrinsicWidth((int) a.getDimension(
                R.styleable.ShapeDrawable_width, state.mIntrinsicWidth));
        setIntrinsicHeight((int) a.getDimension(
                R.styleable.ShapeDrawable_height, state.mIntrinsicHeight));

        final int tintMode = a.getInt(R.styleable.ShapeDrawable_tintMode, -1);
        if (tintMode != -1) {
            state.mTintMode = Drawable.parseTintMode(tintMode, Mode.SRC_IN);
        }

        final ColorStateList tint = a.getColorStateList(R.styleable.ShapeDrawable_tint);
        if (tint != null) {
            state.mTint = tint;
        }
    }
ShapeDrawable构造方法:
  /**
     * ShapeDrawable constructor.
     */
    public ShapeDrawable() {
        this(new ShapeState(null), null);
    }

    /**
     * Creates a ShapeDrawable with a specified Shape.
     *
     * @param s the Shape that this ShapeDrawable should be
     */
    public ShapeDrawable(Shape s) {
        this(new ShapeState(null), null);

        mShapeState.mShape = s;
    }
     /**
     * The one constructor to rule them all. This is called by all public
     * constructors to set the state and initialize local properties.
     */
    private ShapeDrawable(ShapeState state, Resources res) {
        mShapeState = state;

        initializeWithState(state, res);
    }
ShapeDrawa实例化的时候new了一个ShapeState,绑定了ShaderFactory, public abstract Shader resize(int width, int height);该方法在setShape 、onBoundsChange是会调用,重新测量,代码如下:
   private void updateShape() {
        if (mShapeState.mShape != null) {
            final Rect r = getBounds();
            final int w = r.width();
            final int h = r.height();

            mShapeState.mShape.resize(w, h);
            if (mShapeState.mShaderFactory != null) {
                mShapeState.mPaint.setShader(mShapeState.mShaderFactory.resize(w, h));
            }
        }
        invalidateSelf();
    }
下面是onDraw调用:
    @Override
    public void draw(Canvas canvas) {
        final Rect r = getBounds();
        final ShapeState state = mShapeState;
        final Paint paint = state.mPaint;

        final int prevAlpha = paint.getAlpha();
        paint.setAlpha(modulateAlpha(prevAlpha, state.mAlpha));

        // only draw shape if it may affect output
        if (paint.getAlpha() != 0 || paint.getXfermode() != null || paint.hasShadowLayer()) {
            final boolean clearColorFilter;
            if (mTintFilter != null && paint.getColorFilter() == null) {
                paint.setColorFilter(mTintFilter);
                clearColorFilter = true;
            } else {
                clearColorFilter = false;
            }

            if (state.mShape != null) {
                // need the save both for the translate, and for the (unknown)
                // Shape
                final int count = canvas.save();
                canvas.translate(r.left, r.top);
                onDraw(state.mShape, canvas, paint);
                canvas.restoreToCount(count);
            } else {
                canvas.drawRect(r, paint);
            }

            if (clearColorFilter) {
                paint.setColorFilter(null);
            }
        }

        // restore
        paint.setAlpha(prevAlpha);
    }
通过ShapeState获取画笔,先判断是否需要清除colorFilter,然会根据shape进行绘制,paint重新赋值。开发中一般都在使用shape绘制纯色背景块,通过selector控制shape显示.还有更多Drawable子类这里就不列举了,看了Drawable系列的相关资料后,萌生出了这么一种想法,通过工厂,直接造成自己想要的Drawable资源,传入简单的参数就可以了,不再用每次都写Drawable.xml文件 ,下面是个简要思路:
public class DrawableFactory {

    ............此处省略..................

    public static final int DRAWABLE_SHAPE=0;

    public Drawable getDrawable(DrawableType mType,OnBasicDrawableListener onBasicDrawableListener){
        Drawable mDrawable=null;
        switch (mType.getTypeValue()) {
        case DRAWABLE_SHAPE:
            mDrawable=ShapeDrawableHelper.getInstance(mContext).getDrawable(onBasicDrawableListener);
            break;

        default:
            break;
        }
        return mDrawable;
    }
}
根据传入不同的Drawable类型,判断选择不同的helper类,通过getDrawable获取Drawable,不同的Drawable实例所需要的参数通过onBasicDrawableListener定义的方法获取。以上就是我看了Drawable相关资料的收获,这里做个记录分享。


 1663
1663


 被折叠的 条评论
为什么被折叠?
被折叠的 条评论
为什么被折叠?
 到【灌水乐园】发言


