


最近一直在学习Windows下驱动开发,尝试过SoftICE调试,可安装上后系统启动(Start NetICE)后,整个系统就死机了,以前在Win2K下安装挺好的,郁闷。所以改成WinDbg调试,发现很好用,把配置和调试过程记录如下,以为日后提供参考。
1 准备工作
1.1 计算机两台。
(1)被调试计算机配置,OS为WinXP+SP2
需要修改系统盘下boot.ini,可用cmd命令进入Dos屏环境,然后转到系统盘根目录下,修改:
attrib -h -s -r boot.ini
notepad boot.ini
attrib +h +s +r boot.ini
然后添加一行:
multi(0)disk(0)rdisk(0)partition(1)/WINDOWS="Microsoft Windows XP Professional Debug" /fastdetect /debug /debugport=com1 /baudrate=115200
修改其内容为:
[boot loader]
timeout=30
default=multi(0)disk(0)rdisk(0)partition(1)/WINDOWS
[operating systems]
multi(0)disk(0)rdisk(0)partition(1)/WINDOWS="Microsoft Windows XP Professional" /noexecute=optin /fastdetect
multi(0)disk(0)rdisk(0)partition(1)/WINDOWS="Microsoft Windows XP Professional Debug" /fastdetect /debug /debugport=com1 /baudrate=115200
(2)主机环境配置,OS为WinXP+SP2
->安装WinDbg6.5
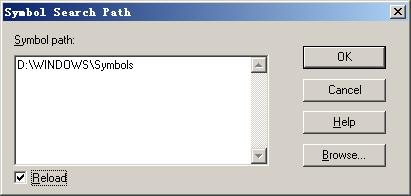
->安装WinXP符号表
->安装WinXP SP2 DDK
(3)两计算机之间通过交叉串口线连接。
1.2 驱动程序准备
(1)利用驱动开发教程中的范例WDM1为被调试驱动。
(2)在WinDBg中设置WinXP符号路径及WDM1源代码路径。
(3) 在build Check环境下,build WDM1源代码路径。
(4)把编译后的Wdm1.sys拷贝到被调试计算机中,并安装。
(5)把调用程序Wdm1Test.exe拷贝到被调试计算机中。
2 调试驱动程序
2.1 在主计算机上打开WinDBG,File->Kernel Debug启动主机。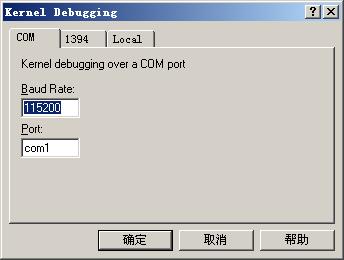
2.2 打开被调试计算机,并选择Debug状态菜单,进入被调试状态。按下CTRL+Break进入调试状态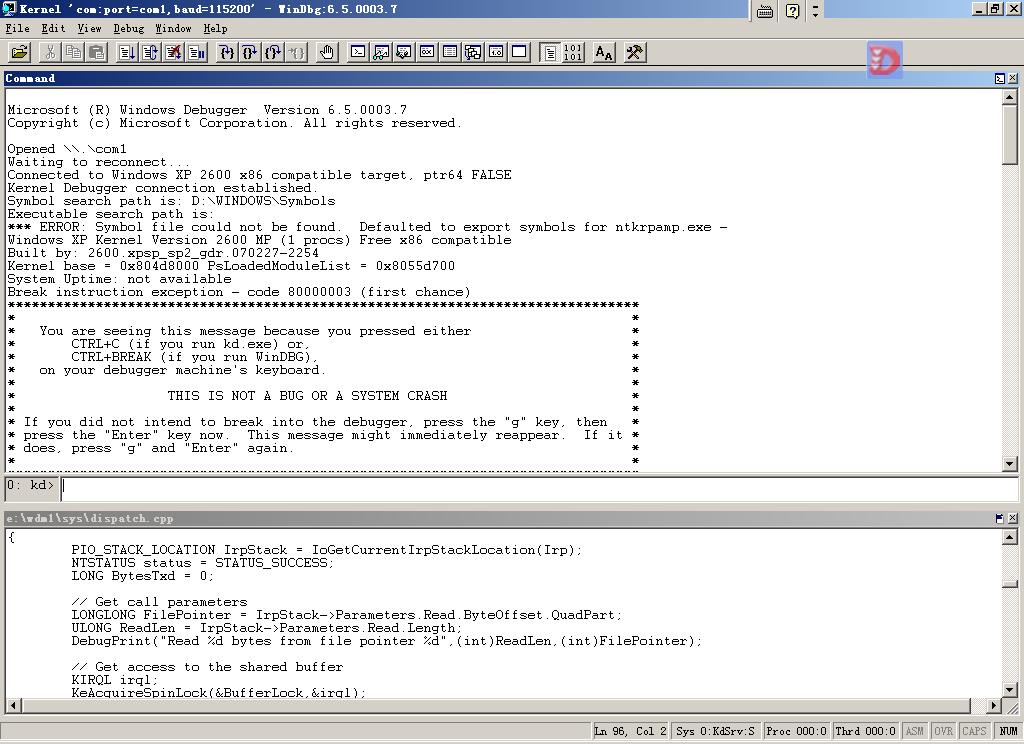
2.3 输入lm命令,看WDM1.sys是否被加载
2.4 设置断点
0: kd> bp wdm1!Wdm1Read
0: kd> bp wdm1!Wdm1Write
2.5 输入命令g,运行被调试计算机。
2.6 待被调试计算机启动后,运行WDM1Test.exe,可以看到windbg捕获到断点。
在Wdm1Read函数处中断: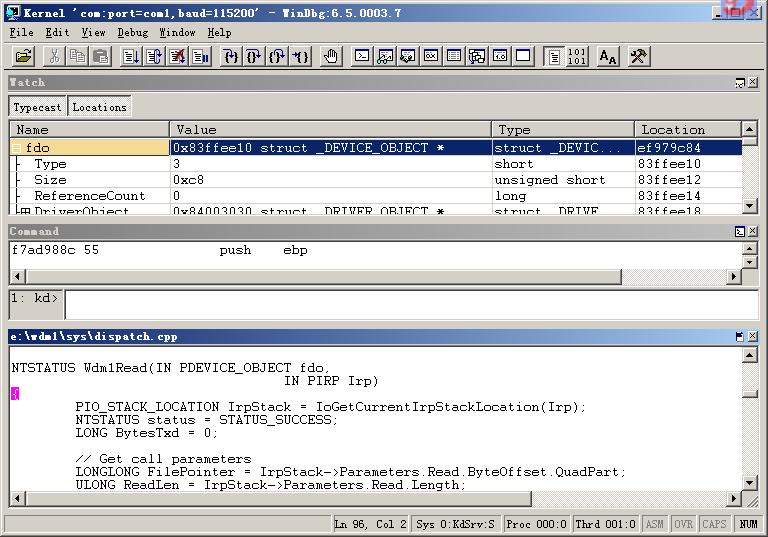
在Watch窗口中,输入fdo,可以显示变量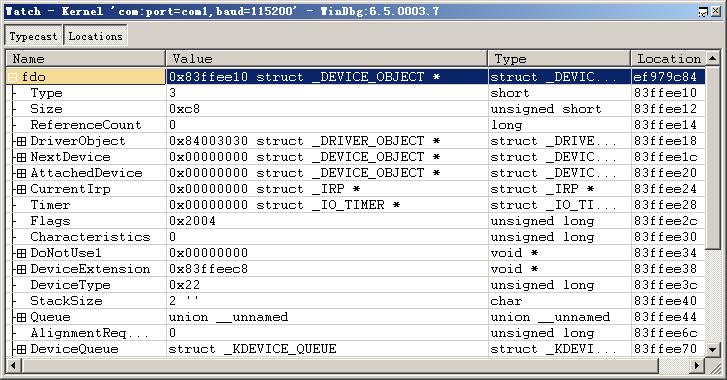
2.5 在Wdm1Write处中断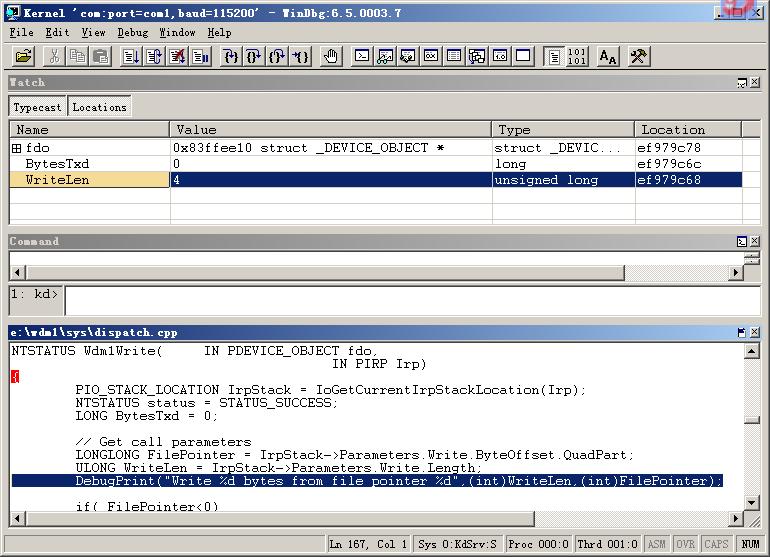
2.6 Wdm1Write函数
NTSTATUS Wdm1Write( IN PDEVICE_OBJECT fdo,
IN PIRP Irp)
{
PIO_STACK_LOCATION IrpStack = IoGetCurrentIrpStackLocation(Irp);
NTSTATUS status = STATUS_SUCCESS;
LONG BytesTxd = 0;
// Get call parameters
LONGLONG FilePointer = IrpStack->Parameters.Write.ByteOffset.QuadPart;
ULONG WriteLen = IrpStack->Parameters.Write.Length;
DebugPrint("Write %d bytes from file pointer %d",(int)WriteLen,(int)FilePointer);
if( FilePointer<0)
status = STATUS_INVALID_PARAMETER;
else
{
// Get access to the shared buffer
KIRQL irql;
KeAcquireSpinLock(&BufferLock,&irql);
BytesTxd = WriteLen;
// (Re)allocate buffer if necessary
if( ((ULONG)FilePointer)+WriteLen>BufferSize)
{
ULONG NewBufferSize = ((ULONG)FilePointer)+WriteLen;
PVOID NewBuffer = ExAllocatePool(NonPagedPool,NewBufferSize);
if( NewBuffer==NULL)
{
BytesTxd = BufferSize - (ULONG)FilePointer;
if( BytesTxd<0) BytesTxd = 0;
}
else
{
RtlZeroMemory(NewBuffer,NewBufferSize);
if( Buffer!=NULL)
{
RtlCopyMemory(NewBuffer,Buffer,BufferSize);
ExFreePool(Buffer);
}
Buffer = (PUCHAR)NewBuffer;
BufferSize = NewBufferSize;
}
}
// Write to shared memory
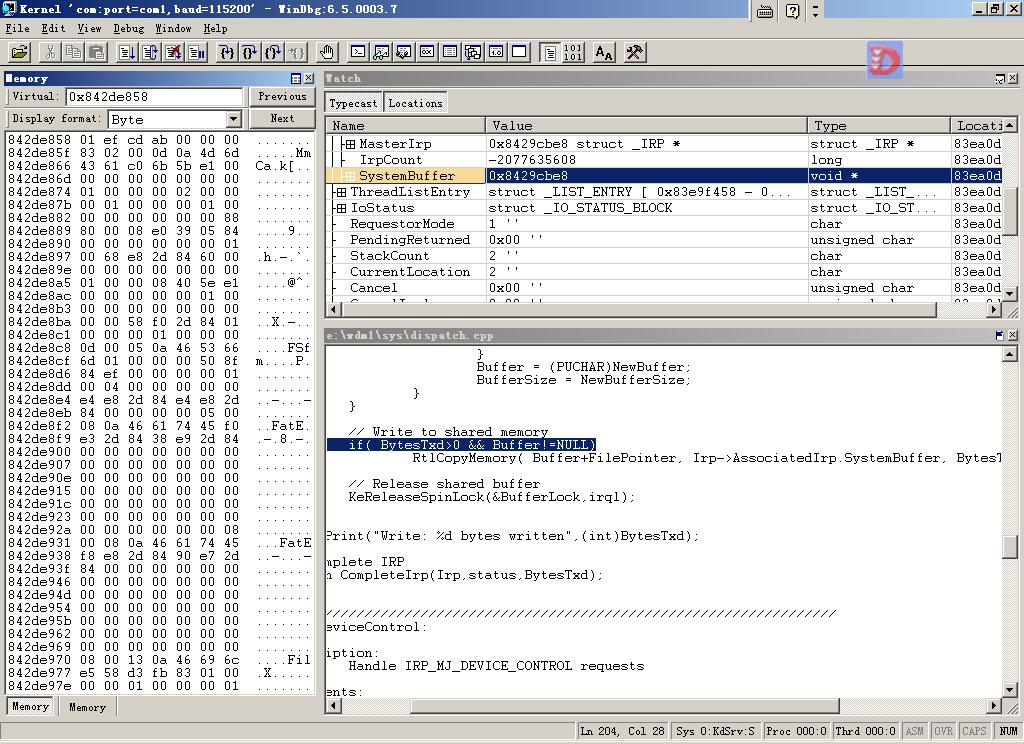
if( BytesTxd>0 && Buffer!=NULL)
RtlCopyMemory( Buffer+FilePointer, Irp->AssociatedIrp.SystemBuffer, BytesTxd);
// Release shared buffer
KeReleaseSpinLock(&BufferLock,irql);
}
DebugPrint("Write: %d bytes written",(int)BytesTxd);
// Complete IRP
return CompleteIrp(Irp,status,BytesTxd);
}
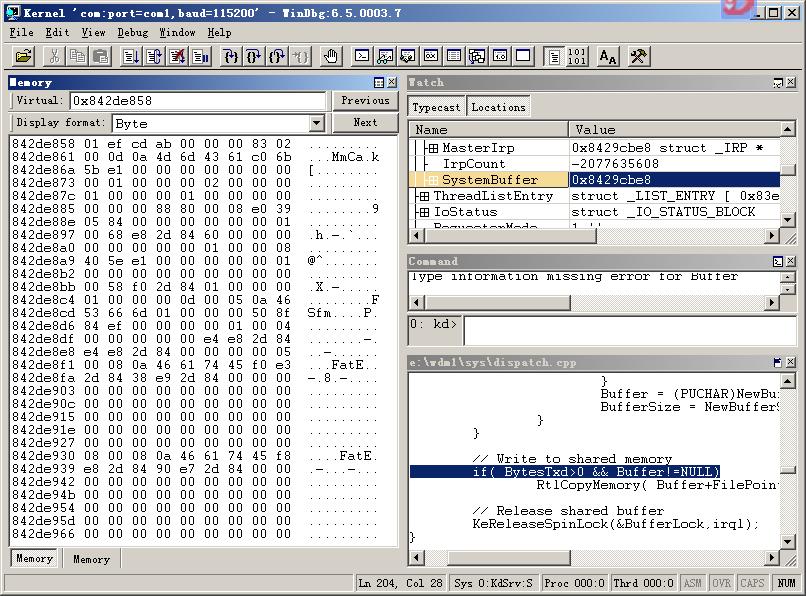
单步调试可以观察Irp->AssociatedIrp.SystemBuffer的变化。

 3
3  结束语
结束语
个人感觉来说Windbg还是一个很不错的工具,调试时不用担心主计算机系统蓝屏,重启等,而且调试方便。


 2535
2535


 被折叠的 条评论
为什么被折叠?
被折叠的 条评论
为什么被折叠?
 到【灌水乐园】发言


