


主要有:模态对话框$ionicModal、上拉菜单$ionicActionSheet、弹出框$ionicPopup、浮动框$ionicPopover 载入指示器$ionicLoading、背景幕$ionicBackdrop
一.模态对话框 : $ionicModal
模态对话框常用来供用户进行选择或编辑,在模态对话框关闭之前,其他的用户交互行为被阻止。
在ionic中使用模态对话框有三个步骤:
1.声明对话框模板
使用ion-modal-view指令声明对话框模板,对话框模板通常置入 script内以构造内联模板:
<script id="a.html" type="text/ng-template">
       <ion-modal-view> <!--对话框内容--> </ion-modal-view>
</script>
服务$ionicModal有两个方法用来创建对话框对象:
fromTemplate(templateString,options) - 使用字符串模板
fromTemplateUrl(templateUrl,options) - 使用内联模板
这两个方法返回的都是一个对话框对象。
3.操作对话框对象
对象框对象有以下方法用于显示、隐藏或删除对话框:
show() - 显示对话框
hide() - 隐藏对话框
remove() - 移除对话框
isShown() - 对话框是否可视?
<!DOCTYPE html>
<html ng-app="myApp">
<head>
<meta charset="UTF-8">
<meta name="viewport" content="initial-scale=1,maximum-scale=1,user-scalable=no,width=device-width,height=device-height">
<script src="../lib/js/ionic.bundle.min.js"></script>
<link rel="stylesheet" type="text/css" href="../lib/css/ionic.min.css">
</head>
<body ng-controller="myCtrl">
<ion-header-bar class="bar-positive">
<h1 class="title">$ionicModal</h1>
</ion-header-bar>
<ion-content padding="true">
<button class="button button-block" ng-click="openModal();">打开模态对话框</button>
</ion-content>
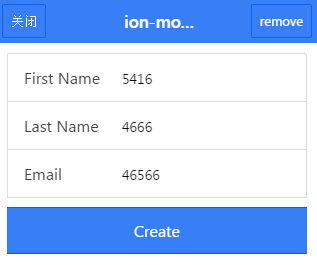
<script id="my-modal.html" type="text/ng-template">
<ion-modal-view>
<ion-header-bar class="bar-positive">
<h1 class="title">ion-modal-view</h1>
<a class="button" ng-click="closeModal();">关闭</a>
<a class="button" ng-click="removeModal();">remove</a>
</ion-header-bar>
<ion-content>
<div class="padding">
<div class="list">
<label class="item item-input">
<span class="input-label">First Name</span>
<input ng-model="newUser.firstName" type="text">
</label>
<label class="item item-input">
<span class="input-label">Last Name</span>
<input ng-model="newUser.lastName" type="text">
</label>
<label class="item item-input">
<span class="input-label">Email</span>
<input ng-model="newUser.email" type="text">
</label>
<button class="button button-full button-positive" ng-click="createContact()">Create</button>
</div>
</div>
</ion-content>
</ion-modal-view>
</script>
</body>
</html>
<script>
angular.module("myApp", ["ionic"])
.controller("myCtrl", function($scope, $ionicModal) {
// angularjs $broadcast $emit $on 事件触发controller间的值传递
// http://blog.51yip.com/jsjquery/1602.html
$ionicModal.fromTemplateUrl("my-modal.html", {
scope: $scope,
animation: "slide-in-up"
}).then(function(modal) {
$scope.modal = modal;
});
$scope.openModal = function() {
$scope.modal.show();
};
$scope.closeModal = function() {
$scope.modal.hide();
};
$scope.removeModal = function() {
$scope.modal.remove();
};
//Cleanup the modal when we are done with it!
$scope.$on("$destroy", function() {
console.log('modal.$destroy');
$scope.modal.remove();
});
// Execute action on hide modal
$scope.$on("modal.hidden", function() {
// Execute action
console.log('modal.hidden');
});
// Execute action on remove modal
$scope.$on("modal.removed", function() {
// Execute action
console.log('modal.removed');
});
});
</script>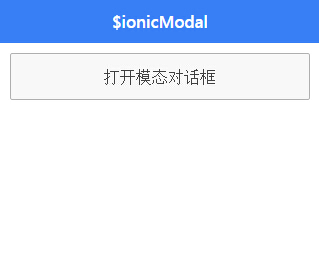
二.上拉菜单 : $ionicActionSheet
上拉菜单是一个自屏幕底部向上滑出的菜单,通常用来让用户做出选择。
ionic的上拉菜单由三种按钮组成,点击任何按钮都自动关闭上拉菜单:
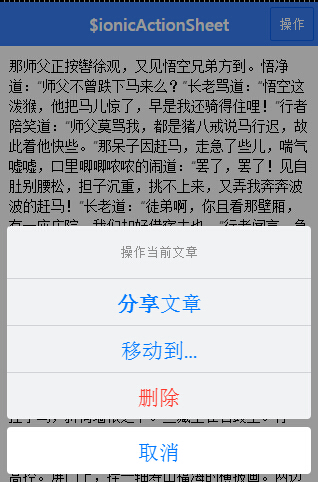
- 取消按钮 - 取消按钮总是位于菜单的底部,用户点击该按钮将关闭。一个上拉菜单 最多有一个取消按钮。
- 危险选项按钮 - 危险选项按钮文字被标红以明显提示。一个上拉菜单最多有一个 危险选项按钮。
- 自定义按钮 - 用户定义的任意数量的按钮。
在ionic中使用上拉菜单需要遵循以下步骤:
1.定义上拉菜单选项
使用一个JSON对象定义上拉菜单选项,包括以下字段:
- titleText - 上拉菜单的标题文本;
- buttons - 自定义按钮数组。每个按钮需要一个描述对象,其text字段用于按钮显示;
- cancelText - 取消按钮的文本。如果不设置此字段,则上拉菜单中不出现取消按钮;
- destructiveText - 危险选项按钮的文本。如果不设置此字段,则上拉菜单中不出现危险选项按钮;
- buttonClicked - 自定义按钮的回调函数,当用户点击时触发;
- cancel - 取消按钮回调函数,当用户点击时触发;
- destructiveButtonClicked - 危险选项按钮的回调函数,当用户点击时触发;
- cancelOnStateChange - 当切换到新的视图时是否关闭此上拉菜单。默认为true cssClass - 附加的CSS样式类名称。
2.创建上拉菜单
$ionicActionSheet服务的show()方法用来创建上拉菜单,返回一个函数,调用该返回函数可以关闭此菜单。
<!DOCTYPE html>
<html ng-app="myApp">
<head>
    <meta charset="UTF-8">
    <meta name="viewport" content="initial-scale=1,maximum-scale=1,user-scalable=no,width=device-width,height=device-height">
    <script src="../lib/js/ionic.bundle.min.js"></script>
    <link rel="stylesheet" type="text/css" href="../lib/css/ionic.min.css">
</head>
<body  ng-controller="myCtrl">
	<ion-header-bar class="bar-positive">
		<h1 class="title">$ionicActionSheet</h1>
		<a class="button" ng-click="show();">操作</a>
	</ion-header-bar>
	<ion-content padding="true">
		<p>那师父正按辔徐观,又见悟空兄弟方到。悟净道:“师父不曾跌下马来么?”长老骂道:“悟空这泼猴,他把马儿惊了,早是我还骑得住哩!”行者陪笑道:“师父莫骂我,都是猪八戒说马行迟,故此着他快些。”那呆子因赶马,走急了些儿,喘气嘘嘘,口里唧唧哝哝的闹道:“罢了,罢了!见自肚别腰松,担子沉重,挑不上来,又弄我奔奔波波的赶马!”长老道:“徒弟啊,你且看那壁厢,有一座庄院,我们却好借宿去也。”行者闻言,急抬头举目而看,果见那半空中庆云笼罩,瑞霭遮盈,情知定是佛仙点化,他却不敢泄漏天机,只道:“好,好,好!我们借宿去来。”</p>
		<p>长老连忙下马,见一座门楼,乃是垂莲象鼻,画栋雕梁。沙僧歇了担子,八戒牵了马匹道:“这个人家,是过当的富实之家。”行者就要进去,三藏道:“不可,你我出家人,各自避些嫌疑,切莫擅入。且自等他有人出来,以礼求宿,方可。”八戒拴了马,斜倚墙根之下。三藏坐在石鼓上。行者、沙僧坐在台基边。久无人出,行者性急,跳起身入门里看处,原来有向南的三间大厅,帘栊高控。屏门上,挂一轴寿山福海的横披画。两边金漆柱上,贴着一幅大红纸的春联,上写着:“丝飘弱柳平桥晚,雪点香梅小院春。”正中间,设一张退光黑漆的香几,几上放一个古铜兽炉。上有六张交椅,两山头挂着四季吊屏。</p>	</ion-content>
</body>
</html>
<script>
angular.module("myApp", ["ionic"])
.controller("myCtrl",function($scope, $ionicActionSheet, $timeout) {

	// Triggered on a button click, or some other target
	$scope.show = function() {

		// Show the action sheet
		var hideSheet= $ionicActionSheet.show({
            cancelOnStateChange:true,
            cssClass:'action_s',
			titleText: "操作当前文章",
			buttons: [
				{ text: "<b>分享</b>文章" },
				{ text: "移动到..." }
			],
			buttonClicked: function(index) {
                    console.log('操作了第'+index+'个文章');
                    return true;
			},
			cancelText: "取消",
			cancel: function() {
			  // add cancel code..

                console.log('执行了取消操作');
                return true;
			},
			destructiveText: "删除",
			destructiveButtonClicked:function(){
                console.log('执行了删除操作');
                return true;

			}
		});

		// For example's sake, hide the sheet after two seconds
		$timeout(function() {
			hideSheet();
		}, 2000);

	};


});

</script>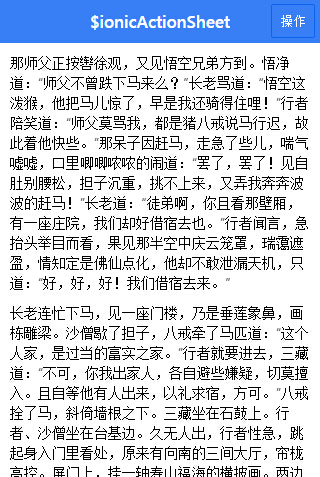
三.弹出框 : $ionicPopup
弹出框通常用于提醒、警告等,在用户响应之前其他交互行为不能继续。与模态 对话框覆盖整个屏幕空间不同,弹出框通常仅占据一部分屏幕空间。
在ionic中,使用$ionicPopup服务管理弹出框:
$ionicPopup.show(options) .then(
     function(){ //这个函数在弹出框关闭时被调用
});
show()方法的参数options是一个JSON对象,可以包括以下字段:
- title - 弹出框标题文本;
- subTitle - 弹出框副标题文本;
- template - 弹出框内容的字符串模板;
- templateUrl - 弹出框内容的内联模板URL;
- scope - 要关联的作用域对象;
- buttons - 自定义按钮数组。按钮总是被置于弹出框底部;
- cssClass - 附加的CSS样式类
简化的特定弹出框
除了show()方法,$ionicPopup还针对一些特定场景提供了简化的方法,这些方法不需要 自定义按钮,只需要设置title和template即可:
1. alert(options) - 警告弹出框,仅包含一个按钮供关闭弹出框。
option属性:
{
title: '', // String. 弹窗的标题。
subTitle: '', // String (可选)。弹窗的子标题。
template: '', // String (可选)。放在弹窗 body 内的 html 模板。
templateUrl: '', // String (可选)。 放在弹窗 body 内的 html 模板的 URL。
 okText: '', // String (默认: 'OK')。 OK 按钮的文字。
okType: '', // String (默认: 'button-positive')。 OK 按钮的类型。
 }
option属性:
{
title: '', // String. 弹窗标题。
subTitle: '', // String (可选)。弹窗的副标题。
template: '', // String (可选)。放在弹窗 body 内的 html 模板。
templateUrl: '', // String (可选)。放在弹窗 body 内的一个 html 模板的 URL。
cancelText: '', // String (默认: 'Cancel')。一个取消按钮的文字。
cancelType: '', // String (默认: 'button-default')。取消按钮的类型。
okText: '', // String (默认: 'OK')。 OK 按钮的文字。
okType: '', // String (默认: 'button-positive')。 OK 按钮的类型。
}
3.prompt(options) - 输入提示弹出框,包含一个文本输入框、一个取消按钮和一个确认按钮。
option属性:
{
title: '', // String. 弹窗的标题。 subTitle: '', // String (可选)。弹窗的副标题。
template: '', // String (可选)。放在弹窗 body 内的 html 模板。 templateUrl: '', // String (可选)。放在弹窗 body 内的 html 模板的 URL。 inputType: // String (默认: 'text')。 input 的类型。
 inputPlaceholder: // String (默认: '')。 input 的 placeholder。 cancelText: // String (默认: 'Cancel')。取消按钮的文字。 cancelType: // String (默认: 'button-default')。取消按钮的类型。
okText: // String (默认: 'OK')。 OK 按钮的文字。
okType: // String (默认: 'button-positive')。
}
<!DOCTYPE html>
<html ng-app="myApp">
<head>
<meta charset="UTF-8">
<meta name="viewport" content="initial-scale=1,maximum-scale=1,user-scalable=no,width=device-width,height=device-height">
<script src="../lib/js/ionic.bundle.min.js"></script>
<link rel="stylesheet" type="text/css" href="../lib/css/ionic.min.css">
</head>
<body ng-controller="myCtrl">
<ion-header-bar class="bar-positive">
<h1 class="title">$ionicPopup</h1>
</ion-header-bar>
<ion-content padding="true">
<a class="button button-block button-calm" ng-click="showPopup();">定制弹出框/popup</a>
<a class="button button-block button-calm" ng-click="showConfirm();">确认框/confirm</a>
<a class="button button-block button-calm" ng-click="showAlert();">警告框alert</a>
<a class="button button-block button-calm" ng-click="showPrompt();">提示框/prompt</a>
</ion-content>
<ion-footer-bar class="bar-positive">
<h1 class="title">{{status}}</h1>
</ion-footer-bar>
</body>
</html>
<script>
angular.module("myApp", ["ionic"])
.controller("myCtrl",function($scope, $ionicPopup, $timeout) {
$scope.status = "";
// 显示定制弹出框
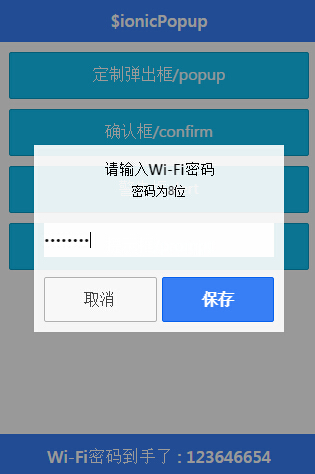
$scope.showPopup = function() {
$scope.data = {}
// 调用$ionicPopup弹出定制弹出框
$ionicPopup.show({
template: "<input type='password' ng-model='data.wifi'>",
title: "请输入Wi-Fi密码",
subTitle: "密码为8位",
scope: $scope,
buttons: [
{ text: "取消" },
{
text: "<b>保存</b>",
type: "button-positive",
onTap: function(e) {
return $scope.data.wifi;
}
}
]
})
.then(function(res) {
$scope.status = ["Wi-Fi密码到手了",":",res].join(" ");
});
};
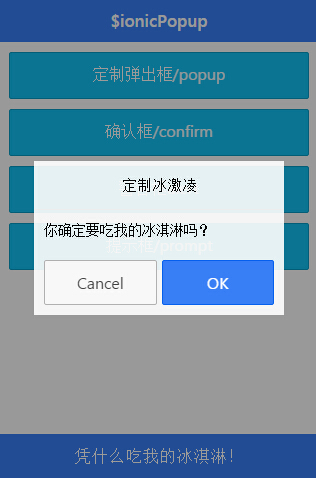
// 确认弹出框
$scope.showConfirm = function() {
$ionicPopup.confirm({
title: "定制冰激凌",
template: "你确定要吃我的冰淇淋吗?",
okText:"OK"
})
.then(function(res) {
if(res) {
$scope.status = "凭什么吃我的冰淇淋!";
} else {
$scope.status = "谢谢你不吃之恩!";
}
});
};
//警告弹出框
$scope.showAlert = function() {
$ionicPopup.alert({
title: "不要吃果冻",
template: "它们可能是用旧的皮鞋帮做的!"
})
.then(function(res) {
$scope.status = "感谢上帝,你没吃鞋帮哦!11";
});
};
//输入提示框
$scope.showPrompt = function(){
//todo....
$ionicPopup.prompt({
title: "不要吃果冻",
template: "它们可能是用旧的皮鞋帮做的!"
})
.then(function(res) {
$scope.status = "感谢上帝,你没吃鞋帮哦!"+res;
});
}
});
</script>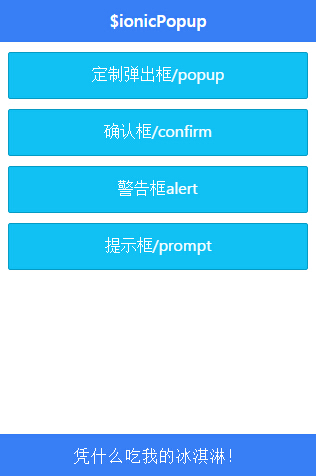


四.浮动框 : $ionicPopover
如果需要从脚本中控制列表元素,可以使用$ionicListDelegate服务: 浮动框通常用以非侵入的方式提供当前视图的额外信息。
在ionic中使用浮动框的几个步骤:
1.声明模板:
需要首先利用ion-popover-view指令声明一个模板内容:
<ion-popover-view> <!--模板内容--> </ion-popover-view>
使用$ion-popover服务的以下方法创建浮动框对象:
- fromTemplate(templateString,options) - 使用模板字符串构造浮动框。
- fromTemplateurl(templateUrl,options) - 使用内联模板构造浮动框。
注意:这两个方法返回的都是promise对象,在浮动框对象被构造 成功后得到解析,这时可以获取浮动框对象:
$ionicPopover.fromTemplate(...) .then(function(popover){
//popover参数是浮动框对象
});
浮动框对象提供以下方法:
- show() - 显示浮动框
- hide() - 关闭浮动框
- remove() - 移除浮动框
- isShown() - 浮动框是否处于显示状态
<!DOCTYPE html>
<html ng-app="myApp">
<head>
    <meta charset="UTF-8">
    <meta name="viewport" content="initial-scale=1,maximum-scale=1,user-scalable=no,width=device-width,height=device-height">
    <script src="../lib/js/ionic.bundle.min.js"></script>
    <link rel="stylesheet" type="text/css" href="../lib/css/ionic.min.css">
</head>
<body  ng-controller="myCtrl">
	<ion-header-bar class="bar-positive">
		<h1 class="title">$ionicPopover</h1>
		<a class="button" ng-click="openPopover($event);">帮助</a>
	</ion-header-bar>
	<ion-content direction="xy">
		$ionicPopover
	</ion-content>
	<script id="ez-popover.html" type="text/ng-template">
		<ion-popover-view class="calm-bg light padding">
			<p>这里应该有些帮助信息....</p>
		</ion-popover-view>
	</script>
</body>
</html>
<script>

angular.module("myApp", ["ionic"])
.controller("myCtrl", function($scope, $ionicPopover) {

	$ionicPopover.fromTemplateUrl("ez-popover.html", {
		scope: $scope
	})
	.then(function(popover){
		$scope.popover = popover;
	})
	$scope.openPopover = function($event) {
		$scope.popover.show($event);
	};
	$scope.closePopover = function() {
		$scope.popover.hide();
	};
	//销毁事件回调处理:清理popover对象
	$scope.$on("$destroy", function() {
		$scope.popover.remove();
	});
	// 隐藏事件回调处理
	$scope.$on("popover.hidden", function() {
		// Execute action
	});
	//删除事件回调处理
	$scope.$on("popover.removed", function() {
		// Execute action
	});
});


</script>
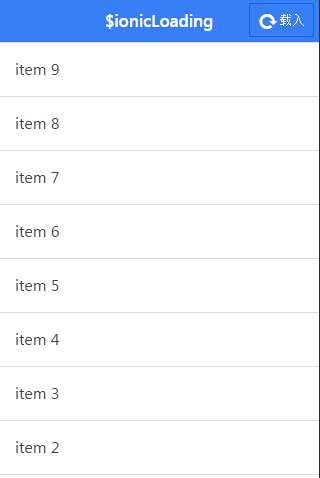
当进行耗时的操作时,可以使用载入指示器提示用户操作进行中,并暂时阻止交互。 载入指示器通常会叠加一个半透明的幕布层以便阻止用户的交互。
在ionic中,使用$ionicLoading服务操作载入指示器:
- show(options) - 显示载入指示器
- hide() - 隐藏载入指示器
显示参数:show()方法的options参数是一个JSON对象,可以包含如下字段:
- template - 模板字符串
- templateUrl - 内联模板的Url
- scope - 要绑定的作用域对象
- noBackdrop - 是否隐藏背景幕
- hideOnStateChange - 当切换到新的视图时,是否隐藏载入指示器
- delay - 显示载入指示器之前要延迟的时间,以毫秒为单位,默认为0,即不延迟
- duration - 载入指示器持续时间,以毫秒为单位。时间到后载入指示器自 动隐藏。默认情况下, 载入指示器保持显示状态,知道显示的调用hide()方法
参数配置服务 : $ionicLoadingConfig
如果要在多处都使用载入指示器,统一对options参数进行配置是一个更好的方法,这样 在应用时直接调用show() 方法而不必传递参数了。这通过定义一个constant provider来实现:
angular.module("ezApp", ["ionic"])
 .constant("$ionicLoadingConfig",{
template : "default loading template ..." })<!DOCTYPE html>
<html ng-app="myApp">
<head>
<meta charset="UTF-8">
<meta name="viewport" content="initial-scale=1,maximum-scale=1,user-scalable=no,width=device-width,height=device-height">
<script src="../lib/js/ionic.bundle.min.js"></script>
<link rel="stylesheet" type="text/css" href="../lib/css/ionic.min.css">
</head>
<body ng-controller="myCtrl">
<ion-header-bar class="bar-positive">
<h1 class="title">$ionicLoading</h1>
<a class="button icon ion-refresh" ng-click="load();">载入</a>
</ion-header-bar>
<ion-content>
<ion-list>
<ion-item collection-repeat="item in items">{{item}}</ion-item>
</ion-list>
</ion-content>
</body>
</html>
<script>
angular.module("myApp", ["ionic"])
.controller("myCtrl", function($scope, $ionicLoading,$timeout) {
$scope.items = [];
var idx = 0;
$scope.load = function() {
//显示载入指示器
$ionicLoading.show({
template: "正在载入数据,请稍后..."
});
//延时2000ms来模拟载入的耗时行为
$timeout(function(){
for(var i=0;i<10;i++,idx++) $scope.items.unshift("item " + idx);
//隐藏载入指示器
$ionicLoading.hide();
},2000);
};
});
</script>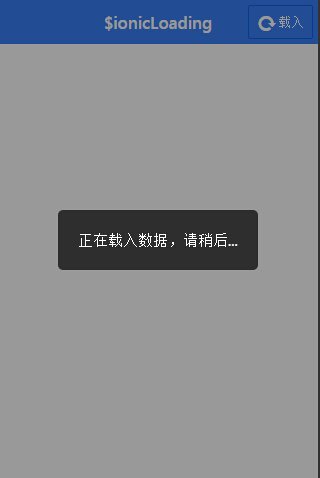
六.背景幕 : $ionicBackdrop
在浮动框、载入指示器中我们已经接触过背景幕。它是一个覆盖全屏的半透明图层,用来 阻止用户的交互行为。
我们可以使用$ionicBackdrop服务单独地使用背景幕:
- retain() - 保持背景幕
- release() - 释放背景幕
为什么不是show()和hide()呢?
在UI中可能有多个指令/元素都使用背景幕,为每个指令都创建单独的背景幕是不明智的。
事实上,$ionicBackdrop服务在DOM中只保留有一个背景幕。每次当使用retain()方法时,只是给背景幕加一次锁,release()方法只是给背景幕解一次锁。如果retain()被调用三次, 背景幕将一直显示,直到release()也被调动三次后才隐藏。
<!DOCTYPE html>
<html ng-app="myApp">
<head>
    <meta charset="UTF-8">
    <meta name="viewport" content="initial-scale=1,maximum-scale=1,user-scalable=no,width=device-width,height=device-height">
    <script src="../lib/js/ionic.bundle.min.js"></script>
    <link rel="stylesheet" type="text/css" href="../lib/css/ionic.min.css">
</head>
<body  ng-controller="myCtrl">
	<ion-header-bar class="bar-positive">
		<h1 class="title">$ionicBackdrop</h1>
	</ion-header-bar>
    <ion-content>
        <div class="ezpop has-header padding">
            <a class="button button-block button-calm" ng-click="retain();">retain</a>
            <a class="button button-block button-calm" ng-click="release();">release</a>
        </div>

    </ion-content>

    <ion-footer-bar class="bar-positive">
		<h1 class="title">背景幕锁:{{locks}}</h1>
    </ion-footer-bar>
</body>
</html>
<script>
angular.module("myApp",["ionic"])
.controller("myCtrl",function($scope, $ionicBackdrop, $timeout,$interval) {
	$scope.locks = 0;
	//保持背景幕
	$scope.retain = function() {
		$ionicBackdrop.retain();
		$scope.locks++;
	};
	//释放背景幕
	$scope.release = function() {
		$ionicBackdrop.release();
		$scope.locks > 0 ? $scope.locks-- : 0;
	};

    $interval(function(){
        if($scope.locks > 0){
            $ionicBackdrop.release();

             $scope.locks--;
        }

    },2000)
});


</script>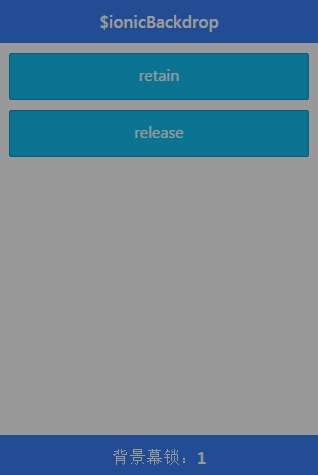


 3964
3964

 被折叠的 条评论
为什么被折叠?
被折叠的 条评论
为什么被折叠?
 到【灌水乐园】发言


