


在一个项目的开发中,Listview的用处是毋庸置疑的
下面举个小例子:
Test.java
public class Test {
    private String text, url_pic;
    public Test(String text, String url_pic) {
        this.text = text;
        this.url_pic = url_pic;
    }

    public String getText() {
        return text;
    }

    public void setText(String text) {
        this.text = text;
    }

    public void setUrl_pic(String url_pic) {
        this.url_pic = url_pic;
    }

    public String getUrl_pic() {
        return url_pic;
    }
}
TestAdapter.java
public class TestAdapter extends BaseAdapter {
    private Context context;
    private List<Test> choiceList;

    public TestAdapter(Context context, List<Test> choiceList) {
        this.context = context;
        this.choiceList = choiceList;
    }
    @Override
    public int getCount() {
        return choiceList.size();
    }

    @Override
    public Object getItem(int position) {
        return choiceList.get(position);
    }

    @Override
    public long getItemId(int position) {
        return position;
    }

    @Override
    public View getView(int position, View convertView, ViewGroup parent) {
        if(convertView  == null) {
            convertView = LayoutInflater.from(context).inflate(R.layout.item_choice,null);
        }
        TextView text = (TextView)convertView.findViewById(R.id.text);
        ImageView imageView = (ImageView) convertView.findViewById(R.id.imageView);
        Test choice = choiceList.get(position);
        text.setText(choice.getText());
        Glide.with(context).load(choice.getUrl_pic()).into(imageView);
        return convertView;
    }
}
TestActivity.java
public class TestActivity extends Activity implements AdapterView.OnItemClickListener{

    private SwipeRefreshLayout swipeRefreshLayout;
    private ListView lv_choice;
    private List<Test> vol_list;
    private TestAdapter vol_adapter;

    //通过新开线程先数据从服务器读取并显示在ListView上面
    private Handler mHander = new Handler() {
        public void handleMessage(android.os.Message msg) {
            List<Test> info_vol = (List<Test>) msg.obj;
            vol_adapter = new TestAdapter(getApplicationContext(),info_vol);
            lv_choice.setAdapter(vol_adapter);
            swipeRefreshLayout.setRefreshing(false);
        }
    };

    @Override
    protected void onCreate(Bundle savedInstanceState) {
        super.onCreate(savedInstanceState);
        setContentView(R.layout.activity_choice);
        swipeRefreshLayout = (SwipeRefreshLayout) findViewById(R.id.refreshable_view);
        lv_choice = (ListView)findViewById(R.id.lv_choice);
        lv_choice.setOnItemClickListener(this);
        vol_list = new ArrayList<Test>();
        //下拉刷新
        swipeRefreshLayout.setOnRefreshListener(new SwipeRefreshLayout.OnRefreshListener() {
            @Override
            public void onRefresh() {
                swipeRefreshLayout.setRefreshing(true);
                //TODO what you want
            }
        });

        new Thread() {
            public void run() {
                //读取服务器数据
                for(int i=0; i<5; i++){
                    String text = "text";
                    String url_pic = "http://imgsrc.baidu.com/baike/pic/item/b64543a98226cffca90bcfecbd014a90f603ea4f.jpg";
                    vol_list.add(new Test(text, url_pic));
                }

                //子线程通过Message对象封装信息,并且用初始化好的,
                //Handler对象的sendMessage()方法把数据发送到主线程中,从而达到更新UI主线程的目的
                Message msg = new Message();
                msg.obj = vol_list;
                mHander.sendMessage(msg);
            }
        }.start();
    }

    /**
     * 列表按键的监听器,
     * 实现按键跳转的功能。
     */
    @Override
    public void onItemClick(AdapterView<?> parent, View view, int position, long id) {

    }
}
使用新线程进行存放数据主要是因为在实际使用中从服务器读取数据的过程不能在UI线程中进行,所以需要重新开线程来读取,这时Handler就需要用来从更新UI线程。
item_choice.xml
<?xml version="1.0" encoding="utf-8"?>
<RelativeLayout xmlns:android="http://schemas.android.com/apk/res/android"
    android:layout_width="match_parent"
    android:layout_height="wrap_content"
    android:padding="20dp">

    <TextView
        android:id="@+id/text"
        android:layout_width="wrap_content"
        android:layout_height="wrap_content"
        android:textStyle="bold"
        android:textSize="40sp"
        android:textColor="@android:color/black"
        android:text="text"/>

    <ImageView
        android:layout_width="100dp"
        android:layout_height="100dp"
        android:id="@+id/imageView"
        android:src="@mipmap/ic_launcher"
        android:layout_centerVertical="true"
        android:layout_alignParentRight="true"
        android:layout_alignParentEnd="true" />

</RelativeLayout>
activity_choice.xml
<LinearLayout xmlns:android="http://schemas.android.com/apk/res/android"
    xmlns:tools="http://schemas.android.com/tools"
    android:layout_width="match_parent"
    android:layout_height="match_parent"
    android:orientation="vertical"
    android:background="@android:color/white"
    tools:context="com.example.bear.mp3.CareChosen.TestActivity">

    <android.support.v4.widget.SwipeRefreshLayout
        android:id="@+id/refreshable_view"
        android:layout_width="wrap_content"
        android:layout_height="wrap_content">
        <ListView
            android:id="@+id/lv_choice"
            android:layout_width="match_parent"
            android:layout_height="match_parent"
            android:divider="#00000000">
        </ListView>
    </android.support.v4.widget.SwipeRefreshLayout>

</LinearLayout>
AndroidManifest.xml
<!-- 完全访问网络 -->
    <uses-permission android:name="android.permission.INTERNET" />
在AndroidManifest.xml中,需要添加访问网络权限
compile 'com.github.bumptech.glide:glide:3.6.1'想要使用Glide,需要在build.gradle中添加上面那句话。Glide框架的具体用法自行百度吧,它是google自家的显示图片的框架。在Listview中的使用能让Listview更加流畅,而且它也很好的解决了图片错位的问题。
Listview优化
这里有一个优化的地方,就是重用view,这样减少内存消耗,同时加快item加载速度。
在getView中优化的地方,大家想必都非常情况,下面我总结了两种优化的写法,请大家指正。
第一:
重用了convertView,很大程度上的减少了内存的消耗。通过判断convertView是否为null,是的话就需要产生一个视图出来,然后给这个视图数据,最后将这个视图返回给底层,呈献给用户。
第二:
上面的写法会有一个缺点,就是每次在getVIew的时候,都需要重新的findViewById,重新找到控件,然后进行控件的赋值以及事件相应设置。这样其实在做重复的事情,因为的getview中,其实包含有这些控件,而且这些控件的id还都是一样的,也就是其实只要在view中findViewById一次,后面无需要每次都要findViewById了。
TestAdapter.java
public class TestAdapter extends BaseAdapter {
    private Context context;
    private List<Test> choiceList;

    public TestAdapter(Context context, List<Test> choiceList) {
        this.context = context;
        this.choiceList = choiceList;
    }
    @Override
    public int getCount() {
        return choiceList.size();
    }

    @Override
    public Object getItem(int position) {
        return choiceList.get(position);
    }

    @Override
    public long getItemId(int position) {
        return position;
    }

    @Override
    public View getView(int position, View convertView, ViewGroup parent) {
        ViewHolder holder;
        if(convertView  == null) {
            convertView = LayoutInflater.from(context).inflate(R.layout.item_choice,null);
            holder = new ViewHolder();
            holder.text = (TextView) convertView.findViewById(R.id.text);
            holder.imageView = (ImageView) convertView.findViewById(R.id.imageView);
            convertView.setTag(holder);
        }else {
        holder = (ViewHolder) convertView.getTag();
        }

        Test choice = choiceList.get(position);
        holder.text.setText(choice.getText());
        Glide.with(context).load(choice.getUrl_pic()).into(holder.imageView);
        return convertView;
    }

    class ViewHolder {
        TextView text;
        ImageView imageView ;
    }

}
在这两种个方法中,并会出现图片的错位,一般解决的方法就是给imageView加一个Tag。然而在使用Glide来显示图片时并很好的解决了这个问题
在Listview中下拉刷新已是主流,虽说网上有着许许多多的开源项目,但是我还是建议使用SwipeRefreshLayout,具体使用方法上面也有简单提到。
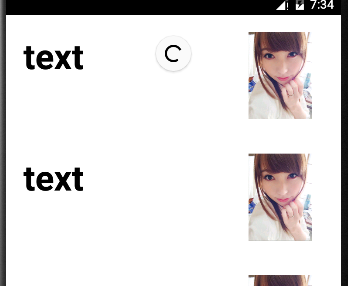
下面是运行的效果:
Volley和Glide都是一些很好的框架,都能使开发变得更简便。


 731
731

 被折叠的 条评论
为什么被折叠?
被折叠的 条评论
为什么被折叠?
 到【灌水乐园】发言


