


进入第10章了,看到群里其他筒子已经完成在服务器上的部署并上线了,好生羡慕。
这一章节的内容是讲用户资料的,比如我们平时注册一个网站以后,总有一个页面是让我们修改自我介绍,城市,还能显示注册时间,最后一次登录等信息
既然讲到以上这些,那我们肯定要在模型里面多加一些信息了
如下
class User(UserMixin,db.Model):

#...

	name = db.Column(db.String(64))
	location = db.Column(db.String(64))
	about_me = db.Column(db.Text())
	member_since = db.Column(db.DateTime(),default = datetime.utcnow)
	last_seen = db.Column(db.DateTime(),default = datetime.utcnow)
注意到about_me的类型是Text,和平时的String有区别,主要区别是String是有长度限制的,Text无限制
新添加的字段保存用户的真实姓名、所在地、自我介绍、注册日期和最后访问日期。
两个时间戳的默认值都是当前时间。注意,datetime.utcnow 后面没有(),因为db.Column()的default 参数可以接受函数作为默认值,所以每次需要生成默认值时,db.Column() 都会调用指定的函数。member_since 字段只需要默认值即可。
last_seen 字段创建时的初始值也是当前时间,但用户每次访问网站后,这个值都会被刷新。我们可以在User 模型中添加一个方法完成这个操作
class User(UserMixin, db.Model):

# ...
def ping(self):
	self.last_seen = datetime.utcnow()           #调用此方法的作用是刷新last_seen属性,显示为登录时间
	db.session.add(self)
每次收到用户的请求时都要调用ping() 方法。由于auth 蓝本中的before_app_request 处理程序会在每次请求前运行,所以能很轻松地实现这个需求.
app/main/views.py:资料页面的路由
@auth.before_app_request
def before_request():
	if current_user.is_authenticated:
		current_user.ping()                  #如果当前用户是已经授权的,那么就调用ping方法来刷新last_seen属性
		if not current_user.confirmed \       #而用户confirmed属性没有的话,则进行下面语句的判断
			and request.endpoint[:5] !='auth.':
			return redirect(url_for('auth.unconfirmed'))
根据每个不同用户,会显示不同的资料显示页面
@main.route('/user/<username>')
def user(username):
	user = User.query.filter_by(username = username).first()
	if user is None:                                          #如果根据用户名没有找到此用户的话,则报错404
		abort (404)
	return render_template('user.html',user = user)           #如果能找到用户,则渲染的模板用user.html
好,路由设置好了以后,就该来看模板里面的内容如何写了
{% extends "base.html" %}
{% block title %}Flasky{% endblock %}
{% block page_content %}
{% block scripts %}
{{ super() }}
{{ moment.include_moment() }} <!--这里有个天坑,作者不知道是不是故意的,把引入moment给忘记了 -->
{% endblock %}
<div class="page-header">
<h1>{{user.username}}</h1>
{% if user.name or user.location %} <!-- 如果name或者location属性有值,再激活下面的<p> -->
<p>
{% if user.name %}{{ user.name }}{% endif %} <!-- 如果有name属性,显示名字 -->
{% if user.location %} <!-- 如果有location属性,进入下一行的功能 -->
From <a href="http://maps.google.com/?q={{ user.location }}"> <!-- 这里利用google maps来给予定位 -->
{{ user.location }}
</a>
{% endif %}
</p>
{% endif %}
{% if current_user.is_administrator() %} <!-- 如果当前用户是管理员 -->
<p><a href = "mailto:{{ user.email }}">{{ user.email }}</a></p> <!-- 会显示邮件链接 -->
{% endif %}
{% if user.about_me %}<p>{{ user.about_me }}</p>{% endif %} <!-- 如果有自我介绍的篇幅,则显示自我介绍 -->
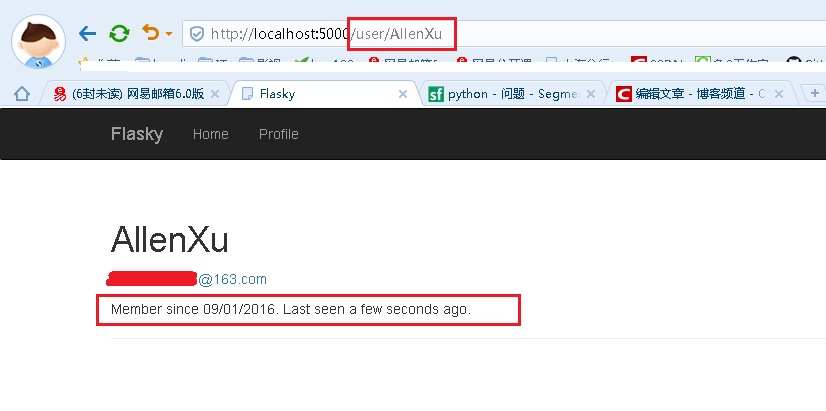
<p>
Member since {{ moment(user.member_since).format('L') }}. <!-- 显示什么时候注册的,也就是第一次请求的时间 -->
Last seen {{ moment(user.last_seen).fromNow() }}. <!-- 显示最后一次登录距今为止多久了 -->
</p>
</div>
{% endblock %}
上面的模板里面,千万有一个要记住,你要用moment功能的时候,你必须要添加super script的用法,作者不知道是不是故意的,漏写了来考读者........
{% block scripts %}
{{ super() }}
{{ moment.include_moment() }}
{% endblock %}
基本上目前所有的网站,用户都会有一个按钮来进入资料设置的页面,所以,我们也是要在基础页面上添加一个按钮
所以base.html的添加修改如下
{% if current_user.is_authenticated() %}
<li>
<a href="{{ url_for('main.user', username=current_user.username) }}">
Profile
</a>
</li>
{% endif %}
把资料页面的链接包含在条件语句中是非常必要的,因为未认证的用户也能看到导航条,但我们不应该让他们看到资料页面的链接。


 3000
3000

 被折叠的 条评论
为什么被折叠?
被折叠的 条评论
为什么被折叠?
 到【灌水乐园】发言


