


 本文介绍了如何通过谷歌官方教程学习使用Fragment构建动态用户界面,包括创建Fragment、构建灵活UI和Fragment间的通信。讲解了Fragment作为Activity的模块化部分,如何在不同屏幕尺寸下创建多面板UI,以及如何在运行时添加、移除和替换Fragment。同时,重点讨论了Fragment间通信的机制,通过定义接口并在Activity中实现来传递消息。
阅读谷歌官方教程第一章 Getting Started
今天我们来看Google教程第一章的第四节,通过Fragment建立一个动态的用户界面。这一节没有对Fragement的生命周期展开(Google 把它放在了API Guide里面而不是Training),而是对Fragment的用法,比如说如何创建一个Fragment, 如何创造灵活UI,如何使Fragment和Activity,或其他的Fragment之间通信,尤其是第三个内容,之前一直不懂,这次学到了很多东西。
Building a Dynamic UI with Fragments
如果想创建一个灵活的多面板的UI,你需要把UI组件和activity的行为包装成一个个标准的模块,能让你自由的在Activity里面添加或是删除。Fragment就是解决这个问题的最好工具,它就像是一个嵌套的Activity一样,能让你定义它自己的布局并且管理它自己的生命周期。
When a fragment specifies its own layout, it can be configured in different combinations with other fragments inside an activity to modify your layout configuration for different screen sizes (a small screen might show one fragment at a time, but a large screen can show two or more).
我菜菜地翻译一下,一旦Fragment确定了它自己的布局文件,根据不同设备的屏幕尺寸,它就能够和Activity里面其它的Fragemnt一起组成不同的组合来组成Activity的布局。举一个简单的例子就是小屏幕上可能一次只显示一个Fragment,而大屏幕上能显示两个Fragment甚至更多。
所以Fragment除了之前在看到听到一些能提高APP的运行性能,也可以优化不同设备尺寸的用户体验。
这一小节分为三个内容:
- Creating a Fragment
- Building a Flexible UI
- Communicating with Other Fragments
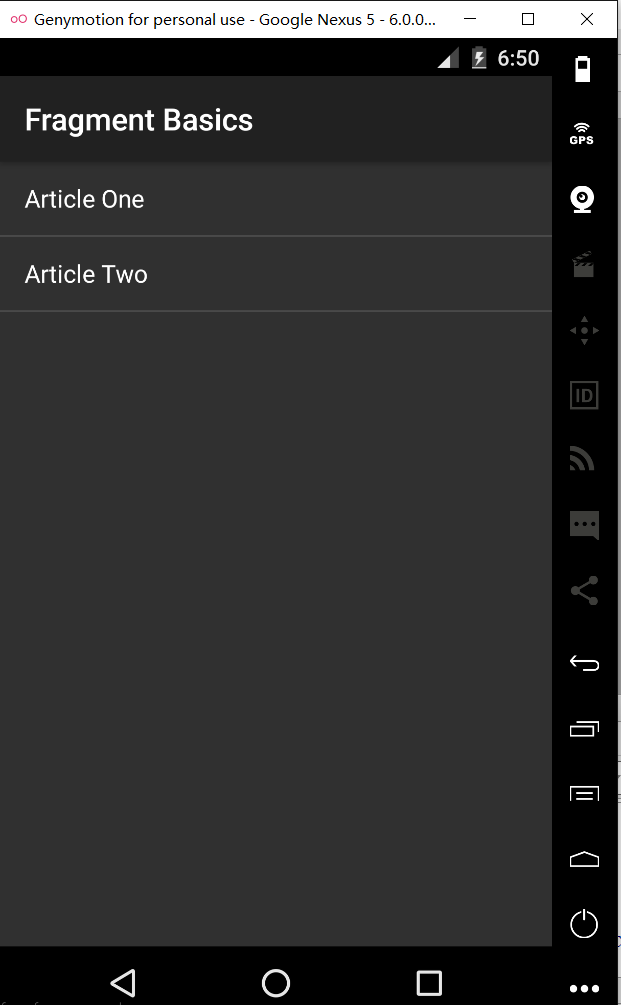
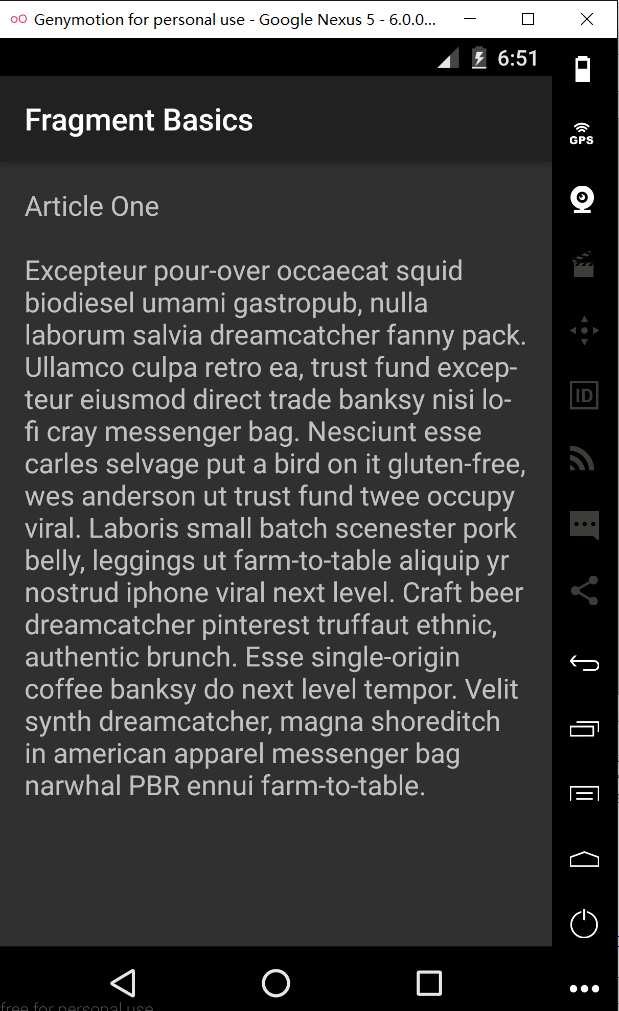
我先把官方示例APP的截图贴出来,如果后面看不懂Fragment之间的交互,大家也可以先看看截图理解一下。
大概的意思是:点击一个Fragment A的文章标题列表,然后Fragment B替换Fragment A,内容切换成具体的文章内容。
下面开始吧。
第一个内容: Creating a Fragment
You can think of a fragment as a modular section of an activity, which has its own lifecycle, receives its own input events, and which you can add or remove while the activity is running (sort of like a “sub activity” that you can reuse in different activities).
我们可以把Fragment认为是Activity的一个子内容,有它自己的生命周期,接受它自己的输入指令,并且你可以在Activity运行的时候对它进行添加或是移除,而且可以在不同的Activity里面复用。
为了实现Fragment,我们要用Support Library这个类库,通过它我们的APP可以兼容Android版本低至1.6的设备,当然我们也可以用v7的Support Library,不过它和Android2.1(API 7)并且它也包含所有你需要的Fragment API。
1. Create a Fragment Class
为了创建一个Fragment, 我们应该要继承Fragment类,如同我们创建一个Activity的时候应该要继承Activity类,都是一个道理,不同的地方就是我们需要实现 onCreateView() 这么一个回调方法去定义布局。事实上,如果单单要去让这个Fragment运行起来,这也是唯一一个需要实现的生命周期的回调方法。
官方给出的例子:
import android.os.Bundle;
import android.support.v4.app.Fragment;
import android.view.LayoutInflater;
import android.view.ViewGroup;

public class ArticleFragment extends Fragment {
    @Override
    public View onCreateView(LayoutInflater inflater, ViewGroup container,
        Bundle savedInstanceState) {
        // Inflate the layout for this fragment
        return inflater.inflate(R.layout.article_view, container, false);
    }
}
Fragment也需要实现自己的有关生命周期的回调方法,就如果Activity切换时那样。比如在Activity onPause() 方法被回调的时候, 在这个Activity其中的任何Fragment的 onPause() 方法也会被回调。
2.Add a Fragment to an Activity using XML
先来看一段官方的表述:
While fragments are reusable, modular UI components, each instance of a Fragment class must be associated with a parent FragmentActivity. You can achieve this association by defining each fragment within your activity layout XML file.
就是说每个Fragment实例应该和一个父Activity相联系,通过在父Activity里面的布局文件里定义fragment来完成这个联系。
官方还给出了一个提示:
Note: FragmentActivity is a special activity provided in the Support Library to handle fragments on system versions older than API level 11. If the lowest system version you support is API level 11 or higher, then you can use a regular Activity.
意思是说,FragmentActivity是为了处理API等级低于7的Activity,如果你支持的最低系统版本API大于等于11,你可以使用常规的Activity就可以了。
官方给出了在大屏幕下的布局文件,其布局文件名用-large限定符标识:
res/layout-large/news_articles.xml
<LinearLayout xmlns:android="http://schemas.android.com/apk/res/android"
    android:orientation="horizontal"
    android:layout_width="fill_parent"
    android:layout_height="fill_parent">

    <fragment android:name="com.example.android.fragments.HeadlinesFragment"
              android:id="@+id/headlines_fragment"
              android:layout_weight="1"
              android:layout_width="0dp"
              android:layout_height="match_parent" />

    <fragment android:name="com.example.android.fragments.ArticleFragment"
              android:id="@+id/article_fragment"
              android:layout_weight="2"
              android:layout_width="0dp"
              android:layout_height="match_parent" />

</LinearLayout>
以及布局文件的在Activity中的应用,和平常没什么太大的区别。
import android.os.Bundle;
import android.support.v4.app.FragmentActivity;

public class MainActivity extends FragmentActivity {
    @Override
    public void onCreate(Bundle savedInstanceState) {
        super.onCreate(savedInstanceState);
        setContentView(R.layout.news_articles);
    }
}
如果这里你用的是v7的类- v7 appcompat library,你应该继承 AppCompatActivity ,它是FragmentActivity的一个子类,以前一直不知道,也懒得查,现在终于知道了,原来它是子类啊!
第二个内容: Building a Flexible UI
在设计支持各种屏幕尺寸的应用时,你可以在不同的布局配置中重复使用 Fragment ,以便根据相应的屏幕空间提供更出色的用户体验。
例如,一次只显示一个 Fragment 可能就很适合手机这种单窗格界面,但在平板电脑上,你可能需要设置并列的 Fragment,因为平板电脑的屏幕尺寸较宽阔,可向用户显示更多信息。
如下图所示:

两个 Fragment,显示在不同尺寸屏幕上同一 Activity 的不同配置中。在较宽阔的屏幕上,两个 Fragment 可并列显示;在手机上,一次只能显示一个 Fragment,因此必须在用户导航时更换 Fragment。
利用 FragmentManager 类提供的方法,你可以在运行时添加、移除和替换 Activity 中的 Fragment,以便为用户提供一种动态体验。
1.在运行时向 Activity 添加 Fragment
我们可以在Activity的运行周期内动态地添加Fragment , 如果这样,我们不用想上面讲的那样在Activity的布局文件里面使用 < fragment > 元素去定义fragment,因为我们要做到动态添加,而不是把 Fragment 死死的固定下来,那怎么办呢?
在这种情况下,我们应该在Activity中为Fragment去定义一个容器,来保存Fragemnt的布局。和上面的示例作比较,我们来看看下面这个示例:
res/layout/news_articles.xml:
    <FrameLayout xmlns:android="http://schemas.android.com/apk/res/android"
        android:id="@+id/fragment_container"
        android:layout_width="match_parent"
        android:layout_height="match_parent" />
细心的人会发现,我们这个布局文件的名称和上面的布局文件相比,少了一个-large的限定词,言外之意就是这个布局文件是给屏幕尺寸小于large的设备使用的,上面那个例子可以理解为给平板的Activity的布局,我们可以把两个Fragment都放进去,因为有足够的空间可以放的下,现在的布局是给手机等屏幕尺寸相对较小的设备使用的,因为空间有限只能显示一个Fragemnt,所以我们要用动态的添加,移除,替换,而这个空间就由上面的容器提供。
要执行对Fragment的添加或是移除,我们必须使用FragmentManager 创建一个FragmentTransaction,后者可以提供Fragment添加,移除和替换等Fragment相关事务的API。
如果Activity中的Fragment可以被添加,被替换,我们就应该在Activity的onCreate()方法里面对Fragment进行初始化。
在Activity内部,我们可以用Supprt Library API调用 getSupportFragmentManager() 以获取 FragmentManager,然后调用 beginTransaction() 创建 FragmentTransaction,最后通过调用 add() 来添加Fragment。
我们可以用同一个FragmentTransaction对Activity进行多项Fragment事务操作,当准备好进行更改后,用 commit() 提交。
官方给出了下面的代码:
    import android.os.Bundle;
    import android.support.v4.app.FragmentActivity;

    public class MainActivity extends FragmentActivity {
        &Override
        public void onCreate(Bundle savedInstanceState) {
            super.onCreate(savedInstanceState);
            setContentView(R.layout.news_articles);

            // 确认 Activity 使用的布局版本包含
            // fragment_container FrameLayout
            if (findViewById(R.id.fragment_container) != null) {

                // 不过,如果我们要从先前的状态还原,
                // 则无需执行任何操作而应返回
                // 否则就会得到重叠的 Fragment 。
                if (savedInstanceState != null) {
                    return;
                }

                // 创建一个要放入 Activity 布局中的新 Fragment
                HeadlinesFragment firstFragment = new HeadlinesFragment();

                // 如果此 Activity 是通过 Intent 发出的特殊指令来启动的,
                // 请将该 Intent 的 extras 以参数形式传递给该 Fragment
                firstFragment.setArguments(getIntent().getExtras());

                // 将该 Fragment 添加到“fragment_container”FrameLayout 中
                getSupportFragmentManager().beginTransaction()
                        .add(R.id.fragment_container, firstFragment).commit();
            }
        }
    }
官方还有这么一句话:
由于该 Fragment 已在运行时添加到 FrameLayout 容器中,而不是在 Activity 布局中通过 元素进行定义,因此该 Activity 可以移除和替换这个 Fragment 。
2.用一个 Fragment 替换另一个 Fragment
替换 Fragment 的步骤与添加 Fragment 的步骤相似,但需要调用 replace() 方法,而非 add()。
这里由一个新的东西,我们可以看看:
请注意,当你执行替换或移除 Fragment 等 Fragment 事务时,最好能让用户向后导航和“撤消”所做更改。要通过 Fragment 事务允许用户向后导航,你必须调用 addToBackStack(),然后再执行 FragmentTransaction。
注意:当你移除或替换 Fragment 并向返回堆栈添加事务时,已移除的 Fragment 会停止(而不是销毁)。如果用户向后导航,还原该 Fragment,它会重新启动。如果你没有向返回堆栈添加事务,那么该 Fragment 在移除或替换时就会被销毁。
还有一个例子:
    // 创建 Fragment 并为其添加一个参数,用来指定应显示的文章
    ArticleFragment newFragment = new ArticleFragment();
    Bundle args = new Bundle();
    args.putInt(ArticleFragment.ARG_POSITION, position);
    newFragment.setArguments(args);

    FragmentTransaction transaction = getSupportFragmentManager().beginTransaction();

    // 将 fragment_container View 中的内容替换为此 Fragment ,
    // 然后将该事务添加到返回堆栈,以便用户可以向后导航
    transaction.replace(R.id.fragment_container, newFragment);
    transaction.addToBackStack(null);

    // 执行事务
    transaction.commit();
如果我们想让Fragment的状态保留下来,即当我们按下返回键的时候能重新看到上一个Fragment,我们应该调用addToBackStack()方法,保存在返回堆栈中,这样它才能保存下来。原来它是这个作用,哈哈。
关于addToBackStack()方法的参数,官方给出了这么个解释:
addToBackStack() 方法可接受可选的字符串参数,来为事务指定独一无二的名称。除非你打算使用 FragmentManager.BackStackEntry API 执行高级 Fragment 操作,否则无需使用此名称。
恩(⊙o⊙)…,解释太高端,我也看不懂,反正用null就行啦!
第三个内容:Communicating with Other Fragments
如果说前面的东西我还能轻松的学学,心里独白,本boy原来就差不多知道,就差一丢丢。。。。但是下面这个以前见了就一点脾气都没有,看不懂,就是什么回调啊,什么鬼啊。关于Fragment之间相互通信的问题,嗯,今天能解决这个问题真是太棒了!
先来看官方的一段表述:
In order to reuse the Fragment UI components, you should build each as a completely self-contained, modular component that defines its own layout and behavior. Once you have defined these reusable Fragments, you can associate them with an Activity and connect them with the application logic to realize the overall composite UI.
意思大概是说,为了去实现Fragment的复用,我们应该把每一个Fragment构建成自身完备的一个个模块,其中定义它本身的布局和行为。一旦你定义了这些Fragment,你就应该在Activity中把他们都联系起来,把他们和APP的执行逻辑联系起来,以达到实现一套综合有序,完备的UI。(恩,Google爸爸说的是)
Often you will want one Fragment to communicate with another, for example to change the content based on a user event. All Fragment-to-Fragment communication is done through the associated Activity. Two Fragments should never communicate directly.
这段话厉害,官方告诉我们两个Fragment应该通过Activity之间联系,而互相之间不能联系!至于为什么,我就呵呵哒。
1.Define an Interface
恩,先看Google说,联系的机理到底是什么:
To allow a Fragment to communicate up to its Activity, you can define an interface in the Fragment class and implement it within the Activity. The Fragment captures the interface implementation during its onAttach() lifecycle method and can then call the Interface methods in order to communicate with the Activity.
对对对!!!,就是这玩意,当初看了多少博客还是不太懂,敲起来吗也是犹犹豫豫,似懂非懂。现在静下心来好好翻译一下:
为了允许Fragment向上和Activity进行交流,我们可以在Fragment里面定义一个接口,然后在Activity中执行它。这个Fragment在 onAttach() 方法里面可以去捕捉到接口的执行,然后就可以调用接口的方法和Activity进行沟通了。
如果大家没什么感觉,可以看读几遍上面的英文,然后再看看下面的示例:
public class HeadlinesFragment extends ListFragment {
    OnHeadlineSelectedListener mCallback;

    // Container Activity must implement this interface
    public interface OnHeadlineSelectedListener {
        public void onArticleSelected(int position);
    }

    @Override
    public void onAttach(Activity activity) {
        super.onAttach(activity);

        // This makes sure that the container activity has implemented
        // the callback interface. If not, it throws an exception
        try {
            mCallback = (OnHeadlineSelectedListener) activity;
        } catch (ClassCastException e) {
            throw new ClassCastException(activity.toString()
                    + " must implement OnHeadlineSelectedListener");
        }
    }

    ...
}
现在Fragment可以通过 mCallback 成员变量调用 onArticleSelected() 方法向Activity 发送信息,而不是调用 OnHeadlineSelectedListener 接口。
比方说当用户点击列表项的一个条目时,Fragment会用callback接口去向父Acticity发送信息。
 @Override
    public void onListItemClick(ListView l, View v, int position, long id) {
        // Send the event to the host activity
        mCallback.onArticleSelected(position);
    }
如果现在还没动别急,看完下面的肯定会懂了
2.Implement the Interface
为了去接收Fragment的事件回调,我们必须的父Activity中继承在Fragment类中定义好的接口:
下面是官方给出的Activity实现接口的例子:
public static class MainActivity extends Activity
        implements HeadlinesFragment.OnHeadlineSelectedListener{
    ...

    public void onArticleSelected(int position) {
        // The user selected the headline of an article from the HeadlinesFragment
        // Do something here to display that article
    }
}
我们在这个方法里去定义具体处理传来消息的内容。接着向下看。
3.Deliver a Message to a Fragment
Activity向Fragment发送消息,先要通过 FragmentManager 的 findFragmentById() 得到Fragment实例, 然后直接调用Fragment的公有方法就可以了。说是这么说,看是要看例子才能懂。
打个比方说,我们在手机上打开一个应用,刚开始是一个Fragment A ,里面有文章的列表 (artist 1, artist2),然后我们点击列表中的某一项,Fragment A 发送信息给父Activity,然后父Activity在实现了A的接口中的方法里面处理这个事件,你点击了artist1,我就得到Fragment B(专门用于显示文章的Fragment)的实例,Fragment B的内容换成指定的内容。
官方给出了下面的例子:
public static class MainActivity extends Activity
        implements HeadlinesFragment.OnHeadlineSelectedListener{
    ...

    public void onArticleSelected(int position) {
        // The user selected the headline of an article from the HeadlinesFragment
        // Do something here to display that article

        ArticleFragment articleFrag = (ArticleFragment)
                getSupportFragmentManager().findFragmentById(R.id.article_fragment);

        if (articleFrag != null) {
            // If article frag is available, we're in two-pane layout...

            // Call a method in the ArticleFragment to update its content
            articleFrag.updateArticleView(position);
        } else {
            // Otherwise, we're in the one-pane layout and must swap frags...

            // Create fragment and give it an argument for the selected article
            ArticleFragment newFragment = new ArticleFragment();
            Bundle args = new Bundle();
            args.putInt(ArticleFragment.ARG_POSITION, position);
            newFragment.setArguments(args);

            FragmentTransaction transaction = getSupportFragmentManager().beginTransaction();

            // Replace whatever is in the fragment_container view with this fragment,
            // and add the transaction to the back stack so the user can navigate back
            transaction.replace(R.id.fragment_container, newFragment);
            transaction.addToBackStack(null);

            // Commit the transaction
            transaction.commit();
        }
    }
}
这个例子和我说的是一样的,不过他多了一个 if 语句用来判断, if (articleFrag != null) 这句话的意思是,如果Fragment B 存在,这时说明在平板等可以直接显示两个Fragment的设备上,我直接显示对应的文章内容,如果Fragment B不存在,这时说明运行的设备只能显示得下一个Fragment,我只能替换Fragment A ,然后显示Fragment B。
好了。这就是全部内容,我觉得这个多看几遍肯定能看懂。
总结一下:
1. Fragment A创建事件回调的接口,和对应的变量
2. 然后在onAttach()方法里面捕捉完成接口的实现,就是传来的Activity的引用,这样才对应的起来啊!
3. 在Activity中继承Fragment A中的接口,并实现具体的方法
4. 在方法里面得到Fragment B 的实例,调用Fragment B 的公有方法
到此为止,就完成的Fragment之间的通信,是通过Activity完成,还记得Google说任意两个Fragment之间不能直接通信哦!
Fragment之间都会了,Fragment和Activity之间肯定没问题了。
好了今天就这样吧,本boy吃晚饭去了。


 378
378

 被折叠的 条评论
为什么被折叠?
被折叠的 条评论
为什么被折叠?
 到【灌水乐园】发言


