


前言
因为最近想和后台进行对接,昨天自己在Google上研究了半天关于Volley的内容,觉得很开心。因为原来觉得关于网络这块,一直是个很复杂的东西和流程,没想到Google已经推出了能把这方面封装的这么好的工具——Volley。通过它可以方便的实现小流量的数据传输,而且还可以根据自己的需求进行定制。其中我还自己看看json的东西,也在这个里面小实践了一下。
不过看完教程,我也慢慢看懂了一件事,现在我们学的这些框架都是Google,或者第三方的大神帮我们封装好的,我们只需要按照接口去调用就行,而学完可只是学习了别人定义的方法怎么使用,要进一步真正了解这一块,应该深入其中的源码,自己去理解其中的过程,甚至创造出一个自己的框架来。
因为Volley教程的最后一讲是关于自定义Request的内容,通过查看一些StringRequest或是ImageRequest,我才发现,原来这些也都是大神们一步一步用JAVA语言编写出来的。真正要继续走下去还有很远的路,要相信自己。
正文
这次我一边看教程一边对着敲代码,自己做了一个测试的APP,没有讲究布局什么的,先放一个图出来:
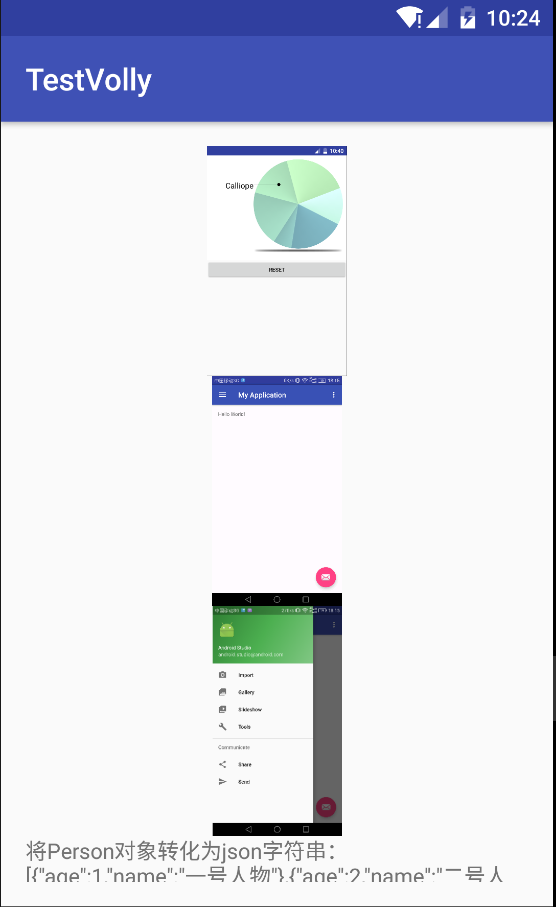
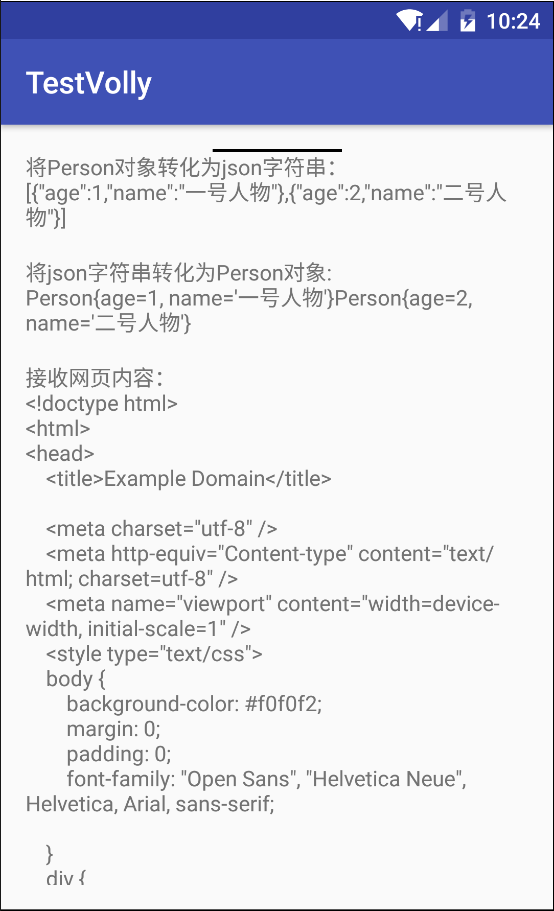
第一张图是,我通过ImageRequest,ImageLoader,NetworkImageView三种方式加载的三张网络图片;第二张图由3个TextView组成,第一个TextView我把Java对象转化为json格式的字符串,第二个TextView是把json格式字符串转化为Java对象,第三个TextView我是把网页内容通过StringRequest内容读取出来。
好了,下面结合Google的教程记录学到的内容:
Volley是一个HTTP的lib,它让Android APP访问网络数据更加简单快捷,它有很多优点:
- 自动安排网络请求调度
- 同时实现多个连接
- 可设定请求的优先级
- 提供取消请求的API
- 方便定制
- and so on
Volley在RPC类型操作(远程调度资源)来更新UI方面性能卓越。它和各种协议都能很简单的整合,支持string, images, json这些原生数据。Volley对一些基本的网络请求都进行了封装,能帮你解脱出编写基本代码的苦海,让你集中精力处理代码逻辑。
Volley不适合大量的网络流操作,因为它在解析的时候把所有的请求的放在内存里。对于大流量下载,可以考虑用DownloadManager。
接下来让我们看看怎么集成Volley到自己项目里面:
第一步用git clone volley:
打开一个仓库,然后直接在git上面敲上去下面的代码:
git clone https://android.googlesource.com/platform/frameworks/volley这样,我们就把volley项目克隆到了当前的仓库文件夹下面了。
第二步加入自己的项目:
我用的是Andorid Studio,打开要引入Volley的项目,然后点击File->New->Import Module,然后选中刚才的文件,这样你就会发现除了app之外,又多了一个volley目录。然后点击File->Project Structure->选中APP,点击Dependencies,选中右上角的绿色加号,选择Module Dependency,然后选中volley就好了。
发送一个简单的Request
基本模式是这样的,首先创建一个RequestQueue,然后传递给它一个Request对象。RequestQueue负责管理网络操作的线程,读取或写入缓存,解析响应。Request负责解析原始的响应信息。先看如何用默认的RequestQueue来完成这些操作:
基本操作
首先要添加访问网络的权限:
android.permission.INTERNET首先我们用Volley提供的Volley.newRequestQueue方法建立一个默认的RequestQueue:
final TextView mTextView = (TextView) findViewById(R.id.text);
...

// Instantiate the RequestQueue.
RequestQueue queue = Volley.newRequestQueue(this);
String url ="http://www.google.com";

// Request a string response from the provided URL.
StringRequest stringRequest = new StringRequest(Request.Method.GET, url,
            new Response.Listener<String>() {
    @Override
    public void onResponse(String response) {
        // Display the first 500 characters of the response string.
        mTextView.setText("Response is: "+ response.substring(0,500));
    }
}, new Response.ErrorListener() {
    @Override
    public void onErrorResponse(VolleyError error) {
        mTextView.setText("That didn't work!");
    }
});
// Add the request to the RequestQueue.
queue.add(stringRequest);
Volley会把解析好的响应分发到主线程,我们可以方便的在主线程中通过接收到的数据来完成UI的更新,比如说显示一张图片。但是我们也要注意及时的取消不必要的Request,避免造成主线程的阻塞。
Volley工作的大体流程
添加一个Request很简单,就像之前代码中展示的那样,你先构造一个Request,然后用add()把它添加到RequestQueue里面就好了。它会自动在并行的线程里得到响应,处理网络响应,发送给UI线程。
一旦你调用add(),Volley就会运行一个cache加工线程和网络线程池,添加到RequestQueue之后,Volley会从先看看这个request能不能由cache处理,如果可以,直接由cache县城处理,然后把解析过后的响应递交到UI线程,如果不能,那这个请求就会被放在网络队列中,第一个可获得的网络线程就把它从队列中取出来,执行HTTP操作,然后在工作线程中解析响应,把响应写入换成,然后再把响应递交给UI线程。
下面这张图很清晰的描绘的整个流程:

取消一个Request
调用cancel()里取消一个Request,一旦取消,这个Reuqest就再也不能被调用。这意味着你可以在onStop()方法里面取消所有的预备Request,然后不需要再看是否有Request的实例了,onSaveInstanceState()这些方法你也不必去担心了。
用好cancel()方法能很好的处理Request,最好的途径就是给Request添加一个Tag。我们可以给具有相同途径的Request指定一个相同的标签,然后在不需要它们的时候一起取消掉,合理实现了Request的分组管理。比如用ViewPaper显示好几屏的图片,滑到下一页时我们应该及时取消掉上一页的Request,这样它不会占着资源影响我们这一屏幕资源的加载。
下面是一个示例,分两步:
第一步,给Request添加TAG
public static final String TAG = "MyTag";
StringRequest stringRequest; // Assume this exists.
RequestQueue mRequestQueue;  // Assume this exists.

// Set the tag on the request.
stringRequest.setTag(TAG);

// Add the request to the RequestQueue.
mRequestQueue.add(stringRequest);
第二步,在onStop()方法里面取消掉所有有这个TAG的Request:
@Override
protected void onStop () {
    super.onStop();
    if (mRequestQueue != null) {
        mRequestQueue.cancelAll(TAG);
    }
}
当然,这些都是根据需求来写的,如果你想预先加载准备好,你就不要调用cancel()。
建立一个RequestQueue
这个需求对于我这种刚入门的人应该不大,只要用Volley.newRequstQueue()创建一个默认的就好。不过以后肯定会因为需要去定制自己的RequestQueue,毕竟default并不能很好满足项目开发。
建立一个Network和Cache
RequestQueue需要两个东西,一个network负责传输request,一个缓存负责处理缓存。在Volley的工具箱里都有这两种的标准实现。DiskBasedCache提供带有内存索引的一个文件一个响应的缓存,BasicNetwork提供一个你偏好的HTTP传输方式的network传输。
RequestQueue mRequestQueue;

// Instantiate the cache
Cache cache = new DiskBasedCache(getCacheDir(), 1024 * 1024); // 1MB cap

// Set up the network to use HttpURLConnection as the HTTP client.
Network network = new BasicNetwork(new HurlStack());

// Instantiate the RequestQueue with the cache and network.
mRequestQueue = new RequestQueue(cache, network);

// Start the queue
mRequestQueue.start();

String url ="http://www.example.com";

// Formulate the request and handle the response.
StringRequest stringRequest = new StringRequest(Request.Method.GET, url,
        new Response.Listener<String>() {
    @Override
    public void onResponse(String response) {
        // Do something with the response
    }
},
    new Response.ErrorListener() {
        @Override
        public void onErrorResponse(VolleyError error) {
            // Handle error
    }
});

// Add the request to the RequestQueue.
mRequestQueue.add(stringRequest);

// ...
如果你只想要实时的发送请求,不想把一些线程留在那里不管,你可以在需要的时候创建一个ResqustQueue,然后在得到响应之后调用cancel()取消掉这个RequestQueue。不过更常见的一种方式是创建一个RequestQueue的单例,然后在你的APP的生命周期里保持它一直运行着。
创建一个RequestQueue单例
如果APP经常使用网络,建立起一个单例是一个很好的选择,因为重复的创建是不必要的,不仅更加无谓的消耗运行内存,更重要的是让缓存的存在意义基本变为0了。这里有两种方式,一种是实现一个单例,里面有RequstQueue,里面有其他的一些Volley功能方法。另一种是实现一个Application的子类,然后在onCreate()方法里创建一个RequestQueue,不过官方更推荐第一种方法,因为它更加模块化。
实现单例和APP的生命周期相同,传入一个Application的上下文context就好了,注意不是Activity的。
public class MySingleton {
    private static MySingleton mInstance;
    private RequestQueue mRequestQueue;
    private ImageLoader mImageLoader;
    private static Context mCtx;

    private MySingleton(Context context) {
        mCtx = context;
        mRequestQueue = getRequestQueue();

        mImageLoader = new ImageLoader(mRequestQueue,
                new ImageLoader.ImageCache() {
            private final LruCache<String, Bitmap>
                    cache = new LruCache<String, Bitmap>(20);

            @Override
            public Bitmap getBitmap(String url) {
                return cache.get(url);
            }

            @Override
            public void putBitmap(String url, Bitmap bitmap) {
                cache.put(url, bitmap);
            }
        });
    }

    public static synchronized MySingleton getInstance(Context context) {
        if (mInstance == null) {
            mInstance = new MySingleton(context);
        }
        return mInstance;
    }

    public RequestQueue getRequestQueue() {
        if (mRequestQueue == null) {
            // getApplicationContext() is key, it keeps you from leaking the
            // Activity or BroadcastReceiver if someone passes one in.
            mRequestQueue = Volley.newRequestQueue(mCtx.getApplicationContext());
        }
        return mRequestQueue;
    }

    public <T> void addToRequestQueue(Request<T> req) {
        getRequestQueue().add(req);
    }

    public ImageLoader getImageLoader() {
        return mImageLoader;
    }
}
下面是使用单例的代码:
// Get a RequestQueue
RequestQueue queue = MySingleton.getInstance(this.getApplicationContext()).
    getRequestQueue();

// ...

// Add a request (in this example, called stringRequest) to your RequestQueue.
MySingleton.getInstance(this).addToRequestQueue(stringRequest);
创建一个标准的Request
有时候APP访问网络数据希望得到string,images,json,满足这些要求的request,Volley已经为我们封装好了:
- StringRequest 给出一个URL,返回一个原始的字符创资源
- ImageRequest 给出一个URL,从response里返回一个image
- JsonObjectRequest或是JsonArrayRequest都是给出一个URL,返回一个jsonobject或者是jsonarray
这些都是基本的Request,如果他们能满足你的需求,你就直接用,下一节还会讲怎么订制自己的Request。
请求一张Image
最开始的图片展示展示了三张图片,这三张图片分别用了下面要介绍的三种加载网络图片的方式:
ImageRequest 给出一个图片的URL,在回调方法里返回一个Bitmap,它还提供了指定图片尺寸大小的功能。它主要的好处是利用了Volley的自动调度功能,把昂贵的图片开销操作放在了工作worker线程(这个worker我不知道怎么翻译)
ImageLoader,这个类不仅能加载图片还能把图片缓存起来。它适合于处理大量的ImageRequest。比如所ListView的每一个Item都包含一个图片,ImageLoader提供的缓存可以有效的方式图片一闪而过的情况。如果能在缓存中找到图片那么就可以避免阻塞或是延迟UI线程。ImgaeLoader可以整合很多响应,没有它的话基本每一个响应都要放一张图片到View上面,布局不得不传递每一个图片,整合使得同时处理多个响应成为可能,提高了加载性能。
- NetworkImageView建立在ImageLoader上面,如果你的ImageView的图片是从网络上加载,那么它是ImageView的一个很好的代替。如果View脱离了视图层次,NetworkImageView也可以管理取消预备请求。
一个使用ImageRequest的例子
给一个url,然后把加载出来的图片显示到View上:
ImageView mImageView;
String url = "http://i.imgur.com/7spzG.png";
mImageView = (ImageView) findViewById(R.id.myImage);
...

// Retrieves an image specified by the URL, displays it in the UI.
ImageRequest request = new ImageRequest(url,
    new Response.Listener<Bitmap>() {
        @Override
        public void onResponse(Bitmap bitmap) {
            mImageView.setImageBitmap(bitmap);
        }
    }, 0, 0, null,
    new Response.ErrorListener() {
        public void onErrorResponse(VolleyError error) {
            mImageView.setImageResource(R.drawable.image_load_error);
        }
    });
// Access the RequestQueue through your singleton class.
MySingleton.getInstance(this).addToRequestQueue(request);
使用ImageLoader
下面是一个使用ImageLoader的例子,给出一个URL,和一个ImageLoader.getImageListener即可:
ImageLoader mImageLoader;
ImageView mImageView;
// The URL for the image that is being loaded.
private static final String IMAGE_URL =
    "http://developer.android.com/images/training/system-ui.png";
...
mImageView = (ImageView) findViewById(R.id.regularImageView);

// Get the ImageLoader through your singleton class.
mImageLoader = MySingleton.getInstance(this).getImageLoader();
mImageLoader.get(IMAGE_URL, ImageLoader.getImageListener(mImageView,
         R.drawable.def_image, R.drawable.err_image));
使用单例的方式得到ImageLoader还是很重要,这关系到用户体验,如果用户每次重新打开这个Activity,你有要重新去创建一个ImageLoader,那么会照成图片闪过,用户等待的不好的情况,用单例的ImageLoader把图片缓存起来是解决这个问题的有效方式。
使用NetworkImageView
给一个图片URL,还有一个ImageLoader就行:
ImageLoader mImageLoader;
NetworkImageView mNetworkImageView;
private static final String IMAGE_URL =
    "http://developer.android.com/images/training/system-ui.png";
...

// Get the NetworkImageView that will display the image.
mNetworkImageView = (NetworkImageView) findViewById(R.id.networkImageView);

// Get the ImageLoader through your singleton class.
mImageLoader = MySingleton.getInstance(this).getImageLoader();

// Set the URL of the image that should be loaded into this view, and
// specify the ImageLoader that will be used to make the request.
mNetworkImageView.setImageUrl(IMAGE_URL, mImageLoader);
LRU Cache的例子
我们加载图片一定会用到缓存,Volley通过DiskBasedCache类提供了一个标准的缓存实现,它能直接把文件缓存到硬盘上的特定的文件夹中,如果使用ImageLoader,我么应该提供一个定制好的LRU bitmap cache去实现ImageLoader.ImageCache接口。而且,这个最好是单例模式,因为图片要缓存的原因。
import android.graphics.Bitmap;
import android.support.v4.util.LruCache;
import android.util.DisplayMetrics;
import com.android.volley.toolbox.ImageLoader.ImageCache;

public class LruBitmapCache extends LruCache<String, Bitmap>
        implements ImageCache {

    public LruBitmapCache(int maxSize) {
        super(maxSize);
    }

    public LruBitmapCache(Context ctx) {
        this(getCacheSize(ctx));
    }

    @Override
    protected int sizeOf(String key, Bitmap value) {
        return value.getRowBytes() * value.getHeight();
    }

    @Override
    public Bitmap getBitmap(String url) {
        return get(url);
    }

    @Override
    public void putBitmap(String url, Bitmap bitmap) {
        put(url, bitmap);
    }

    // Returns a cache size equal to approximately three screens worth of images.
    public static int getCacheSize(Context ctx) {
        final DisplayMetrics displayMetrics = ctx.getResources().
                getDisplayMetrics();
        final int screenWidth = displayMetrics.widthPixels;
        final int screenHeight = displayMetrics.heightPixels;
        // 4 bytes per pixel
        final int screenBytes = screenWidth * screenHeight * 4;

        return screenBytes * 3;
    }
}
下面是一个用cache实例化ImageLoader的例子:
RequestQueue mRequestQueue; // assume this exists.
ImageLoader mImageLoader = new ImageLoader(mRequestQueue, new LruBitmapCache(
            LruBitmapCache.getCacheSize()));
请求JSON
Volley提供了两种标准的JSON请求:
- JsonArrayRequest 给出一个URL,response返回一个JsonArray
- JsonObjectRequest 给出一个URL,response返回一个JsonObject
TextView mTxtDisplay;
ImageView mImageView;
mTxtDisplay = (TextView) findViewById(R.id.txtDisplay);
String url = "http://my-json-feed";

JsonObjectRequest jsObjRequest = new JsonObjectRequest
        (Request.Method.GET, url, null, new Response.Listener<JSONObject>() {

    @Override
    public void onResponse(JSONObject response) {
        mTxtDisplay.setText("Response: " + response.toString());
    }
}, new Response.ErrorListener() {

    @Override
    public void onErrorResponse(VolleyError error) {
        // TODO Auto-generated method stub

    }
});

// Access the RequestQueue through your singleton class.
MySingleton.getInstance(this).addToRequestQueue(jsObjRequest);
实现一个自定义的Request
如果你的response是一个string, image,或是json,你无需自定义,而如果你向的到一些其他的response,你就要自己去定义Request了。比如说你想修改一下JsonObjectRequest,你想直接通过json得到一个对象,那么你就要自定义Request,官方教程中的GsonRequest就是讲这个。
自定义Request有两步:
- 继承Request < T >类,< T >代表了你想解析得到的响应的类型,比如说你想在response中得到string类型的接口,那么你就应该继承Request< String >
- 实现parseNetworkResponse()和deliverResponse()抽象方法
parseNetworkResponse
一个Response里面包括了你想要递交的解析过后的Response:
@Override
protected Response<T> parseNetworkResponse(
        NetworkResponse response) {
    try {
        String json = new String(response.data,
        HttpHeaderParser.parseCharset(response.headers));
    return Response.success(gson.fromJson(json, clazz),
    HttpHeaderParser.parseCacheHeaders(response));
    }
    // handle errors
...
}- parseNetworkResponse需要一个NetworkResponse参数,里面包含了the response payload as a byte[], HTTP status code, and response headers.。。。。。不知道这些是什么。
- 返回一个Response< T >,T代表的你想返回的response类型,比如StringRequest里面这个位置是Request< String >。
deliverResponse
通过这个方法,Volley会把你在parseNetworkResponse()里面解析得到的response直接返回给UI线程。
protected void deliverResponse(T response) {
        listener.onResponse(response);
GsonRequest示例
下面是GsonRequest的示例,Gson是一个lib,能实现json和java对象的相互转化:
public class GsonRequest<T> extends Request<T> {
    private final Gson gson = new Gson();
    private final Class<T> clazz;
    private final Map<String, String> headers;
    private final Listener<T> listener;

    /**
     * Make a GET request and return a parsed object from JSON.
     *
     * @param url URL of the request to make
     * @param clazz Relevant class object, for Gson's reflection
     * @param headers Map of request headers
     */
    public GsonRequest(String url, Class<T> clazz, Map<String, String> headers,
            Listener<T> listener, ErrorListener errorListener) {
        super(Method.GET, url, errorListener);
        this.clazz = clazz;
        this.headers = headers;
        this.listener = listener;
    }

    @Override
    public Map<String, String> getHeaders() throws AuthFailureError {
        return headers != null ? headers : super.getHeaders();
    }

    @Override
    protected void deliverResponse(T response) {
        listener.onResponse(response);
    }

    @Override
    protected Response<T> parseNetworkResponse(NetworkResponse response) {
        try {
            String json = new String(
                    response.data,
                    HttpHeaderParser.parseCharset(response.headers));
            return Response.success(
                    gson.fromJson(json, clazz),
                    HttpHeaderParser.parseCacheHeaders(response));
        } catch (UnsupportedEncodingException e) {
            return Response.error(new ParseError(e));
        } catch (JsonSyntaxException e) {
            return Response.error(new ParseError(e));
        }
    }
}
ps: Json小知识:
        Person one = new Person();
        one.setAge(1);
        one.setName("一号人物");
        Person two = new Person();
        two.setName("二号人物");
        two.setAge(2);
        Person[] personArray = new Person[]{one, two};
        String jsonString = JGsonSingleton.getInstance(this).getGson().toJson(personArray);
        jsonText.setText("将Person对象转化为json字符串:" + "\n" + jsonString + "\n");

        Person[] jsonPerson = JGsonSingleton.getInstance(this).getGson().fromJson(jsonString, Person[].class);
        String personString = "";
        for (Person person : jsonPerson) {
            personString += person.toString();
        }
        jsonObject.setText("将json字符串转化为Person对象: " + "\n" + personString + "\n");
自己写的代码,用Gson的toJson()方法直接把Person对象转化为Json,也可以用Gson的fromJson()方法,把json字符串直接转换为Person对象,单个对象的转化是可以的,对象数组的转化也是可以的。
好了,今天的内容就这么多了。


 3593
3593

 被折叠的 条评论
为什么被折叠?
被折叠的 条评论
为什么被折叠?
 到【灌水乐园】发言


