


本博客是对尚硅谷Spring4.X系列视频第一讲Hello World的笔记。
Spring官网:
http://spring.io/
Spring下载:
http://repo.springsource.org/libs-release-local/org/springframework/spring/
Spring是什么?
Spring是一个开源框架。
Spring为简化企业级应用开发而生,使用Spring可以使简单的JavaBean实现以前只有EJB才能实现的功能。
Spring是一个IOC(DI) 和 AOP 容器框架。
具体描述Spring
轻量级:Spring是非侵入性的-基于Spring开发的应用中的对象可以不依赖于Spring的API。也就是说在使用spring的时候,不需要继承实现Spring的类和接口,就可以享受Spring提供给我们的功能。
依赖注入(DI—dependency injection, IOC)
面向切面编程(AOP—aspect oriented programming)
容器:Spring是一个容器,因为它包含并且管理应用对象的生命周期。
框架:Spring实现了使用简单的组件配置组合成一个复杂的应用,在Spring中可以使用XML和java注解组合这些对象。
一站式:在IOC和AOP的基础上可以整合各种企业应用的开源框架和有些的第三方类库(实际上Spring自身也提供了展现层的SpringMVC和持久层的Spring JDBC)
安装 SPRING TOOL SUITE
Spring Tool Suite是一个Eclipse插件,利用该插件可以更方便的在Eclipse平台上开发基于Spring的应用。
下载SPRING TOOL SUITE:
地址:http://download.springsource.com/release/TOOLS/update/3.8.1.RELEASE/e4.5/springsource-tool-suite-3.8.1.RELEASE-e4.5.2-updatesite.zip
请注意下载和自己Eclipse版本相对应的插件版本,否则会出现无法安装的问题。
查看Eclipse版本可以通过Help -> About Eclipse
安装步骤如下:
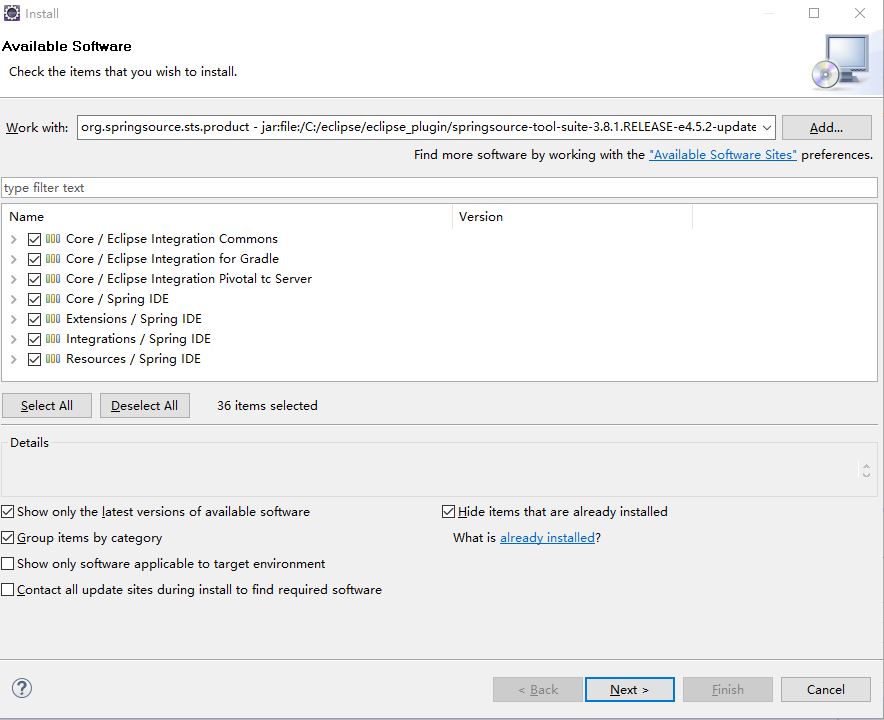
Help -> Install New Software -> Add
选择下载好的SPRING TOOL SUITE, 点击OK, 出现如下信息:
一直点击 Next, 等待安装过程结束,并重启Eclipse。
点击Windows -> preferences
出现下图所示的内容表示安装成功

搭建Spring开发环境
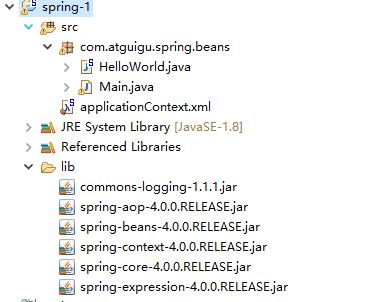
把以下jar包加入到工程的classpath下
commons-logging-1.1.1.jar
spring-aop-4.0.0.RELEASE.jar
spring-beans-4.0.0.RELEASE.jar
spring-context-4.0.0.RELEASE.jar
spring-core-4.0.0.RELEASE.jar
spring-expression-4.0.0.RELEASE.jar
Spring的配置文件:一个典型的Spring项目需要创建一个或者多个Bean配置文件,这些配置文件用于在Spring IOC容器里配置Bean。 Bean的配置文件可以放在classpath下,也可以放在其他目录下。
新建一个HelloWorld类:
package com.atguigu.spring.beans;
public class HelloWorld {

    private String name;
    public String getName() {
        return name;
    }
    public void setName(String name) {
        this.name = name;
    }
    public void hello(){
        System.out.println("hello: " + name);
    }
}
新建一个Main类:
package com.atguigu.spring.beans;
public class Main {

    public static void main(String[] args) {

        // 步骤1:创建HelloWorld的一个对象
        HelloWorld helloWorld = new HelloWorld();
        // 步骤2:为name属性赋值
        helloWorld.setName("World");
        // 步骤3: 调用hello方法
        helloWorld.hello();
    }

}
上述程序的输出是我们要达到的效果,输出:hello: World.
但是到目前为止,我们并没有使用到Spring的特性。
而一旦使用Spring,就可以将步骤1和步骤2 交给Spring去完成。
开始使用Spring
在src下创建一个spring 配置文件。
右键 -> new -> Spring Bean Configuration File -> Next
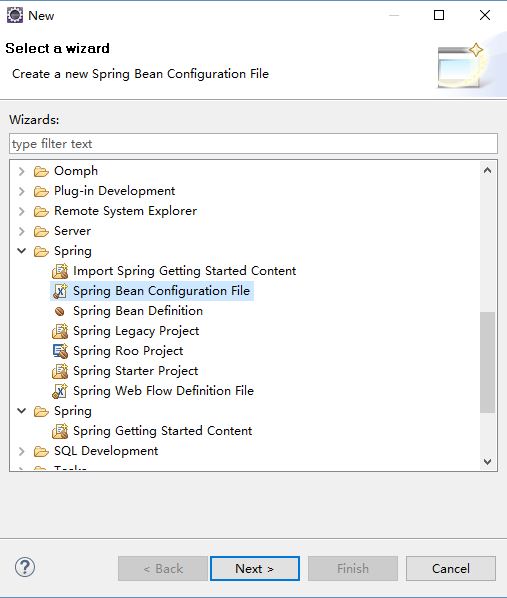
命名为applicationContext.xml, 文件内容如下:
<?xml version="1.0" encoding="UTF-8"?>
<beans xmlns="http://www.springframework.org/schema/beans"
    xmlns:xsi="http://www.w3.org/2001/XMLSchema-instance"
    xsi:schemaLocation="http://www.springframework.org/schema/beans http://www.springframework.org/schema/beans/spring-beans.xsd">
    <!-- 配置bean -->
    <bean id="helloWorld" class="com.atguigu.spring.beans.HelloWorld" >
        <property name="name" value="World"></property>
    </bean>
</beans>
id一般使用类名的第一个字母小写。
class是类的全类名。
class全类名用反射的方式由Spring帮我们创建对象。
id,标识这个对象的唯一值。
name,对应HelloWorld的name属性,请在HelloWorld提供name的set方法。
重新书写Main方法
package com.atguigu.spring.beans;

import org.springframework.context.ApplicationContext;
import org.springframework.context.support.ClassPathXmlApplicationContext;

public class Main {

    public static void main(String[] args) {
        //步骤1: 创建Spring 的IOC 容器
        ApplicationContext ctx = new ClassPathXmlApplicationContext("applicationContext.xml");
        //步骤2: 从IOC容器中获取bean实例
        HelloWorld helloWorld = (HelloWorld) ctx.getBean("helloWorld");
        //步骤3: 调用hello方法
        helloWorld.hello();
    }
}
ApplicationContext: 表示Spring中的IOC容器,它是一个接口。
ClassPathXmlApplicationContext:表示配置文件在类路径下。传入的是配置文件的名字。
getBean()方法中的参数helloWorld是配置文件中的id值。
输出hello: World, 这个World值是在IOC容器中进行配置的,bean文件中value的值即是这个值的来源。
在HelloWorld类中加入如下构造器和修改set方法,并且注释掉Main方法中的步骤二和步骤三方法,也就是Main方法只生成了一个IOC容器:
    public void setName2(String name) {
        System.out.println("setName: " + name);
        this.name = name;
    }
    public HelloWorld(){
        System.out.println("这是一个构造器");
    }
输出结果如下:
这是一个构造器
setName: World
可见,在创建容器的时候,会调用bean的构造器,把bean文件中的bean初始化。同时调用该类的set方法,为类的属性赋值。
以上就是Hello World的内容。
项目工程结构如下:


 443
443

 被折叠的 条评论
为什么被折叠?
被折叠的 条评论
为什么被折叠?
 到【灌水乐园】发言


