


Spring4.X + Spring MVC + Mybatis3 零配置应用开发框架搭建详解(3) - 实现最基本的登录处理
1. 基本架构:
基础框架搭建完成后,我们开始进行Spring + SpringMVC + Mybatis的集成,来完成登录功能的处理。我们根据数据流向,来创建相应的内容,先看看大致的数据流向图:

根据上面的数据流向图,需要创建用户登录页面、登录成功页面,权限管理模块、控制层、服务层、数据库持久层,下面我们分别来创建对应的内容:
2. 创建用户登录页面和登录后的页面
首先修改【webapp】下的【login.jsp】,添加一个需要输入登录信息的表单,然后在【WEB-INF】下创建【pages】目录,在【pages】目录下创建【index】目录,在【index】目录下创建【index.jsp】,不要问为什么创建那么多文件目录和层级,太麻烦,因为这是我的习惯,真正做项目后层级划分的好处以后你就懂。
login.jsp
<%@ page contentType="text/html;charset=UTF-8" language="java" %>
<%@ taglib uri="http://java.sun.com/jsp/jstl/core" prefix="c"%>
<html>
<head>
    <title>登录</title>
</head>
<body>

<h1>系统登录</h1>

<div>
  <c:if test="${param.error != null}">
    <p>用户名密码错误!</p>
  </c:if>
  <c:if test="${param.logout != null}">
    <p>您已注销!</p>
  </c:if>
</div>
<c:url value="/login" var="loginUrl"/>
<form action="${loginUrl}" method="post" id="loginForm">
  <div>
    <input type="text" name="username" class="username" placeholder="用户名" autocomplete="off"/>
  </div>
  <div>
    <input type="password" name="password" class="password" placeholder="密码" οncοntextmenu="return false" οnpaste="return false"/>
  </div>
  <input type="hidden" name="${_csrf.parameterName}" value="${_csrf.token}"/>
  <button id="submit" type="submit">登录</button>
</form>


</body>
</html>
index.jsp
<%@ page contentType="text/html;charset=UTF-8" language="java" %>
<!DOCTYPE html>
<html>
<head>
    <title>首页</title>
</head>

<body>
<h1>首页</h1>

<h2>登录成功</h2>
</body>
</html>
3. 在pom.xml中添加依赖jar包
首先在web项目下的pom.xml中添加公共的依赖库,以保证配置重用。
下面主要添加的是Spring核心的几个公用依赖包和日志包,以及工具类。插件中主要配置指定编译JDK的版本,以及资源文件的配置。
提示:添加依赖包的时候要注意设置Maven源的事,如果你自己设置的源出现问题,可以看看我的这篇博文:Maven国内源设置 - OSChina国内源失效了,别更新了
【Web项目下的pom.xml】
<?xml version="1.0" encoding="UTF-8"?>
<project xmlns="http://maven.apache.org/POM/4.0.0"
         xmlns:xsi="http://www.w3.org/2001/XMLSchema-instance"
         xsi:schemaLocation="http://maven.apache.org/POM/4.0.0 http://maven.apache.org/xsd/maven-4.0.0.xsd">
    <modelVersion>4.0.0</modelVersion>

    <groupId>com.aitongyi.web</groupId>
    <artifactId>web</artifactId>
    <version>1.0-SNAPSHOT</version>

    <!-- 将项目定义为公共项目 -->
    <packaging>pom</packaging>

    <modules>
        <module>back</module>
        <module>dao</module>
        <module>bean</module>
        <module>cache</module>
        <module>service</module>
        <module>task</module>
    </modules>

    <!-- 项目的依赖包 -->
    <dependencies>
        <dependency>
            <groupId>org.springframework</groupId>
            <artifactId>spring-core</artifactId>
            <version>4.1.6.RELEASE</version>
        </dependency>
        <dependency>
            <groupId>org.springframework</groupId>
            <artifactId>spring-context</artifactId>
            <version>4.1.6.RELEASE</version>
        </dependency>
        <dependency>
            <groupId>org.springframework</groupId>
            <artifactId>spring-web</artifactId>
            <version>4.1.6.RELEASE</version>
        </dependency>
        <dependency>
            <groupId>org.springframework</groupId>
            <artifactId>spring-beans</artifactId>
            <version>4.1.6.RELEASE</version>
        </dependency>
        <dependency>
            <groupId>org.springframework</groupId>
            <artifactId>spring-jdbc</artifactId>
            <version>4.1.6.RELEASE</version>
        </dependency>
        <dependency>
            <groupId>org.springframework</groupId>
            <artifactId>spring-context-support</artifactId>
            <version>4.1.6.RELEASE</version>
        </dependency>
        <dependency>
            <groupId>org.quartz-scheduler</groupId>
            <artifactId>quartz</artifactId>
            <version>2.2.2</version>
        </dependency>
        <dependency>
            <groupId>org.quartz-scheduler</groupId>
            <artifactId>quartz-jobs</artifactId>
            <version>2.2.2</version>
        </dependency>

        <dependency>
            <groupId>ch.qos.logback</groupId>
            <artifactId>logback-core</artifactId>
            <version>1.1.3</version>
        </dependency>
        <dependency>
            <groupId>ch.qos.logback</groupId>
            <artifactId>logback-classic</artifactId>
            <version>1.1.3</version>
        </dependency>
        <dependency>
            <groupId>ch.qos.logback</groupId>
            <artifactId>logback-access</artifactId>
            <version>1.1.3</version>
        </dependency>
        <dependency>
            <groupId>org.slf4j</groupId>
            <artifactId>slf4j-api</artifactId>
            <version>1.6.6</version>
        </dependency>
        <dependency>
            <groupId>org.slf4j</groupId>
            <artifactId>jcl-over-slf4j</artifactId>
            <version>1.6.6</version>
        </dependency>

        <dependency>
            <groupId>org.apache.commons</groupId>
            <artifactId>commons-lang3</artifactId>
            <version>3.3</version>
        </dependency>
        <dependency>
            <groupId>commons-io</groupId>
            <artifactId>commons-io</artifactId>
            <version>2.4</version>
        </dependency>
        <dependency>
            <groupId>mysql</groupId>
            <artifactId>mysql-connector-java</artifactId>
            <version>5.1.6</version>
        </dependency>
        <dependency>
            <groupId>org.mybatis</groupId>
            <artifactId>mybatis</artifactId>
            <version>3.3.0</version>
        </dependency>
        <dependency>
            <groupId>org.mybatis</groupId>
            <artifactId>mybatis-spring</artifactId>
            <version>1.2.3</version>
        </dependency>
        <dependency>
            <groupId>org.apache.commons</groupId>
            <artifactId>commons-dbcp2</artifactId>
            <version>2.1.1</version>
        </dependency>

        <dependency>
            <groupId>commons-fileupload</groupId>
            <artifactId>commons-fileupload</artifactId>
            <version>1.2.2</version>
        </dependency>
        <dependency>
            <groupId>org.aspectj</groupId>
            <artifactId>aspectjweaver</artifactId>
            <version>1.8.6</version>
        </dependency>


        <dependency>
            <groupId>javax.servlet</groupId>
            <artifactId>jstl</artifactId>
            <version>1.2</version>
        </dependency>
        <dependency>
            <groupId>javax.servlet</groupId>
            <artifactId>javax.servlet-api</artifactId>
            <version>3.1.0</version>
            <scope>provided</scope>
        </dependency>
        <!-- end -->
    </dependencies>


    <!-- repositories节点是配置maven下载jar的中央仓库,
    默认的是国外的,下载奇慢无比,推荐使用自己搭建sonatype nexus中央仓库 -->
    <repositories>
        <repository>
            <id>central</id>
            <name>Central Repository</name>
            <url>http://repo1.maven.org/maven2/</url>
            <snapshots>
                <enabled>false</enabled>
            </snapshots>
        </repository>
        <repository>
            <id>jboss-public-repository-group</id>
            <name>JBoss Public Repository Group</name>
            <url>http://repository.jboss.org/nexus/content/groups/public/</url>
            <layout>default</layout>
            <releases>
                <enabled>true</enabled>
                <updatePolicy>never</updatePolicy>
            </releases>
            <snapshots>
                <enabled>true</enabled>
                <updatePolicy>never</updatePolicy>
            </snapshots>
        </repository>
        <repository>
            <id>jboss-deprecated</id>
            <name>JBoss Deprecated</name>
            <url>https://repository.jboss.org/nexus/content/repositories/deprecated/</url>
            <layout>default</layout>
            <releases>
                <enabled>true</enabled>
                <updatePolicy>never</updatePolicy>
            </releases>
            <snapshots>
                <enabled>false</enabled>
            </snapshots>
        </repository>
        <repository>
            <id>jboss-maven2-brew</id>
            <name>JBoss Maven 2 Brew Repository</name>
            <url>http://repository.jboss.org/maven2-brew/</url>
            <layout>default</layout>
            <releases>
                <enabled>true</enabled>
                <updatePolicy>never</updatePolicy>
            </releases>
            <snapshots>
                <enabled>false</enabled>
            </snapshots>
        </repository>

        <repository>
            <id>io.spring.repo.maven.release</id>
            <url>http://repo.spring.io/release/</url>
            <snapshots>
                <enabled>false</enabled>
            </snapshots>
        </repository>
        <repository>
            <id>io.spring.repo.maven.milestone</id>
            <url>http://repo.spring.io/milestone/</url>
            <snapshots>
                <enabled>false</enabled>
            </snapshots>
        </repository>
    </repositories>

    <build>
        <plugins>
            <!-- 指定Maven编译插件,如果不设置,它就会用maven-compiler-plugin默认的jdk版本来进行处理 -->
            <!-- 这样就容易出现版本不匹配的问题,以至于可能导致编译不通过的问题 -->
            <plugin>
                <groupId>org.apache.maven.plugins</groupId>
                <artifactId>maven-compiler-plugin</artifactId>
                <version>3.1</version>
                <configuration>
                    <source>1.7</source>
                    <target>1.7</target>
                    <fork>true</fork>
                    <verbose>true</verbose>
                    <encoding>UTF-8</encoding>
                    <compilerArguments>
                        <sourcepath>${project.basedir}/src/main/java</sourcepath>
                    </compilerArguments>
                </configuration>
            </plugin>
            <!--  maven-resources-plugin则用来处理资源文件。默认的主资源文件目录是src/main/resources,
            很多用户会需要添加额外的资源文件目录,这个时候就可以通过配置maven-resources-plugin来实现。
            此外,资源文件过滤也是Maven的一大特性,你可以在资源文件中使用${propertyName}形式的Maven属性,
            然后配置maven-resources-plugin开启对资源文件的过滤,之后就可以针对不同环境通过命令行或者Profile传入属性的值,
            以实现更为灵活的构建。  -->
            <plugin>
                <groupId>org.apache.maven.plugins</groupId>
                <artifactId>maven-resources-plugin</artifactId>
                <version>2.6</version>
                <configuration>
                    <encoding>UTF-8</encoding>
                </configuration>
            </plugin>
        </plugins>
    </build>

</project>
然后我们再来配置【back】模块中pom.xml的内容:
<?xml version="1.0" encoding="UTF-8"?>
<project xmlns="http://maven.apache.org/POM/4.0.0"
         xmlns:xsi="http://www.w3.org/2001/XMLSchema-instance"
         xsi:schemaLocation="http://maven.apache.org/POM/4.0.0 http://maven.apache.org/xsd/maven-4.0.0.xsd">
    <parent>
        <artifactId>web</artifactId>
        <groupId>com.aitongyi.web</groupId>
        <version>1.0-SNAPSHOT</version>
    </parent>
    <modelVersion>4.0.0</modelVersion>

    <artifactId>back</artifactId>
    <packaging>war</packaging>
    <properties>
        <project.build.sourceEncoding>UTF-8</project.build.sourceEncoding>
    </properties>

    <dependencies>
        <dependency>
            <groupId>com.aitongyi.web</groupId>
            <artifactId>dao</artifactId>
            <version>${project.version}</version>
        </dependency>
        <dependency>
            <groupId>com.aitongyi.web</groupId>
            <artifactId>bean</artifactId>
            <version>${project.version}</version>
        </dependency>

        <!-- spring  -->
        <dependency>
            <groupId>org.springframework</groupId>
            <artifactId>spring-webmvc</artifactId>
            <version>4.1.6.RELEASE</version>
        </dependency>
        <dependency>
            <groupId>org.springframework.security</groupId>
            <artifactId>spring-security-web</artifactId>
            <version>4.0.2.RELEASE</version>
        </dependency>
        <dependency>
            <groupId>org.springframework.security</groupId>
            <artifactId>spring-security-config</artifactId>
            <version>4.0.2.RELEASE</version>
        </dependency>
        <dependency>
            <groupId>org.springframework.security</groupId>
            <artifactId>spring-security-taglibs</artifactId>
            <version>4.0.2.RELEASE</version>
        </dependency>
        <dependency>
            <groupId>org.springframework</groupId>
            <artifactId>spring-context-support</artifactId>
            <version>4.1.6.RELEASE</version>
        </dependency>
        <dependency>
            <groupId>org.quartz-scheduler</groupId>
            <artifactId>quartz</artifactId>
            <version>2.2.2</version>
        </dependency>
        <dependency>
            <groupId>org.quartz-scheduler</groupId>
            <artifactId>quartz-jobs</artifactId>
            <version>2.2.2</version>
        </dependency>
        <!-- end -->

        <!-- serlvet & jstl -->
        <dependency>
            <groupId>javax.servlet</groupId>
            <artifactId>jstl</artifactId>
            <version>1.2</version>
        </dependency>
        <dependency>
            <groupId>javax.servlet</groupId>
            <artifactId>javax.servlet-api</artifactId>
            <version>3.1.0</version>
            <scope>provided</scope>
        </dependency>
        <!-- end -->

        <dependency>
            <groupId>commons-io</groupId>
            <artifactId>commons-io</artifactId>
            <version>2.4</version>
        </dependency>
        <dependency>
            <groupId>commons-fileupload</groupId>
            <artifactId>commons-fileupload</artifactId>
            <version>1.2.2</version>
        </dependency>
        <dependency>
            <groupId>org.aspectj</groupId>
            <artifactId>aspectjweaver</artifactId>
            <version>1.8.6</version>
        </dependency>

        <dependency>
            <groupId>mysql</groupId>
            <artifactId>mysql-connector-java</artifactId>
            <version>5.1.6</version>
        </dependency>
        <dependency>
            <groupId>org.mybatis</groupId>
            <artifactId>mybatis</artifactId>
            <version>3.3.0</version>
        </dependency>
        <dependency>
            <groupId>org.mybatis</groupId>
            <artifactId>mybatis-spring</artifactId>
            <version>1.2.3</version>
        </dependency>
        <dependency>
            <groupId>org.apache.commons</groupId>
            <artifactId>commons-dbcp2</artifactId>
            <version>2.1.1</version>
        </dependency>

    </dependencies>
</project>
4. 编写零配置代码
4.1 【back】项目
在【back】项目的【src/main/java】目录下创建【com.aitongyi.web.back.conf】配置代码包、【com.aitongyi.web.back.controller】控制层代码包;
在【dao】项目的【src/main/java】目录下创建【com.aitongyi.web.dao.conf】配置代码包、【com.aitongyi.web.dao.mapper】持久层代码包;
在【service】项目的【src/main/java】目录下创建【com.aitongyi.web.service】服务层代码包;
在【bean】项目的【src/main/java】目录下创建【com.aitongyi.web.bean】模型代码包 ;
在【back】项目【com.aitongyi.web.back.conf】包中创建五个配置对象:
【BackConfig.java】:负责管理基本配置信息
import org.springframework.beans.factory.annotation.Configurable;
import org.springframework.context.annotation.Bean;
import org.springframework.context.annotation.PropertySource;
import org.springframework.context.support.PropertySourcesPlaceholderConfigurer;
import org.springframework.scheduling.quartz.SchedulerFactoryBean;

@Configurable
@PropertySource(value={"classpath:back.properties"})
public class BackConfig {
	@Bean
    public static PropertySourcesPlaceholderConfigurer propertyConfigInDev() {
        return new PropertySourcesPlaceholderConfigurer();
    }

	@Bean(name="schedulerFactoryBean")
	public SchedulerFactoryBean schedulerFactoryBean(){
		return new SchedulerFactoryBean();
	}

}【MvcConfig.java】:负责处理SpirngMVC的配置信息以及组件的加载
import org.mybatis.spring.annotation.MapperScan;
import org.springframework.context.annotation.Bean;
import org.springframework.context.annotation.ComponentScan;
import org.springframework.context.annotation.EnableAspectJAutoProxy;
import org.springframework.scheduling.annotation.EnableScheduling;
import org.springframework.web.multipart.commons.CommonsMultipartResolver;
import org.springframework.web.servlet.config.annotation.DefaultServletHandlerConfigurer;
import org.springframework.web.servlet.config.annotation.EnableWebMvc;
import org.springframework.web.servlet.config.annotation.ResourceHandlerRegistry;
import org.springframework.web.servlet.config.annotation.WebMvcConfigurerAdapter;
import org.springframework.web.servlet.view.InternalResourceViewResolver;

@EnableWebMvc
@EnableAspectJAutoProxy
@EnableScheduling
@ComponentScan(basePackages = {"com.aitongyi.web.back.controller","com.aitongyi.web.service"})
@MapperScan("com.aitongyi.web.dao.mapper")
public class MvcConfig extends WebMvcConfigurerAdapter {

    @Override
    public void addResourceHandlers(ResourceHandlerRegistry registry) {

    }

    @Override
    public void configureDefaultServletHandling(DefaultServletHandlerConfigurer configurer) {
        configurer.enable();
    }

    /**
     * jsp视图解析器
     * @return
     */
    @Bean
    public InternalResourceViewResolver jspViewResolver() {
        InternalResourceViewResolver bean = new InternalResourceViewResolver();
        bean.setViewClass(org.springframework.web.servlet.view.JstlView.class);
        bean.setPrefix("/WEB-INF/pages/");
        bean.setSuffix(".jsp");
        return bean;
    }

    /**
     *  公共部分解析器
     * @return
     */
    @Bean(name="multipartResolver")
	public CommonsMultipartResolver commonsMultipartResolver(){
		CommonsMultipartResolver common = new CommonsMultipartResolver();
		common.setMaxUploadSize(10 * 1024 * 1024);//10M
		return common;
	}

}【SecurityConfig.java】:负责安全相关的配置处理,其中有一段代码:
auth.jdbcAuthentication().dataSource(dataSource).passwordEncoder(md5Encoder);这是SpringSecurity安全框架自动处理的逻辑,首先是通过username查询users表中是否有记录,然后通过将密码进行MD5加密,去跟数据库中的密码比对,如果相同就让用户执行configure方法中配置的登陆策略。
import org.springframework.beans.factory.annotation.Autowired;
import org.springframework.security.authentication.encoding.Md5PasswordEncoder;
import org.springframework.security.config.annotation.authentication.builders.AuthenticationManagerBuilder;
import org.springframework.security.config.annotation.method.configuration.EnableGlobalMethodSecurity;
import org.springframework.security.config.annotation.web.builders.HttpSecurity;
import org.springframework.security.config.annotation.web.builders.WebSecurity;
import org.springframework.security.config.annotation.web.configuration.EnableWebSecurity;
import org.springframework.security.config.annotation.web.configuration.WebSecurityConfigurerAdapter;
import org.springframework.security.web.csrf.CsrfFilter;
import org.springframework.security.web.header.HeaderWriter;
import org.springframework.security.web.header.HeaderWriterFilter;
import org.springframework.web.filter.CharacterEncodingFilter;

import javax.servlet.http.HttpServletRequest;
import javax.servlet.http.HttpServletResponse;
import javax.sql.DataSource;
import java.util.ArrayList;
import java.util.List;

@EnableWebSecurity
@EnableGlobalMethodSecurity(prePostEnabled = true)
public class SecurityConfig extends WebSecurityConfigurerAdapter {

	private static Md5PasswordEncoder md5Encoder = new Md5PasswordEncoder();

	@Autowired
	private DataSource dataSource;

	@Autowired
	public void configureGlobal(AuthenticationManagerBuilder auth) throws Exception {
		auth.jdbcAuthentication().dataSource(dataSource).passwordEncoder(md5Encoder);
	}

	@Override
	public void configure(WebSecurity web) throws Exception {
		web.ignoring().antMatchers("/resource/**");
	}

	@Override
	protected void configure(HttpSecurity http) throws Exception {

		http
//				将login.jsp定为登陆页面,只处理/login这个请求
				.formLogin().loginPage("/login.jsp").and().formLogin().loginProcessingUrl("/login")
//				如果登陆成功就跳转到/home这个地址,如果失败就跳转到/?error=1
				.and().formLogin().defaultSuccessUrl("/home").and().formLogin().failureUrl("/?error=1");
//		这里配置的是登出的请求
		http.logout().logoutUrl("/logout")
//				登陆成功后跳转的地址,以及删除的cookie名称
				.and().logout().logoutSuccessUrl("/")
				.and().logout().deleteCookies("JSESSIONID");
//		配置记住我的过期时间
		http.rememberMe().tokenValiditySeconds(1209600)
				.and().rememberMe().rememberMeParameter("remember-me");
		CharacterEncodingFilter encodeFilter = new CharacterEncodingFilter();
		encodeFilter.setEncoding("utf-8");
		encodeFilter.setForceEncoding(true);
		http.addFilterBefore(encodeFilter, CsrfFilter.class); // 放在csrf filter前面
		http.headers().disable();
		HeaderWriter headerWriter = new HeaderWriter() {
			public void writeHeaders(HttpServletRequest request, HttpServletResponse response) {
				response.setHeader("Cache-Control", "no-cache, no-store, max-age=0, must-revalidate");
				response.setHeader("Expires", "0");
				response.setHeader("Pragma", "no-cache");
				response.setHeader("X-Frame-Options", "SAMEORIGIN");
				response.setHeader("X-XSS-Protection", "1; mode=block");
				response.setHeader("x-content-type-options", "nosniff");
			}
		};
		List<HeaderWriter> headerWriterFilterList = new ArrayList<>();
		headerWriterFilterList.add(headerWriter);
		HeaderWriterFilter headerFilter = new HeaderWriterFilter(headerWriterFilterList);
		http.addFilter(headerFilter);
	}
}【WebApplicationInitializer.java】:这是整个项目的核心。Servlet3.0规范,支持将web.xml相关配置也硬编码到代码中[servlet,filter,listener,等等],并由javax.servlet.ServletContainerInitializer的实现类负责在容器启动时进行加载,
spring提供了一个实现类SpringServletContainerInitializer(在spring-web包中的org.springframework.web目录),该类会调用所有org.springframework.web.WebApplicationInitializer实现类的onStartup方法,将相关的组件注册到服务器;而我们的WebApplicationInitializer继承自AbstractAnnotationConfigDispatcherServletInitializer,而AbstractAnnotationConfigDispatcherServletInitializer就实现了org.springframework.web.WebApplicationInitializer的onStartup方法,所以WebApplicationInitializer就是整个项目的关键,我们的整个项目就是通过它来启动。
import com.aitongyi.web.dao.conf.DatabaseConfig;
import org.springframework.web.servlet.support.AbstractAnnotationConfigDispatcherServletInitializer;

import javax.servlet.Filter;

public class WebApplicationInitializer extends AbstractAnnotationConfigDispatcherServletInitializer {
	/**
	 * 获取配置信息
	 * @return
	 */
	@Override
	protected Class<?>[] getRootConfigClasses() {
		return new Class[] { BackConfig.class, DatabaseConfig.class, SecurityConfig.class };
	}
	@Override
	protected Class<?>[] getServletConfigClasses() {
		return new Class[] { MvcConfig.class };
	}

	@Override
	protected String[] getServletMappings() {
		return new String[] { "/" };
	}

	@Override
	protected Filter[] getServletFilters() {
		return null;
	}
}
【SecurityWebApplicationInitializer.java】:是安全方面的启动组件,与上面的WebApplicationInitializer继承关系类似,可以启动加载一些安全相关的配置和类。暂时不需要实现。
import org.springframework.security.web.context.AbstractSecurityWebApplicationInitializer;

public class SecurityWebApplicationInitializer extends AbstractSecurityWebApplicationInitializer {

}
【com.aitongyi.web.back.controller.UserController】:用户访问控制器
import com.aitongyi.web.service.UserService;
import org.slf4j.Logger;
import org.slf4j.LoggerFactory;
import org.springframework.beans.factory.annotation.Autowired;
import org.springframework.security.access.prepost.PreAuthorize;
import org.springframework.stereotype.Controller;
import org.springframework.web.bind.annotation.RequestMapping;
import org.springframework.web.bind.annotation.RequestMethod;

/**
 * 用户请求处理器
 * Created by admin on 16/8/6.
 */
@Controller
public class UserController {
    private static final Logger logger = LoggerFactory.getLogger(UserController.class);

    @Autowired
    private UserService userService;

    @RequestMapping(value = "/home", method = RequestMethod.GET)
    @PreAuthorize("isAuthenticated()")// isAuthenticated 如果用户不是匿名用户就返回true
    public String showHomePage() {
        try {
            userService.loadUserByUsername("admin");
            logger.info("load user ");
        }catch (Exception e){
            logger.error(e.getLocalizedMessage(), e);
        }

        return "/index/index";
    }
}【日志文件】:logback.xml
<?xml version="1.0" encoding="UTF-8"?>
<configuration>

     <appender name="default" class="ch.qos.logback.core.rolling.RollingFileAppender">
        <rollingPolicy class="ch.qos.logback.core.rolling.TimeBasedRollingPolicy">
            <fileNamePattern>/app/logs/back.%d{yyyy-MM-dd}.log</fileNamePattern>
            <maxHistory>3</maxHistory>
        </rollingPolicy>
        <encoder>
            <pattern>[%-5level][%d{HH:mm:ss}] - [%logger{15}] - %msg%n</pattern>
            <charset>UTF-8</charset>
        </encoder>
    </appender>

    <appender name="console" class="ch.qos.logback.core.ConsoleAppender">
        <encoder>
            <pattern>[%-5level][%d{HH:mm:ss}] - [%logger] - %msg%n</pattern>
            <charset>UTF-8</charset>
        </encoder>
    </appender>

    <logger name="org.springframework.jdbc" level="DEBUG" additivity="false">
        <appender-ref ref="console"/>
    </logger>
    <logger name="org.springframework" level="INFO" additivity="false">
        <appender-ref ref="console"/>
    </logger>
    <root level="DEBUG">
        <appender-ref ref="console"/>
    </root>

</configuration>【数据库配置】:back.properties
#========= Mysql ============
jdbc.driver = com.mysql.jdbc.Driver
db.url = jdbc:mysql://127.0.0.1/web?useUnicode=true&characterEncoding=UTF-8
db.username = root
db.password = 123456
db.maxtotal = 150
db.minidle = 40
db.maxidle = 60
由于配置了数据库信息,所以数据库是必须的,需要你安装一个MySQL,然后创建一个web数据库,创建一张users表,具体字段见下面数据库表创建文件:(登录密码是123456)
CREATE TABLE `users` (
  `id` int(11) NOT NULL AUTO_INCREMENT,
  `username` varchar(50) NOT NULL,
  `password` varchar(50) NOT NULL,
  `enabled` tinyint(1) NOT NULL,
  `create_date` timestamp NOT NULL DEFAULT CURRENT_TIMESTAMP,
  PRIMARY KEY (`id`),
  UNIQUE KEY `ix_username` (`username`)
) ENGINE=InnoDB AUTO_INCREMENT=8 DEFAULT CHARSET=utf8;
INSERT INTO `users` (`id`, `username`, `password`, `enabled`, `create_date`)
VALUES
	(1,'admin','e10adc3949ba59abbe56e057f20f883e',1,'2016-06-24 13:17:23'),
	(2,'user','e10adc3949ba59abbe56e057f20f883e',1,'2016-06-24 13:20:05');
另外还要创建一张权限表:
CREATE TABLE `authorities` (
  `username` varchar(50) NOT NULL,
  `authority` varchar(50) NOT NULL,
  UNIQUE KEY `ix_auth_username` (`username`,`authority`),
  CONSTRAINT `fk_authorities_users` FOREIGN KEY (`username`) REFERENCES `users` (`username`)
) ENGINE=InnoDB DEFAULT CHARSET=utf8;
insert into(username, authority) value('admin','ROLE_ADMIN');如果你想自己定义密码,就使用
String password = md5Encoder.encodePassword(明文密码, null);来获取一个数据库中的密码,将password替换数据库的password就可以了。
【com.aitongyi.web.bean.User】:用户对象,主要是登陆时做安全验证使用。
import java.util.Date;

/**
 * Created by admin on 16/8/8.
 */
public class User {
    private Integer id;
    private String username;
    private String password;
    private boolean enabled;
    private Date createDate;

    public Date getCreateDate() {
        return createDate;
    }

    public void setCreateDate(Date createDate) {
        this.createDate = createDate;
    }

    public boolean isEnabled() {
        return enabled;
    }

    public void setEnabled(boolean enabled) {
        this.enabled = enabled;
    }

    public Integer getId() {
        return id;
    }

    public void setId(Integer id) {
        this.id = id;
    }

    public String getPassword() {
        return password;
    }

    public void setPassword(String password) {
        this.password = password;
    }

    public String getUsername() {
        return username;
    }

    public void setUsername(String username) {
        this.username = username;
    }
}
【pom.xml】
<?xml version="1.0" encoding="UTF-8"?>
<project xmlns="http://maven.apache.org/POM/4.0.0"
         xmlns:xsi="http://www.w3.org/2001/XMLSchema-instance"
         xsi:schemaLocation="http://maven.apache.org/POM/4.0.0 http://maven.apache.org/xsd/maven-4.0.0.xsd">
    <parent>
        <artifactId>web</artifactId>
        <groupId>com.aitongyi.web</groupId>
        <version>1.0-SNAPSHOT</version>
    </parent>
    <modelVersion>4.0.0</modelVersion>

    <artifactId>bean</artifactId>


</project>
4.3 【dao】项目
【DatabaseConfig.java】:数据库配置类
import org.apache.commons.dbcp2.BasicDataSource;
import org.apache.ibatis.session.SqlSessionFactory;
import org.mybatis.spring.SqlSessionFactoryBean;
import org.slf4j.Logger;
import org.slf4j.LoggerFactory;
import org.springframework.beans.factory.annotation.Value;
import org.springframework.context.annotation.Bean;
import org.springframework.context.annotation.Configuration;
import org.springframework.jdbc.datasource.DataSourceTransactionManager;
import org.springframework.transaction.annotation.EnableTransactionManagement;

import javax.sql.DataSource;

/**
 * Created by admin on 16/8/8.
 */

@Configuration
@EnableTransactionManagement
public class DatabaseConfig {
    private static final Logger logger = LoggerFactory.getLogger(DatabaseConfig.class);

    @Value("${jdbc.driver}")
    private String jdbcDriver;

    @Value("${db.url}")
    private String dbUrl;

    @Value("${db.username}")
    private String username;

    @Value("${db.password}")
    private String password;

    @Value("${db.maxtotal}")
    private Integer maxTotal;

    @Value("${db.minidle}")
    private Integer minIdle;

    @Value("${db.maxidle}")
    private Integer maxIdle;

    @Bean(destroyMethod = "close")
    public DataSource dataSource() {
        logger.info("mysql url:"+dbUrl);
        BasicDataSource dataSource = new BasicDataSource();
        dataSource.setDriverClassName(jdbcDriver);
        dataSource.setUrl(dbUrl);
        dataSource.setUsername(username);
        dataSource.setPassword(password);
        dataSource.setMaxTotal(maxTotal);
        dataSource.setMinIdle(minIdle);
        dataSource.setMaxIdle(maxIdle);
        return dataSource;
    }

    @Bean
    public DataSourceTransactionManager txManager() {
        return new DataSourceTransactionManager(dataSource());
    }

    @Bean
    public SqlSessionFactory sqlSessionFactory() throws Exception {
        SqlSessionFactoryBean sessionFactory = new SqlSessionFactoryBean();
        sessionFactory.setDataSource(dataSource());
        return sessionFactory.getObject();
    }
}
【 UserMapper.java 】:数据库持久层接口,主要是Mybatis管理
mport com.aitongyi.web.bean.User;
import org.apache.ibatis.annotations.Insert;
import org.apache.ibatis.annotations.Param;
import org.apache.ibatis.annotations.Select;

/**
 * 用户数据映射
 * Created by admin on 16/8/8.
 */
public interface UserMapper {

    @Select(value="select username,password,enabled from users where username = #{username}")
    User loadUserByUsername(@Param("username") String username);
    @Insert(value="insert into users (username, password, enabled, create_date) value(#{username},#{password},#{enabled},#{createDate})")
    void saveUser(User user);
}
【pom.xml】
<?xml version="1.0" encoding="UTF-8"?>
<project xmlns="http://maven.apache.org/POM/4.0.0"
         xmlns:xsi="http://www.w3.org/2001/XMLSchema-instance"
         xsi:schemaLocation="http://maven.apache.org/POM/4.0.0 http://maven.apache.org/xsd/maven-4.0.0.xsd">
    <parent>
        <artifactId>web</artifactId>
        <groupId>com.aitongyi.web</groupId>
        <version>1.0-SNAPSHOT</version>
    </parent>
    <modelVersion>4.0.0</modelVersion>

    <artifactId>dao</artifactId>


    <dependencies>
        <dependency>
            <groupId>com.aitongyi.web</groupId>
            <artifactId>bean</artifactId>
            <version>${project.version}</version>
        </dependency>
    </dependencies>
</project>
4.4 【service】项目
【UserService】:用户服务接口
import com.aitongyi.web.bean.User;
import com.aitongyi.web.dao.mapper.UserMapper;
import org.slf4j.Logger;
import org.slf4j.LoggerFactory;
import org.springframework.beans.factory.annotation.Autowired;
import org.springframework.stereotype.Service;
import org.springframework.transaction.annotation.Transactional;

/**
 * 用户服务接口
 *
 */
@Service
public class UserService {
    private static final Logger logger = LoggerFactory.getLogger(UserService.class);
   @Autowired
   private UserMapper userMapper;


    @Transactional
    public User loadUserByUsername(String username) {
        return userMapper.loadUserByUsername(username);
    }

    @Transactional
    public void saveUser(User user) {
        userMapper.saveUser(user);
//        测试异常后数据是否回滚
//        getError();
    }

    private void getError() {
        int i = 1 / 0;
        logger.info("i:{}" , i);
    }
}
4.5 添加git过滤文件
右键选择项目,添加一个过滤文件,在文件中能匹配上的文件将不会通过版本控制软件进行版本控制。


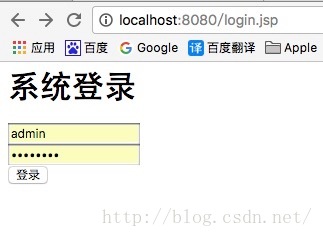
到目前为止,项目的所有文件都已经创建完成,我们点击运行按钮,启动项目,输入用户名:admin,密码:123456,登录,就能看到登录成功
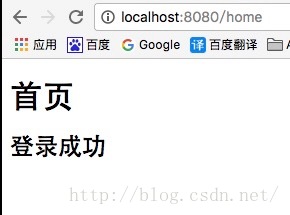
如果你会问,我们没有写登录验证的代码,为什么就自动登录了呢?你试着把密码输错,你会发现你登录不了了!就是这么神奇!
其实这是我们使用SpringSecurity安全框架的原因,安全框架自动会帮我们做一切登录验证的事!你看看日志中有这么一段:
Executing prepared SQL statement [select username,password,enabled from users where username = ?]以上内容其实就已经搭建完成一个基本的零配置框架,今天就写到这里,由于时间的关系,我会继续补上以下内容:
1. 可以通过加入任务调度配置来执行任务调度。
2. 可以加入redis缓存来实现缓存管理。
3. 可以集成shiro安全框架,也可以自己写(个人觉得目前的安全框架文档不全、配置繁琐、使用复杂)
4. 登录页面、首页样式需要调整
目录


 1万+
1万+

 被折叠的 条评论
为什么被折叠?
被折叠的 条评论
为什么被折叠?
 到【灌水乐园】发言


