


为了更好的表达数据库使用的方式,这里做一个实现用户注册-信息保存-用户登录的小程序。
第一步:创建自定义SQLiteOpenHelper
SQLiteOpenHelper在使用SQLite中非常的方便好用,当人也可以不用,但是既然有好的办法,何必为难自己呢。
MyDBOpenHelper.java:
import android.content.Context;
import android.database.sqlite.SQLiteDatabase;
import android.database.sqlite.SQLiteOpenHelper;
import android.util.Log;

/**
 * Created by lucky on 15/4/14.
 */
public class MyDBOpenHelper extends SQLiteOpenHelper {
    public static final String DATABASE_NAME = "mydatabase.db";
    public static final int DATABASE_VERSION = 1;

    public MyDBOpenHelper(Context context) {
        super(context, DATABASE_NAME, null, DATABASE_VERSION);
    }

    @Override
    public void onCreate(SQLiteDatabase sqLiteDatabase) {
        Log.e("LOG", "create table");
        sqLiteDatabase.execSQL("create table if not exists user (_id integer primary key autoincrement, name varchar, password varchar)");
    }

    @Override
    public void onUpgrade(SQLiteDatabase sqLiteDatabase, int i, int i2) {
        sqLiteDatabase.execSQL("drop table if exists user");
        onCreate(sqLiteDatabase);
    }
}
第二步:创建自己的数据库服务类
其实有了SQLiteOpenHelper之后,也可以直接在代码中对数据库进行操作,但是这样的话,会让代码更繁杂不容易维护,自己定义一个数据库服务类,将数据库的各项操作封装好,这样更佳方便。
MyDatabaseService.java:
import android.content.Context;
import android.database.Cursor;
import android.util.Log;

/**
 * Created by lucky on 15/4/14.
 */
public class MyDatabaseService {
    private MyDBOpenHelper myDBOpenHelper;

    public MyDatabaseService(Context context) {
        Log.e("LOG", "database constructor");
        myDBOpenHelper = new MyDBOpenHelper(context);
    }

    public void saveUserInfo(UserBean userBean) {
        myDBOpenHelper.getWritableDatabase().execSQL(
                "insert into user (name,password) values(?,?)",
                new Object[]{
                        userBean.getName(), userBean.getPassword()
                }
        );
    }

    public void updateUserInfo(UserBean userBean) {
        myDBOpenHelper.getWritableDatabase().execSQL(
                "update user set name=?, password=? where _id=?",
                new Object[]{
                        userBean.getName(), userBean.getPassword(), userBean.get_id()
                }
        );
    }

    public UserBean findUserInfoFromName(String str) {
        Cursor cursor = myDBOpenHelper.getReadableDatabase().rawQuery(
                "select * from user where name = ?",
                new String[]{str}
        );
        while (cursor.moveToNext()) {
            UserBean userBean = new UserBean();
            userBean.set_id(cursor.getInt(0));
            userBean.setName(cursor.getString(1));
            userBean.setPassword(cursor.getString(2));
            cursor.close();
            return userBean;
        }
        return null;
    }

    public UserBean findUserInfoFromNameAndPassword(String str1, String str2) {
        Cursor cursor = myDBOpenHelper.getReadableDatabase().rawQuery(
                "select * from user where name = ? and password = ?",
                new String[]{str1, str2}
        );
        while (cursor.moveToNext()) {
            UserBean userBean = new UserBean();
            userBean.set_id(cursor.getInt(0));
            userBean.setName(cursor.getString(1));
            userBean.setPassword(cursor.getString(2));
            cursor.close();
            return userBean;
        }
        return null;
    }

    public UserBean findUserInfoFromId(Integer id) {
        Cursor cursor = myDBOpenHelper.getReadableDatabase().rawQuery(
                "select * from user where _id = ?",
                new String[]{String.valueOf(id)}
        );
        while (cursor.moveToNext()) {
            UserBean userBean = new UserBean();
            userBean.set_id(cursor.getInt(0));
            userBean.setName(cursor.getString(1));
            userBean.setPassword(cursor.getString(2));
            cursor.close();
            return userBean;
        }
        return null;
    }

    public void deleteUserInfoFromId(Integer id) {
        myDBOpenHelper.getWritableDatabase().execSQL(
                "delete from user where _id=?",
                new Object[]{id}
        );
    }

    public void deleteAllUserInfo() {
        myDBOpenHelper.getWritableDatabase().execSQL(
                "delete from user"
        );
    }

    public void close() {
        myDBOpenHelper.close();
    }
}
用户信息使用一个UseBean存储,该类代码如下:
UserBean.java:
/**
 * Created by lucky on 15/4/14.
 */
public class UserBean {
    private int _id;
    private String name;
    private String password;

    public int get_id() {
        return _id;
    }

    public void set_id(int _id) {
        this._id = _id;
    }

    public String getName() {
        return name;
    }

    public void setName(String name) {
        this.name = name;
    }

    public String getPassword() {
        return password;
    }

    public void setPassword(String password) {
        this.password = password;
    }
}
第三步:用户登录和注册实现
activity_main.xml:
<RelativeLayout xmlns:android="http://schemas.android.com/apk/res/android"
    xmlns:tools="http://schemas.android.com/tools"
    android:layout_width="match_parent"
    android:layout_height="match_parent"
    android:paddingBottom="@dimen/activity_vertical_margin"
    android:paddingLeft="@dimen/activity_horizontal_margin"
    android:paddingRight="@dimen/activity_horizontal_margin"
    android:paddingTop="@dimen/activity_vertical_margin"
    tools:context=".MainActivity">

    <Button
        android:id="@+id/btn_0"
        android:layout_width="wrap_content"
        android:layout_height="wrap_content"
        android:onClick="onClickLogin"
        android:text="登录" />

    <Button
        android:id="@+id/btn_1"
        android:layout_width="wrap_content"
        android:layout_height="wrap_content"
        android:layout_toRightOf="@+id/btn_0"
        android:onClick="onClickRegister"
        android:text="注册" />
</RelativeLayout>
布局文件非常简单,只有两个按钮,分别是登录和注册。
MainActivity.java:
import android.app.AlertDialog;
import android.content.DialogInterface;
import android.content.Intent;
import android.support.v7.app.ActionBarActivity;
import android.os.Bundle;
import android.view.LayoutInflater;
import android.view.Menu;
import android.view.MenuItem;
import android.view.View;
import android.widget.EditText;
import android.widget.Toast;
public class MainActivity extends ActionBarActivity {
@Override
protected void onCreate(Bundle savedInstanceState) {
super.onCreate(savedInstanceState);
setContentView(R.layout.activity_main);
initView();
}
private void initView() {
}
@Override
public boolean onCreateOptionsMenu(Menu menu) {
// Inflate the menu; this adds items to the action bar if it is present.
getMenuInflater().inflate(R.menu.menu_main, menu);
return true;
}
@Override
public boolean onOptionsItemSelected(MenuItem item) {
// Handle action bar item clicks here. The action bar will
// automatically handle clicks on the Home/Up button, so long
// as you specify a parent activity in AndroidManifest.xml.
int id = item.getItemId();
//noinspection SimplifiableIfStatement
if (id == R.id.action_settings) {
return true;
}
return super.onOptionsItemSelected(item);
}
public void onClickLogin(View view) {
AlertDialog.Builder builder = new AlertDialog.Builder(this);
LayoutInflater layoutInflater = LayoutInflater.from(this);
final View loginInput = layoutInflater.inflate(R.layout.logininput, null);
builder.setView(loginInput);
builder.setPositiveButton("登录", new DialogInterface.OnClickListener() {
@Override
public void onClick(DialogInterface dialogInterface, int i) {
EditText edt_name = (EditText) loginInput.findViewById(R.id.edt_login_UserName);
EditText edt_password = (EditText) loginInput.findViewById(R.id.edt_login_PassWord);
MyDatabaseService myDatabaseService = new MyDatabaseService(getBaseContext());
boolean ifPassed = myDatabaseService.findUserInfoFromNameAndPassword(edt_name.getText().toString(), edt_password.getText().toString()) != null;
myDatabaseService.close();
if (ifPassed) {
MyDatabaseService databaseService = new MyDatabaseService(getBaseContext());
UserBean userBean = databaseService.findUserInfoFromName(edt_name.getText().toString());
Bundle bundle = new Bundle();
bundle.putInt("id", userBean.get_id());
Intent intent = new Intent(getBaseContext(), UserManager.class);
intent.putExtras(bundle);
startActivity(intent);
} else {
Toast.makeText(getBaseContext(), "账户或密码错误", Toast.LENGTH_SHORT).show();
}
}
});
builder.setNegativeButton("取消", new DialogInterface.OnClickListener() {
@Override
public void onClick(DialogInterface dialogInterface, int i) {
}
});
builder.show();
}
public void onClickRegister(View view) {
AlertDialog.Builder builder = new AlertDialog.Builder(this);
LayoutInflater layoutInflater = LayoutInflater.from(this);
final View registerInput = layoutInflater.inflate(R.layout.registerinput, null);
builder.setView(registerInput);
builder.setPositiveButton("注册", new DialogInterface.OnClickListener() {
@Override
public void onClick(DialogInterface dialogInterface, int i) {
EditText edt_name = (EditText) registerInput.findViewById(R.id.edt_resgister_UserName);
EditText edt_password = (EditText) registerInput.findViewById(R.id.edt_resgister_PassWord);
EditText edt_re_password = (EditText) registerInput.findViewById(R.id.edt_resgister_re_PassWord);
MyDatabaseService databaseService = new MyDatabaseService(getBaseContext());
boolean hasNotRes = databaseService.findUserInfoFromName(edt_name.getText().toString()) == null;
databaseService.close();
if ((edt_name.getText().length() != 0 && edt_password.getText().length() != 0 && edt_re_password.getText().length() != 0)
&& edt_password.getText().toString().equals(edt_re_password.getText().toString()) && hasNotRes) {
MyDatabaseService myDatabaseService = new MyDatabaseService(getBaseContext());
UserBean userBean = new UserBean();
userBean.setName(edt_name.getText().toString());
userBean.setPassword(edt_password.getText().toString());
myDatabaseService.saveUserInfo(userBean);
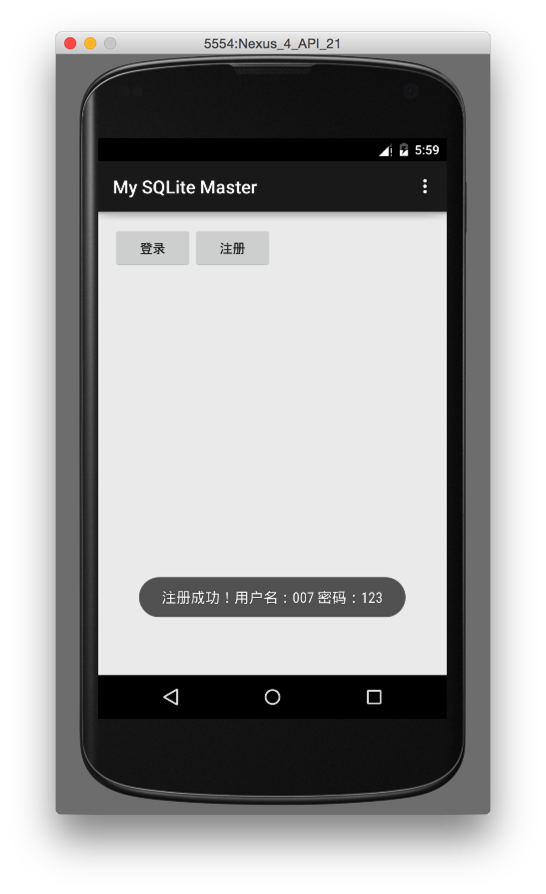
Toast.makeText(getBaseContext(), "注册成功!用户名:" + userBean.getName() + " 密码:" + userBean.getPassword(), Toast.LENGTH_SHORT).show();
myDatabaseService.close();
} else {
if (hasNotRes) {
Toast.makeText(getBaseContext(), "输入有误!", Toast.LENGTH_SHORT).show();
} else {
Toast.makeText(getBaseContext(), "用户名已被占用", Toast.LENGTH_SHORT).show();
}
}
}
});
builder.setNegativeButton("取消", new DialogInterface.OnClickListener() {
@Override
public void onClick(DialogInterface dialogInterface, int i) {
}
});
builder.show();
}
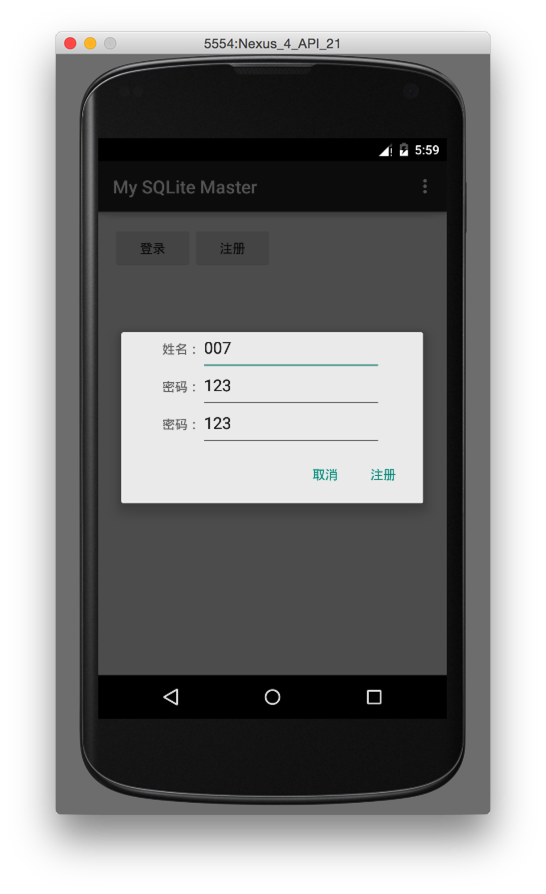
}我们在两个按钮的点击事件里边,分别弹出了的两个对话框做登录和注册信息的输入处理,登录和注册对话框的创建方法是一样的,都是通过添加一个自定义的view,然后在点击对话框的确认按钮后,获取自定义view内控件的输入信息来判断并进行相关操作。
两个对话框添加的view引用的布局文件代码如下。
registerinput.xml:
<?xml version="1.0" encoding="utf-8"?>
<RelativeLayout xmlns:android="http://schemas.android.com/apk/res/android"
    android:layout_width="match_parent"
    android:layout_height="match_parent"
    android:orientation="horizontal">


    <LinearLayout
        android:id="@+id/resgister_1"
        android:layout_width="wrap_content"
        android:layout_height="wrap_content"
        android:layout_centerHorizontal="true"
        android:orientation="horizontal">

        <TextView
            android:id="@+id/res_tvUserName"
            android:layout_width="wrap_content"
            android:layout_height="wrap_content"
            android:text="姓名:" />

        <EditText
            android:id="@+id/edt_resgister_UserName"
            android:layout_width="wrap_content"
            android:layout_height="wrap_content"
            android:minWidth="200dip" />
    </LinearLayout>

    <LinearLayout
        android:id="@+id/resgister_2"
        android:layout_width="wrap_content"
        android:layout_height="wrap_content"
        android:layout_below="@+id/resgister_1"
        android:layout_centerHorizontal="true"
        android:orientation="horizontal">

        <TextView
            android:id="@+id/res_tvPassWord"
            android:layout_width="wrap_content"
            android:layout_height="wrap_content"
            android:text="密码:" />

        <EditText
            android:id="@+id/edt_resgister_PassWord"
            android:layout_width="wrap_content"
            android:layout_height="wrap_content"
            android:minWidth="200dip" />
    </LinearLayout>

    <LinearLayout
        android:id="@+id/resgister_3"
        android:layout_width="wrap_content"
        android:layout_height="wrap_content"
        android:layout_below="@+id/resgister_2"
        android:layout_centerHorizontal="true"
        android:orientation="horizontal">

        <TextView
            android:id="@+id/tv_res_re_PassWord"
            android:layout_width="wrap_content"
            android:layout_height="wrap_content"
            android:text="密码:" />

        <EditText
            android:id="@+id/edt_resgister_re_PassWord"
            android:layout_width="wrap_content"
            android:layout_height="wrap_content"
            android:minWidth="200dip" />
    </LinearLayout>
</RelativeLayout>
logininput.xml:
<?xml version="1.0" encoding="utf-8"?>
<RelativeLayout xmlns:android="http://schemas.android.com/apk/res/android"
android:layout_width="match_parent"
android:layout_height="match_parent"
android:orientation="horizontal">
<LinearLayout
android:id="@+id/login_1"
android:layout_width="wrap_content"
android:layout_height="wrap_content"
android:layout_centerHorizontal="true"
android:orientation="horizontal">
<TextView
android:id="@+id/log_tvUserName"
android:layout_width="wrap_content"
android:layout_height="wrap_content"
android:text="姓名:" />
<EditText
android:id="@+id/edt_login_UserName"
android:layout_width="wrap_content"
android:layout_height="wrap_content"
android:minWidth="200dip" />
</LinearLayout>
<LinearLayout
android:id="@+id/login_2"
android:layout_width="wrap_content"
android:layout_height="wrap_content"
android:layout_below="@+id/login_1"
android:layout_centerHorizontal="true"
android:orientation="horizontal">
<TextView
android:id="@+id/log_tvPassWord"
android:layout_width="wrap_content"
android:layout_height="wrap_content"
android:text="密码:" />
<EditText
android:id="@+id/edt_login_PassWord"
android:layout_width="wrap_content"
android:layout_height="wrap_content"
android:minWidth="200dip" />
</LinearLayout>
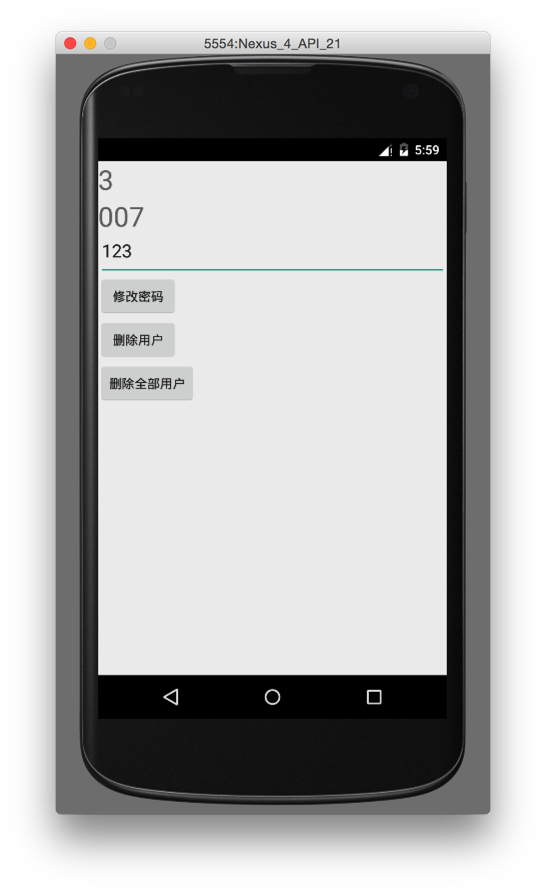
</RelativeLayout>第四步:用户管理实现
在该界面,实现了用户的修改密码,删除密码和删除全部用户数据(当然,这个在正常的应用里边是不会在这里出现的)。
在MainActivity里边的登录通过后,会启动UserManager,并传递给它一个id,这个id是唯一的,通过这个id在UserManager里边可以明确知道要管理哪一个用户,并且获取到该id对应用户的全部信息。
UserManager.java:
import android.app.Activity;
import android.os.Bundle;
import android.view.View;
import android.widget.EditText;
import android.widget.TextView;
import android.widget.Toast;

/**
 * Created by lucky on 15/4/14.
 */
public class UserManager extends Activity {
    TextView tex_id;
    TextView tex_name;
    EditText edt_password;
    UserBean userBean;

    @Override
    protected void onCreate(Bundle savedInstanceState) {
        super.onCreate(savedInstanceState);
        setContentView(R.layout.usermanager);
        tex_id = (TextView) findViewById(R.id.tv_id);
        tex_name = (TextView) findViewById(R.id.tv_username);
        edt_password = (EditText) findViewById(R.id.edt_password);
        Bundle bundle = getIntent().getExtras();
        MyDatabaseService myDatabaseService = new MyDatabaseService(getBaseContext());
        userBean = myDatabaseService.findUserInfoFromId(bundle.getInt("id"));
        myDatabaseService.close();
        tex_id.setText("" + userBean.get_id());
        tex_name.setText(userBean.getName());
        edt_password.setText(userBean.getPassword());
    }

    public void onClickEditPassword(View view) {
        userBean.setPassword(edt_password.getText().toString());
        MyDatabaseService myDatabaseService = new MyDatabaseService(getBaseContext());
        myDatabaseService.updateUserInfo(userBean);
        myDatabaseService.close();
        Toast.makeText(getBaseContext(), "用户:" + userBean.getName() + " 的密码已被修改为:" + userBean.getPassword(), Toast.LENGTH_SHORT).show();
        finish();
    }

    public void onClickDelete(View view) {
        MyDatabaseService myDatabaseService = new MyDatabaseService(getBaseContext());
        myDatabaseService.deleteUserInfoFromId(userBean.get_id());
        myDatabaseService.close();
        Toast.makeText(getBaseContext(), "用户:" + userBean.getName() + " 已经被删除", Toast.LENGTH_SHORT).show();
        finish();
    }

    public void onClickDelAll(View view) {
        MyDatabaseService myDatabaseService = new MyDatabaseService(getBaseContext());
        myDatabaseService.deleteAllUserInfo();
        myDatabaseService.close();
        Toast.makeText(getBaseContext(), "数据库已清空", Toast.LENGTH_SHORT).show();
        finish();
    }
}
布局文件代码:
usermanager.xml:
<?xml version="1.0" encoding="utf-8"?>
<LinearLayout xmlns:android="http://schemas.android.com/apk/res/android"
    android:layout_width="match_parent"
    android:layout_height="match_parent"
    android:orientation="vertical">

    <TextView
        android:id="@+id/tv_id"
        android:layout_width="match_parent"
        android:layout_height="wrap_content"
        android:hint="ID"
        android:textSize="30sp" />

    <TextView
        android:id="@+id/tv_username"
        android:layout_width="match_parent"
        android:layout_height="wrap_content"
        android:hint="UserName"
        android:textSize="30sp" />

    <EditText
        android:id="@+id/edt_password"
        android:layout_width="match_parent"
        android:layout_height="wrap_content"
        android:hint="Input Password"
        android:textSize="20sp" />

    <Button
        android:layout_width="wrap_content"
        android:layout_height="wrap_content"
        android:onClick="onClickEditPassword"
        android:text="修改密码" />

    <Button
        android:layout_width="wrap_content"
        android:layout_height="wrap_content"
        android:onClick="onClickDelete"
        android:text="删除用户" />

    <Button
        android:onClick="onClickDelAll"
        android:text="删除全部用户"
        android:layout_width="wrap_content"
        android:layout_height="wrap_content" />
</LinearLayout>
运行后效果截图如下:
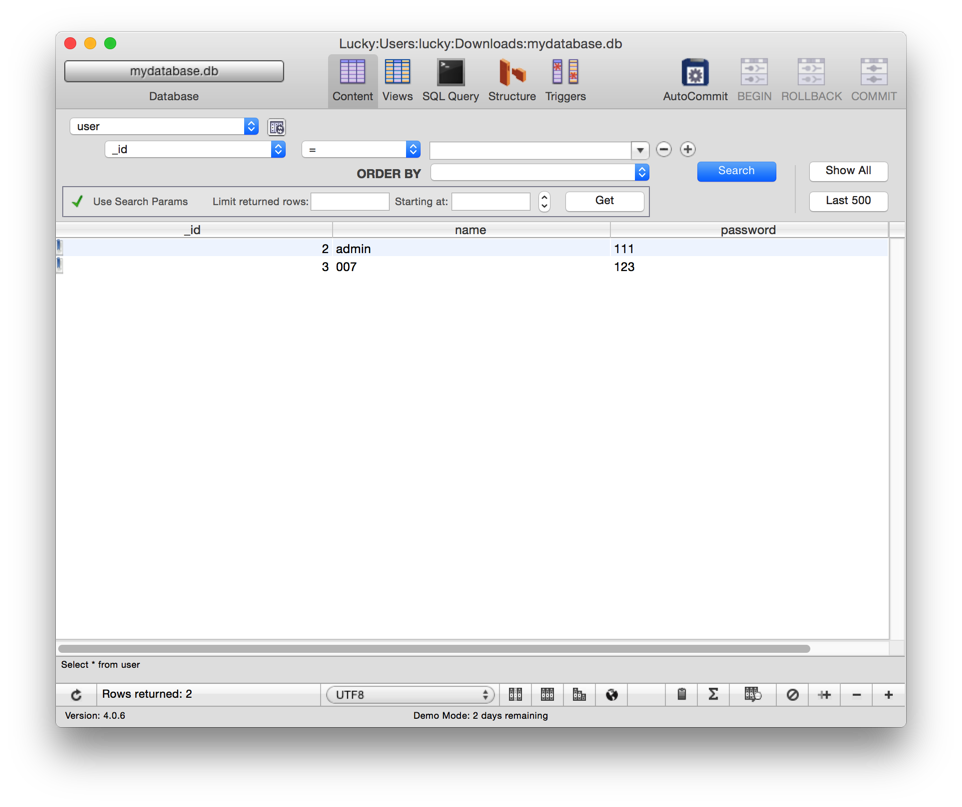
第五步:数据库文件查看
我们可以在data/data/packagename/databases 里边查看到自己的数据库文件mydatabase.db,通过相关的数据库文件查看工具打开后可以看到里边表信息如图:


 1682
1682

 被折叠的 条评论
为什么被折叠?
被折叠的 条评论
为什么被折叠?
 到【灌水乐园】发言


