


1. 编译U-Boot
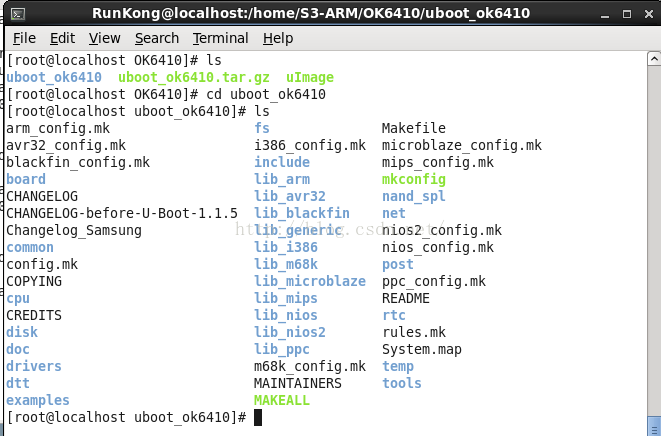
在linux下解压缩uboot源码
第二步:配置相关选项,编译出能在目标板上运行的映像文件
打开顶层Makefile 可以看到这个选项

这里使用编译选项然后make编译
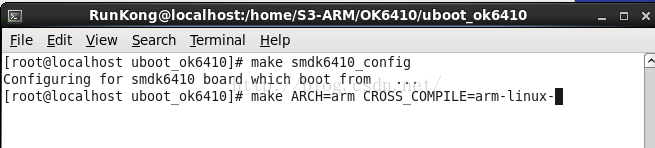
用上面的编译总是出错,然后百度查了一下,make smdk6410_config是老版本的uboot 的6410的配置选项,正确的是Makefile下面的这个

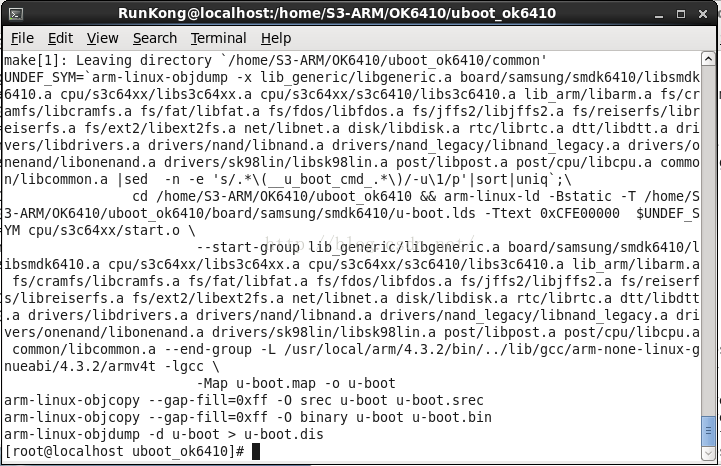
然后编译通过
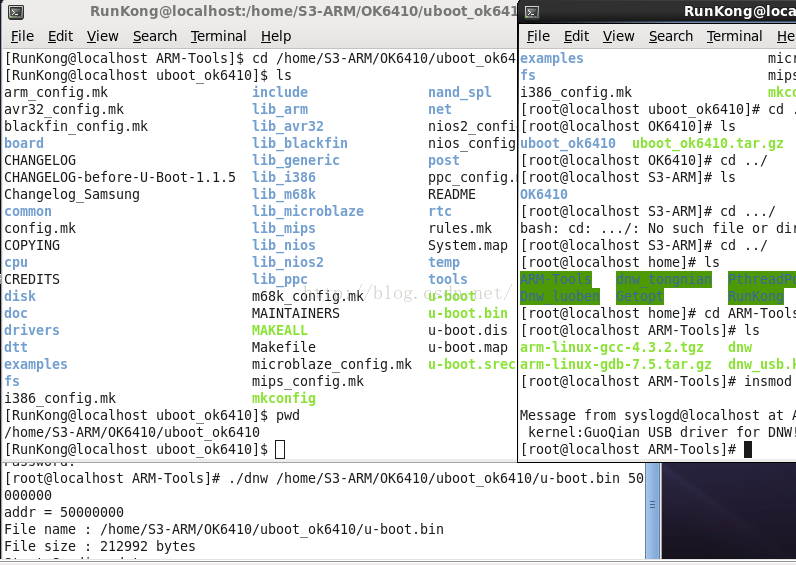
然后连接好USB线,和前面的 一样,通过dnw把编译生成的u-boot.bin下载到开发板,开发板设置到nandflash启动。
开机启动然后通过串口就能看到,这里选择6 ,输入help命令,然后就可以看到uboot的一些相关命令使用说明
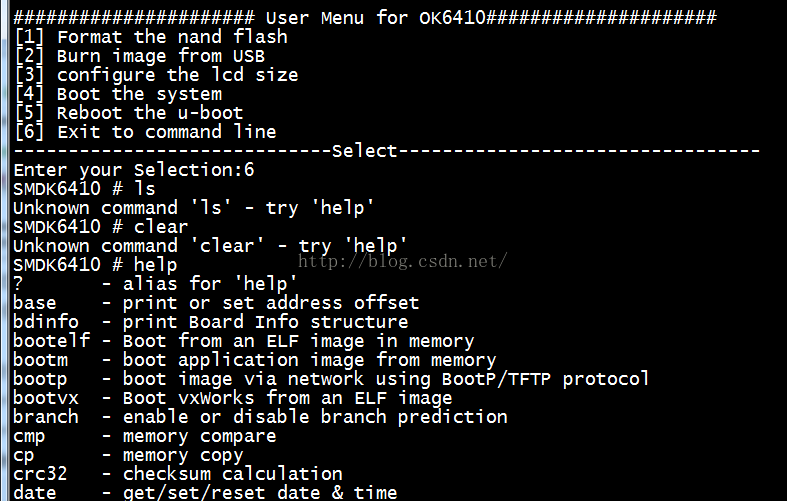
lias for 'help'
base    - print or set address offset
bdinfo  - print Board Info structure
bootelf - Boot from an ELF image in memory
bootm   - boot application image from memory
bootp   - boot image via network using BootP/TFTP protocol
bootvx  - Boot vxWorks from an ELF image
branch  - enable or disable branch prediction
cmp     - memory compare
cp      - memory copy
crc32   - checksum calculation
date    - get/set/reset date & time
dcache  - enable or disable data cache
dnw     - initialize USB device and ready to receive for Windows server (specific)
echo    - echo args to console
erase   - erase FLASH memory
exit    - exit script
fatinfo - print information about filesystem
fatload - load binary file from a dos filesystem
fatls   - list files in a directory (default /)
flinfo  - print FLASH memory information
go      - start application at address 'addr'
help    - print online help
icache  - enable or disable instruction cache
imls    - list all images found in flash
itest   - return true/false on integer compare
loadb   - load binary file over serial line (kermit mode)
loads   - load S-Record file over serial line
loady   - load binary file over serial line (ymodem mode)
loop    - infinite loop on address range
md      - memory display
mm      - memory modify (auto-incrementing)
movi    - moviNAND sub-system
mtest   - simple RAM test
mw      - memory write (fill)
nand    - NAND sub-system
nboot   - boot from NAND device
nfs     - boot image via network using NFS protocol
nm      - memory modify (constant address)
ping    - send ICMP ECHO_REQUEST to network host
printenv- print environment variables
protect - enable or disable FLASH write protection
rarpboot- boot image via network using RARP/TFTP protocol
reset   - Perform RESET of the CPU
saveenv - save environment variables to persistent storage
setenv  - set environment variables
sleep   - delay execution for some time
test    - minimal test like /bin/sh
tftpboot- boot image via network using TFTP protocol
usb     - USB sub-system
version - print monitor version
2.上面的 U-Boot常用命令大概可以分类为已下几种
1>帮助命令
2>环境变量相关命令
3>程序下载命令
4>内存操作命令
5>Flash操作命令
6>程序执行命令
7>设置自动启动命令
这里重点讲解已下让开发板上电后开机自启动设置过程中要使用的一些命令:
首先在笔记本的linux上搭建一个tftp服务器,开发板作为tftp服务端,上电后能自动将tftp服务器上的uImage.bin下载到0X50008000处(这里用的是OK6410开发板)
因为tftp是通过网络下载文件的,所以这里需要设置一些参数,要保证开发板和linux之间能ping通
这里IP要设置同一网段,虚拟机VMWare网络设置的是桥接模式,电脑和开发板接在同一个路由器上,这里先看看开发板和windows系统的IP(windows防火墙要关闭)
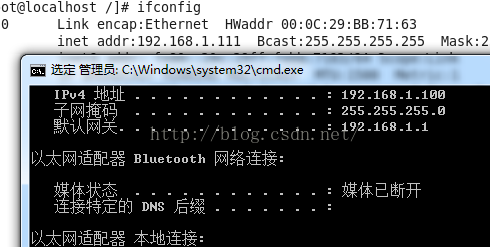
所以这里把开发板的ip暂时设置为192.168.1.110,设置完了之后别忘啦saveenv命令保存进nandflash里面
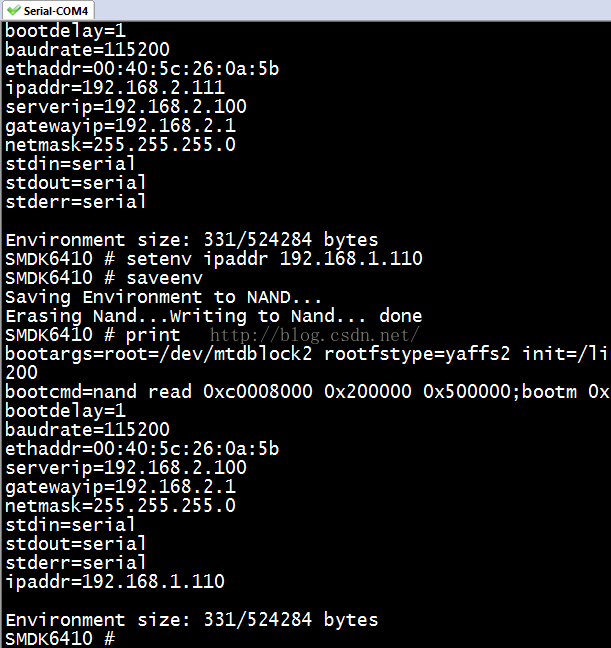
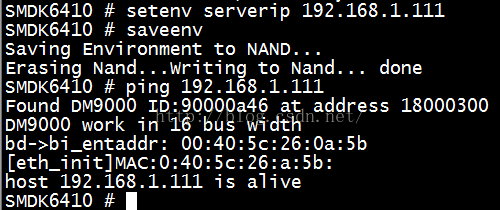
这里同时要设置tftp服务器serverip为上面截图中的linux的ip :setenv serverip 192.168.1.111 设置完后保存
进行到这一步可以在开发板的串口终端上ping一下虚拟机,看是否ping的通,这里linux的网络设置一样要关闭防火墙等
这次ping通的很顺利,记得之前学的这里折腾了好长时间!下面就是配置Linux上的tftp服务器了.
这里如何搭建TFTP服务器就不详述了!网上一搜资料很多。这里只简单介绍一下其中比较重要需要注意的地方
vim /etc/xinetd.d/tftp(打开linux下tftp的配置文件可以看到):
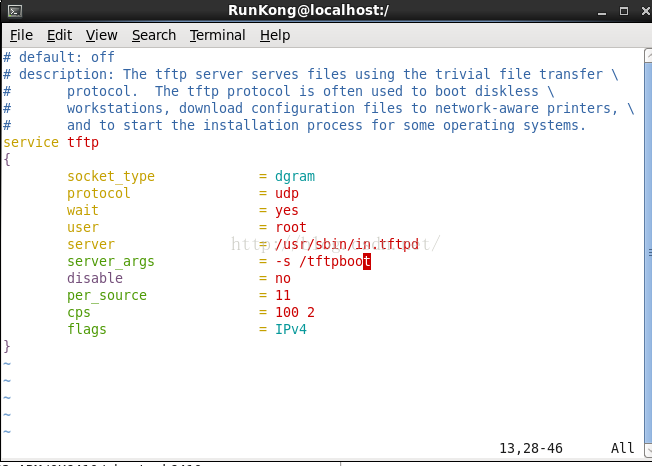
注意着里服务器的目录是/tftpboot 就是根目录下的tftpboot目录,就是说根目录下要有这个目录才行!
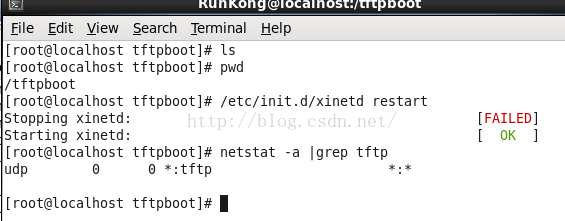
上面的图中是重新启动tftp服务器。并且可以看到tftp网络服务已经启动了。
然后将要下载的linux内核镜像uImage文件通过samba拷贝到tftp目录下!到这里linux的tftp部分准备完毕!
剩下的就是在开发板作为客户端下载文件到指定位置了,这里还是比较顺利!有点基础发现出了什么问题解决起来也很轻松!(下面的下载地址0x50008000全部改为0xc0008000)不然操作会不成功,这里我的是0K6410
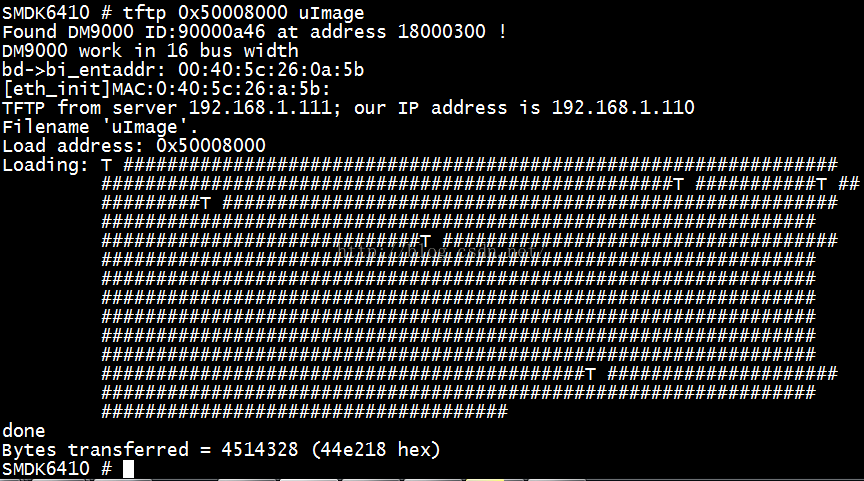
这里可以使用bootm 0x50008000命令启动内核
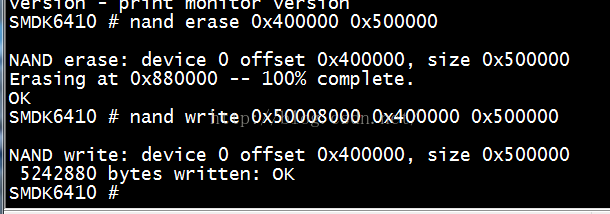
这里后边会用到一个比较重要的命令:nand erase 起始地址start 长度len
这个命令表示擦除start处开始的,长度为len的区域:比如 nand erase 0x400000 0x500000 擦除从4M开始处擦除5M nandflash的长度
还有一个是nand write命令:
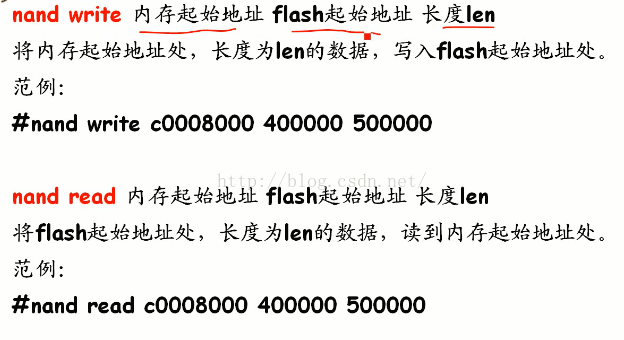
上面下载的uImage文件大约4M多,验证上面的nand命令,这里把下载到内存中的uImage通过nand命令写到nandflash中(掉电不丢失),然后通过nand read命令把uImage读出来读到内存中,看是否能启动uImage!
nand erase 0x400000 0x500000
nand write 0xc0008000 0x400000 0x500000
开机重新启动,关闭电源,然后打开电源(清掉内存里面的数据)。

重新从nandflash中把数据读取到内存中,然后bootm命令看是否能启动内核?
bootm 0xc0008000可以看到内核启动成功。这里就不贴图了
下面来设置开机自动启动内核!
有了上面的基础,nandflash中存放了uImagge,增加一个环境变量使开机后自动将uImage拷贝到内存中,然后自动启
:setenv bootcmd c0008000 400000 500000 \; bootm c0008000
然后saveenv 关闭电源,打开电源, 可以看到开机后自动启动内核了,这个是一个产品开发成熟后应该有的状态就是自动启动内核!
在交叉开发的时候这个也可以使用,就是每次上电开机后设置成自动从tftp下载uImage文件!
setenv bootcmd tftp c0008000 uImage \; bootm c0008000同样可以开机自动从tftp下载然后运行内核


 3361
3361


 被折叠的 条评论
为什么被折叠?
被折叠的 条评论
为什么被折叠?
 到【灌水乐园】发言


