


上一篇写了GPIO简单的流水灯测试,看着有点单调,习惯了串口调试,板子上没有串口 那就另想办法吧,看着LCD突然有了个想法,为什么不把调试信息输出到LCD上,以前在做2416 WINCE开发的时候就经常这样干非常直观,那说干就干。
STM32F429I-DISO SDK里已经把开发包做好,那就直接拿过来用吧。
#define MESSAGE1 "STM32F429I-Discoverry" //提示信息
#define MESSAGE1_1 " GPIO TEST "
#define MESSAGE2 " LED3 LED4 "
#define MESSAGE2_1 " ^-^ "
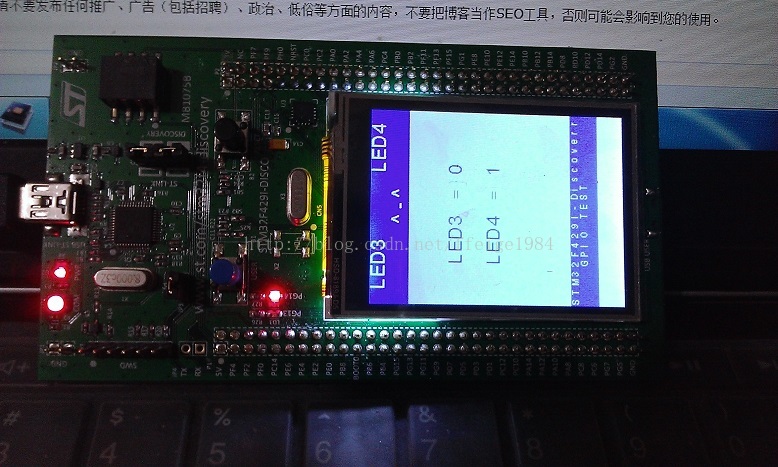
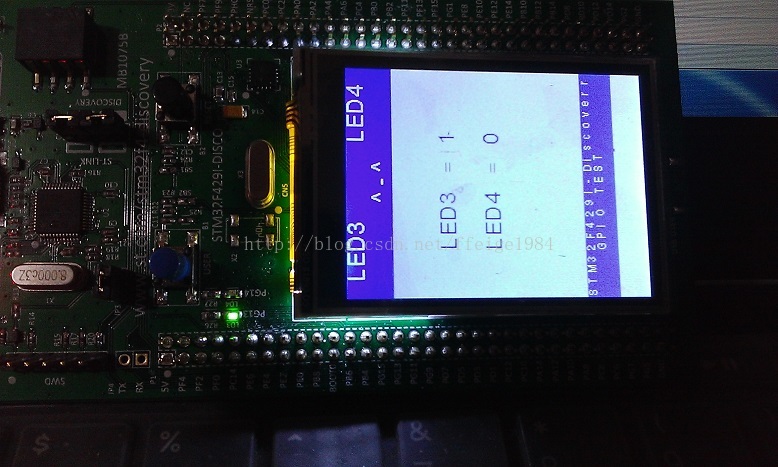
#define MESSAGE5 " LED3 = %d" //LED3状态 1亮 0灭
#define MESSAGE6 " LED4 = %d" //LED4状态
#define LINENUM 0x15 //行数
#define FONTSIZE Font12x12 //字体大小定义完了,那就该具体实现了,惯例先初始化 LCD初始化实现:
static void Display_Init(void)
{
  /* Initialize the LCD */
  LCD_Init();
  LCD_LayerInit();
  /* Eable the LTDC */
  LTDC_Cmd(ENABLE);

  /* Set LCD Background Layer  */
  LCD_SetLayer(LCD_BACKGROUND_LAYER);

  /* Clear the Background Layer */
  LCD_Clear(LCD_COLOR_WHITE);

  /* Configure the transparency for background */
  LCD_SetTransparency(0);

  /* Set LCD Foreground Layer  */
  LCD_SetLayer(LCD_FOREGROUND_LAYER);

  /* Configure the transparency for foreground */
  LCD_SetTransparency(200);

  /* Clear the Foreground Layer */
  LCD_Clear(LCD_COLOR_WHITE);

  /* Set the LCD Back Color and Text Color*/
  LCD_SetBackColor(LCD_COLOR_BLUE);
  LCD_SetTextColor(LCD_COLOR_WHITE);

    /* Set the LCD Text size */
  LCD_SetFont(&FONTSIZE);

  /* Set the LCD Back Color and Text Color*/
  LCD_SetBackColor(LCD_COLOR_BLUE);
  LCD_SetTextColor(LCD_COLOR_WHITE);

  LCD_DisplayStringLine(LINE(LINENUM), (uint8_t*)MESSAGE1);
  LCD_DisplayStringLine(LINE(LINENUM + 1), (uint8_t*)MESSAGE1_1);
  LCD_DisplayStringLine(LINE(0x17), (uint8_t*)"                               ");

  /* Set the LCD Text size */
  LCD_SetFont(&Font16x24);

  LCD_DisplayStringLine(LCD_LINE_0, (uint8_t*)MESSAGE2);
  LCD_DisplayStringLine(LCD_LINE_1, (uint8_t*)MESSAGE2_1);

  /* Set the LCD Back Color and Text Color*/
  LCD_SetBackColor(LCD_COLOR_WHITE);
  LCD_SetTextColor(LCD_COLOR_BLUE);
}
初始化完成了,那就改实现显示函数了
static void Display(void)
{
  uint8_t  led3 = 0, led4 = 0;
  uint8_t aTextBuffer[50];

  led3 = GPIO_ReadOutputDataBit(LED3_GPIO_PORT,LED3_PIN);     //读取LED3对应引脚值

  sprintf((char*)aTextBuffer, MESSAGE5, led3);
  LCD_DisplayStringLine(LCD_LINE_4, (uint8_t*)aTextBuffer);    //把LED3状态更新到屏幕上

  led4 = GPIO_ReadOutputDataBit(LED3_GPIO_PORT,LED4_PIN);      //读取LED4对应引脚值
  sprintf((char*)aTextBuffer, MESSAGE6, led4);
   LCD_DisplayStringLine(LCD_LINE_6, (uint8_t*)aTextBuffer);	//把LED4状态更新到屏幕上
}
这就是显示函数,读取LED对应的值,组成字符串,最后更新到LCD,LCD显示。
接下来就改主函数了:
int main(void)
{
  int i;

	Display_Init();
  LEDInit();
	SysTickInit();
  while (1)
  {
		Delay(500);
		GPIO_SetBits(LED4_GPIO_PORT,LED4_PIN);
		GPIO_ResetBits(LED3_GPIO_PORT,LED3_PIN);
		Display();
		Delay(500);
		GPIO_SetBits(LED3_GPIO_PORT,LED3_PIN);
		GPIO_ResetBits(LED4_GPIO_PORT,LED4_PIN);
		Display();
  }
}
惯例,主要函数部分实现完了,那就看最终的显示结果吧.


 被折叠的 条评论
为什么被折叠?
被折叠的 条评论
为什么被折叠?
 到【灌水乐园】发言


