


Google在Android 5.0 以上版本新增了自定义Toolbar的功能,对于开发者是一件喜事。相比于Actionbar,Toolbar最明显的一点就是变得很自由,可随处放置。
- 使用Toolbar之前先在build.gradle引入v7支持包
dependencies {
    ...
    compile 'com.android.support:appcompat-v7:26.1.0'
    compile 'com.android.support:palette-v7:26.1.0'
}- 在styles.xml文件里把Actionbar去掉
<resources>
    <style name="AppTheme" parent="Theme.AppCompat.Light.NoActionBar">
        <item name="colorPrimary">@color/colorPrimary</item>
        <item name="colorPrimaryDark">@color/colorPrimaryDark</item>
        <item name="colorAccent">@color/colorAccent</item>
    </style>
</resources>- layout/mytoolbar.xml界面布局代码如下:
<?xml version="1.0" encoding="utf-8"?>
<android.support.v7.widget.Toolbar xmlns:android="http://schemas.android.com/apk/res/android"
    android:id="@+id/toolbar"
    android:layout_width="match_parent"
    android:layout_height="wrap_content"
    android:background="?attr/colorPrimary"
    android:minHeight="?attr/actionBarSize"
     >
</android.support.v7.widget.Toolbar> - layout/activity_toolbar.xml界面布局代码如下:
<?xml version="1.0" encoding="utf-8"?>
<LinearLayout xmlns:android="http://schemas.android.com/apk/res/android"
    xmlns:tools="http://schemas.android.com/tools"
    android:layout_width="match_parent"
    android:layout_height="match_parent"
    android:orientation="vertical"
    tools:context=".ToolbarActivity">

    <include layout="@layout/mytoolbar" />

    <android.support.v4.widget.DrawerLayout
        android:id="@+id/id_drawerlayout"
        android:layout_width="match_parent"
        android:layout_height="match_parent">
        <!--内容界面-->
        <LinearLayout
            android:id="@+id/ll_content"
            android:layout_width="match_parent"
            android:layout_height="match_parent"
            android:orientation="vertical"
            android:background="@drawable/bg">

            <TextView
                android:layout_width="match_parent"
                android:layout_height="match_parent"
                android:gravity="center"
                android:text="内容界面"
                android:textColor="@android:color/white"/>


        </LinearLayout>
        <!--侧或菜单界面-->
        <LinearLayout
            android:id="@+id/ll_tabs"
            android:layout_width="match_parent"
            android:layout_height="match_parent"
            android:background="@android:color/darker_gray"
            android:orientation="vertical"
            android:layout_gravity="start">

            <TextView
                android:id="@+id/tv_close"
                android:layout_width="match_parent"
                android:layout_height="match_parent"
                android:gravity="center"
                android:clickable="true"
                android:text="侧滑界面,点击收回侧滑"
                android:textColor="@android:color/white"/>

        </LinearLayout>

    </android.support.v4.widget.DrawerLayout>
</LinearLayout>- menu/main.xml界面布局代码如下:
<menu xmlns:android="http://schemas.android.com/apk/res/android"
    xmlns:app="http://schemas.android.com/apk/res-auto"
    xmlns:tools="http://schemas.android.com/tools"
    tools:context=".ToolbarActivity">

    <item
        android:id="@+id/ab_search"
        android:orderInCategory="80"
        android:title="搜索"
        app:actionViewClass="android.support.v7.widget.SearchView"
        app:showAsAction="ifRoom" />
    <item
        android:id="@+id/action_share"
        android:orderInCategory="90"
        android:title="分享"
        app:showAsAction="ifRoom" />
    <item
        android:id="@+id/action_settings"
        android:orderInCategory="100"
        android:title="设置"
        app:showAsAction="never" />

</menu>- ToolbarActivity.java逻辑代码如下:
package com.fukaimei.moontoolbar;

import android.graphics.Bitmap;
import android.graphics.BitmapFactory;
import android.graphics.drawable.ColorDrawable;
import android.support.v4.widget.DrawerLayout;
import android.support.v7.app.ActionBarDrawerToggle;
import android.support.v7.app.AppCompatActivity;
import android.os.Bundle;
import android.support.v7.graphics.Palette;
import android.support.v7.widget.Toolbar;
import android.view.Menu;
import android.view.MenuItem;
import android.view.View;
import android.view.Gravity;
import android.widget.TextView;
import android.widget.Toast;


public class ToolbarActivity extends AppCompatActivity {
    private Toolbar mToolbar;
    private DrawerLayout mDrawerLayout;
    private ActionBarDrawerToggle mDrawerToggle;
    private TextView tv_close;

    @Override
    protected void onCreate(Bundle savedInstanceState) {
        super.onCreate(savedInstanceState);
        setContentView(R.layout.activity_toolbar);
        initViews();
    }

    private void initViews() {
        tv_close = (TextView) this.findViewById(R.id.tv_close);
        mToolbar = (Toolbar) this.findViewById(R.id.toolbar);
        mToolbar.setTitle("Toolbar");

        setSupportActionBar(mToolbar);
        //是否给左上角图标的左边加上一个返回的图标
        getSupportActionBar().setDisplayHomeAsUpEnabled(true);
        getSupportActionBar().setLogo(R.drawable.ic_launcher);
        mToolbar.setOnMenuItemClickListener(new Toolbar.OnMenuItemClickListener() {
            @Override
            public boolean onMenuItemClick(MenuItem item) {
                switch (item.getItemId()) {
                    case R.id.action_settings:
                        Toast.makeText(ToolbarActivity.this, "设置动作", Toast.LENGTH_SHORT).show();
                        break;
                    case R.id.action_share:
                        Toast.makeText(ToolbarActivity.this, "分享动作", Toast.LENGTH_SHORT).show();
                        break;
                    default:
                        break;
                }
                return true;
            }
        });
        //设置侧或布局
        mDrawerLayout = (DrawerLayout) this.findViewById(R.id.id_drawerlayout);
        mDrawerToggle = new ActionBarDrawerToggle(this, mDrawerLayout, mToolbar, R.string.drawer_open,
                R.string.drawer_close);
        mDrawerToggle.syncState();
        mDrawerLayout.setDrawerListener(mDrawerToggle);
        tv_close.setOnClickListener(new View.OnClickListener() {
            @Override
            public void onClick(View v) {
                mDrawerLayout.closeDrawer(Gravity.LEFT);
            }
        });
        //使用Patette
        setPatette();
    }

    private void setPatette() {
        Bitmap bitmap = BitmapFactory.decodeResource(getResources(), R.drawable.bg);
        Palette.from(bitmap).generate(new Palette.PaletteAsyncListener() {
            @Override
            public void onGenerated(Palette palette) {
                Palette.Swatch swatch = palette.getVibrantSwatch();
                getSupportActionBar().setBackgroundDrawable(new ColorDrawable(swatch.getRgb()));

            }
        });
    }

    @Override
    public boolean onCreateOptionsMenu(Menu menu) {
        // Inflate the menu; this adds items to the action bar if it is present.
        getMenuInflater().inflate(R.menu.main, menu);
        return true;
    }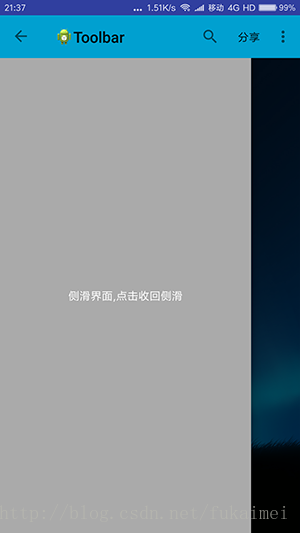
}- Demo程序运行效果界面截图如下:


 483
483

 被折叠的 条评论
为什么被折叠?
被折叠的 条评论
为什么被折叠?
 到【灌水乐园】发言


