


Jersey uses Jackson to convert object to / form JSON. In this tutorial, we show you how to convert a “Track” object into JSON format, and return it back to user.
1. Dependency
To make Jersey support JSON mapping, declares “jersey-json.jar” in Maven pom.xml file.
    <dependency>
        <groupId>com.sun.jersey</groupId>
        <artifactId>jersey-server</artifactId>
        <version>1.8</version>
    </dependency>

    <dependency>
        <groupId>com.sun.jersey</groupId>
        <artifactId>jersey-json</artifactId>
        <version>1.8</version>
    </dependency>
2. Integrate JSON with Jersey
In web.xml, declares “com.sun.jersey.api.json.POJOMappingFeature” as “init-param” in Jersey mapped servlet. It will make Jersey support JSON/object mapping.
    <init-param>
        <param-name>com.sun.jersey.api.json.POJOMappingFeature</param-name>
        <param-value>true</param-value>
    </init-param>
File : web.xml – full example.
<web-app ...>

  <servlet>
    <servlet-name>jersey-serlvet</servlet-name>
    <servlet-class>com.sun.jersey.spi.container.servlet.ServletContainer</servlet-class>
    <init-param>
        <param-name>com.sun.jersey.config.property.packages</param-name>
        <param-value>com.mkyong.rest</param-value>
    </init-param>
    <init-param>
        <param-name>com.sun.jersey.api.json.POJOMappingFeature</param-name>
        <param-value>true</param-value>
    </init-param>
    <load-on-startup>1</load-on-startup>
  </servlet>

  <servlet-mapping>
    <servlet-name>jersey-serlvet</servlet-name>
    <url-pattern>/rest/*</url-pattern>
  </servlet-mapping>

</web-app>
3. Simple Object
A simple “Track” object, later Jersey will convert it into JSON format.
package com.mkyong;

public class Track {

    String title;
    String singer;

    public String getTitle() {
        return title;
    }

    public void setTitle(String title) {
        this.title = title;
    }

    public String getSinger() {
        return singer;
    }

    public void setSinger(String singer) {
        this.singer = singer;
    }

    @Override
    public String toString() {
        return "Track [title=" + title + ", singer=" + singer + "]";
    }

}
4. JAX-RS with Jersey
Annotate the method with @Produces(MediaType.APPLICATION_JSON). Jersey will use Jackson to handle the JSON conversion automatically.
package com.mkyong.rest;

import javax.ws.rs.Consumes;
import javax.ws.rs.GET;
import javax.ws.rs.POST;
import javax.ws.rs.Path;
import javax.ws.rs.Produces;
import javax.ws.rs.core.MediaType;
import javax.ws.rs.core.Response;

import com.mkyong.Track;

@Path("/json/metallica")
public class JSONService {

    @GET
    @Path("/get")
    @Produces(MediaType.APPLICATION_JSON)
    public Track getTrackInJSON() {

        Track track = new Track();
        track.setTitle("Enter Sandman");
        track.setSinger("Metallica");

        return track;

    }

    @POST
    @Path("/post")
    @Consumes(MediaType.APPLICATION_JSON)
    public Response createTrackInJSON(Track track) {

        String result = "Track saved : " + track;
        return Response.status(201).entity(result).build();

    }

}
5. Demo
See demo for GET and POST request.
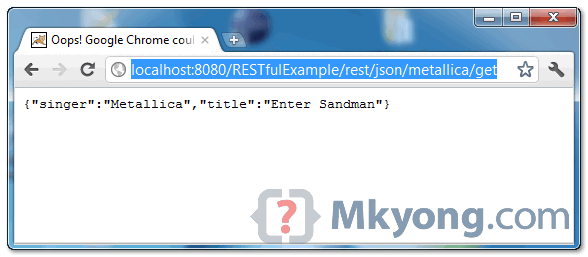
1. GET method
When URI pattern “/json/metallica/get” is requested, the Metallica classic song “Enter Sandman” will be returned in JSON format.
{
    "singer":"Metallica",
    "title":"Enter Sandman"
}
2. POST method
To test post request, you can create a RESTful client (refer to this Jersey client APIs example), and “post” the json format string to URI pattern “/json/metallica/post“, the posted json string will be converted into “Track” object automatically.


 247
247

 被折叠的 条评论
为什么被折叠?
被折叠的 条评论
为什么被折叠?
 到【灌水乐园】发言


