


参考:
http://wiki.batcom-it.net/index.php?title=Building_Qt_on_Windows_%28MinGW%29
http://harmattan-dev.nokia.com/docs/library/html/qt4/install-win.html
测试机器:windows7 x64, mingw32, qt-4.8.5
1) 下载qt的源代码
2) 下载mingw32工具链
git clone git://code.csdn.net/wuzh1230/bitcoin.git
3) 解压并配置
最好是在干净的代码上做一个git备份,否则qt太大,很难察觉那些文件修改了。
git init . && git add . && git commit -m "add clean sources"
配置:
使用windows的configure.exe执行配置命令,否则qmake会使用Makefile.unix构建,进而失败。
用help看看qt configure options那些事儿
Usage: configure [-buildkey <key>]
       [-release] [-debug] [-debug-and-release] [-shared] [-static]
       [-no-fast] [-fast] [-no-exceptions] [-exceptions]
       [-no-accessibility] [-accessibility] [-no-rtti] [-rtti]
       [-no-stl] [-stl] [-no-sql-<driver>] [-qt-sql-<driver>]
       [-plugin-sql-<driver>] [-system-sqlite] [-arch <arch>]
       [-D <define>] [-I <includepath>] [-L <librarypath>]
       [-help] [-no-dsp] [-dsp] [-no-vcproj] [-vcproj]
       [-no-qmake] [-qmake] [-dont-process] [-process]
       [-no-style-<style>] [-qt-style-<style>] [-redo]
       [-saveconfig <config>] [-loadconfig <config>]
       [-qt-zlib] [-system-zlib] [-no-gif] [-no-libpng]
       [-qt-libpng] [-system-libpng] [-no-libtiff] [-qt-libtiff]
       [-system-libtiff] [-no-libjpeg] [-qt-libjpeg] [-system-libjpeg]
       [-no-libmng] [-qt-libmng] [-system-libmng] [-no-qt3support] [-mmx]
       [-no-mmx] [-3dnow] [-no-3dnow] [-sse] [-no-sse] [-sse2] [-no-sse2]
       [-no-iwmmxt] [-iwmmxt] [-openssl] [-openssl-linked]
       [-no-openssl] [-no-dbus] [-dbus] [-dbus-linked] [-platform <spec>]
       [-qtnamespace <namespace>] [-qtlibinfix <infix>] [-no-phonon]
       [-phonon] [-no-phonon-backend] [-phonon-backend]
       [-no-multimedia] [-multimedia] [-no-audio-backend] [-audio-backend]
       [-no-script] [-script] [-no-scripttools] [-scripttools]
       [-no-webkit] [-webkit] [-webkit-debug]
       [-graphicssystem raster|opengl|openvg]
       [-no-directwrite] [-directwrite] [-no-nis] [-nis] [-qpa]
       [-no-cups] [-cups] [-no-iconv] [-iconv] [-sun-iconv] [-gnu-iconv]
       [-neon] [-no-neon] [-largefile] [-little-endian] [-big-endian]
       [-font-config] [-no-fontconfig] [-posix-ipc]
配置并生成qmake
configure.exe -platform win32-g++ -opensource -confirm-license -release -shared -nis -no-s60
如果需要openssl支持,请构建openssl,或者到楼主的git上下载预编译的oenssl。然后在mingw命令行下使用以下脚本配置Qt:
(可能需要把/d/cifs/lab这样的cygwin路径换成d:/cifs/lab这样的windows路径)
configure.exe \
    -I /d/cifs/lab/csdn/bitcoin/3rd/openssl-1.0.1c-mgw/include \
    -L /d/cifs/lab/csdn/bitcoin/3rd/openssl-1.0.1c-mgw/lib \
    -l ssl \
    -l crypto \
    -platform win32-g++ \
    -opensource -confirm-license \
    -release -shared -openssl -nis -no-s60
configure.exe \
    -I "D:\workspace\MinGW64\msys\1.0\local\ssl\include" \
    -L "D:\workspace\MinGW64\msys\1.0\local\ssl\lib" \
    -l ssl \
    -l crypto \
    -platform win32-g++ \
    -opensource \
    -confirm-license \
    -release \
    -static \
    -openssl \
    -nis \
    -no-s60
windows7上的终极脚本
configure.exe \
    -I "/usr/local/ssl/include" \
    -L "/usr/local/ssl/lib" \
    -l ssl \
    -l crypto \
    -release \
    -opensource \
    -confirm-license \
    -static \
    -no-ltcg \
    -no-fast \
    -exceptions \
    -accessibility \
    -stl \
    -no-sql-sqlite \
    -no-qt3support \
    -no-opengl \
    -no-openvg \
    -platform win32-g++ \
    -no-system-proxies \
    -qt-zlib \
    -no-gif \
    -qt-libpng \
    -no-libmng \
    -no-libtiff \
    -qt-libjpeg \
    -no-dsp \
    -no-vcproj \
    -no-incredibuild-xge \
    -plugin-manifests \
    -qmake \
    -process -nomake demos -nomake examples -nomake tools \
    -no-rtti \
    -no-mmx \
    -no-3dnow \
    -no-sse \
    -no-sse2 \
    -openssl \
    -no-dbus \
    -no-phonon -no-phonon-backend \
    -no-multimedia -no-audio-backend \
    -no-webkit \
    -no-script -no-scripttools -no-declarative \
    -arch windows \
    -no-style-plastique \
    -no-style-windowsxp -no-style-windowsvista \
    -no-style-cleanlooks -no-style-cde \
    -no-style-motif \
    -no-native-gestures \
    -saveconfig csdnbuild
删除了
-no-accessibility \如何加速编译过程?
-nomake demos, -nomake examples, -nomake tools
庞大的examples会消耗很多编译时间和磁盘空间。
请检查一下哪些组件启用了,那些Feature包含了。
Qt is now configured for building. Just run mingw32-make.
To reconfigure, run mingw32-make confclean and configure.
4)生成qt库
mingw32-make
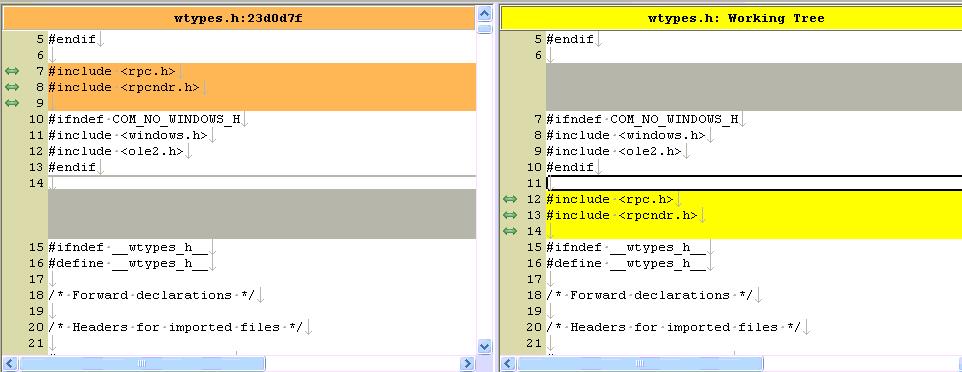
早上来一看,\src\plugins\bearer\nativewifi\main.cpp失败,原因是间接引用了<wctypes.h>但是没有引用windows平台头文件在前,修改platformdefs.h
index 4e0f6d5..7f8abf2 100644
--- a/src/plugins/bearer/nativewifi/platformdefs.h
+++ b/src/plugins/bearer/nativewifi/platformdefs.h
@@ -42,7 +42,10 @@
 #ifndef PLATFORMDEFS_H
 #define PLATFORMDEFS_H

-#include <wtypes.h>
+#ifdef Q_OS_WIN
+#include "../platformdefs_win.h"
+#endif
+
 #undef interface

 //proper header is wlanapi.h, but that is not included in windows XP
或者修改mingw的头文件, #2047
大概又过了1个小时,构建完成
g++ -c -pipe -O2 -frtti -fexceptions -mthreads -Wall -Wextra -DUNICODE -DLOG_SPECTRUMANALYSER -DLOG_ENGINE -DSUPERIMPOSE
_PROGRESS_ON_WAVEFORM -DSPECTRUM_ANALYSER_SEPARATE_THREAD -D_CRT_SECURE_NO_WARNINGS -DQT_DLL -DQT_NO_DEBUG -DQT_MULTIMED
IA_LIB -DQT_GUI_LIB -DQT_CORE_LIB -DQT_HAVE_MMX -DQT_HAVE_3DNOW -DQT_HAVE_SSE -DQT_HAVE_MMXEXT -DQT_HAVE_SSE2 -DQT_THREA
D_SUPPORT -DQT_NEEDS_QMAIN -I'../../../include/QtCore' -I'../../../include/QtGui' -I'../../../include/QtMultimedia' -I'.
./../../include' -I'../3rdparty/fftreal' -I'../../../include/ActiveQt' -I'tmp/moc/release_shared' -I'../../../mkspecs/wi
n32-g++' -o tmp/obj/release_shared/qrc_spectrum.o tmp/rcc/release_shared/qrc_spectrum.cpp
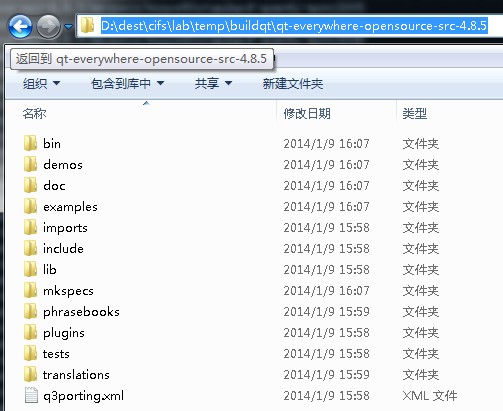
g++ -Wl,-s -mthreads -Wl,-subsystem,windows -o ../release/spectrum.exe object_script.spectrum.Release -L'd:/cifs/lab/te
mp/buildqt/qt-everywhere-opensource-src-4.8.5/lib' -L'd:/cifs/lab/temp/buildqt/qt-everywhere-opensource-src-4.8.5/lib' -
lmingw32 -lqtmain -L../release -lfftreal -lQtMultimedia4 -lQtGui4 -lQtCore4
mingw32-make[4]: Leaving directory 'd:/cifs/lab/temp/buildqt/qt-everywhere-opensource-src-4.8.5/demos/spectrum/app'
mingw32-make[3]: Leaving directory 'd:/cifs/lab/temp/buildqt/qt-everywhere-opensource-src-4.8.5/demos/spectrum/app'
mingw32-make[2]: Leaving directory 'd:/cifs/lab/temp/buildqt/qt-everywhere-opensource-src-4.8.5/demos/spectrum'
mingw32-make[1]: Leaving directory 'd:/cifs/lab/temp/buildqt/qt-everywhere-opensource-src-4.8.5/demos'
5) 安装
mingw32-make install INSTALL_ROOT=dest而且安装位置在哪里呢?
如果当前路径是d:\abc\qt-source\,会安装到d:\dest\abc\qt-source\,why?
6) 用Qt库构建程序
三个步骤
6.1) 设置qmake的路径到path下,也就是上图安装后的目录的bin目录。
$ export PATH=$PATH:/d/cifs/lab/csdn/bitcoin/3rd/qt-4.8.5-mingw32-4.8.1/bin
6.2) 到example目录下找一个sample,执行qmake生成Makefile
Administrator@harrywu-PC /d/cifs/lab/csdn/bitcoin/3rd/qt-4.8.5-mingw32-4.8.1/examples/dialogs
$ cd findfiles/

Administrator@harrywu-PC /d/cifs/lab/csdn/bitcoin/3rd/qt-4.8.5-mingw32-4.8.1/examples/dialogs/findfiles
$ ls
findfiles.exe  findfiles.pro  main.cpp  window.cpp  window.h

Administrator@harrywu-PC /d/cifs/lab/csdn/bitcoin/3rd/qt-4.8.5-mingw32-4.8.1/examples/dialogs/findfiles
$ qmake

Administrator@harrywu-PC /d/cifs/lab/csdn/bitcoin/3rd/qt-4.8.5-mingw32-4.8.1/examples/dialogs/findfiles
$ ls
Makefile        Makefile.Release  findfiles.exe  main.cpp  window.cpp
Makefile.Debug  debug             findfiles.pro  release   window.h
6.3) 执行make relase生成测试例子
Administrator@harrywu-PC /d/cifs/lab/csdn/bitcoin/3rd/qt-4.8.5-mingw32-4.8.1/examples/dialogs/findfiles
$ make release
make -f Makefile.Release
make[1]: Entering directory `/d/cifs/lab/csdn/bitcoin/3rd/qt-4.8.5-mingw32-4.8.1/examples/dialogs/findfiles'
g++ -c -pipe -O2 -frtti -fexceptions -mthreads -Wall -Wextra -DUNICODE -DQT_DLL -DQT_NO_DEBUG -DQT_GUI_LIB -DQT_CORE_LIB
 -DQT_HAVE_MMX -DQT_HAVE_3DNOW -DQT_HAVE_SSE -DQT_HAVE_MMXEXT -DQT_HAVE_SSE2 -DQT_THREAD_SUPPORT -DQT_NEEDS_QMAIN -I'd:/
cifs/lab/temp/buildqt/qt-everywhere-opensource-src-4.8.5/include/QtCore' -I'd:/cifs/lab/temp/buildqt/qt-everywhere-opens
ource-src-4.8.5/include/QtGui' -I'd:/cifs/lab/temp/buildqt/qt-everywhere-opensource-src-4.8.5/include' -I'd:/cifs/lab/te
mp/buildqt/qt-everywhere-opensource-src-4.8.5/include/ActiveQt' -I'release' -I'd:/cifs/lab/temp/buildqt/qt-everywhere-op
ensource-src-4.8.5/mkspecs/default' -o release/main.o main.cpp
g++ -c -pipe -O2 -frtti -fexceptions -mthreads -Wall -Wextra -DUNICODE -DQT_DLL -DQT_NO_DEBUG -DQT_GUI_LIB -DQT_CORE_LIB
 -DQT_HAVE_MMX -DQT_HAVE_3DNOW -DQT_HAVE_SSE -DQT_HAVE_MMXEXT -DQT_HAVE_SSE2 -DQT_THREAD_SUPPORT -DQT_NEEDS_QMAIN -I'd:/
cifs/lab/temp/buildqt/qt-everywhere-opensource-src-4.8.5/include/QtCore' -I'd:/cifs/lab/temp/buildqt/qt-everywhere-opens
ource-src-4.8.5/include/QtGui' -I'd:/cifs/lab/temp/buildqt/qt-everywhere-opensource-src-4.8.5/include' -I'd:/cifs/lab/te
mp/buildqt/qt-everywhere-opensource-src-4.8.5/include/ActiveQt' -I'release' -I'd:/cifs/lab/temp/buildqt/qt-everywhere-op
ensource-src-4.8.5/mkspecs/default' -o release/window.o window.cpp
D:/cifs/lab/temp/buildqt/qt-everywhere-opensource-src-4.8.5/bin/moc.exe -DUNICODE -DQT_DLL -DQT_NO_DEBUG -DQT_GUI_LIB -D
QT_CORE_LIB -DQT_HAVE_MMX -DQT_HAVE_3DNOW -DQT_HAVE_SSE -DQT_HAVE_MMXEXT -DQT_HAVE_SSE2 -DQT_THREAD_SUPPORT -DQT_NEEDS_Q
MAIN -I'd:/cifs/lab/temp/buildqt/qt-everywhere-opensource-src-4.8.5/include/QtCore' -I'd:/cifs/lab/temp/buildqt/qt-every
where-opensource-src-4.8.5/include/QtGui' -I'd:/cifs/lab/temp/buildqt/qt-everywhere-opensource-src-4.8.5/include' -I'd:/
cifs/lab/temp/buildqt/qt-everywhere-opensource-src-4.8.5/include/ActiveQt' -I'release' -I'd:/cifs/lab/temp/buildqt/qt-ev
erywhere-opensource-src-4.8.5/mkspecs/default' -D__GNUC__ -DWIN32 window.h -o release/moc_window.cpp
g++ -c -pipe -O2 -frtti -fexceptions -mthreads -Wall -Wextra -DUNICODE -DQT_DLL -DQT_NO_DEBUG -DQT_GUI_LIB -DQT_CORE_LIB
 -DQT_HAVE_MMX -DQT_HAVE_3DNOW -DQT_HAVE_SSE -DQT_HAVE_MMXEXT -DQT_HAVE_SSE2 -DQT_THREAD_SUPPORT -DQT_NEEDS_QMAIN -I'd:/
cifs/lab/temp/buildqt/qt-everywhere-opensource-src-4.8.5/include/QtCore' -I'd:/cifs/lab/temp/buildqt/qt-everywhere-opens
ource-src-4.8.5/include/QtGui' -I'd:/cifs/lab/temp/buildqt/qt-everywhere-opensource-src-4.8.5/include' -I'd:/cifs/lab/te
mp/buildqt/qt-everywhere-opensource-src-4.8.5/include/ActiveQt' -I'release' -I'd:/cifs/lab/temp/buildqt/qt-everywhere-op
ensource-src-4.8.5/mkspecs/default' -o release/moc_window.o release/moc_window.cpp
g++ -Wl,-s -mthreads -Wl,-subsystem,windows -o release/findfiles.exe release/main.o release/window.o release/moc_window.
o  -L'd:/cifs/lab/temp/buildqt/qt-everywhere-opensource-src-4.8.5/lib' -lmingw32 -lqtmain -lQtGui4 -lQtCore4
make[1]: Leaving directory `/d/cifs/lab/csdn/bitcoin/3rd/qt-4.8.5-mingw32-4.8.1/examples/dialogs/findfiles'
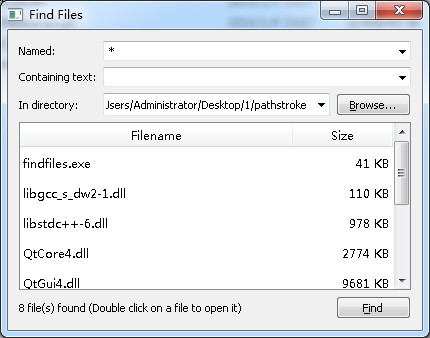
7)测试例子程序
记住复制依赖的dll到可执行例子程序目录下
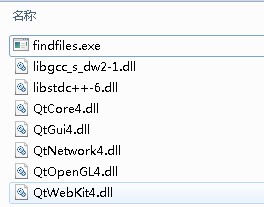
执行:
问题追踪:
(1) confgure.exe和configure脚本的差别
执行sh configure -platform win32-g++ -opensource -confirm-license 会导致配置脚本去引用qmake/Makefile.unix文件,为什么?直接导致UNICODE宏没有定义,进而导致qmake/project.cpp无法编译。
    #mkspecs/default is used as a (gasp!) default mkspec so QMAKESPEC needn't be set once configured
    rm -rf mkspecs/default
    ln -s `echo $XQMAKESPEC | sed "s,^${relpath}/mkspecs/,,"` mkspecs/default
    # fix makefiles
    for mkfile in GNUmakefile Makefile; do
        EXTRA_LFLAGS=
        EXTRA_CFLAGS=
        in_mkfile="${mkfile}.in"
        if [ "$mkfile" = "Makefile" ]; then
#           if which qmake >/dev/null 2>&1 && [ -f qmake/qmake.pro ]; then
#               (cd qmake && qmake) >/dev/null 2>&1 && continue
#           fi
            in_mkfile="${mkfile}.unix"
(2) 如果是在linux下用mingw32交叉编译qt
期望是编译运行在win32窗口系统上的qt,而不是x11支持的qt,但是,在linux上只能执行configure脚本,而这个脚本默认是为linux的x11编写的,
方案一(未测试):使用configure.exe配置,CROSS_COMPILE=i686-w64-mingw32- gmake来编译
方案二(未测试):
./configure -no-fast -no-stl -no-opengl -no-openvg -no-webkit -no-script -no-scripttools -no-declarative -nomake examples -nomake tools -nomake demos -openssl -I /root/harrywu/build/3rd/ssl/include/ -L /root/harrywu/build/3rd/ssl/lib/ -xplatform win32-g++ -device-option CROSS_COMPILE=i686-w64-mingw32- && gmake && gmake install开始的时候,构建系统会调用本地编译器(不带前缀的g++)编译一些qmake相关的构建部件,然后开始invoke带有前缀的交叉工具链构建qt库。
(3) 附一个msvc2008配置脚本
configure.exe ^
    -release ^
    -opensource ^
    -confirm-license ^
    -static ^
    -no-ltcg ^
    -no-fast ^
    -exceptions ^
    -accessibility ^
    -stl ^
    -no-sql-sqlite ^
    -no-qt3support ^
    -no-opengl ^
    -no-openvg ^
    -platform win32-msvc2008 ^
    -no-system-proxies ^
    -qt-zlib ^
    -qt-libpng ^
    -no-libmng ^
    -no-libtiff ^
    -qt-libjpeg ^
    -no-dsp ^
    -vcproj ^
    -no-incredibuild-xge ^
    -plugin-manifests ^
    -qmake ^
    -process -nomake demos -nomake examples ^
    -no-rtti ^
    -no-mmx ^
    -no-3dnow ^
    -no-sse ^
    -no-sse2 ^
    -no-dbus ^
    -no-phonon -no-phonon-backend ^
    -no-multimedia -no-audio-backend ^
    -webkit ^
    -script -scripttools -declarative ^
    -arch windows ^
    -no-style-plastique ^
    -no-style-cleanlooks -no-style-cde ^
    -no-style-motif ^
    -no-native-gestures ^
    -saveconfig csdnbuild


 5319
5319


 被折叠的 条评论
为什么被折叠?
被折叠的 条评论
为什么被折叠?
 到【灌水乐园】发言


