


以前一直想着,ViewPager中间的那个横线怎么跟着屏幕的滑动而滑动,如下图所示:
我们可以看到中间的那个红线在跟着屏幕滑动而滑动
现在github上已经有了这个开源项目,所以我们可以直接拿来用,很方便很实用。文章末尾我将放上资源,可以直接下载。
官网地址:https://github.com/astuetz/PagerSlidingTabStrip
关于怎么导入包,怎么导入程序,这里不再进行赘述,你可以看我之前的一个文章,有详细步骤:
http://blog.csdn.net/harryweasley/article/details/41413547
我简单翻译一下官网上的内容:
交互式页面指示器控件,完美配合ViewPager控件(来自Android Support Library)
注意:这里的ViewPager的适配器必须是继承的FragmentPagerAdapter,并重写getPageIconResId(int position)或者getPageTitle(int position)方法
用法
在sample/文件夹下有一个现成的可运行工程
1.加入library作为本地包工程,或者加入依赖在build.gradle(我对gradle不是很了解,所以用前面那个导入包的方法)
dependencies {
    compile 'com.astuetz:pagerslidingtabstrip:1.0.1'
}
2.在你的layout里加入PagerSlidingTabStrip控件,它通常要在ViewPager控件之上
<com.astuetz.PagerSlidingTabStrip
    android:id="@+id/tabs"
    android:layout_width="match_parent"
    android:layout_height="48dip" />
3.在你的onCreate方法(或者onCreateView对于一个fragment),绑定PagerSlidingTabStrip控件到ViewPager上
// 初始化ViewPager并且添加适配器
 ViewPager pager = (ViewPager) findViewById(R.id.pager);
 pager.setAdapter(new TestAdapter(getSupportFragmentManager()));
 //向ViewPager绑定PagerSlidingTabStrip
 PagerSlidingTabStrip tabs = (PagerSlidingTabStrip) findViewById(R.id.tabs);
 tabs.setViewPager(pager);
4.(可选的)如果你想在你的ViewPager用到onPageChangeListener监听方法,你应该如下设置,而不是直接用ViewPager设置
tabs.setOnPageChangeListener(mPageChangeListener); 个性化设置
为了让你的app不像另一个 Play Store上面的app,你可以添加这些属性来做出自己独具一格的应用。
pstsIndicatorColor Color of the sliding indicator 滑动条的颜色
pstsUnderlineColor Color of the full-width line on the bottom of the view 滑动条所在的那个全宽线的颜色
pstsDividerColor Color of the dividers between tabs 每个标签的分割线的颜色
pstsIndicatorHeightHeight of the sliding indicator 滑动条的高度
pstsUnderlineHeight Height of the full-width line on the bottom of the view 滑动条所在的那个全宽线的高度
pstsDividerPadding Top and bottom padding of the dividers 分割线底部和顶部的填充宽度
pstsTabPaddingLeftRight Left and right padding of each tab 每个标签左右填充宽度
pstsScrollOffset Scroll offset of the selected tab
pstsTabBackground Background drawable of each tab, should be a StateListDrawable 每个标签的背景,应该是一个StateListDrawable
pstsShouldExpand If set to true, each tab is given the same weight, default false 如果设置为true,每个标签是相同的控件,均匀平分整个屏幕,默认是false
pstsTextAllCaps If true, all tab titles will be upper case, default true 如果为true,所有标签都是大写字母,默认为true
所有的属性都有他们自己的getter和setter方法来随时改变他们
接下来,我将写下我自己的小demo,总结自己遇到的问题,来记录一下关于这个控件的问题。
先看下截图
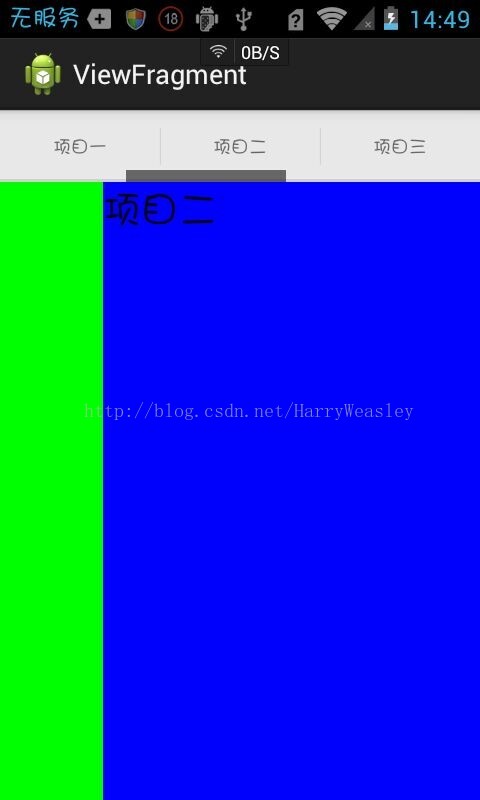
首先是activity_main.xml文件
<RelativeLayout xmlns:android="http://schemas.android.com/apk/res/android"
    xmlns:tools="http://schemas.android.com/tools"
    android:layout_width="match_parent"
    android:layout_height="match_parent"
    tools:context=".MainActivity" xmlns:app="http://schemas.android.com/apk/res/com.example.viewfragment">

    <com.astuetz.PagerSlidingTabStrip
        android:id="@+id/tabs"
        android:layout_width="match_parent"
        android:layout_height="48dip"
        app:pstsShouldExpand="true"
        />

    <android.support.v4.view.ViewPager
        android:id="@+id/viewPager"
        android:layout_below="@id/tabs"
        android:layout_width="fill_parent"
        android:layout_height="fill_parent" />

</RelativeLayout>
其中,1.android:layout_below=”@id/tabs”一定要记得写上,是让ViewPager控件在tabs之
2. xmlns:app=”http://schemas.android.com/apk/res/com.example.viewfragment, 这句话是我的理解是,如果你想要用PagerSlidingTabStrip,就必须加上,不过他会自动加,不需要你来管他。
接下来是三个fragment,都是很简单的设置了不同的颜色背景而已,我这里就不再贴出代码了,稍后会放上自己的小demo
最后,我们来看看MainActivity中都进行了什么处理吧,
package com.example.viewfragment;

import android.os.Bundle;
import android.support.v4.app.Fragment;
import android.support.v4.app.FragmentActivity;
import android.support.v4.app.FragmentManager;
import android.support.v4.app.FragmentPagerAdapter;
import android.support.v4.view.ViewPager;

import com.astuetz.PagerSlidingTabStrip;

public class MainActivity extends FragmentActivity {
    ViewPager viewPager;
    PagerSlidingTabStrip tabs;

    @Override
    protected void onCreate(Bundle savedInstanceState) {
        super.onCreate(savedInstanceState);
        setContentView(R.layout.activity_main);
        viewPager = (ViewPager) findViewById(R.id.viewPager);
        viewPager.setAdapter(new myPagerAdapter(getSupportFragmentManager()));
        tabs = (PagerSlidingTabStrip) findViewById(R.id.tabs);
        tabs.setViewPager(viewPager);
    }

    class myPagerAdapter extends FragmentPagerAdapter {
        String[] title = { "项目一", "项目二", "项目三" };
        Fragment1 fragment1;
        Fragment2 fragment2;
        Fragment3 fragment3;

        public myPagerAdapter(FragmentManager fm) {
            super(fm);
        }

        @Override
        public Fragment getItem(int position) {
            switch (position) {
            case 0:
                fragment1 = new Fragment1();
                return fragment1;
            case 1:
                fragment2 = new Fragment2();
                return fragment2;
            case 2:
                fragment3 = new Fragment3();
                return fragment3;

            default:
                return null;
            }
        }

        @Override
        public int getCount() {

            return title.length;
        }

        @Override
        public CharSequence getPageTitle(int position) {
            return title[position];
        }

    }

}
接下来是补充内容:
1.MainActivity继承的是FragmentActivity,因为想要用到getSupportFragmentManager()来构造适配器
2.
public Fragment getItem(int position) {
            switch (position) {
            case 0:
                fragment1 = new Fragment1();
                return fragment1;
            case 1:
                fragment2 = new Fragment2();
                return fragment2;
            case 2:
                fragment3 = new Fragment3();
                return fragment3;

            default:
                return null;
            }
        }
在做这个方法的时候,出现了cannot convert from Fragment1 to Fragment这个错误,关于这个错误,你可以点击
http://blog.csdn.net/jason0539/article/details/9712273进行查看。
3.如果是重写的getPageTitle(int position)这个方法,则tabs是文字标题;如果是重写的getPageIconResId(int position),则tabs是图标显示。
如图所示:
上面四个标签就是重写的getPageIconResId(int position)
private final int[] ICONS = { R.drawable.ic_launcher_gplus, R.drawable.ic_launcher_gmail,
                R.drawable.ic_launcher_gmaps, R.drawable.ic_launcher_chrome };


        @Override
        public int getPageIconResId(int position) {
            return ICONS[position];
        }
4.关于官网上的demo上fragment是这样给出的
/*
 * Copyright (C) 2013 Andreas Stuetz <andreas.stuetz@gmail.com>
 *
 * Licensed under the Apache License, Version 2.0 (the "License");
 * you may not use this file except in compliance with the License.
 * You may obtain a copy of the License at
 *
 *      http://www.apache.org/licenses/LICENSE-2.0
 *
 * Unless required by applicable law or agreed to in writing, software
 * distributed under the License is distributed on an "AS IS" BASIS,
 * WITHOUT WARRANTIES OR CONDITIONS OF ANY KIND, either express or implied.
 * See the License for the specific language governing permissions and
 * limitations under the License.
 */

package com.astuetz.viewpager.extensions.sample;

import android.os.Bundle;
import android.support.v4.app.Fragment;
import android.util.TypedValue;
import android.view.Gravity;
import android.view.LayoutInflater;
import android.view.View;
import android.view.ViewGroup;
import android.widget.FrameLayout;
import android.widget.FrameLayout.LayoutParams;
import android.widget.TextView;

public class SuperAwesomeCardFragment extends Fragment {

    private static final String ARG_POSITION = "position";

    private int position;

    public static SuperAwesomeCardFragment newInstance(int position) {
        SuperAwesomeCardFragment f = new SuperAwesomeCardFragment();
        Bundle b = new Bundle();
        b.putInt(ARG_POSITION, position);
        f.setArguments(b);
        return f;
    }

    @Override
    public void onCreate(Bundle savedInstanceState) {
        super.onCreate(savedInstanceState);

        position = getArguments().getInt(ARG_POSITION);
    }

    @Override
    public View onCreateView(LayoutInflater inflater, ViewGroup container, Bundle savedInstanceState) {

        LayoutParams params = new LayoutParams(LayoutParams.MATCH_PARENT, LayoutParams.MATCH_PARENT);

        FrameLayout fl = new FrameLayout(getActivity());
        fl.setLayoutParams(params);

        final int margin = (int) TypedValue.applyDimension(TypedValue.COMPLEX_UNIT_DIP, 8, getResources()
                .getDisplayMetrics());

        TextView v = new TextView(getActivity());
        params.setMargins(margin, margin, margin, margin);
        v.setLayoutParams(params);
        v.setLayoutParams(params);
        v.setGravity(Gravity.CENTER);
        v.setBackgroundResource(R.drawable.background_card);
        v.setText("CARD " + (position + 1));

        fl.addView(v);
        return fl;
    }

} 关于TypedValue.applyDimension()这个方法,你可以查看http://blog.csdn.net/harryweasley/article/details/42172321
关于params.setMargins(margin, margin, margin, margin);你可以查看http://www.itnose.net/detail/6038494.html
我这里就不在解释了
好了,关于PagerSlidingTabStrip我已经基本写完了,收获还是很大的。
接下来总结一下,我这个文章的其他链接地址:
1.关于cannot convert from Fragment1 to Fragment这个错误,你可以查看http://blog.csdn.net/jason0539/article/details/9712273
2.关于TypedValue.applyDimension()这个方法,你可以查看http://blog.csdn.net/harryweasley/article/details/42172321
3.关于params.setMargins(margin, margin, margin, margin);你可以查看http://www.itnose.net/detail/6038494.html
4.本篇博客地址:。。。。。。。。。。
5.PagerSlidingTabStrip在github上的地址 ,https://github.com/astuetz/PagerSlidingTabStrip
6.自己应用的下载地址http://download.csdn.net/detail/harryweasley/8314811
7.官网的PagerSlidingTabStrip下载地址 http://download.csdn.net/detail/harryweasley/8314807
8.关于怎么导入包,怎么导入程序,你可以查看 http://blog.csdn.net/harryweasley/article/details/41413547


 7872
7872

 被折叠的 条评论
为什么被折叠?
被折叠的 条评论
为什么被折叠?
 到【灌水乐园】发言


