


- 获取状态栏高度:
/**
     *
     * @return 状态栏高度
     */
    public static int getStatusBarHeight() {
         return Resources.getSystem().getDimensionPixelSize(Resources.getSystem().getIdentifier("status_bar_height", "dimen", "android"));
    }
2.px转dp
/**
     * px to dip
     *
     * @param context
     * @param pxValue
     * @return
     */
    public static int px2dip(Context context, float pxValue) {
        final float scale = context.getResources().getDisplayMetrics().density;
        return (int) (pxValue / scale + 0.5f);
    }
3.dp转px
/**
     * dip to px
     *
     * @param context
     * @param dpValue
     * @return
     */
    public static int dip2px(Context context, float dpValue) {
        final float scale = context.getResources().getDisplayMetrics().density;
        return (int) (dpValue * scale + 0.5f);
    }
4.获取sd卡路径
/**
     * 获取sd卡路径
     * @param mContext
     * @return
     */
    public static File getFileDir(Context mContext) {
        File cacheDir = null;

        if (Environment.getExternalStorageState().equals(Environment.MEDIA_MOUNTED)) {
            cacheDir = mContext.getExternalFilesDir(null);
        } else {
            cacheDir = mContext.getFilesDir();

        }
        return cacheDir;
    }
5.获取文件夹路径(不存在则创建)
/**
     *
     * @param mContext
     * @param filename
     * @param forlderName
     * @return 文件夹路径
     */
    public static String makeFilePath(Context mContext, String forlderName) {
        File cacheDir = new File(getFileDir(mContext), forlderName);
        if (!cacheDir.exists()) {
            cacheDir.mkdirs();
        }
        return cacheDir.getPath();
    }
6.读取文件中的文本内容
 try {
    // 获取到了文件
    FileInputStream fileInputStream = new FileInputStream(getFilesDir().getAbsolutePath() + "/apps.txt");
    byte[] b = new byte[fileInputStream.available()];
    fileInputStream.read(b);
    String allInfos = new String(b);
    Toast.makeText(this, allInfos, 0).show();
} catch (Exception e) {
    // TODO Auto-generated catch block
    e.printStackTrace();

}
7.得到屏幕宽度
/**
     *
     * @return 屏幕宽度(单位:px)
     */
    public static int getScreenWidth(Activity mActivity) {
        DisplayMetrics displayMetrics = new DisplayMetrics();
        mActivity.getWindowManager().getDefaultDisplay().getMetrics(displayMetrics);
        return displayMetrics.widthPixels;
    }
8.得到屏幕高度
/**
     *
     * @return 屏幕高度(单位:px)
     */
    public static int getScreenHeight(Activity mActivity) {
        DisplayMetrics displayMetrics = new DisplayMetrics();
        mActivity.getWindowManager().getDefaultDisplay().getMetrics(displayMetrics);
        return displayMetrics.heightPixels;
    }
9.将字符串存到文件
/**
     * 将要备份的应用信息存放在文件里
     * @param info 要备份的应用信息
     */
    public static void saveAllInfos(Activity mActivity, String info) {
        if (info != null) {
            try {
                FileOutputStream outStream = mActivity.openFileOutput(Constant.NAME_BACKED_APPS, Context.MODE_PRIVATE);
                outStream.write(info.getBytes());
                outStream.close();
            } catch (Exception e) {
                e.printStackTrace();
            }
        }
    }
10.日期相关
public class DateUtils {

    public static String FORMAT_YYYY_MM_DD = "yyyy-MM-dd";

    public static String FORMAT_CHINESE_MM_DD="MM月dd日";

    public static String fORMAT_YYYY_MM_DD_HH_MM_SS="yyyy/MM/dd HH:mm:ss";

    public static String FORMAT_YYYY_MM_DD_HH_MM = "yyyy-MM-dd HH:mm";

    /**
     * 将日期字符串转换为日期
     *
     * @param sourceDate
     *            :待转换的日期字符串
     * @param fomart
     *            :日期字符串的格式
     * @return
     */
    public static Date convertToDate(String sourceDate, String fomart) {
        Date targetDate;
        try {
            targetDate = (new SimpleDateFormat(fomart)).parse(sourceDate);
        } catch (ParseException e) {
            targetDate = new Date();
        }
        return targetDate;
    }

    /**
     * 将日期转换为指定格式字符串
     *
     * @param sourceDate
     *            :待转换的日期
     * @param fomart
     *            :日期字符串的格式
     * @return
     */
    public static String toString(Date sourceDate, String fomart){
        return (new SimpleDateFormat(fomart)).format(sourceDate);
    }

    /**
     * 将日期字符串转换为指定格式字符串
     *
     * @param sourceDate
     *            :待转换的日期
     * @param sourceFomart
     *            :待转换日期的格式
     * @param fomart
     *            :转换后日期字符串的格式
     * @return
     */
    public static String toString(String sourceDate,String sourceFomart, String fomart){
        Date tempDate=DateUtils.convertToDate(sourceDate, sourceFomart);
        return (new SimpleDateFormat(fomart)).format(tempDate);
    }

    public static String getCurrentTime(String format) {
        Date date = new Date();
        SimpleDateFormat sdf = new SimpleDateFormat(format, Locale.getDefault());
        String currentTime = sdf.format(date);
        return currentTime;
    }

    /**
     *
     * @return 当前时间
     */
    public static String getCurrentTime() {
        return getCurrentTime(DateUtils.fORMAT_YYYY_MM_DD_HH_MM_SS);
    }
}
11.获取手机IMEI
String imei = ((TelephonyManager) getSystemService(TELEPHONY_SERVICE)).getDeviceId();12.获取剩余容量和总容量:
/**
     * @return SD卡剩余容量
     */
    public static long getAvailableSDSize(){
        //取得SD卡文件路径
        File path = Environment.getExternalStorageDirectory();
        StatFs sf = new StatFs(path.getPath());
        //获取单个数据块的大小(Byte)
        long blockSize = sf.getBlockSize();
        //空闲的数据块的数量
        long freeBlocks = sf.getAvailableBlocks();
        //返回SD卡空闲大小(MB)
        return (freeBlocks * blockSize) >> 20;
    }

    /**
     * 获取SD卡总容量
     * @return
     */
    public static long getSDSize(){
        File path = Environment.getExternalStorageDirectory();
        StatFs stat = new StatFs(path.getPath());
        long blockSize = stat.getBlockSize();
        long availableBlocks = stat.getBlockCount();
        return availableBlocks * blockSize;
    }

    /**
     * 获取剩余磁盘空间(单位:MB)
     * @return
     */
    public static long getAvailableDiskSize() {
        File root = Environment.getRootDirectory();
        StatFs sf = new StatFs(root.getPath());
        long blockSize = sf.getBlockSize();
        long availCount = sf.getAvailableBlocks();
        return (availCount * blockSize) >> 20;
    }
13.ScrollView嵌套ListView获取ListView总高度:
comments.addAll(JsonHelper.convertList(JsonHelper.tojson(response.getResult()), PostComment.class));
adapter.setComments(comments);
int listViewHeight = 0;
if(listView.getLayoutParams() != null) {
    for (int i = 0, count = adapter.getCount(); i < count; i++) {
        View listItem = adapter.getView(i, null, listView);
        listItem.measure(0, 0);
        listViewHeight += listItem.getMeasuredHeight();
    }
    listView.getLayoutParams().height = listViewHeight;
    listView.setLayoutParams(listView.getLayoutParams());
    listView.requestLayout();
}
14.判断ListView的内容向上飞还是向下飞
listView.getRefreshableView().setOnScrollListener(new OnScrollListener() {
    @Override
    public void onScrollStateChanged(AbsListView view, int scrollState) {
        final ListView lw = listView.getRefreshableView();
        if(scrollState == 0) {
            final int currentFirstVisibleItem = lw.getFirstVisiblePosition();
            if (currentFirstVisibleItem > mLastFirstVisibleItem) {
                Log.i("a", "文字向上飞");
                ObjectAnimator.ofFloat(ll_article_detail_bottom, "translationY", toolBarBotom, toolBarBotom + toolBarHeight).setDuration(1000).start();
            } else if (currentFirstVisibleItem < mLastFirstVisibleItem) {
                Log.i("a", "文字向下飞");
                ObjectAnimator.ofFloat(ll_article_detail_bottom, "translationY", toolBarBotom + toolBarHeight, toolBarBotom).setDuration(1000).start();
            }
            mLastFirstVisibleItem = currentFirstVisibleItem;
        }
    }

    @Override
    public void onScroll(AbsListView view, int firstVisibleItem, int visibleItemCount, int totalItemCount) {

    }
});
15.ScrollView要嵌套ListView: 推荐在一个listview里面做。把握好addHeaderView(view, null, false)跟addFooterView,足以应对了。
16.WebView在xml设置android:scrollbars=”none”不显示滚动条。
17.先发送登录api,后存jsession
18.Fragment的setUserVisibleHint方法类似于Activity的onResume
19.http的请求方式 get post put delete 分别对应 查 改 増 和 删。
20.继承了Application的类要在清单文件的application节点配好类名才会被调用。但是继承Application的类在清单文件配置的时候在一些集成开发环境ide要省略前面的点。
21.替换Fragment
FragmentManager fm = getSupportFragmentManager();
fm.beginTransaction().replace(android.R.id.content, PlaceHolderFragment.newInstance()).commit();
22.缓存也是存数据库
23.Fragment往子Fragment传参,子Fragment的私有变量提供set方法。
24.spinner使用:
adapter = new ArrayAdapter<String>(context, android.R.layout.simple_spinner_item, years);
adapter.setDropDownViewResource(android.R.layout.simple_spinner_dropdown_item);
25.按钮边框:
<stroke
    android:width="1dp"
    android:color="@color/glh_grey_line"
    android:dashWidth="0dp"
    android:dashGap="2dp" />
26.AutoCompleteTextVIew
27.如果arraylist是null,则不能调用clear方法
28.wv_home_content.loadUrl(file:///android_asset/loading.html);
29.从服务器传过来的json数据中,value如果是以数字开头的话,用jsonnode直接get会得到用双引号括起来的value,例如”1eabcd”,所以要想得到原来的值,应该调用substring函数将value前后的双引号去掉。
30.viewpager如果用同一个adapter图片无论如何都无法更新,就用另一个viewpager。
31.安卓版本比较android.os.Build.VERSION.SDK_INT >= 18
32.在子线程里setText不生效可能是子线程不能刷新界面,要刷新主界面。现在才知道是不能在子线程中操控控件。正确的做法应该是在子线程中发送消息给窗口。让界面线程自己管理界面。
33.写ActivityManager的目的是用于那些有“退出”按钮的应用,如果没有退出按钮,说明用户默许我们一步一步退出应用。
34.编译的时候没有错,运行的时候却报找不到类的错误,很可能是版本不支持。
35.获取WebView当前处理的url
public boolean shouldOverrideUrlLoading(WebView view, String url) {
     view.loadUrl(url);
     // 记住当前的URL
     currentLeftUrl = url;
     // 由当前的WebView处理跳转
     return true;
 }
36.设置全屏、没有标题:
super.onCreate(savedInstanceState);
getWindow().setFlags(WindowManager.LayoutParams.FLAG_FULLSCREEN,  WindowManager.LayoutParams.FLAG_FULLSCREEN);
//requestWindowFeature(Window.FEATURE_NO_TITLE);
setContentView(R.layout.activity_loading);
37.拨打电话的时候报activitynotfoundexception,记得要把”tel:”加上:
Intent intent=new Intent();
intent.setAction(Intent.ACTION_DIAL);
intent.setData(Uri.parse("tel:" + logisticsTelephone));
startActivity(intent);
38.ImageView展示本地图片:
ImageView imageView = new ImageView(mActivity);
// 展示本地图片
imageView.setImageBitmap(BitmapFactory.decodeResource(getResources(), R.drawable.logistics_default));
imageView.setScaleType(ImageView.ScaleType.FIT_XY);
images.add(imageView);
adapter.notifyDataSetChanged();
39.对话框
new AlertDialog.Builder(ReceivedGiftDetailActivity.this).setTitle(R.string.label_reject_gift).setMessage(R.string.msg_gift_rejected_confirm)
 .setPositiveButton(R.string.msg_more_version_yes, new DialogInterface.OnClickListener() {
 @Override
 public void onClick(DialogInterface dialog, int which) {
 new DealGiftTask(REJECT_GIFT).execute();
 }
 }).setNegativeButton(R.string.msg_more_version_no, null).show();
40.本地图片Drawable转Bitmap
res= getResources();//activity的方法
BitmapFactory.decodeResource(res, id);//id = R.drawable.x
41.相对布局toRightOf 的时候No resource found 找不到id,是因为要将用到的id写在前面,或者无论何时都带@+
42.明明在xml中配置了activity,一切也正常,为什么还是报找不到activity的空指针异常?很有可能是清单文件的application的theme限定死了,而某些activity用到了getActionBar方法,结果为空,就找不到了。也有可能是activity.xml文件中context限定了。
43.三种方法得到实例化的layout的方法:
LayoutInflater inflater = getLayoutInflater(); LayoutInflater inflater = (LayoutInflater) layout
mContext.getSystemService(LAYOUT_INFLATER_SERVICE);
View layout = inflater.inflate(R.layout.custom_dialog,null);LayoutInflater.from(mContext).inflate(R.layout.item_message_list, null);44.TextView增加如下属性实现走马灯:
android:singleLine="true"
android:ellipsize="marquee"
android:marqueeRepeatLimit="marquee_forever"
android:focusable="true"
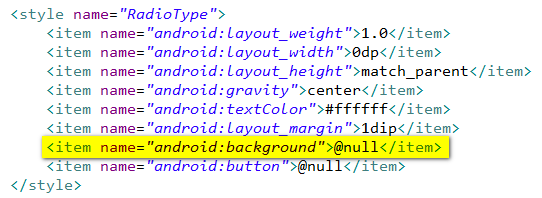
android:focusableInTouchMode="true"45.要想RadioButton在RadioGroup文字图片都居中,除了button为null之外,background也要null
46.ImageButton加上android:background=”@null”可以去除边框
47.获取状态栏高度
public static int getStatusBarHeight() {
 return Resources.getSystem().getDimensionPixelSize(
 Resources.getSystem().getIdentifier("status_bar_height", "dimen", "android"));
}
48.按钮setTag, Button可以set一个tag,然后在onClick事件里面v.getTag就可以得到相应的对象或字符串。
holder.checkGiftButton.setTag(myGift);
// 点击查看礼物
holder.checkGiftButton.setOnClickListener(new OnClickListener() {
    @Override
    public void onClick(View v) {
        if (v.getTag() instanceof MyGift) {
            MyGift myGift = (MyGift) v.getTag();
            Intent mIntent = new Intent();
            mIntent.putExtra("gift_id", myGift.getGift_id());
            mIntent.setClass(context,
            ReceivedGiftDetailActivity.class);
            context.startActivity(mIntent);
        }
    }
});
49.字符串插入变量值
tv_expired_time.setText(String.format(getString(R.string.label_expired_time), DateUtils.getCurrentTime()));
50.滑动开关
<com.woyoli.views.WiperSwitch
    android:layout_width="wrap_content"
    android:layout_height="wrap_content"
    android:layout_alignParentRight="true"
    android:layout_centerVertical="true"
    android:layout_marginRight="10dp" />
51.view也可以直接setTag
Holder holder = new Holder();
view.setTag(holder);
private static class ViewHolder {
    ImageView giftImage;
    TextView giftTitle;
    TextView giftNumber;
    Button checkGiftButton;
    Button shareButton;
    CircularImage userIcon;
    int position;
}
52.保证旋屏不会重走生命周期:
<activity
    android:name=".activity.ReceivedGiftDetailActivity"
    android:configChanges="screenSize|orientation|keyboardHidden|navigation"
    android:label="@string/app_name"
    android:screenOrientation="portrait" />
53.width或height要设为0dp权重才会忽略margin的space
54.由drawable的id得到drawable
allGiftButton.setBackground(getResources().getDrawable(R.drawable.button_my_gift_all_pressed));55.要第二次进去头像才是圆的,这是因为有时候网络比较差,无法瞬间加载所有的图片,这时候就要在display的回调函数(callback)里面设置图片,以保证图片是已经缓冲好了。
56.LinearLayout是从上到下分配空间的,比如vertical的话,假如下部的控件的宽高都是match_parent,但是实际效果是除开上部分之外的其余空间。
57.只有文字用ArrayAdapter,有本地图片SimpleAdapter,有网络图片用BaseAdapter。
58.点击popupwindow之外其他地方隐藏popwindow:
neighborhoodWindow.setOutsideTouchable(true);
neighborhoodWindow.setBackgroundDrawable(new BitmapDrawable(getResources(), Bitmap.createBitmap(dm.widthPixels, dm.heightPixels, Bitmap.Config.ALPHA_8)));
59.popupwindow在代码里加上popupwindow.setBackgroundDrawable(null);就可以去除边框,并且还保留原来的背景。
60.自定义Adapter在监听onItemClickListener的时候,总是被子控件拦截,干脆就用子控件来实现监听,而且子控件要match_parent。
61.FrameLayout解决layout点击事件被屏蔽:节点加上
android:descendantFocusability="blocksDescendants"62.illness_TV.setTextColor(R.color.gray); 这个错了你这样用变成 颜色指是 R.color.gray指示的ID值了 应该是
illness_TV.setTextColor(this.getResources().getColor(R.color.gray));
63.左侧导航菜单,底部菜单,底部悬浮菜单,滑动菜单。
64.Android底部导航栏怎么做?ViewPager+RadioGroup+RadioButton+frament
65.有人说,不要用viewpager了,你可以用actionbar+Fragment实现。
66.Selector示例
<?xml version="1.0" encoding="utf-8"?> xml version="1.0" encoding="utf-8"?>
<selector xmlns:android="http://schemas.android.com/apk/res/android"> selector xmlns:android="http://schemas.android.com/apk/res/android">
    <item android:drawable="@drawable/checkbox_checked" android:state_checked="true"></item>
    <item android:drawable="@drawable/checkbox_checked" android:state_selected="true"></item>
    <item android:drawable="@drawable/checkbox_checked" android:state_pressed="true"></item>
    <item android:drawable="@drawable/checkbox_unchecked"></item>
</selector> selector>
67.CheckBox示例:
<CheckBox
    CheckBoxandroid:id="@+id/cb_agreeRegister"
    android:layout_width="wrap_content"
    android:layout_height="wrap_content"
    android:background="@null"
    android:button="@null"
    android:checked="true"
    android:drawablePadding="5dp"
    android:drawableLeft="@drawable/selector_customed_checkbox" />
68.RelativeLayout中Button靠底部对齐,然后清单文件中设置activity为android:windowSoftInputMode=”adjustPan”就可以实现按钮总在软键盘上方
69.友盟既有统计又有推送:
先master后secret
<meta-datameta-data
android:name="UMENG_MESSAGE_SECRET"
android:value="ivufpvhp8bh51tsntazsgjyotwhg5ppn" >
</meta-data>
<meta-data
android:name="UMENG_MESSAGE_SECRET"
android:value="9fe0a415186f4e813d694970ffa04fc4" >
</meta-data>
70.Fragment嵌套问题在fragment里还有fragment的话,里面要用getChildFragmentManager()来获取fragmentManager
71.去掉EditText的下划线:
android:background="@null"72.查看安卓系统是否支持ble
PackageManager pm = getPackageManager();
boolean isBT = pm.hasSystemFeature(PackageManager.FEATURE_BLUETOOTH);
boolean isBLE = pm.hasSystemFeature(PackageManager.FEATURE_BLUETOOTH_LE);
73.如果Activity继承了BaseActivity,只让父类接管onBackPressed,那么iv_back.setOnClickListener(new OnClickListener…),不能是this
74.出现onItemClickListener不能响应,原因可能有多种,本人总结了有两种情况,一种是isEnable中返回值为false导致不能点击和选择,一种是因为item中有了checkable或者button类(子类)控件导致了item的焦点失去,从不能响应。
75.将listview的分隔线去掉:
listview.setDividerHeight(0);76.intentFeedback.putExtra(Constant.LOAD_URL_KEY, moreInfo.getFollow());
77.listview的adapter往下滚再往上滚UI会刷新(变化),可能因为switch没有处理好所有的情况,要处理所有情况并在default做一些默认的操作。
78.透明颜色:#000000
帧布局、PopupWindow(是一个widget,也可以理解为一个ViewGroup,可以放各种布局、控件)、ListPopupWindow
79.不同的xml文件可以有相同的id
80.最小和最大高度一样就是准确的高度了。
81.
ViewStub
FragmentTabs
82.在其他地方开发的Android项目,不自动编译,在清单文件更改了安卓最高版本,更改了编码格式为UTF-8,还是不行,这时候右键project,properties,Java build path,order and export,把本机的android sdk版本勾选上即可。有时候还要更改java jdk版本号。
83.当前变量获得焦点,其他地方没有变暗,默认的java视图下,在工具栏上应该会有一个Toggle Mark Occurency的按钮,选中就可以了。
84.string.xml中:
UI的:label_开头
消息的:msg_开头
85.android:id=”@+id/btn”,表示在R.java文件里面新增一个id为btn的控件索引,最常用的一种声明控件id的方式。android:id=”@android:id/tabhost”,表示引用的是系统已有的ID,在对应的sdk目录下的ids.xml里面。一般外部不去调用,是组件内部调用的时候使用。.android:id=”@id/btn” ,表示引用一个已经存在的ID,在R.java里面的,比如我们自己建了一个ids.xml,里面声明了一组id,其中一个是btn,那么你就可以这样引用了。
86.T 后面要用的话 必须都是 T? 后面要用 就不会有限制但是对于泛型本身而言。没有啥本质区别。
87.你在Xx类里定义了一个带参数的构造方法,那么这个Xx类就没有无参数的构造方法了。 子类在继承父类时,如果没有相同的带参构造方法,那么他就需要在其构造方法中明确的通过super()调用父类的带参构造方法,否则构造不出父类,从而也构造不出他自己了。 你如果在父类中写个不带参数的构造方法,就可以不用实现父类的带参构造方法了。
如果父类的构造函数无参,子类的构造函数可以有参也可以无参,但是子类有参的时候要调用父类的构造函数;如果父类的构造函数有参,那么子类的构造函数一定要有参。
88.一个类里面有另外一个类的对象,叫做聚合。
89.全屏:
getWindow().setFlags(WindowManager.LayoutParams.FLAG_FULLSCREEN, WindowManager.LayoutParams.FLAG_FULLSCREEN);90.四张在线图片:
http://url.cn/XhlEfM
http://url.cn/UZz9Hy
http://url.cn/dPqnyF
http://url.cn/Z0Er2u
91.想在ViewPager切换的时候不刷新WebView,就设置缓存页数为Tab的总页数就行了。试试viewPager.setOffscreenPageLimit(3); 这个是设置viewPager的缓存页数
92.webview不能直接设高度
把你这个webview放到一个layout中,如LinearLayout (在你xml中定义)。 LinearLayout.LayoutParams lp=new LinearLayout.LayoutParams(w, l); ll.setLayoutParams(lp); ll.addView(webview); 就可以了
93.测量组件高度
RadioGroup mRadioGroup = (RadioGroup) mActivity.findViewById(R.id.rg_bottom);
mRadioGroup.measure(View.MeasureSpec.UNSPECIFIED, View.MeasureSpec.UNSPECIFIED);
bottomTabHeight = mRadioGroup.getMeasuredHeight();
94.要想TextView有按下效果,必须设置
android:clickable="true"95.要想把包裹内容的栏放在底部,其余为一个整体在上面除了用帧布局的话,相对布局可能就要计算高度然后为内容设定高度了。
96.其实,在res文件夹下添加资源会在R文件中添加该资源的引用,如果该资源没有被使用到,也一样会把该资源打包进安装程序中。
97.最有效的:先导入附加的library,再导入目标项目,然后右击项目,property,安卓版本要对应,最主要的是add library里把附加的library添加进来。可能要在AndroidManifest.xml中修改最低版本号
98.PS:右击图层,转换为智能对象,编辑对象,就可以保存图片。
99.每次打开一个Activity都要add一下,虽然在点击后退的时候finish掉了,但是退出整个程序的时候还是要遍历fininsh掉。
100.有退出按钮:
1.记录打开的Activity:每打开一个Activity,就记录下来。在需要退出时,关闭每一个Activity即可。
2.发送特定广播:在需要结束应用时,发送一个特定的广播,每个Activity收到广播后,关闭即可。
3.递归退出:在打开新的Activity时使用startActivityForResult,然后自己加标志,在onActivityResult中处理,递归关闭。为了编程方便,最好定义一个Activity基类,处理这些共通问题,也就是第一种。
101.获取控件高度:
toolBarHeight = getApplicationContext().getResources().getDimensionPixelSize(R.dimen.button_height);102.安卓获取SD卡路径
String path = android.os.Environment.getExternalStorageDirectory().getPath().toString() + "/IMNG";103.调用浏览器下载
Intent intent = new Intent(Intent.ACTION_VIEW, Uri.parse(urlStr));
104.xutils下载文件
public void downloadPDF(){
        String url ="http://url.cn/XhlEfM";
        HttpUtils http = new HttpUtils();
        http.download(url, PDFPath, true, true, new RequestCallBack<File>() {

        @Override
            public void onStart() {

            }

             @Override
            public void onLoading(long total, long current, boolean isUploading) {

            }

             @Override
             public void onFailure(HttpException error, String msg) {
                   //tvInfo.setText(msg);
                 Toast.makeText(TopicArticleDetailActivity.this, "下载失败", Toast.LENGTH_SHORT).show();
              }

            @Override
            public void onSuccess(ResponseInfo<File> responseInfo) {
                // TODO Auto-generated method stub
                //responseInfo.result.getPath());
                responseInfo.result.getAbsoluteFile();
                Toast.makeText(TopicArticleDetailActivity.this, "下载完成", Toast.LENGTH_SHORT).show();
                Intent intent = new Intent("android.intent.action.VIEW");
                intent.addCategory("android.intent.category.DEFAULT");
                intent.addFlags(Intent.FLAG_ACTIVITY_NEW_TASK);
                Uri uri = Uri.fromFile(responseInfo.result.getAbsoluteFile());
                // 测试的是图片,到时候用intent.setDataAndType(uri, "application/pdf");代替
                intent.setDataAndType(uri, "image/*");
                TopicArticleDetailActivity.this.startActivity(intent);
            }
        });
    }
105.已合并
106.打开WiFi设置:
Intent mIntent = new Intent("/");
ComponentName comp = new ComponentName("com.android.settings","com.android.settings.WirelessSettings");
mIntent.setComponent(comp);
mIntent.setAction("android.intent.action.VIEW");
startActivity(mIntent);
107.查看有无网络以及网络类型:
package com.ics.aop.tool;

import android.content.Context;
import android.net.ConnectivityManager;
import android.net.NetworkInfo;

public class HttpTool {

    /**
     * 判断是否有网络
     * @param context
     * @return
     */
    public static boolean isNetworkConnected(Context context) {
        if (context != null) {
            ConnectivityManager mConnectivityManager = (ConnectivityManager) context
                    .getSystemService(Context.CONNECTIVITY_SERVICE);
            NetworkInfo mNetworkInfo = mConnectivityManager.getActiveNetworkInfo();
            if (mNetworkInfo != null) {
                return mNetworkInfo.isAvailable();
            }
        }
        return false;
    }

    /**
     * 判断网络是否WiFi
     * @param context
     * @return
     */
    public static boolean isWiFiConnected(Context context) {
        if (context != null) {
            ConnectivityManager mConnectivityManager = (ConnectivityManager) context
                    .getSystemService(Context.CONNECTIVITY_SERVICE);
            NetworkInfo mNetworkInfo = mConnectivityManager.getActiveNetworkInfo();
            if (mNetworkInfo != null) {
                return (mNetworkInfo.getType() == ConnectivityManager.TYPE_WIFI);
            }
        }
        return false;
    }

    /**
     * 判断网络是否移动网络
     * @param context
     * @return
     */
    public static boolean isMobileConnected(Context context) {
        if (context != null) {
            ConnectivityManager mConnectivityManager = (ConnectivityManager) context
                    .getSystemService(Context.CONNECTIVITY_SERVICE);
            NetworkInfo mNetworkInfo = mConnectivityManager.getActiveNetworkInfo();
            if (mNetworkInfo != null) {
                return (mNetworkInfo.getType() == ConnectivityManager.TYPE_MOBILE);
            }
        }
        return false;
    }
}
108.要想在Android Studio使用HttpClient,需要在app的gradle文件中添加
android {
useLibrary ‘org.apache.http.legacy’
}
其实推荐使用HttpURLConnection
109.直接在布局里使用android:background=”白色”和android:background=”normal为白色的selector”效果不一样,使用selector的很白,而直接使用白色的,却有灰度,这应该是手机的bug。
110.// 得到当前view的ViewGroup,可以在已经setContentView了的view的ViewGroup里添加剩余部分
ViewGroup mContent = (ViewGroup) findViewById(BaseView.getResId(mApplication, BaseView.ID, "base_content"));
        mContent.addView(mView);
111.获取每一个文字的宽度(像素)
String ss = "请将一维码或二维码放入框内,即可自动扫描";
        float[] array = new float[ss.length()];
        new Paint().getTextWidths(ss, array);
        //array里面装的就是每一个文字的宽度了
112.APP相关
/**
     * 根据包名启动apk
     *
     * @param packagename
     */
    public static void openAppByPackageName(Context context, String packagename) {
        PackageInfo packageinfo = null;
        try {
            packageinfo = context.getPackageManager().getPackageInfo(packagename, 0);
        } catch (PackageManager.NameNotFoundException e) {
            e.printStackTrace();
        }
        if (packageinfo == null) {
            return;
        }
        Intent resolveIntent = new Intent(Intent.ACTION_MAIN, null);
        resolveIntent.addCategory(Intent.CATEGORY_LAUNCHER);
        resolveIntent.setPackage(packageinfo.packageName);
        List<ResolveInfo> resolveinfoList = context.getPackageManager()
                .queryIntentActivities(resolveIntent, 0);

        ResolveInfo resolveinfo = resolveinfoList.iterator().next();
        if (resolveinfo != null) {
            String packageName = resolveinfo.activityInfo.packageName;
            String className = resolveinfo.activityInfo.name;
            Intent intent = new Intent(Intent.ACTION_MAIN);
            intent.addCategory(Intent.CATEGORY_LAUNCHER);
            ComponentName cn = new ComponentName(packageName, className);
            intent.setComponent(cn);
            // 把数据传递到SDK
            Bundle bundle = new Bundle();
            bundle.putString("uid", ConstantUtil.UID);
            bundle.putString("nickname", ConstantUtil.INFOENTITY.getNickname());
            bundle.putString("head", ConstantUtil.INFOENTITY.getIcon());
            bundle.putString("token", ConstantUtil.TOKEN);
            intent.putExtras(bundle);
            context.startActivity(intent);
        }
    }


 2488
2488

 被折叠的 条评论
为什么被折叠?
被折叠的 条评论
为什么被折叠?
 到【灌水乐园】发言


