


 本文详细介绍如何在 XCode 中使用 Core Data 进行数据建模、创建 NSManagedObject 子类及断言查询,同时涵盖版本管理和数据迁移策略。
本篇主要讲述一些细枝末节的知识点。
建模
属性和关系
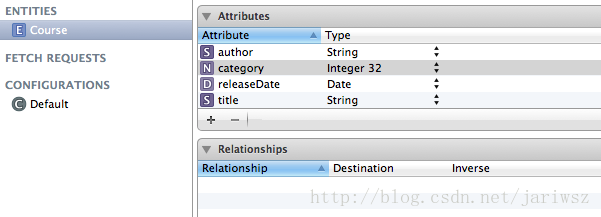
在XCode中,建模时就可以添加属性和标识实体间的相互关系。具体参见下图,下面还有对应说明:
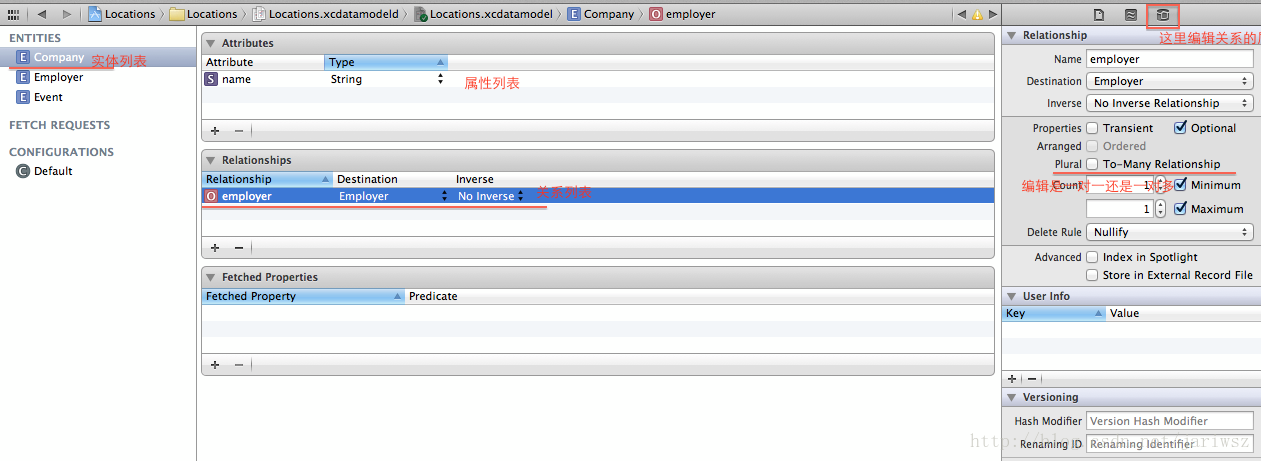
- Entities中列举了实体的列表;
- 每个Entity的属性列表在Attributes中,注意Attributes可以多选之后在右边一起改属性类型;
- 通过添加关系可以标识出两种不同类型的Entity之间的相互联系;
- 每个Relationship都是可以编辑的,主要侧重于一对一还是多对一的关系描述;在我们这个例子中,我们在Employer中设置一对一的关系,然后在Company中选择"To-Many Relationship"选项,使得Company与Employer变成一对多的关系;
- 编辑完相互关系后,在Inverse中设置一下,使两者的关系变成真正的关联关系,而不是孤立的联系(这个可以选择Editor Style为table看到两者区别),到这里是不是和Hibernate有点类似了
 ;
;
创建NSManagedObject类的子类
好处——类型校验
创建NSManagedObject类的子类的对象的好处是你可以不用如下的代码(很明显如下的代码是没有类型校验的):
    NSManagedObject *event = [NSEntityDescription insertNewObjectForEntityForName:@"Event" inManagedObjectContext:managedObjectContext];
    [event setValue:[NSDate date] forKey:@"creationDate"];
步骤
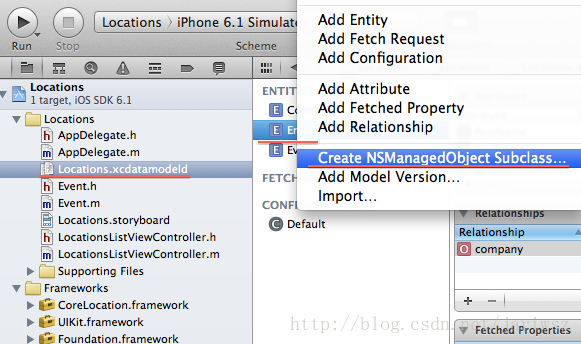
- 选中.xcdatamodeld这个模型文件;
- 选中一个实体;
- 从菜单中选择Editor->Create NSManagedObject class,可以创建需要的子类;
取回数据
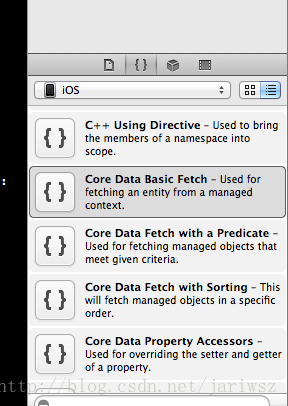
注意fetch data的时候实际上可以直接使用code snippet,如下:
使用断言
使用断言可以用来筛选我们取出的数据,所以我们的代码可能是这样,同样可以使用code snippet:
-(void)loadData
{
    // Create the Request
    NSFetchRequest *request = [[NSFetchRequest alloc] init];
    NSEntityDescription *entity = [NSEntityDescription entityForName:@"Event" inManagedObjectContext:managedObjectContext];
    [request setEntity:entity];
    // Set the Sort Descriptor
    NSSortDescriptor *sortDescriptor = [[NSSortDescriptor alloc] initWithKey:@"creationDate" ascending:NO];
    NSArray *sortDescriptors = [[NSArray alloc] initWithObjects:sortDescriptor, nil];
    [request setSortDescriptors:sortDescriptors];
    // Create Predicate
    // equal
//    NSPredicate *predicate = [NSPredicate predicateWithFormat:@"description == 'Tom's birthday'"];
//    NSPredicate *predicate = [NSPredicate predicateWithFormat:@"description == [c]'tom's birthday'"];
    // like
//    NSPredicate *predicate = [NSPredicate predicateWithFormat:@"description LIKE 'Tom*'"];
//    NSPredicate *predicate = [NSPredicate predicateWithFormat:@"description LIKE [cd]'Tom*'"];
//    NSPredicate *predicate = [NSPredicate predicateWithFormat:@"description LIKE '*om*'"];
    // begins
//    NSPredicate *predicate = [NSPredicate predicateWithFormat:@"description BEGINSWITH 'TOM'"];
    // date
//    NSPredicate *predicate = [NSPredicate predicateWithFormat:@"createDate < %@", [NSDate date]];
    // and
    NSPredicate *predicate = [NSPredicate predicateWithFormat:@"description BEGINSWITH 'TOM' AND createDate < %@", [NSDate date]];
    [request setPredicate:predicate];

    // Execute the Request
    NSError *error = nil;
    NSMutableArray *mutableFetchResults = [[managedObjectContext executeFetchRequest:request error:&error] mutableCopy];
    if (mutableFetchResults == nil) {
        // Handle the error.
        NSLog(@"error loading data");
    }
    // Finish Up
    [self setEventsArray:mutableFetchResults];
}
创建带断言的fetching request templete
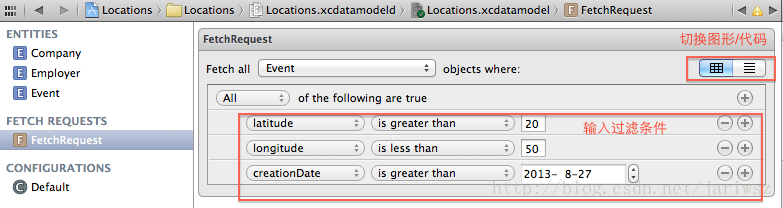
创建模板的好处是XCode本身提供了一个编辑器,这样就不需要我们自己编写这部分断言代码,而是可以使用图形化的方式编辑我们的条件,而且便于我们管理这部分代码。
- 我们选择模型文件,然后去菜单,选择Editor->Add Fetch Request:
- 进入之后的页面中我们可以编辑我们的条件,并且可以切换图形和代码方式查看:
- 编辑完条件后,我们的代码变更为:
    // Create Fetch Request
    NSFetchRequest *fetchRequest = [[self managedObjectModel] fetchRequestTemplateForName:@"EssentialCourses"];

    // Create Sort Descriptor
    NSSortDescriptor *sort = [[NSSortDescriptor alloc]initWithKey:@"releaseDate" ascending:YES];
    NSArray *sortDescriptors = [[NSArray alloc]initWithObjects:sort, nil];
    [fetchRequest setSortDescriptors:sortDescriptors];

    NSError *error = nil;
    NSArray *fetchedObjects = [[self managedObjectContext] executeFetchRequest:fetchRequest error:&error];
    if (fetchedObjects == nil) {
        NSLog(@"Problem! %@",error);
    }

    for (Course *c in fetchedObjects) {
        NSLog(@"Course: %@ by author: %@", c.title, c.author);
    }
- 运行,查看效果。

版本管理
数据不能兼容
对于数据不能兼容的情况,我们在AppDelegate中做如下处理:
- (NSPersistentStoreCoordinator *)persistentStoreCoordinator
{
    if (_persistentStoreCoordinator != nil) {
        return _persistentStoreCoordinator;
    }

    NSURL *storeURL = [[self applicationDocumentsDirectory] URLByAppendingPathComponent:@"CoreDataCourse.sqlite"];

    NSError *error = nil;
    _persistentStoreCoordinator = [[NSPersistentStoreCoordinator alloc] initWithManagedObjectModel:[self managedObjectModel]];
    if (![_persistentStoreCoordinator addPersistentStoreWithType:NSSQLiteStoreType configuration:nil URL:storeURL options:nil error:&error]) {
        // delete record
        [[NSFileManager defaultManager] removeItemAtURL:storeURL error:nil];
        NSLog(@"Unresolved error %@, %@", error, [error userInfo]);
        abort();
    }

    return _persistentStoreCoordinator;
}
注意其中的removeItemAtURL。
向前兼容
为了数据能够向前兼容老版本,你需要做如下工作:
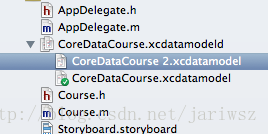
- 创建实体的新版本;
- 新实体创建后会出现如下图的对应model文件:
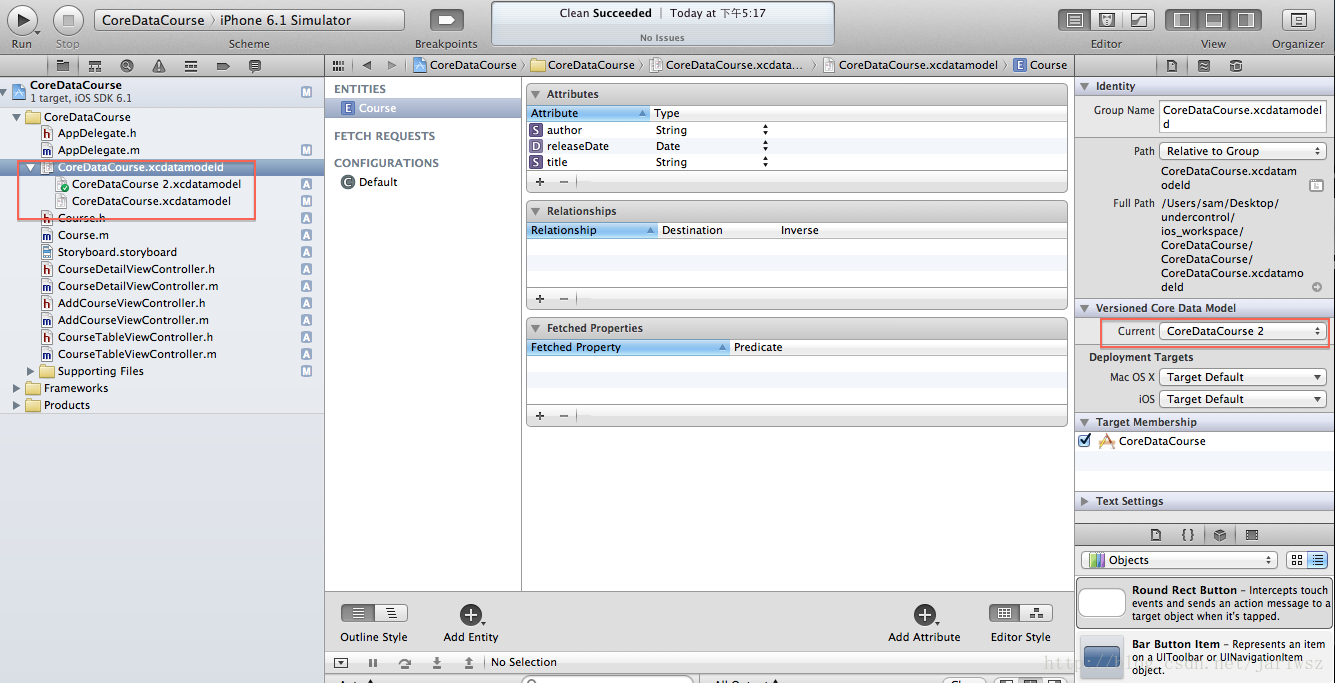
- 去编辑新的实体;
- 选中.cxdatemodelId,在右边的属性中选择激活的模型版本;
- 修改代码,注意新增加的options:
- (NSPersistentStoreCoordinator *)persistentStoreCoordinator
{
    if (_persistentStoreCoordinator != nil) {
        return _persistentStoreCoordinator;
    }

    NSURL *storeURL = [[self applicationDocumentsDirectory] URLByAppendingPathComponent:@"CoreDataCourse.sqlite"];

    NSDictionary *options = [NSDictionary dictionaryWithObjectsAndKeys:[NSNumber numberWithBool:YES],NSMigratePersistentStoresAutomaticallyOption, [NSNumber numberWithBool:YES],NSInferMappingModelAutomaticallyOption, nil];


    NSError *error = nil;
    _persistentStoreCoordinator = [[NSPersistentStoreCoordinator alloc] initWithManagedObjectModel:[self managedObjectModel]];
    if (![_persistentStoreCoordinator addPersistentStoreWithType:NSSQLiteStoreType configuration:nil URL:storeURL options:nil error:&error]) {
        NSLog(@"Unresolved error %@, %@", error, [error userInfo]);
        abort();
    }

    return _persistentStoreCoordinator;
}
- 这里还是描述的简单情况,实际的版本管理和数据合并更加复杂,您可能需要参考:https://developer.apple.com/library/ios/documentation/cocoa/Conceptual/CoreDataVersioning/Articles/Introduction.html

尾声
到这里基本上Core Data相关的功能已经介绍完了,整体上看下来Core Data的学习曲线还是蛮陡峭的,但是基本的使用非常简单,建议大家在工作中逐步摸索。
下面是我学习的一个完整小例子供大家参考:下载地址。


 285
285

 被折叠的 条评论
为什么被折叠?
被折叠的 条评论
为什么被折叠?
 到【灌水乐园】发言


